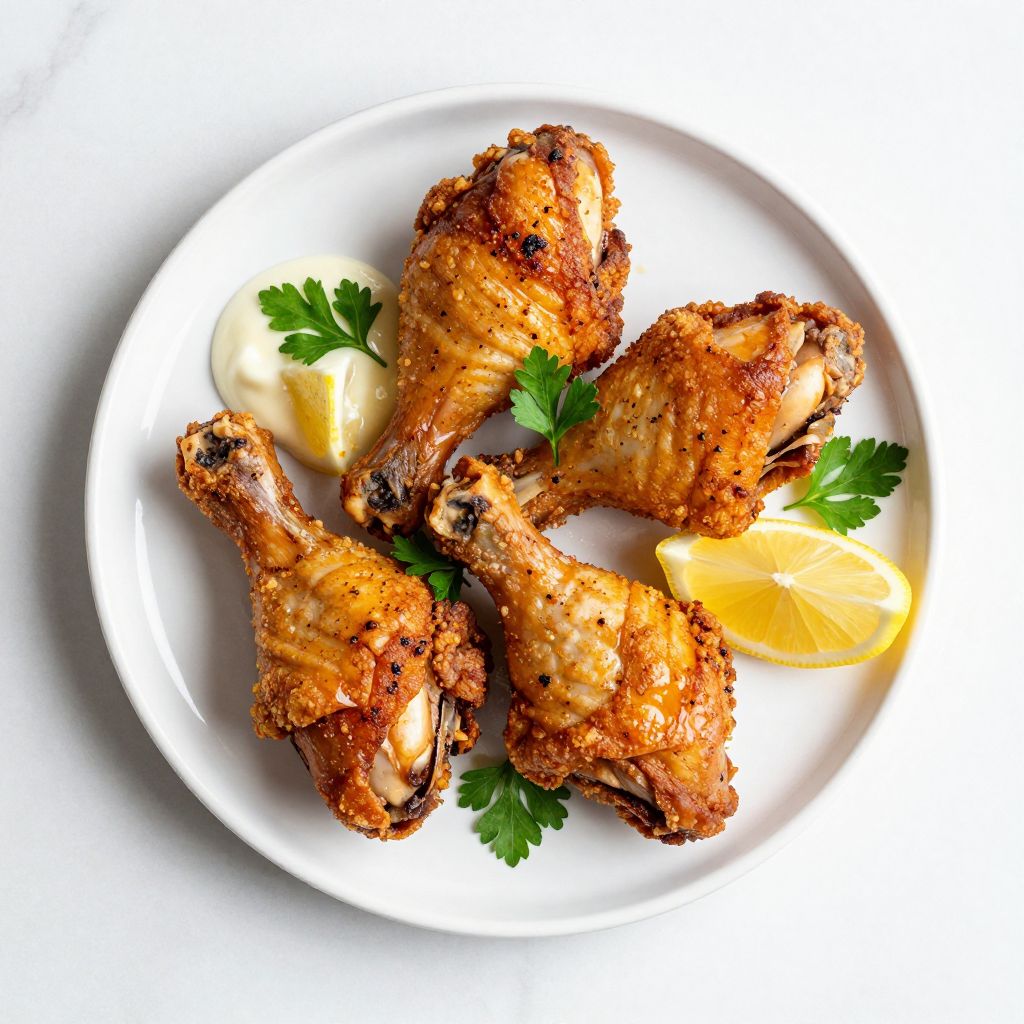
There’s nothing quite like that moment when you bite into fried chicken thighs and the crispy exterior shatters to reveal juicy, tender meat underneath. It’s a sound and texture combo that just hits different, especially when you’ve nailed the seasoning and coating.
This recipe strips away the fuss and delivers restaurant-quality results in your own kitchen. Fried chicken thighs are forgiving, flavorful, and actually more forgiving than breasts since the dark meat stays moist no matter what.
The magic happens in three places: the seasoning blend, the proper oil temperature, and knowing exactly when to pull them out. You’ll learn all three here, plus why thighs beat every other cut for this cooking method.
Why You’ll Love This Recipe
This recipe delivers crispy skin, juicy meat, and bold flavor in under an hour from start to finish.
- Thighs cook faster and stay moister than chicken breasts, making them nearly impossible to dry out.
- The seasoning blend works without any premixes or hard-to-find spices.
- You can fry these in a regular skillet, no deep fryer required.
- Leftovers stay delicious for three days and reheat beautifully.
- Works for weeknight dinners, meal prep, or feeding a crowd.
My Experience Making This Recipe
I first made this version on a random Tuesday night when I had thighs thawing and wanted to prove that homemade fried chicken didn’t need special equipment. My skillet was a regular 12-inch stainless steel number, nothing fancy.
The smell alone had my kitchen smelling like a proper Southern kitchen within minutes. When I pulled that first batch out, the skin crackled when I bit into it, and the meat was so tender it practically fell off the bone.
What surprised me most was how consistent the results were. Every single thigh came out golden and cooked through, which hadn’t always been my experience before nailing down the oil temperature and timing.
Recipe Overview
- Recipe Name: Fried Chicken Thighs
- Servings: 4
- Prep Time: 15 minutes
- Cook Time: 25 minutes
- Total Time: 40 minutes
- Course: Main Dish
- Cuisine: American/Southern
- Calories per Serving: 520
Equipment You Will Need
- 12-inch cast iron or heavy-bottomed stainless steel skillet
- Instant-read meat thermometer
- Paper towels
- Shallow bowl or plate for seasoning flour
- Tongs (metal, heat-resistant)
- Slotted spoon or spider strainer
- Wire rack and sheet pan (for draining)
- Medium mixing bowl
Ingredients for Fried Chicken Thighs
- 8 bone-in, skin-on chicken thighs (about 2.5 to 3 pounds total), patted dry with paper towels
- 1 cup all-purpose flour
- 1 teaspoon kosher salt
- 1 teaspoon freshly ground black pepper
- 1/2 teaspoon garlic powder
- 1/2 teaspoon onion powder
- 1/4 teaspoon cayenne pepper (optional, for heat)
- 2 tablespoons buttermilk (or regular milk)
- Vegetable oil for frying (about 3 to 4 cups)
Ingredient Notes and Substitutions
- Chicken thighs: The bone-in, skin-on cut matters here because skin renders fat that crisps beautifully, and bones keep meat moist. If you only have boneless thighs, reduce cook time by 5 minutes and watch for doneness carefully.
- Buttermilk: It tenderizes the chicken and helps the coating stick better. Plain milk with a splash of lemon juice or vinegar works in a pinch, though the coating won’t be quite as clingy.
- All-purpose flour: This is the standard and gives a crispy shell. Cornstarch mixed with flour creates extra crispness but can brown too fast; use a 1:3 ratio if trying this.
- Vegetable oil: Canola, peanut, or vegetable oil all work fine. Olive oil has too low a smoke point and will taste wrong; avoid it here.
- Salt and pepper: Kosher salt dissolves better than table salt and won’t make the coating grainy. Freshly ground pepper beats pre-ground for flavor.
How to Make Fried Chicken Thighs
Step 1: Pat the Chicken Completely Dry
Use paper towels to pat each thigh thoroughly, inside and out, and on the skin side. Moisture is the enemy of crispy skin; any wet spots will steam instead of fry, so don’t skip this step.
Step 2: Mix Your Seasoning Flour
Combine flour, salt, pepper, garlic powder, onion powder, and cayenne (if using) in a shallow bowl and whisk together. Even distribution of spices matters, so take 30 seconds to really mix this well.
Step 3: Prepare the Buttermilk Dip
Pour buttermilk into a medium bowl and place it next to your seasoning flour station. This keeps your coating process smooth and organized, with one station for the wet and one for the dry.
Step 4: Heat Oil to the Right Temperature
Pour oil into your skillet to about 1.5 inches deep, then heat over medium-high heat until an instant-read thermometer reads 325 to 350 degrees Fahrenheit. This temperature is lower than deep frying but hot enough to crisp the outside while the chicken cooks through without burning.
Step 5: Coat Each Thigh
Dip each chicken thigh into the buttermilk, letting excess drip off, then drag it through the seasoned flour mixture, coating both sides and any crevices. A good coating creates that shatteringly crisp exterior everyone craves.
Step 6: Fry in Batches
Carefully place 4 thighs into the hot oil, skin side down first, and keep the oil temperature steady. Don’t crowd the pan; crowding drops the temperature and steams the chicken instead of frying it.
Step 7: Fry Until Golden, Then Flip
Let them cook for 10 to 12 minutes without moving them; this is when the magic happens and skin gets crispy. Flip and cook the other side for another 8 to 10 minutes until the coating is golden brown all over.
Step 8: Check for Doneness
Insert an instant-read thermometer into the thickest part of the thigh without touching bone; it should read 165 degrees Fahrenheit. This ensures the meat is safely cooked through while still staying juicy.
Step 9: Drain and Rest
Transfer the fried thighs to a wire rack set over a sheet pan lined with paper towels to drain away excess oil. Let them rest for 5 minutes, which allows the exterior to stay crispy while carryover cooking finishes the meat gently.
Pro Tip: Keep your oil temperature steady by adjusting heat between batches. If it creeps above 350 degrees, pull the pan off heat for 30 seconds; if it drops below 325, wait for it to climb back before adding the next batch.
Tips for the Best Fried Chicken Thighs
- Use bone-in, skin-on thighs exclusively for this recipe. Boneless thighs cook unevenly and never develop the same textural contrast between crispy skin and juicy meat.
- Pat the chicken dry at least 15 minutes before frying, or even better, let it air-dry uncovered in the fridge for 30 minutes. Moisture and crispness are opposites.
- Don’t skip the buttermilk step. It adds tenderness and helps the flour coating stick longer during frying, creating a thicker, crunchier crust.
- Check your oil temperature with a thermometer, not guesswork. Oil that’s too cool gives greasy, soggy chicken; oil that’s too hot burns the outside while the inside stays raw.
- Resist the urge to flip too early. Let each side develop a golden crust before moving; constant flipping breaks the coating and releases moisture.
- Rest the finished chicken on a rack, not paper towels alone. The rack lets steam escape from the bottom, keeping the underside crispy instead of getting soggy.
Common Mistakes to Avoid
- Using boneless or skinless thighs: These cook faster and unevenly, and you lose the best part, the crispy skin. Bone-in, skin-on is non-negotiable.
- Wet chicken going into the oil: Even a light sheen of moisture turns to steam and ruins crispness. Dry thoroughly or your coating will never get properly crispy.
- Oil temperature too low: Below 325 degrees, the coating absorbs oil instead of crisping, making greasy, heavy chicken. Always use a thermometer.
- Flipping too soon or too often: You need 10 to 12 minutes per side for the coating to set and brown. Fidgeting with it breaks the crust and releases moisture.
- Stacking the cooked chicken: This traps steam and destroys the crisp. Always use a wire rack so air circulates underneath.
Serving Suggestions
Crispy fried chicken thighs pair beautifully with sides that either complement or cut through the richness of the fried coating. Here are my favorite combinations that make a complete meal.
- Classic buttermilk biscuits with honey butter for soaking up any pan drippings and juices.
- Creamy coleslaw with a tangy vinegar-based dressing to balance the richness and add crunch.
- Crispy waffle fries or seasoned oven fries with garlic aioli for dipping alongside the chicken.
- Fresh green salad with a bright lemon vinaigrette to lighten the plate and refresh the palate between bites.
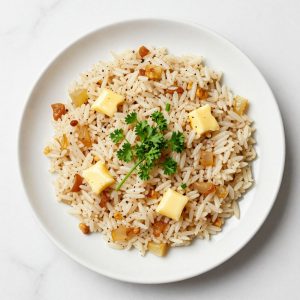
- Mac and cheese or mashed potatoes with gravy for a comfort food dream team.
Variations to Try
- Spicy Cajun version: Add 1 teaspoon of Cajun seasoning blend and 1/2 teaspoon of smoked paprika to the flour. The extra spice and smokiness transforms this into a bolder Louisiana-style bird.
- Herb-crusted: Mix 2 tablespoons of finely chopped fresh herbs (thyme, rosemary, or parsley) into the flour mixture. Fresh herbs add aromatic flavor that dry spices alone can’t match.
- Garlic parmesan crust: Add 1/4 cup grated Parmesan cheese and 1 extra teaspoon of garlic powder to the flour. The cheese creates extra crispness and adds a savory, umami depth.
- Buttermilk ranch style: Add 1 tablespoon of dried ranch seasoning to the flour. This version tastes like a chicken tender dipped in ranch, familiar and crowd-pleasing.
- Honey hot version: After frying, toss cooked thighs in a mixture of hot sauce and melted honey for a sweet-spicy glaze. This adds flavor without changing the frying technique.
Dietary Adaptations
- Gluten-free: Replace all-purpose flour with a gluten-free blend or use a mix of cornstarch and rice flour. The coating works just as well and crisps beautifully, though the texture may be slightly different.
- Dairy-free: Swap buttermilk for unsweetened almond milk mixed with 1 teaspoon of lemon juice or vinegar. This creates the same tenderizing effect without any dairy, though the coating adheres slightly less aggressively.
- Vegan: Use plant-based chicken thighs and replace buttermilk with aquafaba (chickpea liquid) or vegan sour cream thinned with water. The cooking method stays the same, though vegan chicken may cook slightly faster.
- Low-carb/keto: Replace flour with a blend of almond flour, pork rinds, and psyllium husk powder in a 1:1:1 ratio. This creates a crispy crust with minimal carbs, though it browns slightly faster and may need lower heat.
Storage and Reheating
Refrigerator
Store cooled fried chicken thighs in an airtight container for up to 3 days. The meat stays moist and flavorful, though the coating will lose some crispness over time.
- Keep them in a single layer if possible to prevent the coating from getting crushed.
- Wrap loosely in paper towels first to absorb excess moisture and keep them crispier.
Freezer
Fried chicken thighs freeze well for up to 2 months in an airtight freezer bag or container. Thaw overnight in the fridge before reheating.
- Freeze them in a single layer on a sheet pan first, then transfer to freezer bags to prevent sticking.
- Label with the date so you remember when you made them.
Reheating
Oven reheating preserves crispness far better than microwaving, which turns the coating soggy. Preheat your oven to 350 degrees Fahrenheit, place chicken on a wire rack, and bake for 8 to 10 minutes until heated through and the coating crisps back up.
- A toaster oven works beautifully if you’re reheating just one or two thighs.
- Skip the microwave entirely; it will make the coating rubbery and disappointing.
Nutrition Information
| Nutrient | Amount |
|---|---|
| Calories | 520 |
| Total Fat | 32g |
| Saturated Fat | 8g |
| Carbohydrates | 18g |
| Fiber | 0g |
| Sugar | 0g |
| Protein | 42g |
| Sodium | 480mg |
| Cholesterol | 155mg |
These values are estimates based on standard USDA data for chicken thighs and oil absorption during frying. Actual values vary depending on oil type, coating thickness, and cooking method.
Frequently Asked Questions
Can I use chicken breasts instead of thighs?
You technically can, but the results won’t be as good. Breasts cook faster and dry out more easily since they contain less fat than thighs, making it harder to keep them juicy while crisping the coating.
How far ahead can I prep the chicken?
Coat the thighs in buttermilk and seasoned flour up to 2 hours before frying; store them on a plate in the fridge. Don’t coat them longer than that or the coating gets soggy and won’t fry properly.
What oil is best for frying?
Vegetable, canola, or peanut oil all work beautifully since they have high smoke points around 400 degrees. Avoid olive oil and butter, which break down at lower temperatures and taste bitter when burnt.
How do I know when the chicken is fully cooked inside?
Use an instant-read meat thermometer inserted into the thickest part of the thigh without touching bone; it should read 165 degrees Fahrenheit. Visual cues like golden color tell you about the outside, but a thermometer is the only way to know the inside is safe.
Can I reuse the frying oil?
Yes, you can strain it through a fine-mesh strainer or cheesecloth and store it in a sealed container in the fridge for up to 2 weeks. The oil will pick up some chicken flavor, which is fine for frying other proteins.
What’s the difference between shallow frying and deep frying this recipe?
Shallow frying uses 1.5 inches of oil and requires flipping the chicken halfway through. Deep frying uses more oil and cooks more evenly without flipping, though both methods work and taste great.
Why does my coating come off during frying?
This usually means the oil temperature is too low, the chicken wasn’t dry enough, or the coating was applied too thickly. Ensure your thermometer reads 325 to 350 degrees, pat the chicken completely dry, and use a thin, even coating.
Can I make this recipe in an air fryer?
Air fryers work but produce a different texture; the coating gets crispy but less shatteringly so than true frying. If you try it, spray the basket lightly with oil, cook at 380 degrees for 18 to 20 minutes, and flip halfway through.
Final Thoughts
Making fried chicken thighs at home is genuinely easier than you might think, and the results beat takeout by a mile. Once you
Fried Chicken Thighs
Ingredients
Equipment
Method
- Use paper towels to pat each chicken thigh thoroughly dry, inside and out, and on the skin side. Moisture is the enemy of crispy skin, so ensure all wet spots are removed.
- Combine flour, salt, pepper, garlic powder, onion powder, and cayenne (if using) in a shallow bowl and whisk together until evenly distributed.
- Pour buttermilk into a medium bowl and place it next to your seasoning flour station.
- Pour oil into your skillet to about 1.5 inches deep, then heat over medium-high heat until an instant-read thermometer reads 325 to 350 degrees Fahrenheit.
- Dip each chicken thigh into the buttermilk, letting excess drip off, then drag it through the seasoned flour mixture, coating both sides and any crevices thoroughly.
- Carefully place 4 thighs into the hot oil, skin side down first. Do not crowd the pan.
- Let them cook for 10 to 12 minutes without moving them. Flip and cook the other side for another 8 to 10 minutes until the coating is golden brown all over.
- Insert an instant-read thermometer into the thickest part of the thigh without touching bone; it should read 165 degrees Fahrenheit.
- Transfer the fried thighs to a wire rack set over a sheet pan lined with paper towels to drain away excess oil. Let them rest for 5 minutes before serving.
- Repeat the frying process with the remaining 4 chicken thighs, maintaining oil temperature between 325 to 350 degrees Fahrenheit.