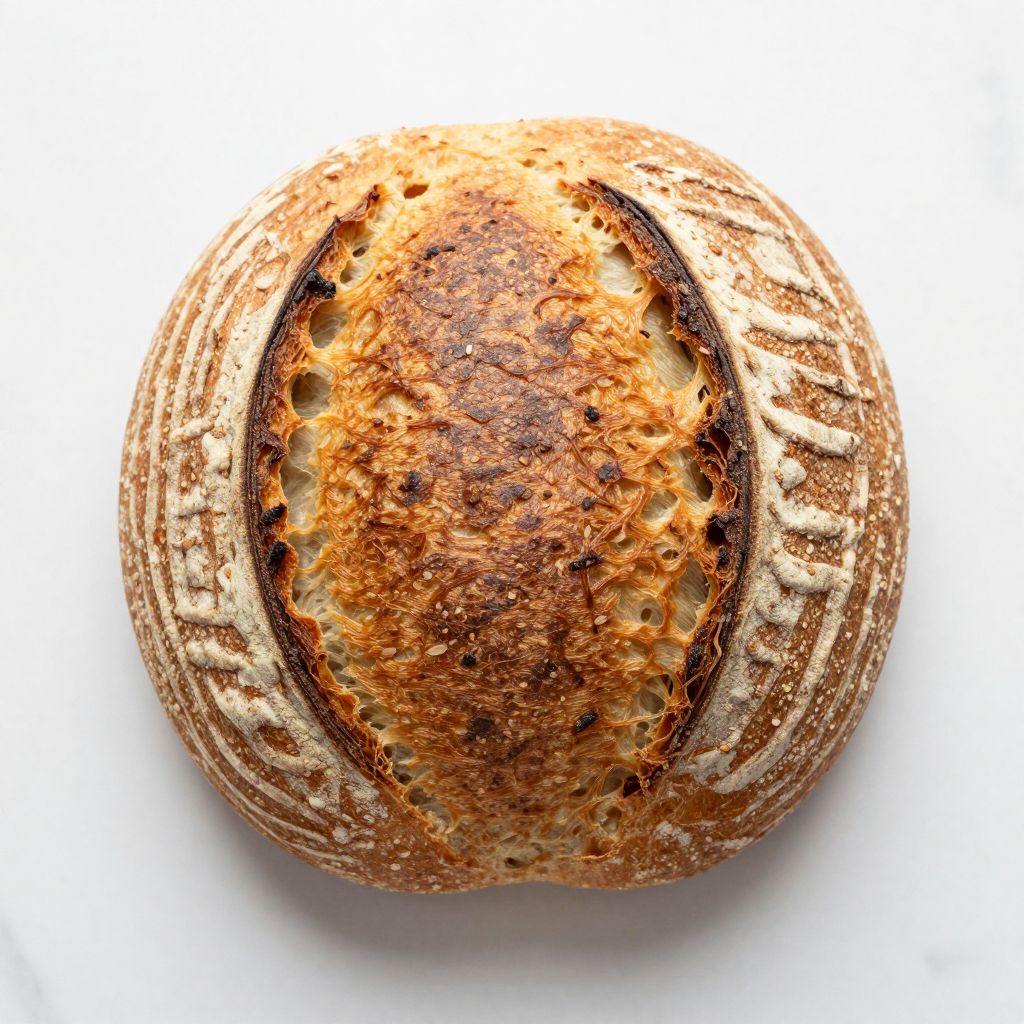
same day sourdough bread recipe
There’s nothing quite like the smell of fresh sourdough filling your kitchen on a lazy afternoon, and the best part is you don’t need to wait days for it to happen.
Same Day Sourdough Bread delivers that tangy, complex flavor and chewy crumb you crave without the multi-day commitment that traditional sourdough demands.
This recipe works because it uses a fed, active starter and warmer water to speed up fermentation while keeping the flavor deep and authentic.
If you’ve ever thought sourdough was out of reach, this is your permission slip to try it today and pull a beautiful, crusty loaf from your oven by dinner.
Why You’ll Love This Recipe
Same day sourdough proves that incredible bread doesn’t require patience measured in days. You get restaurant-quality flavor and texture in a single afternoon.
- Ready to bake in under 8 hours from start to finish
- Tangy, complex flavor from active sourdough fermentation
- Crispy crust with an open, chewy crumb inside
- No commercial yeast needed, just your living starter
- Flexible timing that fits a busy schedule
My Experience Making This Recipe
The first time I made same day sourdough, I was skeptical that real flavor could develop in just one day. By the time the dough hit the oven, I was a believer.
The smell during the final proof was intoxicating: tangy, slightly sweet, with that unmistakable sourdough funk that tells you fermentation is doing its job. When I sliced into the cooled loaf, the crumb was open and airy, with a slight spring that meant the gluten structure had developed perfectly.
My family demolished half the loaf within an hour, which tells you everything you need to know. Same day sourdough gave me that artisan bakery result without the overnight planning.
Recipe Overview
- Recipe Name: Same Day Sourdough Bread
- Servings: 1 loaf (about 12 slices)
- Prep Time: 20 minutes
- Active Fermentation Time: 4 to 5 hours
- Bake Time: 35 to 40 minutes
- Total Time: 7 to 8 hours
- Course: Bread
- Cuisine: Artisan
- Calories per Serving: 180
Equipment You Will Need
- Kitchen scale (essential for accuracy)
- Large mixing bowl
- Dutch oven or covered baking vessel
- Bench scraper or dough card
- Banneton or proofing basket
- Instant read thermometer (optional but helpful)
- Bread lame or sharp knife for scoring
- Stand mixer (optional, you can mix by hand)
- Spray bottle for steam
Ingredients for Same Day Sourdough Bread
- Active sourdough starter: 200 grams (fed 4 to 8 hours before mixing)
- Bread flour: 500 grams
- Water: 350 grams (warm, around 85 to 90 degrees Fahrenheit)
- Sea salt: 10 grams
Ingredient Notes and Substitutions
- Active sourdough starter: A fed starter at peak activity is non-negotiable for same day results; the yeast and bacteria need to be actively fermenting. If your starter is sluggish, feed it and wait longer before using, or use an extra 50 grams to compensate for lower activity.
- Bread flour: Bread flour has higher protein content than all-purpose, which builds stronger gluten and traps gas more effectively. All-purpose flour works but produces a denser crumb and less oven spring.
- Water temperature: Warm water accelerates fermentation without compromising flavor. Cold water slows everything down; use it if your kitchen is very warm or if you want to extend bulk fermentation.
- Sea salt: Table salt works fine and measures similarly, but sea salt has a slightly brighter mineral flavor that sourdough appreciates.
How to Make Same Day Sourdough Bread
Step 1: Mix Your Dough
Combine your fed starter, warm water, and bread flour in a large bowl and stir until all the flour is hydrated and no dry bits remain. This rough, shaggy mass is called the autolyse, and you can let it rest for 30 minutes if you have time, which allows the flour to fully absorb water and makes the dough easier to handle.
If you skip the rest, no problem. The fermentation will proceed normally, just with slightly more effort during the first stretch and fold.
Step 2: Add Salt and Incorporate
Dissolve your sea salt in a few tablespoons of water, then add this to your dough and squeeze it in with your hands until the salt is fully distributed. This step takes about 3 to 4 minutes of squeezing and folding.
Salt strengthens gluten and controls fermentation speed, so don’t skip dissolving it first; it mixes in faster and more evenly.
Step 3: Perform the First Set of Stretches and Folds
Wet your hands and gently pull one side of the dough up and fold it over itself, rotating the bowl a quarter turn and repeating until you’ve folded all four sides. This is your first set of stretches and folds, done for about one minute total.
You’ll perform this four times over the next 2 hours, spaced about 30 minutes apart, building the gluten network without aggressive kneading.
Step 4: Continue Stretches and Folds Every 30 Minutes
After 30 minutes, perform another set of stretches and folds, then again at 60 minutes and 90 minutes. By the fourth set, the dough should feel smooth, cohesive, and slightly puffy.
Watch for the dough to increase in volume by about 25 to 30 percent and feel airy when you touch it; this signals that bulk fermentation is complete, typically around 2 to 2.5 hours total.
Step 5: Pre-Shape and Rest
Turn your dough onto a lightly floured surface and use your bench scraper to gently pre-shape it into a round. Don’t compress it; use surface tension to create a smooth top.
Let it rest on the counter for 20 to 30 minutes uncovered. This bench rest allows the gluten to relax slightly and makes the final shape easier to execute.
Step 6: Final Shape
Flour the top of your dough and flip it onto your work surface so the floured side is down. Using your bench scraper, fold the bottom third up toward the center, seal with the heel of your hand, then fold the left and right sides in and seal.
Finally, roll the dough toward you tightly, creating tension on the surface. This final shape determines how your dough will expand in the oven.
Step 7: Final Proof in the Banneton
Place your shaped dough seam-side up in a floured banneton or proofing basket. Cover it loosely with a plastic bag or cloth and let it proof at room temperature for 1 to 2 hours, depending on your kitchen temperature.
The dough should rise noticeably and feel puffy but not over-proofed; poke it gently and it should spring back slowly about halfway. If it springs back immediately, it needs more time; if it doesn’t spring back at all, it’s over-proofed and will spread too much in the oven.
Step 8: Preheat Your Dutch Oven
Place your Dutch oven in the oven and preheat to 500 degrees Fahrenheit for at least 30 minutes. A hot vessel creates steam immediately when the cold dough hits it, which is crucial for oven spring and crust development.
The high initial heat also sets the crust quickly, trapping moisture inside for that open crumb structure you’re after.
Step 9: Score and Bake
Carefully remove your hot Dutch oven and turn your proofed dough onto a piece of parchment paper. Using a bread lame or sharp knife, score the top with a confident slash about 1/4 inch deep at a 45-degree angle.
Transfer the dough on the parchment into the Dutch oven, cover it, and immediately reduce heat to 450 degrees Fahrenheit. Bake covered for 20 minutes to trap steam, then remove the cover and bake for 15 to 20 minutes more until the crust is deep golden brown.
Step 10: Cool Before Slicing
Remove your finished loaf and place it on a wire rack to cool completely, at least 30 to 45 minutes. The interior crumb continues to set as it cools, and slicing hot bread compresses the structure and steals moisture.
Once fully cooled, you’ll hear a satisfying crackle when you slice into it, proof that your crust has reached its full crispy potential.
Pro Tip: Your starter temperature and activity level control your fermentation speed more than anything else, so check that your starter is at peak activity (doubled in volume with bubbles throughout) before you start, and adjust your proof times if your kitchen is warmer or cooler than 70 degrees Fahrenheit.
Tips for the Best Same Day Sourdough Bread
- Feed your starter early in the day so it reaches peak activity by the time you’re ready to mix dough, typically 4 to 8 hours after feeding depending on temperature and starter strength.
- Use a kitchen scale for all ingredients, especially water and flour; volume measurements introduce too much variability in hydration levels.
- Watch your dough’s behavior, not the clock; fermentation times vary with room temperature, so visual cues like puffiness and slight volume increase matter more than exact timings.
- Don’t skip the preheat on your Dutch oven; a cold or barely warm vessel won’t generate the steam needed for proper oven spring and crust.
- Score with intention and confidence; a hesitant, shallow score creates uncontrolled tearing, while a decisive cut guides the dough’s expansion exactly where you want it.
- Avoid opening the oven during the covered bake phase, as every peek releases steam that you worked hard to build up.
Common Mistakes to Avoid
- Using a sluggish starter: If your starter isn’t actively doubling and showing lots of bubbles at peak, your fermentation will stall and you’ll end up with a dense, sour loaf or miss your same-day deadline entirely.
- Skipping the stretches and folds: These gentle movements build gluten strength without the aggression of kneading, which is essential for open crumb and proper oven spring on a tight timeline.
- Over-proofing the final dough: An over-proofed dough spreads instead of springs in the oven, resulting in a flat loaf with a thick, tough crust and dense crumb.
- Under-proofing: Dough that hasn’t fermented enough produces a tight crumb, minimal rise in the oven, and less developed sourdough flavor.
- Baking in a cold Dutch oven: The vessel must be hot enough to turn surface moisture into steam instantly; a lukewarm pot creates a pale, soft crust instead of a crispy one.
Serving Suggestions
Warm sourdough is at its best within the first few hours of cooling, when the crust snaps and the crumb is still soft. Slice it thick and enjoy it plain or toasted, letting the tangy flavor shine.
- Toasted with cultured butter and fleur de sel for a simple, elegant snack
- Alongside a creamy soup like roasted tomato or mushroom for a comforting meal
- As a vehicle for avocado, soft cheese, or cured meats for open-faced sandwiches
- Dipped in olive oil with fresh herbs, garlic, and crushed red pepper for a quick bruschetta
- Torn into pieces and tossed into a salad with croutons for added texture and tang
Variations to Try
- Whole Wheat Sourdough: Replace 100 to 150 grams of bread flour with whole wheat flour; whole wheat absorbs more water, so increase water by 25 to 50 grams and expect slightly longer fermentation due to lower gluten development.
- Herb and Olive Sourdough: Add 30 grams of chopped fresh herbs (rosemary, thyme, or oregano) and 50 grams of diced Kalamata olives after the salt incorporation; fold them in gently during the final stretches and folds.
- High Hydration Sourdough: Increase water to 375 grams for a more open, craggy crumb; be prepared for a wetter, stickier dough that requires more careful handling but rewards you with a more dramatic open crumb structure.
- Spelt or Einkorn Sourdough: These ancient grains add nutty, rich flavor but ferment faster, so reduce bulk fermentation time by 20 to 30 minutes and watch the dough closely for signs of over-proofing.
- Focaccia-Style Sourdough: Increase water to 375 grams and skip shaping; instead, press the dough into a rectangular pan, dimple it with your fingers, drizzle with olive oil, and top with coarse salt and fresh rosemary before the final proof.
Dietary Adaptations
- Gluten-Free: Use a high-quality gluten-free bread flour blend with xanthan gum included, increase water to 400 grams due to different absorption, reduce bulk fermentation time by 15 to 20 minutes, and expect a denser crumb since gluten-free dough doesn’t trap gas as effectively.
- Low-Carb or Keto: Replace flour with almond flour or coconut flour, but be aware the result won’t resemble traditional sourdough; you’ll get a denser, crumbly bread with a very different flavor and texture profile.
- Vegan: Sourdough is naturally vegan as long as you use only flour, water, salt, and your starter, which contains only wild yeast and bacteria.
- Dairy-Free: Sourdough contains no dairy, but avoid any fillings or toppings that do; serve with dairy-free spreads or olive oil instead of butter.
Storage and Reheating
Refrigerator
Wrap your cooled loaf tightly in plastic wrap or place it in a sealed plastic bag and refrigerate for up to 5 days. Cold temperatures slow mold growth and staling, keeping your bread fresh longer than counter storage.
- Always ensure the bread is fully cooled before wrapping to prevent condensation, which softens the crust
- Slice before refrigerating if you prefer easy access to individual slices
Freezer
Wrap cooled bread in plastic wrap, then place it in a freezer bag and freeze for up to 3 months. Sourdough freezes beautifully and thaws without quality loss if handled properly.
- Slice before freezing for faster thawing and easier use
- Thaw at room temperature in the original wrapping to prevent condensation
Reheating
To restore the crust’s crispness, wrap your bread in a damp paper towel and heat in a 350-degree oven for 5 to 10 minutes until warmed through. The moisture from the towel steams the crumb back to softness while the dry oven heat crisps the crust.
- Never use a microwave, which creates a rubbery, tough crust
- Toasting slices in a standard toaster also works beautifully and is faster for individual portions
Nutrition Information
| Nutrient | Amount |
|---|---|
| Calories | 180 |
| Total Fat | 1 g |
| Saturated Fat | 0 g |
| Carbohydrates | 36 g |
| Fiber | 2 g |
| Sugar | 0 g |
| Protein | 6 g |
| Sodium | 290 mg |
| Cholesterol | 0 mg |
Sourdough fermentation breaks down phytic acid, making minerals more bioavailable, and the slow fermentation process creates a lower glycemic response than commercial yeast bread.
Frequently Asked Questions
Can I make same day sourdough if my starter is new or weak?
A new starter under one month old or a weak starter won’t generate enough yeast and bacteria for same day results. Feed your starter daily for two to three weeks until it consistently doubles within 4 to 8 hours, then try this recipe.
What if my kitchen is cold?
Cold kitchens slow fermentation dramatically, so use warmer water (up to 95 degrees Fahrenheit) and allow extra fermentation time. You might end up with a 9 to 10 hour timeline instead of 7 to 8, but the flavor will still develop.
Can I refrigerate the dough after shaping to extend timing?
Yes, after pre-shaping, you can place the dough in the banneton and refrigerate for 8 to 16 hours instead of final proofing at room temperature. This cold proof develops flavor and actually makes scoring easier, turning your same-day timeline into an overnight option.
What does it mean if my dough spreads too much in the oven?
Over-proofing or weak gluten development causes excessive spreading. Check that your stretches and folds were thorough, reduce final proof time by 15 to 20 minutes next time, and confirm your starter was at peak activity before mixing.
Why is my crust pale instead of deep golden brown?
A pale crust usually means your Dutch oven wasn’t hot enough, you didn’t bake long enough, or you removed the cover too early and lost steam. Ensure the pot preheats for at least 30 minutes at 500 degrees, and bake covered for the full 20 minutes before uncovering.
Can I skip the Dutch oven and bake on a regular baking sheet?
You can try, but the results suffer; without the enclosed environment, steam escapes and you won’t get the same crispy crust or oven spring. If you must bake without a Dutch oven, mist the dough with water several times during the first 15 minutes of baking.
Final Thoughts
Same day sourdough is proof that artisan bread is within reach even on a busy day. You don’t need exotic ingredients, fancy equipment, or a week of planning, just an active starter and a few hours of patience punctuated by gentle folds and fermentation.
Your first loaf might not be perfect, and that’s fine; bake it again, watch your dough more carefully the second time, and you’ll dial in the timing and proofing that works for your kitchen. Before long, fresh sourdough won’t be a special weekend project but a regular part of your baking routine.
Explore More Sourdough Recipes
Once you’ve mastered this same day method, challenge yourself with longer fermentation timelines and different flour blends to expand your sourdough skills.
Try King Arthur sourdough recipe for a classic approach using premium flour, or explore sourdough baguette recipe for a long, crispy loaf with traditional French shaping.
Same Day Sourdough Bread
A tangy, artisan-style sourdough loaf ready in under 8 hours, featuring a crispy crust and open, chewy crumb without any commercial yeast.
- Kitchen scale
- Large mixing bowl
- Dutch oven or covered baking vessel
- Bench scraper or dough card
- Banneton or proofing basket
- Instant-read thermometer
- Bread lame or sharp knife for scoring
- Stand mixer (optional)
- Spray bottle for steam
Main
- 200 g 7 oz active sourdough starter, fed 4 to 8 hours before mixing
- 500 g 17.6 oz bread flour
- 350 g 12.3 oz warm water (85 to 90°F)
- 10 g 0.35 oz sea salt
- Combine 200 g active sourdough starter, 350 g warm water, and 500 g bread flour in a large mixing bowl; stir until a rough dough forms (about 2 minutes). Optionally cover and let autolyse for 30 minutes.
- Dissolve 10 g sea salt in a tablespoon of water, add to the dough, and knead by squeezing and folding for 3 to 4 minutes until fully incorporated.
- Perform the first set of stretch and folds by wetting your hands, lifting one side of the dough, folding it over, rotating the bowl 90°, and repeating on all sides (about 1 minute).
- Over the next 2 hours, perform three more sets of stretch and folds every 30 minutes until the dough is smooth, puffy, and has increased in volume by about 30%.
- After the final fold, let the dough rest at room temperature until bulk fermentation is complete (about 30 additional minutes); the dough should feel airy and jiggly.
- Turn the dough onto a lightly floured surface and pre-shape it into a round using surface tension; rest uncovered for 20 to 30 minutes.
- Final shape the dough by folding the sides toward the center and rolling to create a tight surface tension, then place seam-side up in a floured banneton.
- Cover the banneton loosely and proof at room temperature for 1 to 2 hours until the dough is puffy and springs back slowly when poked.
- Meanwhile, place a Dutch oven in your oven and preheat to 500°F (260°C) for at least 30 minutes.
- Carefully transfer the dough onto parchment, score the top with a ¼-inch incision at a 45° angle using a bread lame or sharp knife, then place dough and parchment into the hot Dutch oven, cover, and reduce oven temperature to 450°F (232°C).
- Bake covered for 20 minutes, remove the lid, and bake uncovered for an additional 15 to 20 minutes until the crust is deep golden brown.
- Remove the loaf from the Dutch oven and cool completely on a wire rack for at least 30 minutes before slicing to set the crumb.
Serve warm or at room temperature; store cooled loaf in an airtight bag for up to 5 days or freeze for up to 3 months.