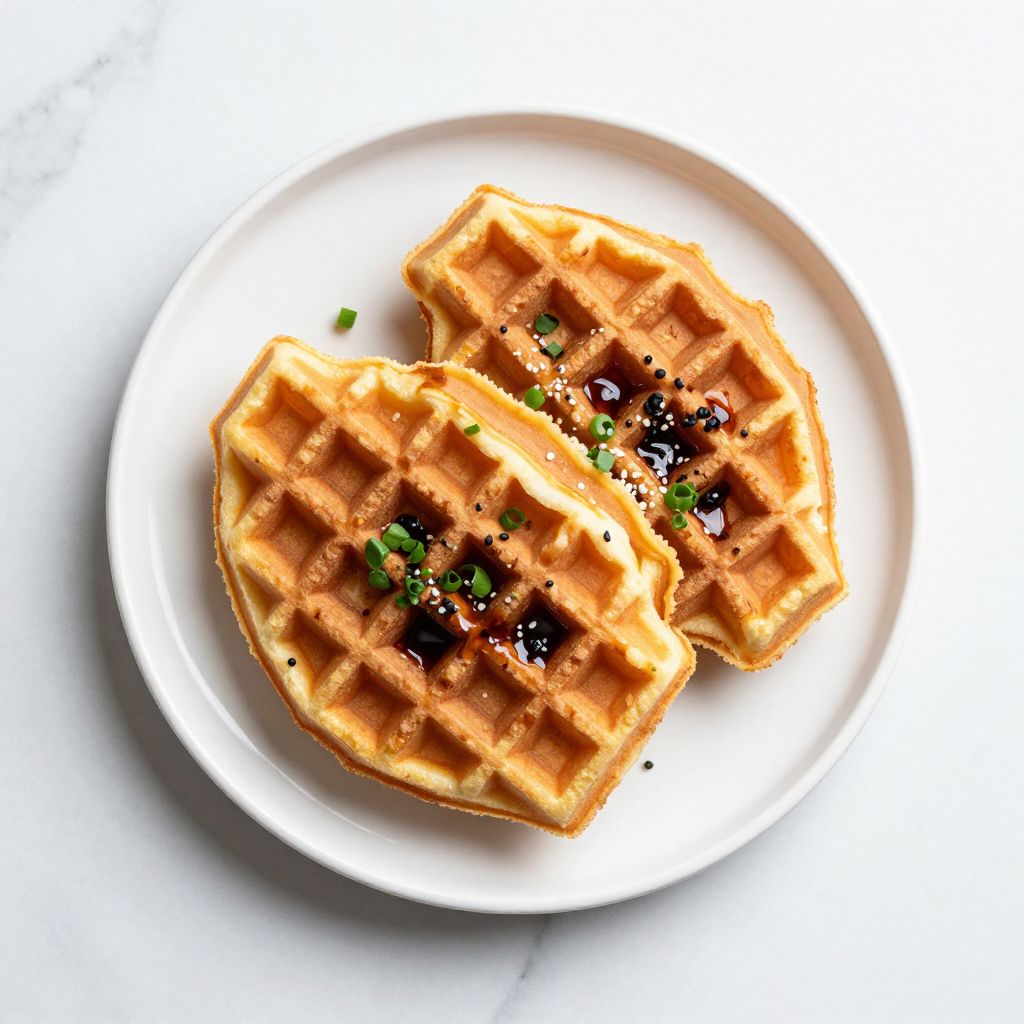
Picture this: you’re biting into a waffle that’s somehow crispy on the outside and pillowy soft on the inside, with a delicate chew that keeps you coming back for another bite.
Mochi waffles are the answer to the waffle debate that’s been raging in your kitchen. They marry the beloved texture of mochi with the comfort of a warm waffle, creating something that feels both indulgent and light. What makes them special is their unique texture: the exterior gets golden and crispy, while the interior stays tender and chewy with that signature mochi bounce.
This recipe comes together faster than you’d expect, and once you master it, you’ll be making these for weekend breakfast, afternoon snacks, and even dessert. Let’s dive into how to create this texture magic in your own waffle iron.
Why You’ll Love This Recipe
Mochi waffles deliver a textural experience that standard waffles simply can’t match. The combination of crispy exterior and chewy interior creates an addictive eating experience that keeps people coming back for seconds.
- Crispy outside, chewy mochi center for an unforgettable texture contrast.
- Ready to serve in under 30 minutes from start to finish.
- Naturally versatile: top with sweet or savory toppings based on your mood.
- Crowd-pleasing enough for kids but sophisticated enough for brunch guests.
- Uses simple pantry ingredients you likely already have at home.
My Experience Making This Recipe
The first time I made mochi waffles, I was skeptical about the texture. I’d tasted them at trendy brunch spots and assumed they required some kind of culinary magic to replicate at home.
What shocked me was how straightforward the process actually is. My waffle iron produced these gorgeous golden squares with barely any fiddling, and when I bit into one, that satisfying crunch gave way to the softest, most yielding interior I’ve ever gotten from a waffle maker.
My family’s reaction sealed the deal. My kids literally asked if we could make these again the next morning, which is the highest compliment I can receive as a home cook.
Recipe Overview
- Recipe Name: Mochi Waffles
- Servings: Makes 8 waffles
- Prep Time: 10 minutes
- Cook Time: 16 minutes
- Total Time: 26 minutes
- Course: Breakfast or Dessert
- Cuisine: Fusion
- Calories per Serving: 185 calories
Equipment You Will Need
- Standard waffle iron (preferably Belgian style for deeper pockets)
- Large mixing bowl
- Medium mixing bowl
- Whisk
- Measuring cups and spoons
- Rubber spatula
- Fork or small whisk for beating eggs
- Non-stick spray or melted butter for greasing
Ingredients for Mochi Waffles
- Mochi flour: 1.5 cups
- All-purpose flour: 0.5 cup
- Granulated sugar: 3 tablespoons
- Baking powder: 2 teaspoons
- Salt: 0.25 teaspoon
- Eggs: 2 large
- Whole milk: 1 cup
- Vanilla extract: 1 teaspoon
- Melted butter: 3 tablespoons
Ingredient Notes and Substitutions
- Mochi flour: This glutinous rice flour is what gives the waffle its signature chewy texture. If you can’t find mochi flour, you can substitute with sweet rice flour (they’re the same thing) or use a 50/50 blend of cornstarch and regular flour, though the chew will be less pronounced.
- All-purpose flour: This provides structure and helps the waffles hold their shape. Cake flour will make them slightly more tender, but all-purpose is your best bet here.
- Baking powder: This creates lift and ensures your waffles aren’t dense. Use fresh baking powder for best results, as old baking powder loses potency.
- Milk: Whole milk creates the richest flavor and texture, but 2% milk works fine if that’s what you have on hand.
- Butter: Melted butter adds richness and helps achieve that golden crust. Neutral oil works but won’t deliver quite the same flavor depth.
How to Make Mochi Waffles
Step 1: Preheat Your Waffle Iron
Turn on your waffle iron and let it heat for at least 5 minutes until it reaches full temperature. A properly heated waffle iron is crucial for getting that crispy exterior while keeping the inside tender.
Step 2: Combine Dry Ingredients
In a large mixing bowl, whisk together mochi flour, all-purpose flour, sugar, baking powder, and salt. Whisking these ingredients together ensures the baking powder distributes evenly, which prevents dense spots in your finished waffles.
Step 3: Beat the Eggs
In a medium bowl, beat the two eggs until they’re light and slightly frothy, about 1 minute. This aerates the eggs and helps create a lighter, fluffier waffle.
Step 4: Combine Wet Ingredients
To the beaten eggs, add the milk, vanilla extract, and melted butter, whisking until fully combined. Make sure there are no butter streaks remaining, as uniform fat distribution helps the waffles cook evenly.
Step 5: Create the Batter
Pour the wet ingredients into the dry ingredients and whisk gently until just combined. Do not overmix; some small lumps are perfectly fine and will actually result in more tender waffles.
Step 6: Prepare the Waffle Iron
Lightly spray or brush your preheated waffle iron with non-stick spray or melted butter. This step is essential for preventing sticking and achieving an even golden color.
Step 7: Cook the Waffles
Pour about 0.33 cup of batter into your waffle iron and close the lid. Cook for 2 minutes or until the waffle is golden brown and stops steaming, which indicates the moisture has been properly cooked out.
Resist the urge to open the lid early; letting the waffle cook undisturbed ensures the exterior gets properly crispy while the interior develops that chewy mochi texture.
Step 8: Transfer and Keep Warm
Remove the finished waffle from the iron with a fork or tongs and place it on a wire rack or plate. A wire rack prevents steam from softening the bottom, but if you’re serving them all at once, a regular plate works fine.
Repeat steps 6 through 8 with the remaining batter until all waffles are cooked.
Pro Tip: Mochi waffles are best served immediately while the exterior is still crispy, so time your cooking so the last batch finishes just as your guests are sitting down to eat.
Tips for the Best Mochi Waffles
- Use a Belgian waffle iron if possible, as the deeper pockets create more surface area for crispiness while protecting the soft interior.
- Don’t skip the preheating step; a cold or warm waffle iron produces uneven browning and soft waffles instead of crispy ones.
- Measure your batter portions consistently using a ice cream scoop or measuring cup so all your waffles cook in roughly the same amount of time.
- Let the batter rest for 5 minutes after mixing; this allows the mochi flour to fully hydrate and results in a better texture.
- If your waffles are coming out too light, increase the heat setting on your waffle iron or cook them slightly longer before opening the lid.
- Keep finished waffles warm in a 200 degree F oven on a wire rack while you finish cooking the remaining batches.
Common Mistakes to Avoid
- Overmixing the batter: This develops gluten and makes waffles tough and dense instead of tender and chewy.
- Opening the waffle iron too early: Prematurely opening releases steam and prevents the exterior from crisping properly, leaving you with soft, underwhelming waffles.
- Using old baking powder: Expired leavening agents won’t create enough rise, resulting in flat, heavy waffles that lack airiness.
- Skipping the waffle iron preheating: Cold irons cook unevenly and produce pale waffles with inconsistent textures.
- Making the batter too thick: If your batter feels like cake batter rather than pancake batter, add a splash of milk to reach the proper consistency.
Serving Suggestions
Mochi waffles are a blank canvas for your favorite toppings, whether you lean sweet or savory. Serve them warm and let your guests build their own creations.
- Sweet: Whipped cream, fresh berries, honey drizzle, and a sprinkle of powdered sugar.
- Indulgent: Nutella, sliced banana, and a dusting of cocoa powder.
- Light and fresh: Greek yogurt, sliced peaches, and a drizzle of maple syrup.
- Breakfast style: Scrambled eggs, crispy bacon, and a touch of maple syrup for sweetness.
- Asian-inspired: Condensed milk drizzle, toasted sesame seeds, and matcha powder.
Variations to Try
- Chocolate mochi waffles: Add 3 tablespoons of unsweetened cocoa powder to the dry ingredients for rich, decadent waffles that pair beautifully with berries and whipped cream.
- Matcha mochi waffles: Sift 2 tablespoons of matcha powder into the dry ingredients for an earthy, slightly bitter flavor that feels sophisticated and pairs well with white chocolate.
- Brown butter mochi waffles: Replace the melted butter with brown butter (cooked until the milk solids turn golden) for a nutty, caramelized depth that elevates the entire recipe.
- Coconut mochi waffles: Substitute 0.25 cup of the milk with coconut milk and add 0.5 cup of shredded coconut to the batter for tropical sweetness.
- Cinnamon sugar mochi waffles: Mix 2 tablespoons of sugar with 1.5 teaspoons of ground cinnamon and sprinkle between layers before cooking for a classic flavor combo.
Dietary Adaptations
- Gluten-free: Replace all-purpose flour with gluten-free all-purpose flour in a 1:1 ratio; the mochi flour is naturally gluten-free, so you’re mostly covered already.
- Dairy-free: Use unsweetened almond milk or oat milk instead of whole milk, and use a dairy-free butter alternative; the waffles will be slightly less rich but still delicious.
- Vegan: Replace eggs with a flax egg (1 tablespoon ground flaxseed plus 3 tablespoons water, mixed and rested for 5 minutes) and use dairy-free milk and butter.
- Lower-carb: This recipe is naturally lower in carbs compared to traditional waffles, but you can reduce sugar to 1 tablespoon if you prefer less sweetness.
Storage and Reheating
Refrigerator
Store cooled mochi waffles in an airtight container on a paper towel to absorb excess moisture. They’ll keep for up to 3 days but are best enjoyed within 24 hours.
- Layer waffles between parchment paper to prevent sticking.
- Keep the container sealed to prevent the waffles from drying out.
Freezer
Mochi waffles freeze beautifully for up to one month. Cool them completely before freezing to prevent condensation.
- Lay waffles flat on a baking sheet and freeze for 2 hours before transferring to a freezer bag.
- This prevents them from sticking together in the bag.
Reheating
To restore that crispy exterior, reheat frozen or refrigerated waffles in a toaster oven at 350 degrees F for about 5 minutes. The stovetop is your secret weapon if you want the absolute crispiest results.
- Toaster oven method: Place on a rack and heat until warmed through and crispy.
- Stovetop method: Heat a skillet over medium heat, lightly butter it, and warm the waffle for 1 minute per side.
Nutrition Information
| Nutrient | Amount |
|---|---|
| Calories | 185 |
| Total Fat | 6 g |
| Saturated Fat | 3.5 g |
| Carbohydrates | 28 g |
| Fiber | 0 g |
| Sugar | 5 g |
| Protein | 3 g |
| Sodium | 125 mg |
| Cholesterol | 50 mg |
Nutrition data is calculated based on standard ingredient measurements and serving portions. Actual values may vary depending on specific brands and preparation methods used.
Frequently Asked Questions
Can I Make the Batter Ahead of Time?
Yes, you can prepare the batter up to 4 hours in advance and store it in the refrigerator. Let it come to room temperature for about 15 minutes before cooking, and give it a gentle stir to recombine any separation that may have occurred.
Why Are My Waffles Coming Out Soft Instead of Crispy?
Soft waffles usually mean your waffle iron isn’t hot enough or you’re opening the lid too early. Make sure you’ve preheated for at least 5 minutes and resist peeking until the steaming has mostly stopped, which indicates the exterior has crisped up.
Where Can I Buy Mochi Flour?
Mochi flour is readily available at Asian grocery stores, some specialty food markets, and online retailers. It’s sometimes labeled as sweet rice flour or glutinous rice flour, which are all the same product.
Can I Double This Recipe?
Absolutely. Simply double all ingredient amounts and proceed with the same method. The cooking time per waffle remains the same since each one goes in individually.
What’s the Difference Between Mochi Waffles and Regular Waffles?
Mochi waffles use mochi flour (glutinous rice flour), which creates a chewy, bouncy interior texture that regular wheat flour cannot replicate. The result is a waffle that’s crispy on the outside but tender and chewy rather than fluffy on the inside.
Can I Use a Regular Waffle Iron Instead of a Belgian One?
Yes, but a Belgian waffle iron with deeper pockets produces better results because it creates more crispy surface area while protecting the soft interior. A regular waffle iron still works and produces good waffles, just with less textural contrast.
Final Thoughts
Mochi waffles are one of those recipes that feels impressive but requires barely any special skill or hard-to-find ingredients. Once you’ve made them once, you’ll have this technique locked in your memory forever.
The magic happens in that waffle iron, transforming simple mochi flour into something that tastes like it came straight from a trendy brunch spot. Make a batch this weekend and see why these waffles have captured the hearts of breakfast lovers everywhere.
Explore More Waffle Recipes
Ready to expand your waffle game? Check out more creative waffle recipes and breakfast ideas to keep your morning routine exciting and delicious.
Try our gluten-free waffle recipe for a naturally grain-free alternative, or explore sago recipes for more unique texture explorations in your cooking.
Mochi Waffles

Crispy on the outside and chewy on the inside, these mochi waffles are made with glutinous rice flour for a unique texture and are ready in under 30 minutes.
- Standard waffle iron (preferably Belgian style)
- Large mixing bowl
- Medium mixing bowl
- Whisk
- Measuring cups and spoons
- Rubber spatula
- Fork or small whisk for beating eggs
- Non-stick spray or melted butter for greasing
Main
- 1.5 cups mochi flour
- 0.5 cup all-purpose flour
- 3 tablespoons granulated sugar
- 2 teaspoons baking powder
- 0.25 teaspoon salt
- 2 large eggs
- 1 cup whole milk
- 1 teaspoon vanilla extract
- 3 tablespoons melted butter
- Preheat the waffle iron for at least 5 minutes until fully heated.
- In a large mixing bowl, whisk together mochi flour, all-purpose flour, granulated sugar, baking powder, and salt until evenly combined.
- In a medium bowl, beat the eggs until light and frothy, about 1 minute.
- Add whole milk, vanilla extract, and melted butter to the beaten eggs and whisk until fully incorporated.
- Pour the wet ingredients into the dry ingredients and whisk gently until just combined; small lumps are fine.
- Spray or brush the preheated waffle iron with non-stick spray or melted butter.
- Pour about 1/3 cup of batter into the waffle iron, close the lid, and cook for 2 minutes or until golden brown and steam subsides.
- Remove the waffle with a fork or tongs and place on a wire rack; repeat cooking with remaining batter.
Serve waffles immediately while the exterior is still crispy to maintain texture contrast.