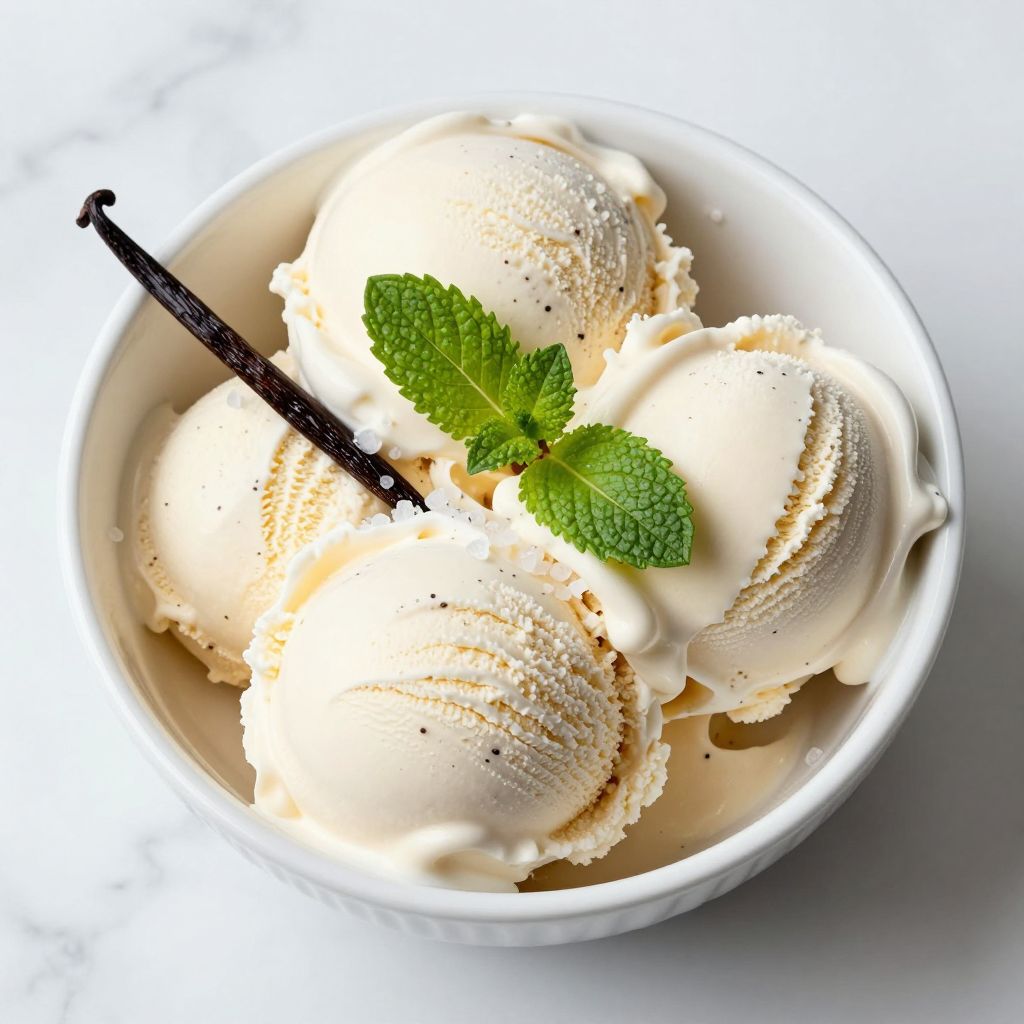
There’s something magical about watching vanilla bean specks swirl into soft-serve perfection as your KitchenAid mixer works its magic. Homemade ice cream tastes nothing like the grocery store version, with real cream and fresh vanilla that makes every spoonful feel like a treat you actually earned.
This KitchenAid ice cream recipe takes the guesswork out of making creamy, scoopable ice cream at home using your stand mixer’s ice cream maker attachment. The result is silky smooth, naturally sweet, and ready to customize with any flavor you crave.
Why You’ll Love This Recipe
Making ice cream in your KitchenAid means no fancy equipment, no messy hand-churning, and no ice cream maker sitting in your freezer taking up space. The mixer does the heavy lifting while you relax.
- Uses simple pantry ingredients you likely have on hand right now
- Takes only minutes to prepare the base before freezing
- Creates restaurant-quality texture with minimal effort
- Lets you control sugar, flavor intensity, and mix-ins completely
- Freezes solid in hours instead of requiring overnight chilling
My Experience Making This Recipe
I’ll be honest: my first batch of homemade ice cream was grainy and over-sweetened. I’d skipped the tempering step and used way too much sugar because I thought more sweetness meant better flavor.
The second time, I followed this recipe exactly and the difference was jaw-dropping. The base came together smooth and pale, the mixer churned it into soft-serve consistency, and within three hours I had something that tasted better than anything I could buy.
My kids actually asked for homemade ice cream over store-bought after that first successful batch. That’s the real test of whether a recipe works.
Recipe Overview
- Recipe Name: Homemade KitchenAid Ice Cream
- Servings: 8 to 10
- Prep Time: 15 minutes
- Chill Time: 4 hours (or overnight)
- Churn Time: 20 to 30 minutes
- Total Time: 4 hours 45 minutes
- Course: Dessert
- Cuisine: American
- Calories per Serving: 285
Equipment You Will Need
- KitchenAid stand mixer with ice cream maker bowl attachment
- Ice cream maker attachment for your KitchenAid (frozen)
- Large mixing bowl
- Whisk
- Instant-read thermometer
- Rubber spatula
- Measuring cups and spoons
- Airtight freezer-safe container
- Shallow baking dish or sheet pan (for tempering)
Ingredients for Homemade KitchenAid Ice Cream
- 2 cups heavy cream, cold
- 1 cup whole milk, cold
- 3/4 cup granulated sugar
- 2 tablespoons corn syrup
- 1 tablespoon vanilla extract
- 1/4 teaspoon fine sea salt
- 1 vanilla bean (optional, for extra flavor)
Ingredient Notes and Substitutions
- Heavy cream provides the fat that makes ice cream creamy and rich. You can substitute half-and-half, but the texture will be less luxurious and the ice cream won’t scoop as well.
- Whole milk balances the heaviness of cream and keeps the ice cream from being overly dense. Low-fat milk makes the base taste thin, so stick with full-fat.
- Granulated sugar sweetens the base and helps with freezing point depression, which keeps ice cream scoopable. Brown sugar adds molasses notes and deepens flavor, though it may darken your ice cream slightly.
- Corn syrup prevents large ice crystals and gives silky mouthfeel. If you don’t have it, use an extra tablespoon of sugar, but the texture won’t be quite as smooth.
- Vanilla extract provides classic flavor quickly. You can use vanilla bean paste for a more authentic look with visible specks, or skip it entirely to make a blank canvas base for other flavors.
- Sea salt enhances sweetness and brings out vanilla flavor without making the ice cream taste salty. Regular table salt works fine in a pinch.
How to Make Homemade KitchenAid Ice Cream
Step 1: Chill Your Equipment
Place your KitchenAid ice cream maker bowl in the freezer at least 24 hours before you plan to churn. An insufficiently frozen bowl will struggle to freeze the mixture and you’ll end up with soft-serve that never hardens.
Step 2: Combine the Cream and Milk
Pour the cold heavy cream and whole milk into a large mixing bowl. Whisk them together gently until combined, making sure not to aerate or over-whip the mixture.
Step 3: Make the Sugar Mixture
In a small bowl, whisk together the granulated sugar and corn syrup until they’re completely blended with no lumps. This helps the sugar dissolve evenly into the base instead of creating gritty spots in your finished ice cream.
Step 4: Temper the Base (The Secret Step)
Add about one cup of the cream mixture to a shallow baking dish and whisk in the sugar mixture gradually. This prevents the sugar from shocking the cream and causing texture problems.
Once the sugar is fully dissolved and the mixture looks smooth, slowly whisk this back into the remaining cream and milk, stirring constantly. This gentle tempering creates a silky base.
Step 5: Add Vanilla and Salt
Stir in the vanilla extract and sea salt, mixing thoroughly so they’re evenly distributed. If you’re using a vanilla bean, scrape the seeds into the mixture and add the pod for extra flavor depth.
Step 6: Chill the Base Completely
Cover the bowl with plastic wrap and refrigerate the mixture for at least 4 hours, or preferably overnight. A fully chilled base churns faster and freezes more efficiently in your mixer.
The cold temperature matters more than you’d think. Ice cream made with room-temperature base takes twice as long to churn and often has an icy texture.
Step 7: Attach the Frozen Bowl to Your KitchenAid
Remove the ice cream maker bowl from the freezer and attach it securely to your KitchenAid stand mixer. Insert the dasher attachment and make sure everything is locked in place before turning on the machine.
Step 8: Pour and Churn
Turn the mixer to a medium speed and slowly pour the chilled ice cream base into the frozen bowl through the opening. The mixer will begin churning immediately, and you’ll see the mixture start to thicken within minutes.
Let it churn for 20 to 30 minutes total. You’re aiming for soft-serve consistency that’s thick but still pourable, similar to soft-serve ice cream from a machine.
Step 9: Transfer to a Freezer Container
Once the ice cream reaches soft-serve consistency, turn off the mixer and carefully remove the bowl. Scoop the ice cream into an airtight freezer-safe container using a rubber spatula.
Press plastic wrap directly onto the surface of the ice cream to prevent freezer burn, then cover with the lid. This extra step keeps ice crystals from forming on top.
Step 10: Freeze Until Scoopable
Place the container in the freezer for at least 2 more hours until the ice cream is firm enough to scoop. You can eat it after this point, though letting it sit overnight creates the best texture.
Pro Tip: The tempering step in Step 4 is what separates silky homemade ice cream from grainy batches, so don’t skip it even though it seems fussy.
Tips for the Best Homemade KitchenAid Ice Cream
- Use an instant-read thermometer to make sure your base reaches at least 160 degrees Fahrenheit if you’re worried about raw egg yolks from a custard base. This recipe uses no eggs, so pasteurization isn’t necessary.
- Add mix-ins like chocolate chips, cookie crumbles, or fruit puree after churning but before the final freeze. Fold them in gently to avoid overmixing, which can make ice cream tough.
- Let your ice cream sit at room temperature for 5 minutes before scooping if it’s too hard straight from the freezer. This makes scooping easier without melting the whole batch.
- Cover your ice cream bowl tightly between uses so it doesn’t absorb freezer odors or develop ice crystals on the surface.
- Taste the chilled base before churning and adjust sweetness if needed. You can always add a bit more vanilla or sugar to the base before it goes in the mixer.
- Make sure your kitchen isn’t too warm when you’re churning. A warm room can slow the freezing process significantly, giving you soft-serve instead of proper ice cream.
Common Mistakes to Avoid
- Skipping the tempering step results in grainy, uneven ice cream with undissolved sugar crystals that feel gritty on your tongue. Take the two extra minutes to do this right.
- Using warm or room-temperature base forces your mixer to work much harder and often produces icy, crystalline texture. Always chill completely.
- Over-churning turns ice cream into butter-like sludge because you’re breaking down the fat globules and incorporating too much air. Stop when it reaches soft-serve consistency, not when it’s rock-hard.
- Forgetting to freeze your bowl attachment means the whole batch will be a slushy mess that never sets properly. Plan ahead and freeze it at least 24 hours before.
- Using low-fat or skim milk creates an icy, unpleasant texture with none of the creamy mouthfeel you want. Stick with whole milk and heavy cream for the best results.
Serving Suggestions
Homemade ice cream shines on its own, but pairing it with the right accompaniments makes it feel like a restaurant dessert. Here are some easy ways to serve it.
- Scoop into a cone or bowl and top with hot fudge sauce, caramel, or fresh berry compote
- Layer with pound cake or brownies to make an ice cream sandwich dessert
- Serve alongside warm pie, brownies, or cobbler as a melting garnish
- Mix into milkshakes or blend with a splash of milk for a creamier drink
- Top with crushed cookies, sprinkles, nuts, or fresh fruit for texture contrast
Variations to Try
- Strawberry ice cream: replace one cup of milk with strawberry puree and reduce sugar by two tablespoons to account for the fruit’s natural sweetness. The result is bright pink and intensely fruity.
- Coffee ice cream: dissolve three tablespoons of instant espresso powder in the cold cream mixture before churning. This creates a sophisticated flavor that pairs beautifully with chocolate.
- Mint chocolate chip: replace one tablespoon of vanilla with one teaspoon of peppermint extract and add mini chocolate chips during the last two minutes of churning. The cooling sensation of mint with rich chocolate is addictive.
- Brown butter: heat one cup of heavy cream until the butter solids turn golden and nutty, then cool completely before using it in the recipe. This deepens flavor and adds sophistication without extra ingredients.
- Salted caramel: swirl in homemade or store-bought salted caramel sauce after churning for pockets of sweet, salty flavor throughout.
Dietary Adaptations
- Gluten-free: This base recipe contains no gluten, but check any add-ins like cookies or brownies for gluten before mixing them in.
- Dairy-free: Replace heavy cream with full-fat coconut cream and use unsweetened oat or almond milk instead of whole milk. The texture will be slightly less creamy but still delicious.
- Vegan: Use coconut cream and non-dairy milk, then add one tablespoon of cornstarch to the base to help with texture since you can’t rely on dairy fat alone.
- Lower-sugar: Replace sugar with a one-to-one sweetener like monk fruit or erythritol, but reduce the amount by about one-quarter since these sweeteners are sweeter than sugar. The freeze time may be slightly longer.
Storage and Reheating
Refrigerator
Store leftover ice cream in an airtight container in the freezer, not the refrigerator. Ice cream melts quickly at fridge temperatures and won’t refreeze properly.
- Keep the surface covered with plastic wrap to prevent freezer burn
- Store away from strongly flavored foods that might transfer odors
- Check after one week for any ice crystal formation or texture changes
Freezer
Homemade ice cream lasts up to one month in the freezer when properly stored in an airtight container. The longer it sits, the more ice crystals can develop, so use it within two weeks for best quality.
- Keep your freezer at zero degrees Fahrenheit or colder
- Don’t refreeze melted ice cream, as it will develop large ice crystals
- Label your container with the date and flavor for easy reference
Reheating
Homemade ice cream doesn’t need reheating since you serve it cold. If your ice cream becomes too hard to scoop, let it sit at room temperature for five minutes to soften slightly.
- Never use the microwave to soften ice cream, as it melts unevenly
- Transfer to the refrigerator for ten minutes if you’re in no rush
- Dip your scoop in warm water between scoops for easier serving
Nutrition Information
| Nutrient | Amount |
|---|---|
| Calories | 285 |
| Total Fat | 22 grams |
| Saturated Fat | 14 grams |
| Carbohydrates | 22 grams |
| Fiber | 0 grams |
| Sugar | 21 grams |
| Protein | 3 grams |
| Sodium | 95 milligrams |
| Cholesterol | 82 milligrams |
These values are approximate and based on standard USDA nutrition data for the ingredients listed. Variations in brands and exact measurements may affect the final nutrition information.
Frequently Asked Questions
Can I make ice cream without an ice cream maker bowl attachment?
Technically yes, but it’s much harder work. You can freeze the mixture in a shallow pan and stir it every 30 minutes with a fork for several hours, breaking up ice crystals as they form, but this requires constant attention.
How long does it take to freeze the ice cream maker bowl?
A full 24 hours in the freezer ensures the bowl stays consistently cold throughout the churning process. Smaller freezers may need the full day, while a standalone freezer might freeze it in 18 hours, so plan ahead.
Can I add the ice cream base while the mixer is still running?
Yes, you can pour it in slowly with the mixer on medium speed. Just make sure to do it gradually so the cold bowl doesn’t shock the mixture, and watch for splashing.
Why did my ice cream come out grainy instead of smooth?
Graininess usually means the sugar didn’t dissolve evenly, the base wasn’t cold enough, or you churned it too long. The tempering step prevents this, so make sure you’re doing it correctly.
Can I use sweetened condensed milk instead of regular milk and sugar?
You can, but the flavor will be different and sweeter. Use one cup of sweetened condensed milk and reduce the sugar to one-quarter cup, then adjust to taste in the chilled base.
What if my ice cream won’t freeze solid after two hours in the freezer?
Check that your freezer temperature is truly zero degrees Fahrenheit or colder. If it’s warmer, the ice cream won’t harden properly, or your ice cream maker bowl wasn’t frozen long enough before churning.
Final Thoughts
Making homemade ice cream with your KitchenAid is honestly easier than you think, and the taste difference justifies the small effort involved. Once you nail this basic vanilla recipe, you’ll find yourself experimenting with flavors and toppings constantly.
Your family will taste the difference immediately, and you’ll feel proud serving something you made from scratch. Go ahead and grab that ice cream maker attachment from the back of your cabinet, freeze that bowl, and get started today.
Homemade KitchenAid Ice Cream
Ingredients
Equipment
Method
- Place your KitchenAid ice cream maker bowl in the freezer at least 24 hours before you plan to churn.
- Pour the cold heavy cream and whole milk into a large mixing bowl. Whisk them together gently until combined.
- In a small bowl, whisk together the granulated sugar and corn syrup until completely blended with no lumps.
- Add about one cup of the cream mixture to a shallow baking dish and whisk in the sugar mixture gradually until fully dissolved and smooth.
- Slowly whisk the sugar-cream mixture back into the remaining cream and milk, stirring constantly.
- Stir in the vanilla extract and sea salt, mixing thoroughly. If using a vanilla bean, scrape the seeds into the mixture and add the pod.
- Cover the bowl with plastic wrap and refrigerate the mixture for at least 4 hours, or preferably overnight.
- Remove the ice cream maker bowl from the freezer and attach it securely to your KitchenAid stand mixer. Insert the dasher attachment.
- Turn the mixer to medium speed and slowly pour the chilled ice cream base into the frozen bowl. Churn for 20 to 30 minutes until it reaches soft-serve consistency.
- Turn off the mixer and scoop the ice cream into an airtight freezer-safe container using a rubber spatula. Press plastic wrap directly onto the surface, then cover with the lid.
- Place the container in the freezer for at least 2 more hours until the ice cream is firm enough to scoop.