
Imagine a luscious, creamy dessert that combines the sweet-tart flavor of cherries with a buttery crust and fluffy filling. That’s what you’ll discover with this Cherry Yum Yum recipe, a delightful treat perfect for any occasion. It’s a crowd-pleaser that’s quick to whip up and brings a burst of flavor in every bite. The creamy texture paired with the refreshing cherry topping makes it a must-try for any dessert lover. So, let’s gather our ingredients and get started!
Why You’ll Love This Recipe
This dessert is a delightful mix of flavors and textures that everyone will enjoy.
- Quick to prepare and perfect for gatherings.
- A creamy, dreamy texture that melts in your mouth.
- Versatile and can be made with fresh or canned cherries.
- Perfectly balanced sweetness that satisfies any sweet tooth.
My Experience Making This Recipe
The first time I made Cherry Yum Yum, my whole family was buzzing with excitement. Watching them take that first bite and seeing their eyes light up was priceless.
There’s something so satisfying about the combination of the creamy filling and the tart cherries that just feels like a hug in dessert form. I could hardly believe how easy it was to make!
Recipe Overview
- Recipe Name: Cherry Yum Yum
- Servings: 8
- Prep Time: 20 minutes
- Cook Time: 0 minutes
- Total Time: 2 hours 20 minutes (includes chilling)
- Course: Dessert
- Cuisine: American
- Calories per Serving: 280
Equipment You Will Need
- Mixing bowls
- 9×9 inch square baking dish
- Electric mixer
- Spatula
- Measuring cups and spoons
Ingredients for Cherry Yum Yum
- 1 cup crushed graham crackers
- 1/2 cup unsalted butter, melted
- 1 package (8 oz) cream cheese, softened
- 1 cup powdered sugar
- 1 cup whipped topping
- 1 can (21 oz) cherry pie filling
Ingredient Notes and Substitutions
- Graham crackers: They create a crunchy base that contrasts with the smooth filling. You can substitute with digestive biscuits if needed.
- Unsalted butter: It binds the crust together and adds richness. Coconut oil works as a dairy-free alternative.
- Cream cheese: This gives the filling its creamy texture. Soft tofu can be used for a dairy-free version.
- Powdered sugar: It sweetens the filling without graininess. You can use granulated sugar, but blend it for a finer texture.
- Whipped topping: This adds lightness to the mixture. You can make your own whipped cream as a fresh alternative.
How to Make Cherry Yum Yum
Step 1: Prepare the Crust
In a mixing bowl, combine the crushed graham crackers and melted butter. This forms a crust that’s both crunchy and flavorful.
Step 2: Press the Crust
Press the mixture firmly into the bottom of a 9×9 inch square baking dish. A well-formed crust is essential to hold the filling together.
Step 3: Beat the Cream Cheese
Using an electric mixer, beat the softened cream cheese in a bowl until smooth. This ensures a creamy filling without lumps.
Step 4: Add the Sugar
Gradually add the powdered sugar to the cream cheese, mixing until fully incorporated. This sweetens the filling while maintaining its creamy texture.
Step 5: Fold in the Whipped Topping
Gently fold in the whipped topping until well combined. This step adds lightness and airiness to the filling.
Step 6: Spread the Filling
Spread the cream cheese mixture evenly over the prepared crust. A smooth layer creates a nice base for the cherry topping.
Step 7: Add Cherry Topping
Pour the cherry pie filling over the cream cheese layer, spreading it evenly. The cherries provide both flavor and a beautiful finish.
Step 8: Chill the Dessert
Cover the dish and refrigerate for at least 2 hours to set. Chilling allows the flavors to meld and the texture to firm up.
Pro Tip: Let the dessert sit in the fridge overnight for an even better flavor!
Tips for the Best Cherry Yum Yum
- Use fresh cherries for a burst of flavor if they are in season.
- Make sure the cream cheese is at room temperature for easy mixing.
- Press the crust firmly to prevent it from crumbling.
- Experiment with different pie fillings like blueberry or apple.
- Top with additional whipped cream for a more indulgent dessert.
Common Mistakes to Avoid
- Not chilling long enough can lead to a runny filling. Give it time to set properly.
- Using cold cream cheese results in lumps. Remember to soften it first.
- Overmixing the cream cheese can cause it to become too airy. Mix just until combined.
- Not pressing the crust firmly enough can lead to a crumbly base. Ensure it’s packed tightly.
Serving Suggestions
This dessert is best enjoyed chilled, allowing the flavors to shine.
- Serve with a dollop of whipped cream on top.
- Pair with a scoop of vanilla ice cream for extra indulgence.
- Garnish with fresh mint for a pop of color.
- Enjoy alongside a cup of coffee or tea for a perfect afternoon treat.
Variations to Try
- Add chocolate chips to the filling for a sweet twist.
- Use lemon zest for a citrusy kick in the cream cheese mixture.
- Try different fruit toppings like strawberries or peaches.
- Make it gluten-free by using gluten-free graham crackers.
Dietary Adaptations
- Gluten-free: Substitute with gluten-free graham crackers.
- Dairy-free: Use vegan cream cheese and whipped topping.
- Vegan: Opt for plant-based cream cheese and coconut whipped cream.
- Low-carb/Keto: Use almond flour for the crust and a sugar substitute for sweetening.
Storage and Reheating
Refrigerator
Store leftovers in the refrigerator for up to 3 days.
- Cover tightly with plastic wrap or a lid.
- Keep away from strong-smelling foods to avoid flavor transfer.
Freezer
This dessert can be frozen for up to 2 months.
- Wrap portions tightly in plastic wrap and then foil.
- Label with the date for easy reference.
Reheating
Thaw in the refrigerator overnight before serving.
- Do not refreeze once thawed.
- Serve chilled for the best texture and flavor.
Nutrition Information
| Nutrient | Amount |
|---|---|
| Calories | 280 |
| Total Fat | 18g |
| Saturated Fat | 10g |
| Carbohydrates | 27g |
| Fiber | 1g |
| Sugar | 18g |
| Protein | 3g |
| Sodium | 180mg |
| Cholesterol | 40mg |
This information may vary based on specific ingredients used and portion sizes.
Frequently Asked Questions
Can I make this dessert ahead of time?
Absolutely! It’s perfect for making a day ahead for the flavors to meld beautifully.
What can I use instead of cherry pie filling?
You can substitute with any fruit pie filling, such as blueberry or peach, depending on your preference.
How do I store leftovers?
Keep them in the fridge, tightly covered for up to three days.
Why is my filling too runny?
If you don’t chill it long enough, the filling may not set properly. Always allow for sufficient chilling time.
Can I use low-fat cream cheese?
Yes, low-fat cream cheese can be used, but the texture might be slightly different.
Final Thoughts
Making Cherry Yum Yum is not just a treat; it’s a delightful experience that brings joy to any table. I hope you give this recipe a try and enjoy every creamy, cherry-filled bite.
For more delicious recipes, check out my Cherry Cheesecake Recipe and explore the flavors of a Cherry Crumble Recipe.
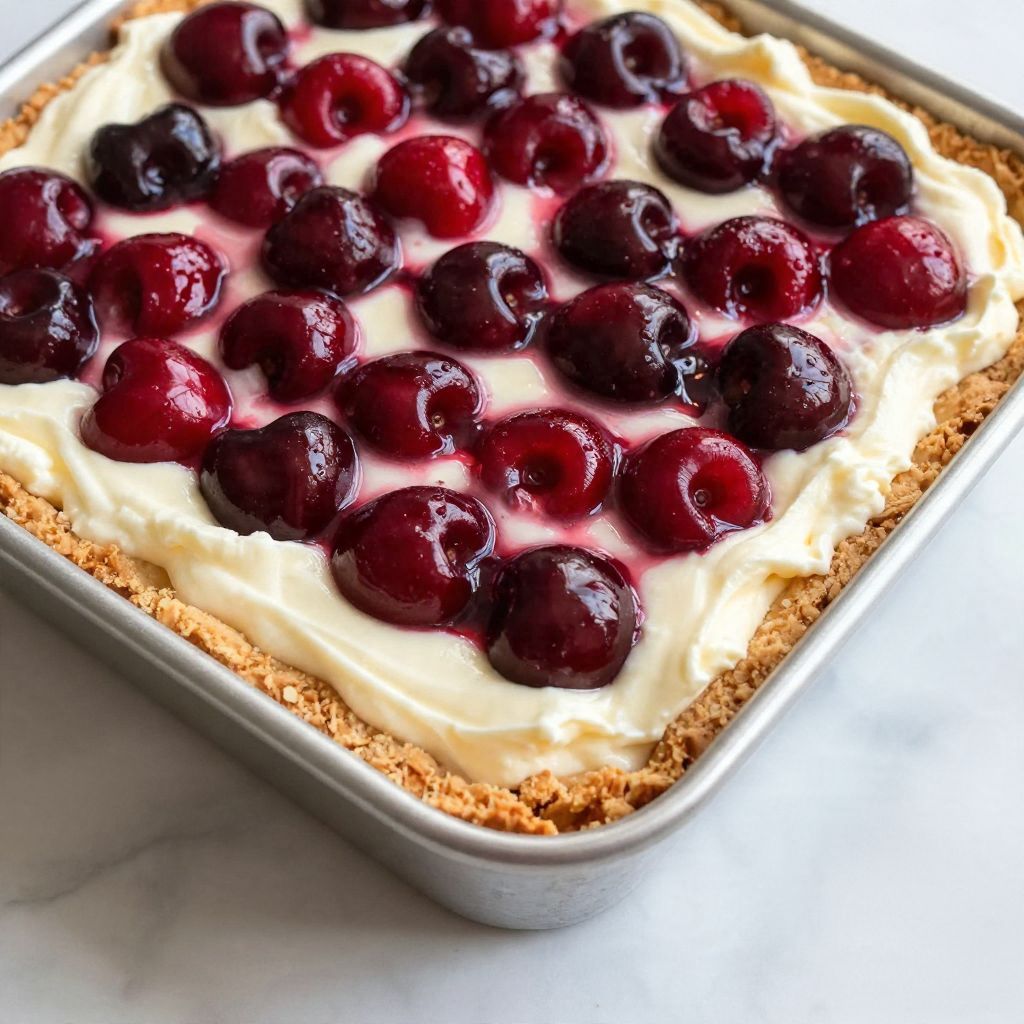
Cherry Yum Yum
Ingredients
Equipment
Method
- In a mixing bowl, combine the crushed graham crackers and melted butter.
- Press the mixture firmly into the bottom of a 9x9 inch square baking dish.
- Using an electric mixer, beat the softened cream cheese in a bowl until smooth.
- Gradually add the powdered sugar to the cream cheese, mixing until fully incorporated.
- Gently fold in the whipped topping until well combined.
- Spread the cream cheese mixture evenly over the prepared crust.
- Pour the cherry pie filling over the cream cheese layer, spreading it evenly.
- Cover the dish and refrigerate for at least 2 hours to set.