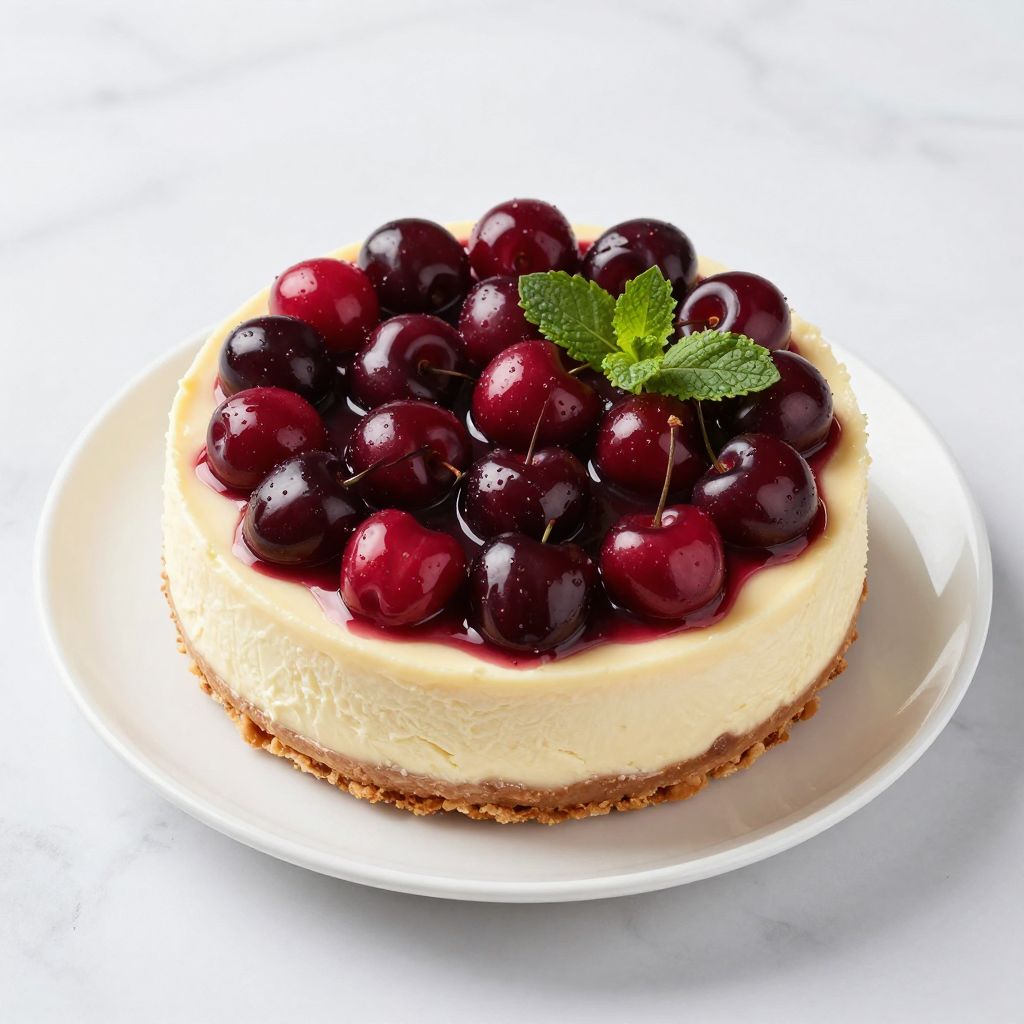
The first time you sink a spoon through velvety cream cheese filling and break into that ruby-red cherry topping, something magical happens. Cherry cheesecake delivers that perfect balance of tangy richness and sweet fruit that turns a simple dessert into a showstopper worthy of your fanciest dinner party or your most casual Tuesday night craving.
This recipe gives you that classic New York-style dense and creamy texture with a buttery graham cracker crust that actually stays crisp. The homemade cherry topping tastes leagues better than anything from a can, and the whole thing comes together without a water bath or any other fussy techniques that make you question your life choices.
Why You’ll Love This Recipe
This cheesecake strikes that rare balance between impressive presentation and straightforward execution. You get bakery-quality results without culinary school training or specialized equipment.
- The filling sets perfectly firm without cracks, giving you clean, beautiful slices every single time
- The cherry topping can be made with fresh or frozen fruit, so you’re not limited by season
- Make it up to three days ahead, which means less stress when you’re hosting
- The graham cracker crust requires no baking and holds together beautifully
- Leftovers actually taste better after a day in the fridge as flavors meld together
My Experience Making This Recipe
I’ve made this cheesecake at least twenty times, and it never fails to get compliments. The first time I served it at a family gathering, my uncle asked if I’d bought it from a fancy bakery, which felt like the ultimate validation.
The smell while it bakes fills your kitchen with this warm, sweet aroma that makes everyone wander in asking when they can eat. I love how the cherries on top glisten like little jewels, and that satisfying moment when you pull the springform pan away to reveal perfectly smooth sides.
My favorite part is actually making the cherry topping because watching it thicken on the stove feels like kitchen magic. The color deepens to this gorgeous burgundy, and tasting it warm before it goes on the cheesecake requires serious self-control.
Recipe Overview
- Recipe Name: Classic Cherry Cheesecake
- Servings: 12 slices
- Prep Time: 30 minutes
- Cook Time: 1 hour 15 minutes
- Total Time: 6 hours (including chilling)
- Course: Dessert
- Cuisine: American
- Calories per Serving: 425
Equipment You Will Need
- 9-inch springform pan
- Electric mixer (stand or hand mixer works fine)
- Large mixing bowl
- Medium saucepan for cherry topping
- Food processor or plastic bag with rolling pin for crushing crackers
- Rubber spatula
- Measuring cups and spoons
- Aluminum foil
Ingredients for Cherry Cheesecake
For the Crust
- 1 and 3/4 cups graham cracker crumbs (about 12 full crackers)
- 1/4 cup granulated sugar
- 6 tablespoons unsalted butter, melted
For the Cheesecake Filling
- 32 ounces cream cheese (four 8-ounce blocks), softened to room temperature
- 1 cup granulated sugar
- 1 cup sour cream, at room temperature
- 1 tablespoon vanilla extract
- 4 large eggs, at room temperature
- 2 tablespoons all-purpose flour
- 1/4 teaspoon salt
For the Cherry Topping
- 3 cups fresh or frozen cherries, pitted
- 1/2 cup granulated sugar
- 2 tablespoons cornstarch
- 1/4 cup water
- 1 tablespoon lemon juice
- 1/2 teaspoon almond extract
Ingredient Notes and Substitutions
- Cream cheese: This creates the dense, creamy base that defines cheesecake texture. You can use reduced-fat cream cheese, but the texture will be slightly less rich and more prone to cracking.
- Sour cream: Adds tang and helps create a smooth, creamy consistency that prevents graininess. Greek yogurt works as a substitute, though it creates a slightly lighter texture.
- Graham crackers: Provide the classic sweet, slightly honey-flavored crust that complements the filling. Swap in vanilla wafers, digestive biscuits, or even Oreos with the filling scraped out for variety.
- Fresh cherries: Give the best flavor and texture for the topping with natural sweetness. Frozen cherries work perfectly well and canned pie filling saves time, though it will be much sweeter and less fresh-tasting.
- Almond extract: Enhances the cherry flavor with complementary nutty notes. Vanilla extract can replace it if you dislike almond, though you’ll miss that classic cherry-almond pairing.
How to Make Cherry Cheesecake
Step 1: Prepare the Crust
Preheat your oven to 325°F and wrap the outside of your springform pan with two layers of aluminum foil to prevent any butter from leaking out. Mix the graham cracker crumbs, sugar, and melted butter in a bowl until the mixture looks like wet sand and holds together when squeezed.
Press this mixture firmly into the bottom of the pan and about 1 inch up the sides, using the bottom of a measuring cup to compact it evenly. A firm crust prevents it from crumbling when you slice the finished cheesecake.
Step 2: Beat the Cream Cheese
Beat the softened cream cheese on medium speed for 3 to 4 minutes until completely smooth and fluffy with no lumps remaining. Starting with room temperature cream cheese prevents lumps that never fully incorporate, which would create an unpleasant grainy texture in your finished cheesecake.
Scrape down the sides and bottom of the bowl at least twice during this process to catch any chunks hiding at the edges. This step matters more than you think for achieving that silky consistency.
Step 3: Add Sugar and Flavorings
Add the sugar, vanilla extract, flour, and salt to the cream cheese, then beat on medium-low speed for about 2 minutes until fully combined. The flour helps stabilize the filling and prevents cracking, while the salt balances the sweetness.
Scrape the bowl again to make sure everything is evenly mixed. You want the sugar completely dissolved, not sitting in grainy pockets.
Step 4: Incorporate Sour Cream
Add the sour cream and mix on low speed just until blended, about 30 seconds. Overmixing at this stage incorporates too much air, which creates bubbles that rise during baking and can cause cracks or an uneven surface.
The mixture should look glossy and move slowly when you tilt the bowl. This thick consistency helps the cheesecake hold its shape during and after baking.
Step 5: Add Eggs Carefully
Add the eggs one at a time, beating on the lowest speed just until each egg disappears into the batter before adding the next. This gentle approach prevents overbeating, which is the number one cause of cheesecake failure.
Stop mixing the moment the last egg is incorporated, even if you think it could use a few more seconds. Those extra seconds of mixing add air that will expand in the oven and then deflate, leaving you with a sunken center.
Step 6: Pour and Smooth
Pour the filling over the prepared crust and use a spatula to spread it evenly, then gently tap the pan on the counter 5 to 10 times to release any air bubbles trapped in the batter. You’ll actually see bubbles rise to the surface, which is oddly satisfying.
Smooth the top with your spatula so it’s level, which helps it bake evenly. Any valleys or peaks will be exaggerated after baking.
Step 7: Bake Low and Slow
Bake at 325°F for 70 to 80 minutes until the edges are set but the center still jiggles slightly when you gently shake the pan, like barely-set jello. The residual heat will finish cooking the center as it cools, so pulling it out while it still wobbles prevents overbaking.
Overbaked cheesecake becomes dry and grainy instead of creamy, so resist the urge to leave it in longer. The center should look glossy and move as one unit when shaken, not liquidy.
Step 8: Cool Gradually
Turn off the oven and crack the door open about 4 inches, then let the cheesecake sit in the cooling oven for 1 hour. This gradual temperature change prevents the dramatic shrinking that causes cracks.
After an hour, remove it from the oven and let it cool completely on a wire rack for another hour before refrigerating. Putting a hot cheesecake directly in the fridge creates condensation that makes the top wet and sticky.
Step 9: Make the Cherry Topping
Combine the cherries, sugar, water, and lemon juice in a medium saucepan over medium heat and bring to a simmer, stirring occasionally. Mix the cornstarch with 2 tablespoons of cold water in a small cup until smooth, then pour it into the simmering cherries.
Cook for 3 to 5 minutes, stirring constantly, until the mixture thickens enough to coat the back of a spoon and turns glossy. Remove from heat, stir in the almond extract, and let it cool completely before spreading on the chilled cheesecake.
Step 10: Chill and Top
Cover the cooled cheesecake with plastic wrap and refrigerate for at least 4 hours or preferably overnight before adding the topping. This full chilling time lets the texture set properly and makes slicing clean and easy.
Spread the cooled cherry topping over the chilled cheesecake just before serving, or serve it on the side if you prefer. Run a knife under hot water and wipe it clean between each slice for those picture-perfect cuts.
Pro Tip: Room temperature ingredients are non-negotiable for smooth cheesecake filling. Set your cream cheese, eggs, and sour cream out on the counter for at least 2 hours before you start, or you’ll be fighting lumps the entire way through.
Tips for the Best Cherry Cheesecake
- Use a light hand when mixing after adding the eggs, stopping the mixer the moment everything is combined. Overbeating incorporates air that expands during baking and causes cracks and a puffed, uneven top that sinks as it cools.
- Check that your oven temperature is accurate with an oven thermometer, since even 25 degrees off can cause overbaking or underbaking. Most home ovens run hot or cold, and cheesecake is too finicky to leave to chance.
- Press the crust firmly and evenly using the bottom of a flat measuring cup or glass, creating a compact layer that won’t crumble. A loose crust falls apart when you try to slice and serve.
- Let the cheesecake chill overnight if possible rather than just the minimum 4 hours for the best texture and easiest slicing. The extra time lets flavors develop and the filling reaches its ideal creamy-but-firm consistency.
- Keep a close eye during the last 10 minutes of baking and trust the jiggle test rather than a timer. Ovens vary, so your cheesecake might be done in 70 minutes or need the full 80.
- Taste your cherries before making the topping and adjust the sugar accordingly, since some cherries are tart and others are naturally sweet. You want a balance that complements rather than overwhelms the tangy cheesecake.
Common Mistakes to Avoid
- Using cold ingredients straight from the fridge creates a lumpy filling that never fully smooths out, no matter how long you beat it. Those lumps bake right into your finished cheesecake, ruining the texture.
- Opening the oven door repeatedly during baking lets in blasts of cool air that cause uneven cooking and dramatic temperature swings. These sudden changes make the cheesecake crack and sink in the center.
- Skipping the cooling step in the oven after baking creates thermal shock that causes the top to crack dramatically. That gradual cooldown is your insurance against those ugly splits across the surface.
- Cutting into the cheesecake before it has fully chilled for at least 4 hours results in a messy, gooey slice that doesn’t hold its shape. Patience here separates amateur results from professional-looking servings.
- Using a dull knife or failing to clean it between slices creates ragged, messy cuts with filling smeared across the top. A hot, clean knife gives you those pristine slices worth photographing.
Serving Suggestions
This cheesecake shines as a standalone dessert, but the right accompaniments can take it from great to unforgettable. Think about contrasting textures and complementary flavors that enhance without competing.
- Serve with a dollop of fresh whipped cream to add lightness that cuts through the rich, dense filling
- Add a scoop of vanilla bean ice cream on the side for temperature contrast that makes each bite more interesting
- Drizzle with dark chocolate sauce to create a Black Forest-inspired variation that chocolate lovers will devour
- Pair with hot coffee or espresso, since the bitterness balances the sweet fruit and creamy filling perfectly
- Garnish with fresh mint leaves and a few whole cherries for a pop of color and fresh flavor
Variations to Try
- Swap the cherry topping for fresh strawberries, blueberries, or mixed berries for a different fruit profile that works beautifully with the cream cheese base. The prep method stays exactly the same.
- Make a chocolate crust using crushed Oreos instead of graham crackers for a richer, more decadent base that pairs amazingly with the cherries. Just leave out the sugar since Oreos are already sweet.
- Mix in 2 teaspoons of almond extract into the filling itself along with the vanilla for a more pronounced almond-cherry flavor throughout. This creates that classic amaretto cheesecake taste.
- Create a marbled effect by swirling 1/4 cup of melted chocolate into the filling before baking, dragging a knife through in figure-eight patterns. The visual appeal alone makes this variation worth trying.
- Try a gingersnap crust for a spiced variation that adds warmth and complexity to complement the bright cherry topping. The ginger-cherry combination tastes like something from a high-end restaurant.
Dietary Adaptations
- Gluten-free: Use gluten-free graham crackers or crushed gluten-free cookies for the crust, and replace the 2 tablespoons of all-purpose flour with cornstarch. The texture stays nearly identical with this simple swap.
- Dairy-free: This one is tough since cheesecake is fundamentally a dairy dessert, but you can try dairy-free cream cheese and coconut cream in place of sour cream. The texture will be softer and less tangy, honestly more like a no-bake cheesecake.
- Lower sugar: Cut the sugar in the filling to 3/4 cup and use a sugar substitute in the topping, though the texture will be slightly less creamy. Cheesecake needs some sugar for proper texture, not just sweetness.
- Keto: Use almond flour and butter for the crust, replace all sugar with erythritol, and use only 2 cups of cherries with extra lemon juice for tartness. The cherry topping becomes more of a garnish than a thick layer to keep carbs down.
Storage and Reheating
Refrigerator
Store leftover cheesecake covered tightly with plastic wrap or in an airtight container for up to 5 days. The texture actually improves after a day or two as flavors meld together.
- Keep the cherry topping on the slices during storage, as removing it makes the surface dry out
- Place a piece of parchment paper between the plastic wrap and the cheesecake to prevent sticking
- Store away from strong-smelling foods since cheesecake absorbs odors easily
Freezer
Freeze individual slices wrapped tightly in plastic wrap and then aluminum foil for up to 2 months. Freeze the cheesecake without the cherry topping if possible, adding fresh topping after thawing for the best texture and appearance.
- Thaw frozen slices in the refrigerator overnight rather than at room temperature
- Frozen cheesecake can be eaten while still slightly frozen for a firmer, almost ice-cream-like texture
- Label each wrapped slice with the date so you know how long it has been frozen
Reheating
Cheesecake is best served cold, so reheating isn’t recommended and will actually ruin the texture. Let refrigerated slices sit at room temperature for 10 to 15 minutes before serving if you want to take the chill off.
- Never microwave cheesecake, as it will melt the filling into a soupy mess
- Cold cheesecake straight from the fridge has the best texture and cleanest slicing
Nutrition Information
WP Recipe Maker #3912remove
 Classic Cherry Cheesecake This classic New York-style cherry cheesecake delivers a perfect balance of tangy richness and sweet fruit with a dense, creamy texture and buttery graham cracker crust. The homemade cherry topping and straightforward technique make this showstopper dessert achievable without fussy water baths or special equipment. Course: Dessert Cuisine: American Keyword: cherry cheesecake, cherry topping, graham cracker crust, homemade cheesecake, New York cheesecake Prep Time: 30m Cook Time: 75m Total Time: 360m Servings: 12 slices – 9-inch springform pan – Electric mixer (stand or hand mixer) – Large mixing bowl – Medium saucepan – Food processor or plastic bag with rolling pin – Rubber spatula – Measuring cups and spoons – Aluminum foil For the Crust – 1 and 3/4 cups graham cracker crumbs about 12 full crackers – 1/4 cup granulated sugar – 6 tablespoons unsalted butter melted For the Cheesecake Filling – 32 ounces cream cheese four 8-ounce blocks, softened to room temperature – 1 cup granulated sugar – 1 cup sour cream at room temperature – 1 tablespoon vanilla extract – 4 large eggs at room temperature – 2 tablespoons all-purpose flour – 1/4 teaspoon salt For the Cherry Topping – 3 cups fresh or frozen cherries pitted – 1/2 cup granulated sugar – 2 tablespoons cornstarch – 1/4 cup water – 1 tablespoon lemon juice – 1/2 teaspoon almond extract 1) Preheat your oven to 325°F and wrap the outside of your springform pan with two layers of aluminum foil to prevent any butter from leaking out. 2) Mix the graham cracker crumbs, sugar, and melted butter in a bowl until the mixture looks like wet sand and holds together when squeezed. 3) Press this mixture firmly into the bottom of the pan and about 1 inch up the sides, using the bottom of a measuring cup to compact it evenly. 4) Beat the softened cream cheese on medium speed for 3 to 4 minutes until completely smooth and fluffy with no lumps remaining. Scrape down the sides and bottom of the bowl at least twice during this process. 5) Add the sugar, vanilla extract, flour, and salt to the cream cheese, then beat on medium-low speed for about 2 minutes until fully combined. Scrape the bowl again. 6) Add the sour cream and mix on low speed just until blended, about 30 seconds. 7) Add the eggs one at a time, beating on the lowest speed just until each egg disappears into the batter before adding the next. Stop mixing the moment the last egg is incorporated. 8) Pour the filling over the prepared crust and use a spatula to spread it evenly, then gently tap the pan on the counter 5 to 10 times to release any air bubbles. Smooth the top with your spatula. 9) Bake at 325°F for 70 to 80 minutes until the edges are set but the center still jiggles slightly when you gently shake the pan. 10) Turn off the oven and crack the door open about 4 inches, then let the cheesecake sit in the cooling oven for 1 hour. 11) Remove from the oven and let it cool completely on a wire rack for another hour before refrigerating. 12) For the cherry topping, combine the cherries, sugar, water, and lemon juice in a medium saucepan over medium heat and bring to a simmer, stirring occasionally. 13) Mix the cornstarch with 2 tablespoons of cold water in a small cup until smooth, then pour it into the simmering cherries. 14) Cook for 3 to 5 minutes, stirring constantly, until the mixture thickens enough to coat the back of a spoon and turns glossy. Remove from heat, stir in the almond extract, and let it cool completely. 15) Cover the cooled cheesecake with plastic wrap and refrigerate for at least 4 hours or preferably overnight before adding the topping. 16) Spread the cooled cherry topping over the chilled cheesecake just before serving. Run a knife under hot water and wipe it clean between each slice for clean cuts. Room temperature ingredients are essential for smooth cheesecake filling. Set your cream cheese, eggs, and sour cream out on the counter for at least 2 hours before starting. The cheesecake can be made up to 3 days ahead and actually tastes better after a day in the fridge as flavors meld together. Store covered tightly in the refrigerator for up to 5 days or freeze individual slices for up to 2 months. calories 425
| Nutrient | Amount |
|---|