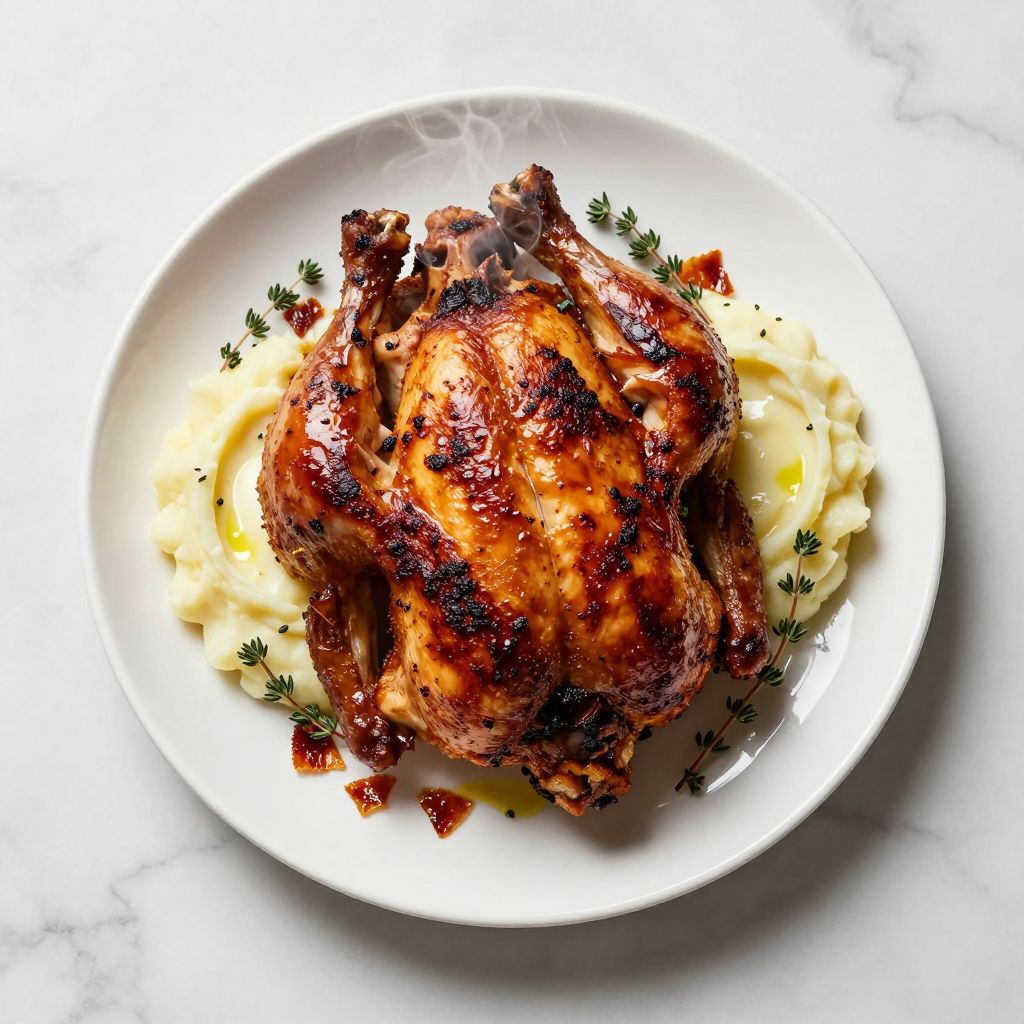
Beer can chicken recipe transforms a simple whole chicken into a juicy, flavorful masterpiece with crispy skin and tender meat that falls right off the bone. This method uses a half-full beer can inserted into the chicken cavity to steam it from the inside while the grill or oven roasts it to golden perfection.
The result is restaurant-quality poultry with minimal effort and maximum flavor. This technique has become a backyard favorite for good reason.
Why You’ll Love This Recipe
This cooking method delivers consistently moist chicken with crispy, seasoned skin that rivals any rotisserie version you can buy. The beer creates steam that keeps the meat incredibly tender while the upright position allows fat to drip away.
- Creates the juiciest chicken you’ve ever tasted with perfectly crispy skin
- Requires just 15 minutes of hands-on prep time with simple ingredients
- Works beautifully on the grill or in your oven year-round
- Feeds a crowd for pennies per serving with impressive presentation
- The upright cooking position bastes the chicken naturally as it cooks
My Experience Making This Recipe
I first attempted this recipe at a summer cookout, skeptical about the whole beer can concept. The aroma of the spice rub mingling with the subtle malt notes from the beer convinced me halfway through cooking that I was onto something special.
When I carved into that bird, the meat was so tender it practically slid off the bone, and the skin shattered like crispy glass. My guests devoured every last bite, and three people asked for the recipe before dessert.
I’ve made this at least two dozen times since then, experimenting with different rubs and beer styles. The method never fails to produce a showstopping centerpiece that tastes even better than it looks.
Recipe Overview
- Recipe Name: Beer Can Chicken
- Servings: 4-6
- Prep Time: 15 minutes
- Cook Time: 75 minutes
- Total Time: 90 minutes
- Course: Main Course
- Cuisine: American
- Calories per Serving: 385
Equipment You Will Need
- 12-ounce beer can
- Can opener or church key
- Grill or oven safe roasting pan
- Meat thermometer
- Small mixing bowl
- Paper towels
- Tongs or large spatula
- Aluminum foil
Ingredients for Beer Can Chicken Recipe
- 1 whole chicken (4 to 5 pounds)
- 1 can beer (12 ounces, any variety)
- 2 tablespoons olive oil
- 2 tablespoons brown sugar
- 2 tablespoons paprika
- 1 tablespoon garlic powder
- 1 tablespoon onion powder
- 1 tablespoon salt
- 1 teaspoon black pepper
- 1 teaspoon dried thyme
- 1 teaspoon cayenne pepper (optional, for heat)
Ingredient Notes and Substitutions
- Beer: The beer adds moisture and subtle flavor through steam, but you can substitute with soda, apple juice, or chicken broth in a pinch.
- Brown sugar: This helps create caramelization on the skin for that crispy texture, though white sugar or honey works if that’s what you have.
- Paprika: Provides color and mild smoky flavor to the rub, but smoked paprika will amp up that grilled taste even more.
- Olive oil: Helps the rub adhere to the skin and promotes browning, though melted butter or avocado oil are excellent alternatives.
- Dried thyme: Adds an earthy, herbal note that complements poultry beautifully, but rosemary or oregano can substitute with a slightly different flavor profile.
How to Make Beer Can Chicken Recipe
Step 1: Prepare the Chicken
Remove the chicken from its packaging and pat it completely dry with paper towels inside and out. Drying the skin thoroughly helps it crisp up during cooking rather than steaming.
Remove any giblets from the cavity and trim excess fat around the opening. The drier the skin, the crispier your finished product will be.
Step 2: Make the Spice Rub
Combine the brown sugar, paprika, garlic powder, onion powder, salt, black pepper, thyme, and cayenne pepper in a small bowl. Mix the spices together until evenly distributed with no clumps of sugar.
This rub forms the flavorful crust that makes the skin irresistible. The sugar balances the savory spices and helps with browning.
Step 3: Season the Chicken
Rub the olive oil all over the chicken, coating the entire surface including inside the cavity. Sprinkle the spice mixture generously over the entire chicken, using your hands to rub it into every crevice.
Don’t forget to season inside the cavity for flavor throughout the meat. Save about a teaspoon of rub to sprinkle on top after positioning the chicken.
Step 4: Prepare the Beer Can
Open the beer can and drink or pour out about half of the contents, leaving roughly 6 ounces in the can. Use a can opener to punch a few additional holes in the top of the can to allow steam to escape.
These extra holes help distribute the steam more evenly throughout the chicken cavity. You can also add a clove of garlic or sprig of herbs to the beer for extra flavor.
Step 5: Position the Chicken
Hold the chicken upright with the cavity opening facing down and lower it onto the beer can. The can should be inserted about halfway into the cavity with the chicken sitting upright as if it’s standing.
Spread the legs out slightly to form a tripod that keeps the chicken stable during cooking. This upright position allows heat to circulate evenly and fat to drip away.
Step 6: Set Up Your Grill or Oven
For grilling, preheat your grill to medium heat around 350-375°F using indirect heat with burners on the sides. For oven roasting, preheat to 375°F and place the chicken in a roasting pan to catch drippings.
Indirect heat prevents the skin from burning before the meat cooks through. A drip pan underneath catches any fat and prevents flare-ups.
Step 7: Cook the Chicken
Place the upright chicken on the grill grates or in the roasting pan and close the lid. Cook for 60-75 minutes without opening the lid frequently, as this releases heat and extends cooking time.
The chicken is done when the internal temperature reaches 165°F in the thickest part of the thigh. The skin should be deep golden brown and crispy all over.
Step 8: Rest and Serve
Carefully remove the chicken from the grill or oven using tongs or a large spatula, being cautious as the beer can will be extremely hot. Tent the chicken loosely with aluminum foil and let it rest for 10-15 minutes before carving.
Resting allows the juices to redistribute throughout the meat rather than running out when you cut into it. Carefully remove the beer can before carving and discard the contents.
Pro Tip: Always use a meat thermometer rather than relying on cooking time alone, as grill temperatures can vary and chicken sizes differ. Insert the thermometer into the thickest part of the thigh without touching bone for the most accurate reading.
Tips for the Best Beer Can Chicken Recipe
- Bring the chicken to room temperature for 30 minutes before cooking so it cooks more evenly throughout.
- Apply the rub at least an hour before cooking, or even overnight in the fridge, to let the flavors penetrate the meat deeper.
- Use a drip pan filled with about an inch of water under the chicken on the grill to keep the environment moist and prevent flare-ups.
- Avoid lifting the grill lid repeatedly to check on the chicken, as each peek drops the temperature by 25-50 degrees and extends cooking time.
- Let the chicken rest the full 15 minutes after cooking, even though you’re tempted to dig in immediately. This step makes the difference between good and exceptional chicken.
- If the skin starts browning too quickly, tent the top loosely with foil while continuing to cook until the internal temperature reaches 165°F.
Common Mistakes to Avoid
- Starting with a wet chicken prevents the skin from crisping properly, resulting in rubbery, pale skin instead of that desirable golden crunch.
- Overfilling the beer can causes liquid to bubble over during cooking, creating a mess and reducing the steaming effect inside the cavity.
- Cooking over direct high heat burns the outside before the inside is done, leaving you with charred skin and undercooked meat near the bone.
- Skipping the resting period causes all the flavorful juices to run out onto your cutting board instead of staying in the meat where they belong.
- Using a chicken that’s too large (over 5 pounds) makes it difficult to cook evenly and increases the risk of the setup becoming unstable and tipping over.
Serving Suggestions
This succulent chicken pairs beautifully with classic cookout sides and fresh summer vegetables. The savory, slightly smoky flavor complements both rich and light accompaniments.
- Creamy coleslaw or tangy vinegar-based slaw to cut through the richness
- Grilled corn on the cob brushed with butter and sprinkled with fresh herbs
- Roasted potato wedges or creamy mashed potatoes to soak up the flavorful juices
- Fresh garden salad with a light vinaigrette for a refreshing contrast
- Baked beans or mac and cheese for a hearty, crowd-pleasing spread
Variations to Try
- Lemon Herb: Replace the paprika and brown sugar with fresh lemon zest, rosemary, and thyme for a bright, Mediterranean flavor that’s perfect for spring dinners.
- Spicy Cajun: Double the cayenne and add 2 teaspoons of Cajun seasoning to the rub for a bold, spicy kick that heat lovers will devour.
- Asian-Inspired: Use a beer can filled with soy sauce, ginger, and garlic, then rub the chicken with five-spice powder and sesame oil for an umami-rich twist.
- Sweet BBQ: Mix your favorite BBQ rub with the chicken and use root beer instead of beer for a sweeter profile that caramelizes beautifully on the grill.
- Herb Butter: Create compound butter with fresh herbs and garlic, then carefully separate the skin from the breast meat and spread the butter underneath before cooking for ultra-rich, moist meat.
Dietary Adaptations
- Gluten-Free: This recipe is naturally gluten-free, but double-check that your beer or substitute liquid doesn’t contain gluten if you have celiac disease or sensitivity.
- Dairy-Free: The recipe as written contains no dairy, so it’s already suitable for those avoiding milk products without any modifications needed.
- Low-Carb/Keto: Skip the brown sugar in the rub and replace it with a granulated sugar substitute like erythritol to keep the recipe keto-friendly while maintaining the caramelization.
- Paleo: Replace the beer with coconut water or chicken broth and omit the brown sugar, using a small amount of honey instead if you need sweetness in the rub.
Storage and Reheating
Refrigerator
Allow the chicken to cool to room temperature, then remove the meat from the bones and store in an airtight container. Properly stored, the cooked chicken will keep for 3-4 days in the refrigerator.
- Store white meat and dark meat separately if possible for different uses later
- Keep the skin attached if you plan to reheat it for serving
- Pour any collected juices over the meat to keep it moist during storage
Freezer
Shred or chop the cooled chicken and place it in freezer-safe containers or bags, removing as much air as possible. Frozen cooked chicken maintains quality for up to 3 months.
- Label containers with the date and contents for easy identification
- Freeze in portion sizes you’ll actually use to avoid repeated thawing
- Thaw overnight in the refrigerator before reheating
Reheating
Reheat chicken in a 350°F oven covered with foil to prevent drying out. Add a splash of chicken broth to the bottom of the pan for extra moisture.
- Oven reheating takes 15-20 minutes and preserves texture better than microwaving
- For crispy skin, remove the foil for the last 5 minutes of reheating
- Microwave individual portions for 1-2 minutes if you’re short on time, though the skin won’t stay crispy
Nutrition Information
| Nutrient | Amount |
|---|---|
| Calories | 385 |
| Total Fat | 22g |
| Saturated Fat | 6g |
| Carbohydrates | 8g |
| Fiber | 1g |
| Sugar | 6g |
| Protein | 38g |
| Sodium | 890mg |
| Cholesterol | 125mg |
Nutritional values are estimates based on a 4-pound chicken serving 6 people and may vary based on specific ingredients used and portion sizes.
Frequently Asked Questions
Can I make beer can chicken without beer?
Absolutely, you can use chicken broth, apple juice, soda, or even plain water with herbs and aromatics in the can. The liquid primarily provides steam for moisture, so any beverage works as long as you have enough to last through the cooking time.
Can I prepare beer can chicken ahead of time?
You can apply the rub up to 24 hours before cooking and store the seasoned chicken covered in the refrigerator for deeper flavor penetration. Insert the beer can and cook the chicken just before serving, as it’s best enjoyed fresh off the grill.
Why is my beer can chicken skin not crispy?
Wet skin is the most common culprit, so make sure to thoroughly pat the chicken dry before applying oil and seasoning. Cooking at too low a temperature or in an environment that’s too humid can also prevent proper crisping.
Do I need a special stand for beer can chicken?
While a dedicated chicken stand makes the setup more stable, the beer can method works perfectly fine without one if your can is sturdy. Just make sure to position the chicken so the legs form a stable tripod with the can.
How do I know when the chicken is done without a thermometer?
Pierce the thickest part of the thigh with a knife and check that the juices run clear without any pink tinge, though a meat thermometer is really the only reliable way to confirm doneness. Undercooked chicken poses health risks, so investing in an instant-read thermometer is worth it.
Can I cook beer can chicken in the oven year-round?
Yes, oven-roasted beer can chicken works beautifully at 375°F for the same cooking time as grilling. Place the chicken in a roasting pan or on a rimmed baking sheet to catch drippings, and you’ll get excellent results even in winter.
Final Thoughts
Beer can chicken delivers impressive results with minimal fuss, making it perfect for both weeknight dinners and special occasions. The combination of moist, flavorful meat and crispy, well-seasoned skin never fails to satisfy.
Give this recipe a try the next time you’re grilling or roasting chicken, and watch it become your new go-to method. Once you experience how tender and juicy this technique makes the meat, you won’t want to cook a whole chicken any other way.
Beer Can Chicken
Ingredients
Equipment
Method
- Remove the chicken from its packaging and pat it completely dry with paper towels inside and out. Remove any giblets from the cavity and trim excess fat around the opening.
- Combine the brown sugar, paprika, garlic powder, onion powder, salt, black pepper, thyme, and cayenne pepper in a small bowl. Mix the spices together until evenly distributed with no clumps of sugar.
- Rub the olive oil all over the chicken, coating the entire surface including inside the cavity. Sprinkle the spice mixture generously over the entire chicken, using your hands to rub it into every crevice. Season inside the cavity as well.
- Open the beer can and drink or pour out about half of the contents, leaving roughly 6 ounces in the can. Use a can opener to punch a few additional holes in the top of the can to allow steam to escape.
- Hold the chicken upright with the cavity opening facing down and lower it onto the beer can. The can should be inserted about halfway into the cavity with the chicken sitting upright. Spread the legs out slightly to form a tripod that keeps the chicken stable.
- For grilling, preheat your grill to medium heat around 350-375°F using indirect heat. For oven roasting, preheat to 375°F and place the chicken in a roasting pan to catch drippings.
- Place the upright chicken on the grill grates or in the roasting pan and close the lid. Cook for 60-75 minutes without opening the lid frequently. The chicken is done when the internal temperature reaches 165°F in the thickest part of the thigh.
- Carefully remove the chicken from the grill or oven using tongs or a large spatula. Tent the chicken loosely with aluminum foil and let it rest for 10-15 minutes before carving. Carefully remove the beer can before carving and discard the contents.


