Picture this: a glossy, golden glaze cascading over your favorite dessert, catching the light like liquid amber. There’s something magical about a perfectly made glaze that transforms a simple cake, donut, or pastry into something bakery-worthy.
Glaze is the secret weapon in every home baker’s arsenal, and this recipe delivers that professional shine with just a handful of pantry staples. It comes together in minutes, requires no special equipment, and adapts beautifully to whatever flavor profile you’re craving.
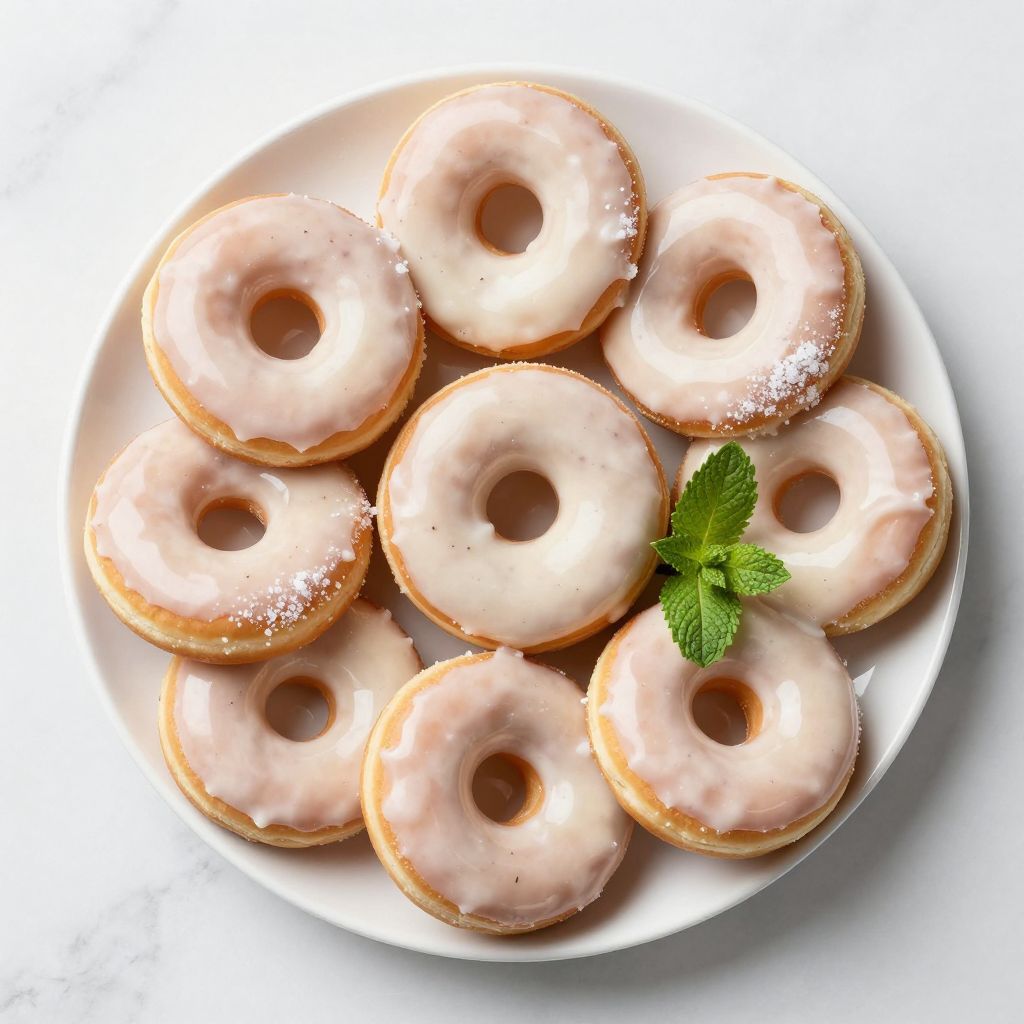
Whether you’re drizzling it over warm cinnamon rolls or dipping freshly fried donuts, this glaze sets with the perfect texture. No sticky mess, no chalky residue, just pure sweet perfection.
Why You’ll Love This Recipe
This glaze recipe solves the age-old problem of drippy, watery toppings that slide right off your baked goods. It strikes that perfect balance between pourable and thick, giving you control over your final presentation.
- Takes only 5 minutes from start to finish with minimal cleanup
- Uses basic ingredients you probably already have in your pantry
- Adjustable consistency means you can customize it for drizzling or dipping
- Infinitely customizable with different extracts, citrus, or spices
- Sets beautifully without becoming too hard or cracking
My Experience Making This Recipe
I first mastered this glaze recipe on a rainy Sunday morning when my kids begged for homemade donuts. The first batch turned out too thin and pooled at the bottom, teaching me the importance of getting the liquid ratio just right.
After that early mishap, I’ve made this glaze hundreds of times for everything from pound cakes to scones. The smell of vanilla mixing with powdered sugar still makes my kitchen feel like a professional bakery, and I love how the glaze catches the light when it sets with that signature glossy finish.
My neighbors now request my glazed lemon cookies every holiday season. They have no idea how ridiculously simple this topping actually is to make.
Recipe Overview
- Recipe Name: Classic Vanilla Glaze
- Servings: Makes about 1 cup (enough for 12-16 donuts or 1 bundt cake)
- Prep Time: 5 minutes
- Cook Time: 0 minutes
- Total Time: 5 minutes
- Course: Topping, Dessert
- Cuisine: American
- Calories per Serving: 85 calories (based on 12 servings)
Equipment You Will Need
- Medium mixing bowl
- Whisk or fork
- Measuring cups and spoons
- Rubber spatula
- Small saucepan (optional, for warming)
Ingredients for Classic Vanilla Glaze
- 2 cups powdered sugar (also called confectioners’ sugar), sifted
- 3 tablespoons whole milk (or as needed for desired consistency)
- 1 teaspoon pure vanilla extract
- 1 tablespoon unsalted butter, melted (optional, for extra richness)
- Pinch of salt (about 1/8 teaspoon)
Ingredient Notes and Substitutions
- Powdered sugar: This creates the smooth, sweet base that sets properly without graininess. Granulated sugar won’t dissolve completely and will give you a gritty texture, so don’t substitute it.
- Whole milk: The fat content helps create a richer glaze with better flow properties. You can use any milk you have, including almond or oat milk, though the flavor will be slightly different.
- Vanilla extract: This provides the classic bakery flavor that makes glazed treats irresistible. Almond extract, lemon extract, or maple extract work beautifully if you want a flavor twist.
- Butter: Adding melted butter gives the glaze a silky mouthfeel and helps it set with a slight sheen. Leave it out for a lighter glaze or if you need a dairy-free version using plant milk.
- Salt: A tiny pinch balances the sweetness and makes all the other flavors pop. Skip it if you’re using salted butter, though the amount is so small it barely matters.
How to Make Classic Vanilla Glaze
Step 1: Sift the Powdered Sugar
Place the powdered sugar in your mixing bowl and sift it to remove any lumps. Those little clumps might seem harmless, but they’ll create annoying bumps in your finished glaze that refuse to dissolve no matter how much you whisk.
Use a fine-mesh sieve or a flour sifter for best results. If you’re feeling lazy and your powdered sugar looks lump-free, you can skip this, but don’t blame me when you find chunks in your glaze.
Step 2: Add the Liquid Ingredients
Pour in 3 tablespoons of milk, the vanilla extract, and the pinch of salt. Start with less milk than you think you need because you can always add more, but you can’t take it back once it’s too thin.
This is where patience pays off. Adding liquid gradually gives you complete control over the final consistency.
Step 3: Whisk Until Smooth
Whisk the mixture vigorously for about 30 seconds until completely smooth and no streaks of powdered sugar remain. The glaze should look thick and creamy at this stage, almost like a paste.
Your arm might get tired, but this whisking action is what creates that silky texture. A fork works in a pinch, but a whisk incorporates everything faster and more thoroughly.
Step 4: Check the Consistency
Lift your whisk and let the glaze drip back into the bowl. It should flow in a thick ribbon that slowly disappears back into the surface.
If it’s too thick and barely moves, you need more liquid. If it’s too thin and runs like water, you’ll need to whisk in more powdered sugar a tablespoon at a time.
Step 5: Adjust to Your Preferred Thickness
For a drizzling glaze that creates pretty lines, keep it on the thicker side. For dipping donuts or cookies, thin it slightly so it coats evenly without being too heavy.
Add milk a teaspoon at a time if you need to thin it, whisking after each addition. The difference between perfect and too thin is about one teaspoon, so go slow.
Step 6: Add the Melted Butter (Optional)
If you want extra richness and shine, whisk in the melted butter now. Make sure the butter is just melted and not hot, or it might cause the glaze to separate slightly.
This step transforms a basic glaze into something that tastes more professional. The butter adds a subtle depth that makes people ask for your secret.
Step 7: Warm Slightly if Needed
If your glaze seems too thick even after adding liquid, warm it gently in the microwave for 5-10 seconds. The slight warmth makes the glaze more pourable without changing the ingredient ratios.
Don’t overheat it or the powdered sugar can break down and create a weird texture. Room temperature or just barely warm is the sweet spot.
Step 8: Use Immediately
Glaze works best when used right away, while it’s still smooth and flowing. Drizzle it over cooled baked goods with a spoon, or dip items directly into the bowl for full coverage.
The glaze will start to set within 10-15 minutes and fully harden in about 30 minutes. If it starts to thicken in the bowl while you’re working, add a few drops of milk and whisk to loosen it up.
Pro Tip: Place a wire rack over a sheet of parchment paper when glazing your baked goods. The excess glaze drips onto the paper, making cleanup a breeze, and you can even scrape up the drippings and reuse them for the next batch.
Tips for the Best Classic Vanilla Glaze
- Always sift your powdered sugar before starting to prevent lumps that ruin the smooth texture you’re after.
- Use pure vanilla extract rather than imitation for a noticeably better flavor that doesn’t taste artificial or chemical.
- Make sure your baked goods are completely cool before glazing, or the heat will melt the glaze and make it slide right off.
- For perfectly even coverage on donuts, dip them face-down into the glaze and give them a slight twist before lifting.
- If your glaze sets too quickly, add a teaspoon of corn syrup to keep it workable longer without changing the flavor.
- Store leftover glaze in an airtight container at room temperature for up to 3 days, whisking in a splash of milk to refresh it before using.
Common Mistakes to Avoid
- Adding all the liquid at once makes it nearly impossible to achieve the right consistency, and you’ll end up playing the guessing game with more powdered sugar.
- Using hot or very cold milk can affect how the glaze sets, with hot milk making it too runny and cold milk creating a thicker texture than you intended.
- Glazing warm baked goods causes the glaze to melt and become transparent instead of setting with that beautiful opaque finish.
- Not whisking thoroughly leaves you with streaks and lumps that look unprofessional and feel unpleasant in your mouth.
- Making the glaze too far in advance means it will harden in the bowl and require significant thinning, which can throw off the sugar-to-liquid ratio.
Serving Suggestions
This glaze turns simple baked goods into showstoppers that look like they came from an expensive bakery. Drizzle it over everything from breakfast pastries to afternoon tea cakes for instant elegance.
- Homemade donuts or donut holes for a classic breakfast treat
- Cinnamon rolls while they’re still slightly warm for maximum indulgence
- Bundt cakes or pound cakes for a traditional finishing touch
- Scones, muffins, or quick breads to add sweetness and visual appeal
- Sugar cookies or shortbread for a simple but effective decoration
Variations to Try
- Lemon Glaze: Replace the vanilla with fresh lemon juice and add 1 teaspoon of lemon zest for a bright, citrusy version that pairs beautifully with blueberry or poppy seed baked goods.
- Chocolate Glaze: Whisk in 2 tablespoons of cocoa powder with the powdered sugar for a rich chocolate version that’s perfect for donuts or brownies.
- Maple Glaze: Replace the milk with pure maple syrup for an autumn-inspired glaze that makes everything taste like breakfast in Vermont.
- Coffee Glaze: Substitute strong brewed coffee for the milk to create a sophisticated glaze that complements chocolate or spice cakes beautifully.
- Cream Cheese Glaze: Beat 2 ounces of softened cream cheese until fluffy before adding the other ingredients for a tangy, richer glaze that’s incredible on cinnamon rolls.
Dietary Adaptations
- Gluten-Free: This glaze is naturally gluten-free as long as your powdered sugar doesn’t contain any additives with gluten, which is rare but worth checking if you’re highly sensitive.
- Dairy-Free: Replace the milk with any plant-based milk like almond, oat, or coconut milk, and skip the butter or use vegan butter for a completely dairy-free version that tastes nearly identical.
- Vegan: Use plant-based milk and omit the butter, or substitute with melted coconut oil for richness without any animal products.
- Low-Carb/Keto: Substitute powdered erythritol or powdered allulose for the powdered sugar, though the texture won’t set quite as firmly and the sweetness level may differ slightly.
Storage and Reheating
Refrigerator
Store leftover glaze in an airtight container in the refrigerator for up to one week. The cold temperature will cause it to thicken and harden considerably, but it comes back to life easily.
- Let it come to room temperature for 15-20 minutes before using
- Whisk in milk a teaspoon at a time to restore the original consistency
- Check for any separation and whisk thoroughly to recombine
Freezer
Freezing glaze isn’t recommended because the texture changes significantly when thawed. The sugar and liquid can separate, creating a grainy consistency that’s difficult to fix.
- If you must freeze it, use a freezer-safe container for up to 1 month
- Thaw overnight in the refrigerator rather than at room temperature
- Expect to add fresh milk and whisk vigorously to restore smoothness
Reheating
You don’t really reheat glaze, but you do need to refresh it if it has hardened. A few seconds in the microwave or the addition of liquid brings it back to working consistency.
- Microwave for 5-10 seconds if the glaze has hardened in the bowl
- Add milk or water one teaspoon at a time to thin it
- Whisk thoroughly after any adjustment to ensure smoothness
Nutrition Information
| Nutrient | Amount |
|---|---|
| Calories | 85 |
| Total Fat | 1g |
| Saturated Fat | 0.5g |
| Carbohydrates | 20g |
| Fiber | 0g |
| Sugar | 19g |
| Protein | 0g |
| Sodium | 15mg |
| Cholesterol | 3mg |
Nutritional values are approximate and based on 12 servings using the full recipe with butter included. Your actual nutrition may vary depending on specific brands used and how much glaze you actually consume per serving.
Frequently Asked Questions
Can I use granulated sugar instead of powdered sugar?
No, granulated sugar won’t dissolve properly in the small amount of liquid, leaving you with a gritty, grainy glaze. Powdered sugar contains cornstarch that helps create the smooth texture and proper consistency you need.
How do I make my glaze thicker or thinner?
Add more powdered sugar a tablespoon at a time to thicken, or add more milk a teaspoon at a time to thin. Make adjustments gradually because small amounts make a big difference in consistency.
Can I make this glaze ahead of time?
You can make it up to 3 days ahead and store it covered at room temperature, but you’ll need to whisk in a bit of milk to loosen it before using. Fresh glaze always works better, so I prefer making it right before I need it.
Why did my glaze turn out cloudy instead of shiny?
Cloudy glaze usually means you added too much liquid or the baked goods were still warm when you glazed them. Make sure everything is completely cool and keep the glaze on the thicker side for better shine.
How long does it take for the glaze to set completely?
The glaze will form a skin and stop being sticky within 10-15 minutes, and it fully hardens in about 30 minutes at room temperature. Higher humidity can extend this time, while a dry environment speeds it up.
Can I color this glaze with food coloring?
Absolutely, gel food coloring works best because it won’t thin out the glaze like liquid food coloring can. Add it drop by drop until you reach your desired color, keeping in mind that the color will lighten slightly as the glaze dries.
What’s the difference between glaze and icing?
Glaze is thinner and more pourable, designed to create a smooth coating that sets with a slight sheen. Icing is thicker and more spreadable, often piped or spread with a knife rather than drizzled or dipped.
Final Thoughts
This simple glaze recipe proves that you don’t need fancy techniques or expensive ingredients to create bakery-quality results at home. Five minutes and a few pantry staples stand between you and beautifully finished baked goods that look like they came from a professional kitchen.
The real beauty of this recipe is its versatility and how forgiving it is once you understand the basic principles. Try it once, and you’ll find yourself reaching for this glaze every time you bake something that needs that final touch of sweetness and shine.
Classic Vanilla Glaze
Ingredients
Equipment
Method
- Place the powdered sugar in your mixing bowl and sift it to remove any lumps using a fine-mesh sieve or a flour sifter.
- Pour in 3 tablespoons of milk, the vanilla extract, and the pinch of salt to the sifted powdered sugar.
- Whisk the mixture vigorously for about 30 seconds until completely smooth and no streaks of powdered sugar remain. The glaze should look thick and creamy at this stage.
- Check the consistency by lifting your whisk and letting the glaze drip back into the bowl. It should flow in a thick ribbon that slowly disappears back into the surface.
- Adjust the thickness by adding milk a teaspoon at a time if too thick, or whisking in more powdered sugar a tablespoon at a time if too thin. For drizzling, keep it thicker; for dipping, thin it slightly.
- If using butter for extra richness and shine, whisk in the melted butter now. Make sure the butter is just melted and not hot.
- If the glaze seems too thick even after adding liquid, warm it gently in the microwave for 5-10 seconds to make it more pourable.
- Use immediately by drizzling over cooled baked goods with a spoon, or dip items directly into the bowl for full coverage. The glaze will start to set within 10-15 minutes and fully harden in about 30 minutes.


