
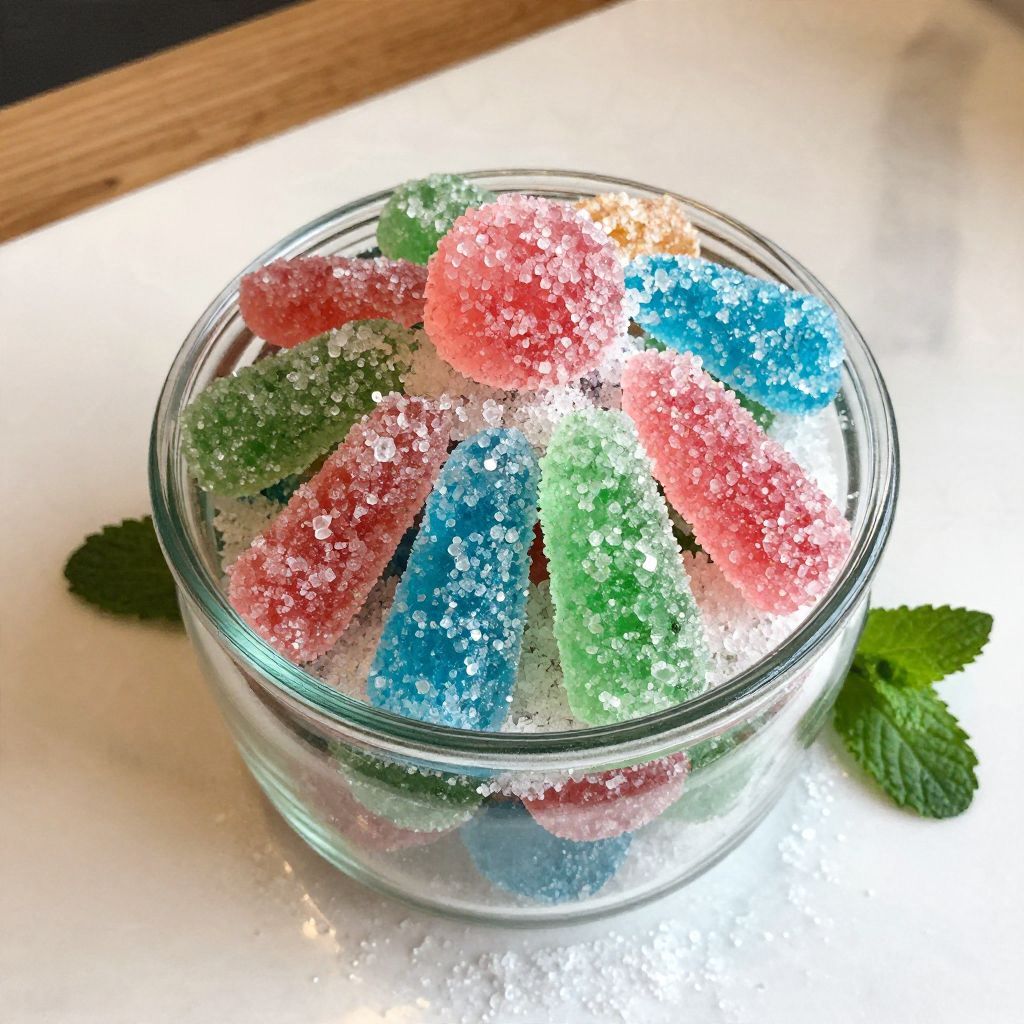
The first time I made crystal candy, I was captivated by the way simple sugar transformed into a dazzling treat. This recipe is not just about making candy; it’s about creating a sweet, shimmering masterpiece that’s perfect for gifts or festive occasions.
What makes this candy so special is its beautiful texture and the fun of watching it grow into vibrant crystals. With just a few ingredients and some patience, you can impress friends and family with your candy-making skills. Let’s gather our supplies and get started on this delightful project!
Why You’ll Love This Recipe
This crystal candy recipe offers a sweet combination of simplicity and elegance.
- Visually stunning and perfect for gifts.
- Customizable flavors and colors.
- Fun and engaging process to watch the crystals grow.
- Uses everyday ingredients you likely have at home.
My Experience Making This Recipe
The first batch I made left me in awe as sugar slowly crystallized into vibrant gems. Watching my kids’ eyes light up as they discovered their own creations was a memory I cherish.
Each time I make crystal candy, I find myself experimenting with different flavors and colors, making each batch unique. It’s a delightful blend of science and art that never fails to impress.
Recipe Overview
- Recipe Name: Crystal Candy
- Servings: About 10 pieces
- Prep Time: 10 minutes
- Cook Time: 1 hour
- Total Time: 24 hours (including crystallization)
- Course: Dessert
- Cuisine: American
- Calories per Serving: Approximately 100 calories
Equipment You Will Need
- Small saucepan
- Wooden spoon
- Glass jar or heatproof container
- String or wooden skewers
- Food coloring (optional)
- Flavoring extracts (optional)
Ingredients for Crystal Candy
- 2 cups granulated sugar
- 1 cup water
- 1/2 teaspoon flavoring extract (e.g., vanilla, mint)
- Food coloring (optional)
- 1/4 cup granulated sugar (for coating)
Ingredient Notes and Substitutions
- Granulated sugar: This is the main ingredient that crystallizes. You can use cane sugar or beet sugar interchangeably.
- Water: Pure water is essential for dissolving sugar. Distilled water can be used for a clearer candy.
- Flavoring extract: This adds taste. You can substitute it with natural flavor extracts like citrus or almond.
- Food coloring: Optional for visual appeal. Natural dyes like beet juice can be used as an alternative.
How to Make Crystal Candy
Step 1: Prepare Your Container
Start by cleaning your glass jar or container. Any residue can affect the crystallization process, leading to uneven results.
Step 2: Combine Ingredients
In a small saucepan, mix the water and sugar. Stir over medium heat until the sugar completely dissolves, creating a syrup.
Step 3: Add Flavor and Color
Remove the saucepan from heat and add the flavoring extract and food coloring if desired. This step adds a personal touch to your candy.
Step 4: Cool the Mixture
Allow the syrup to cool slightly before pouring it into the prepared jar. Pouring too hot can disrupt the crystallization process.
Step 5: Insert Skewers or String
If using skewers, dip them in sugar before placing them into the jar. This gives the crystals a base to start forming on.
Step 6: Crystallization Time
Cover the jar with a cloth and place it somewhere undisturbed at room temperature. It usually takes about 24 hours for crystals to form.
Step 7: Check Your Crystals
After a day, check on your candy. If the crystals are well-formed, carefully remove them from the jar.
Step 8: Coat the Crystals
Roll the crystals in granulated sugar for a sparkly finish. This adds extra sweetness and improves the candy’s appearance.
Pro Tip: Make sure to avoid disturbing the jar while the candy is crystallizing — even a little shake can ruin your beautiful candy!
Tips for the Best Crystal Candy
- Use a clean container to promote even crystallization.
- Experiment with different flavors and colors for fun variations.
- Let the candy crystallize in a cool, dry place for best results.
- Keep the mixture at a consistent temperature to avoid premature crystallization.
- Be patient; the longer you let it sit, the more defined the crystals will be.
Common Mistakes to Avoid
- Not dissolving the sugar completely can lead to gritty candy.
- Using too much heat can cause the sugar to caramelize instead of crystallize.
- Moving the container while the candy sets can disrupt crystal formation.
- Not using enough sugar for coating can result in less appealing candy.
Serving Suggestions
These beautiful candies are great on their own, but they can also shine in other settings. Pair them with desserts or use them as an elegant garnish.
- Serve with hot cocoa or tea.
- Use as a cake decoration.
- Include in gift baskets.
- Share at parties as a sweet treat.
Variations to Try
- Use different extracts like lemon or almond for unique flavors.
- Add citrus zest for a fresh twist.
- Try layered colors for a rainbow effect.
- Experiment with different types of sugar for varying textures.
Dietary Adaptations
- Gluten-free: Naturally gluten-free as it contains no grains.
- Dairy-free: This recipe is completely dairy-free.
- Vegan: A perfect vegan treat, using only plant-based ingredients.
- Low-carb/keto: For a low-carb version, consider using a sugar substitute like erythritol.
Storage and Reheating
Refrigerator
Store crystal candy in an airtight container in the refrigerator to maintain freshness.
- Keep away from moisture to avoid melting.
- Can be stored for up to a month.
Freezer
Freezing is not recommended as it may affect the texture of the candy.
- Best enjoyed fresh or stored in the refrigerator.
Reheating
Reheating is unnecessary since this candy is best enjoyed at room temperature.
- Simply remove from the fridge and allow to sit before serving.
Nutrition Information
| Nutrient | Amount |
|---|---|
| Calories | 100 |
| Total Fat | 0g |
| Saturated Fat | 0g |
| Carbohydrates | 25g |
| Fiber | 0g |
| Sugar | 25g |
| Protein | 0g |
| Sodium | 0mg |
| Cholesterol | 0mg |
Nutrition values may vary based on specific ingredients used.
Frequently Asked Questions
Can I make this candy ahead of time?
Yes, you can prepare it a few days in advance. Just store it properly to maintain freshness.
What if my candy does not crystallize?
This can happen if the mixture was disturbed or not allowed enough time. Ensure a quiet environment for best results.
Can I use flavored sugars instead of extracts?
Absolutely! Flavored sugars can enhance your candy’s taste. Just adjust the sugar quantity accordingly.
How do I prevent the sugar from turning brown?
Keep the heat low while dissolving sugar. High heat can lead to caramelization.
Can I use other types of sugar?
Yes, experimenting with different sugars like brown sugar can yield interesting flavors and colors.
Final Thoughts
Making crystal candy is a delightful and rewarding experience that combines artistry with a touch of science. I encourage you to try this recipe and enjoy the sweet satisfaction of your hard work.
For more sweet inspirations, explore our recipes for candied fruit and candy grapes. Happy cooking!
Crystal Candy
Ingredients
Equipment
Method
- Start by cleaning your glass jar or container.
- In a small saucepan, mix 1 cup water and 2 cups granulated sugar. Stir over medium heat until the sugar completely dissolves.
- Remove the saucepan from heat and add 1/2 teaspoon flavoring extract and food coloring if desired.
- Allow the syrup to cool slightly before pouring it into the prepared jar.
- If using skewers, dip them in 1/4 cup granulated sugar before placing them into the jar.
- Cover the jar with a cloth and place it somewhere undisturbed at room temperature for about 24 hours.
- After 24 hours, check your crystals. Carefully remove them from the jar.
- Roll the crystals in granulated sugar for a sparkly finish.