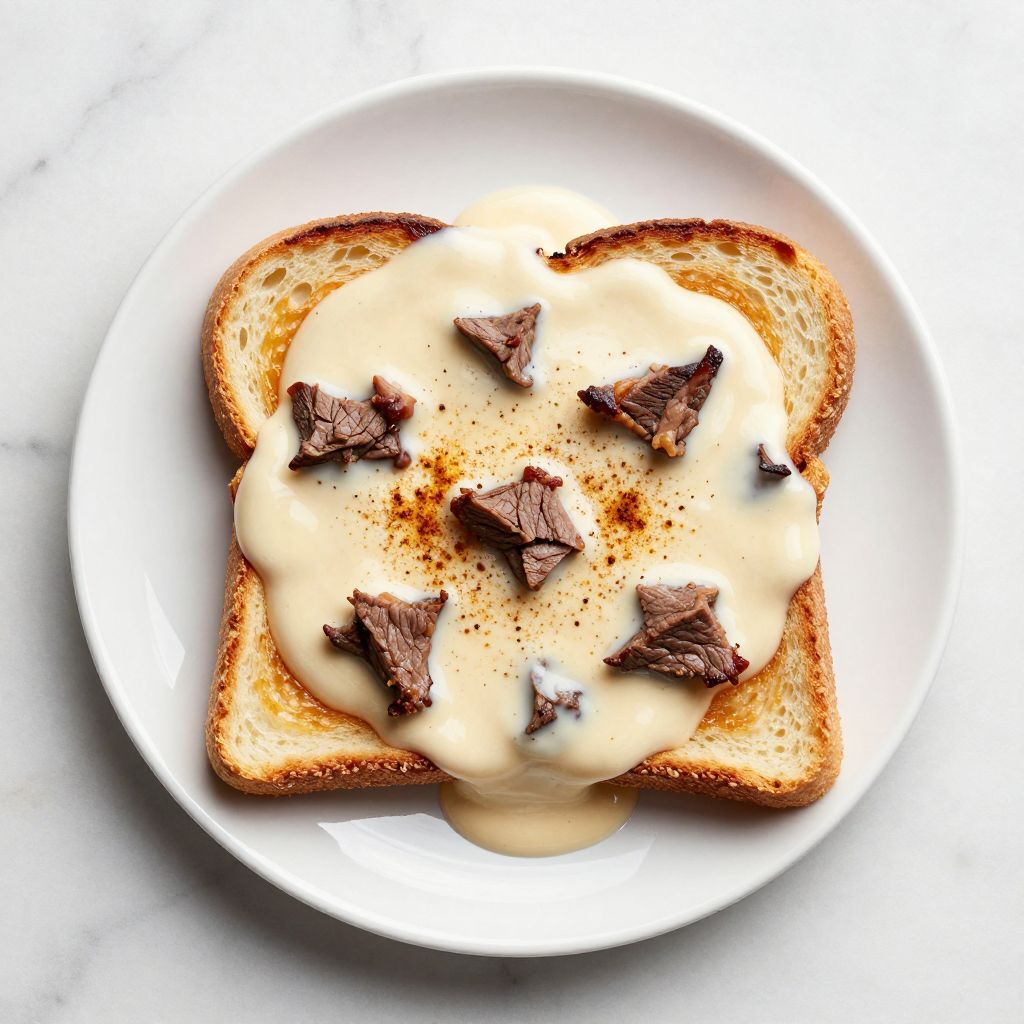
There’s nothing fancy about shit on a shingle, yet this humble military-cafeteria classic has fed hungry soldiers and families for over a century with pure, uncomplicated comfort. The name might raise eyebrows at the dinner table, but once you taste creamy, savory chipped beef over crispy toast, you’ll understand why this dish earned its blunt nickname and loyal following.
What makes this recipe so special is its sheer simplicity and speed: you need just five ingredients and ten minutes to create something deeply satisfying. The magic happens when a silky beef gravy clings to crispy bread, creating a textural contrast that feels both nostalgic and crave-worthy.
Why You’ll Love This Recipe
This dish delivers old-school comfort without pretension or fussy techniques. It’s quick, affordable, and tastes like a warm hug from your grandmother’s kitchen.
- Ready in under 10 minutes from start to finish
- Uses just 5 basic pantry staples and chipped beef
- Perfect for breakfast, lunch, or a quick dinner
- Nostalgic flavors that feel familiar and deeply satisfying
- Budget-friendly and naturally portion-controlled
My Experience Making This Recipe
I first made this dish on a lazy Sunday morning when I found a jar of chipped beef hiding in the back of my pantry. Within minutes, my kitchen smelled like a 1950s diner, and I found myself oddly charmed by how quickly the whole thing came together.
The real surprise was how good it actually tasted. The gravy coated each piece of beef in a creamy, peppery blanket, and the toast provided just enough structure to keep everything interesting.
My roommate ate two servings without asking what was in it, then laughed when I told him the name. That reaction pretty much sums up this recipe: unpretentious, easy to mock, and absolutely delicious once you stop overthinking it.
Recipe Overview
- Recipe Name: Shit on a Shingle
- Servings: 4
- Prep Time: 5 minutes
- Cook Time: 5 minutes
- Total Time: 10 minutes
- Course: Breakfast, Lunch, or Dinner
- Cuisine: American
- Calories per Serving: 320
Equipment You Will Need
- Large skillet or saucepan
- Wooden spoon or whisk
- Measuring cups and spoons
- Toaster or toaster oven
- Cutting board and knife
- Serving plates
Ingredients for Shit on a Shingle
- 4 tablespoons butter
- 3 tablespoons all-purpose flour
- 2 cups whole milk
- 1 jar (5 ounces) chipped beef, torn into bite-sized pieces
- Black pepper to taste
- 8 slices bread, toasted until crispy
- Optional: 1/2 teaspoon garlic powder or paprika for extra flavor
Ingredient Notes and Substitutions
- Chipped beef: This dried, salted beef creates the signature savory flavor and texture of the dish. If you can’t find it, use thinly sliced deli roast beef or even crumbled cooked ground beef, though the flavor will be slightly different.
- Butter: Creates a rich roux base for the gravy and adds classic flavor. You can substitute with olive oil or margarine, but the taste won’t be quite as creamy or satisfying.
- All-purpose flour: Thickens the milk into a smooth gravy without lumps. Cornstarch works as a substitute, but use only 2 tablespoons since it thickens more aggressively.
- Whole milk: Produces the creamiest gravy texture. Half-and-half makes it richer, while 2% milk works but will be slightly thinner.
- Bread: White bread or sourdough both work perfectly; toasting ensures it stays crispy under the hot gravy rather than turning soggy.
How to Make Shit on a Shingle
Step 1: Melt the Butter
Place your large skillet over medium heat and add the butter, letting it melt completely within about 30 seconds. Melting the butter slowly prevents browning and keeps your gravy a light, appetizing color.
Step 2: Make the Roux
Sprinkle the flour over the melted butter and stir constantly for about 1 minute until you have a smooth paste. This roux serves as the thickening agent for your gravy, so thorough stirring prevents lumps from forming.
Step 3: Add the Milk Slowly
Pour in the milk while whisking continuously to prevent lumps from developing. Adding milk gradually while stirring creates a smooth, velvety gravy rather than a chunky, separated mess.
Step 4: Bring to a Simmer
Keep whisking until the mixture reaches a gentle simmer and thickens noticeably, which takes about 2 minutes. The gravy should coat the back of a spoon without being so thick it becomes gluey.
Step 5: Add the Chipped Beef
Tear the chipped beef into bite-sized pieces and stir them into the gravy, heating through for about 1 minute. This rehydrates the beef slightly while infusing the gravy with its salty, savory flavor.
Step 6: Season with Black Pepper
Grind black pepper generously over the gravy and taste for seasoning, adding more pepper or even a pinch of salt if needed. The pepper provides warmth and depth without overpowering the beef’s natural saltiness.
Step 7: Toast the Bread
While the gravy cooks, toast your bread until it’s golden and crispy on all sides. Crispy toast stands up to the hot gravy without falling apart or becoming a soggy mess.
Step 8: Plate and Serve
Arrange the toasted bread on serving plates and ladle the creamy beef gravy generously over the top. Serve immediately while everything is hot and the toast is still at peak crispness.
Pro Tip: Don’t skip the toasting step; it’s the difference between a satisfying meal and bread soup.
Tips for the Best Shit on a Shingle
- Keep your heat at medium to prevent the gravy from scorching on the bottom while you stir. Low heat means longer cooking, but high heat risks burning the milk solids and creating an off flavor.
- Whisk constantly from the moment you add the milk until the gravy reaches its final thickness. This single action prevents lumps and creates the silky texture that makes this dish special.
- Taste the gravy before serving and adjust seasoning as needed, since chipped beef varies in saltiness by brand. Some jars are quite salty, so you may need less added salt than you’d expect.
- Toast the bread in a toaster oven rather than a pop-up toaster for more even browning and easier control. This gives you crispy bread that won’t break apart when the hot gravy hits it.
- Tear the chipped beef into smaller pieces rather than leaving large strips, which creates better texture throughout the gravy. Smaller pieces distribute more evenly and provide beefier flavor in every bite.
Common Mistakes to Avoid
- Adding flour without melting it in butter first creates clumpy, unpleasant gravy that tastes raw. Always make a proper roux to ensure smooth, even thickening.
- Pouring in all the milk at once causes lumps that never fully dissolve, ruining the texture no matter how much you whisk. Add milk gradually while whisking constantly.
- Using bread that isn’t toasted leaves you with a soggy, mushy base that falls apart under the gravy. Toasting is non-negotiable for textural contrast.
- Skipping the simmering step results in thin, runny gravy that slides off the bread instead of coating it. Let the mixture bubble gently for a minute to reach proper thickness.
- Overcooking the chipped beef toughens it and makes it stringy rather than tender. Add it at the very end and heat for just one minute.
Serving Suggestions
This dish works beautifully on its own, but a simple side elevates the whole meal without adding complexity. Fresh fruit or a light salad brightens the richness of the gravy.
- Serve with a simple green salad dressed in vinaigrette to cut through the richness
- Add fresh fruit like orange slices or berries on the side for brightness
- Pair with roasted or steamed vegetables like peas or green beans
- Accompany with a cup of strong coffee or hot tea for a classic breakfast feel
- Serve with pickled vegetables or relish on the side for tangy contrast
Variations to Try
- Creamed Chicken Version: Swap chipped beef for shredded cooked chicken and add a pinch of thyme for a milder, more delicate flavor that still feels comforting.
- Mushroom and Beef Variation: Sauté sliced mushrooms in the butter before making the roux, adding earthy depth that complements the salty beef beautifully.
- Cheese and Pepper Version: Stir in 1/2 cup sharp cheddar cheese after the gravy thickens for tangy richness that makes the dish feel slightly more elevated.
- Paprika and Garlic Twist: Add 1/2 teaspoon smoked paprika and 1/2 teaspoon garlic powder for a slightly more complex, modern flavor profile without losing the classic appeal.
- Creamed Corned Beef Upgrade: Use canned or deli corned beef instead of chipped beef for a heartier, meatier version that’s still quick and satisfying.
Dietary Adaptations
- Gluten-Free: Substitute cornstarch for flour in equal amounts to thicken the gravy, and use gluten-free bread for toasting. The flavor stays identical, though cornstarch may create a slightly slicker texture.
- Dairy-Free: Replace butter with olive oil and milk with unsweetened oat or cashew milk, using cornstarch instead of flour for thickening. The gravy will be slightly less rich but still satisfying and flavorful.
- Vegan/Vegetarian: Skip the chipped beef entirely and add sauteed mushrooms, caramelized onions, and a nutritional yeast for umami depth. The dish becomes entirely plant-based while maintaining comfort-food appeal.
- Low-Carb/Keto: Use almond flour or coconut flour instead of all-purpose flour, serve over cauliflower rice cakes or cloud bread, and use full-fat heavy cream instead of milk. You’ll keep the flavor intact while dramatically reducing carbohydrates.
Storage and Reheating
Refrigerator
Store the gravy and beef mixture separately from the toast to prevent sogginess. Keep everything in airtight containers for up to three days.
- Store gravy in an airtight container for up to 3 days
- Keep toasted bread in a separate container to maintain crispness
- Reheat gravy gently on the stovetop with a splash of milk to restore its silky texture
Freezer
The gravy freezes beautifully for up to two months, while the toast should never be frozen since it loses all texture integrity. Freeze the gravy in ice cube trays for easy portion control.
- Freeze gravy in ice cube trays, then transfer cubes to freezer bags
- Do not freeze toast, as it becomes mushy when thawed
- Label with the date to keep track of storage time
Reheating
Thaw frozen gravy overnight in the refrigerator, then reheat gently over medium-low heat with a splash of milk. Toast fresh bread right before serving to ensure maximum crispness.
- Reheat gravy on the stovetop over medium heat, stirring occasionally
- Add a splash of milk to thin the gravy if it thickens too much during storage
- Toast fresh bread right before serving for the best texture
Nutrition Information
| Nutrient | Amount |
|---|---|
| Calories | 320 |
| Total Fat | 16g |
| Saturated Fat | 9g |
| Carbohydrates | 28g |
| Fiber | 1g |
| Sugar | 4g |
| Protein | 18g |
| Sodium | 890mg |
| Cholesterol | 55mg |
These values are estimates based on standard ingredient sizes and brands. Nutrition will vary depending on the specific products you use and portion sizes.
Frequently Asked Questions
Can I make this recipe ahead of time?
You can prepare the gravy up to three days ahead and store it in the refrigerator, then reheat it gently on the stovetop before serving over freshly toasted bread. Don’t toast the bread in advance, as it loses its crispness within a few hours.
What if I can’t find chipped beef at my grocery store?
Thinly sliced deli roast beef or dried beef works as a direct substitute and will taste nearly identical. Ground beef or shredded chicken provide similar comfort but with a noticeably different flavor and texture.
How thick should the gravy be?
The gravy should be thick enough to coat the back of a spoon but still pourable enough to drench the toast evenly. If it becomes too thick while sitting, simply add a splash of milk and whisk until it reaches the right consistency.
Can I use margarine instead of butter?
Margarine works in a pinch, though the gravy won’t taste quite as rich or creamy. Butter provides a depth of flavor that’s hard to replicate with substitutes, so it’s worth using the real thing if possible.
Why does my gravy taste salty?
Chipped beef is naturally very salty, and different brands vary in their sodium content. Taste the gravy after adding the beef and avoid adding extra salt until you know how salty your particular jar is.
Can I use low-fat or skim milk?
Low-fat milk works but produces a thinner, less velvety gravy since fat carries flavor and creates that luxurious mouthfeel. Whole milk creates the best texture, but 2% milk is a reasonable compromise if you’re watching fat intake.
Final Thoughts
Shit on a shingle deserves far more respect than its crude name suggests. This dish represents pure comfort in its simplest form: quality ingredients treated with basic technique and served without pretense.
Make this recipe for a quick weeknight dinner, a nostalgic breakfast, or whenever you need something warm and satisfying without fuss. You’ll understand why this humble classic has endured for generations.
Shit on a Shingle

This humble military-cafeteria classic features creamy, savory chipped beef gravy served over crispy toast. Ready in just 10 minutes with only 5 basic ingredients, this nostalgic comfort food delivers pure satisfaction without pretension.
- Large skillet or saucepan
- Wooden spoon or whisk
- Measuring cups and spoons
- Toaster or toaster oven
- Cutting board and knife
- Serving plates
Main
- 4 tablespoons butter
- 3 tablespoons all-purpose flour
- 2 cups whole milk
- 1 jar (5 ounces chipped beef, torn into bite-sized pieces)
- Black pepper to taste
- 8 slices bread (toasted until crispy)
- 1/2 teaspoon garlic powder or paprika for extra flavor (optional)
- Place your large skillet over medium heat and add the butter, letting it melt completely within about 30 seconds.
- Sprinkle the flour over the melted butter and stir constantly for about 1 minute until you have a smooth paste.
- Pour in the milk while whisking continuously to prevent lumps from developing.
- Keep whisking until the mixture reaches a gentle simmer and thickens noticeably, which takes about 2 minutes. The gravy should coat the back of a spoon.
- Tear the chipped beef into bite-sized pieces and stir them into the gravy, heating through for about 1 minute.
- Grind black pepper generously over the gravy and taste for seasoning, adding more pepper or even a pinch of salt if needed.
- While the gravy cooks, toast your bread until it’s golden and crispy on all sides.
- Arrange the toasted bread on serving plates and ladle the creamy beef gravy generously over the top. Serve immediately while everything is hot.
Keep your heat at medium to prevent the gravy from scorching. Whisk constantly from the moment you add the milk until the gravy reaches its final thickness. Taste the gravy before serving and adjust seasoning as needed, since chipped beef varies in saltiness by brand. Don’t skip the toasting step – it’s the difference between a satisfying meal and bread soup. Store the gravy and beef mixture separately from the toast in airtight containers for up to 3 days.