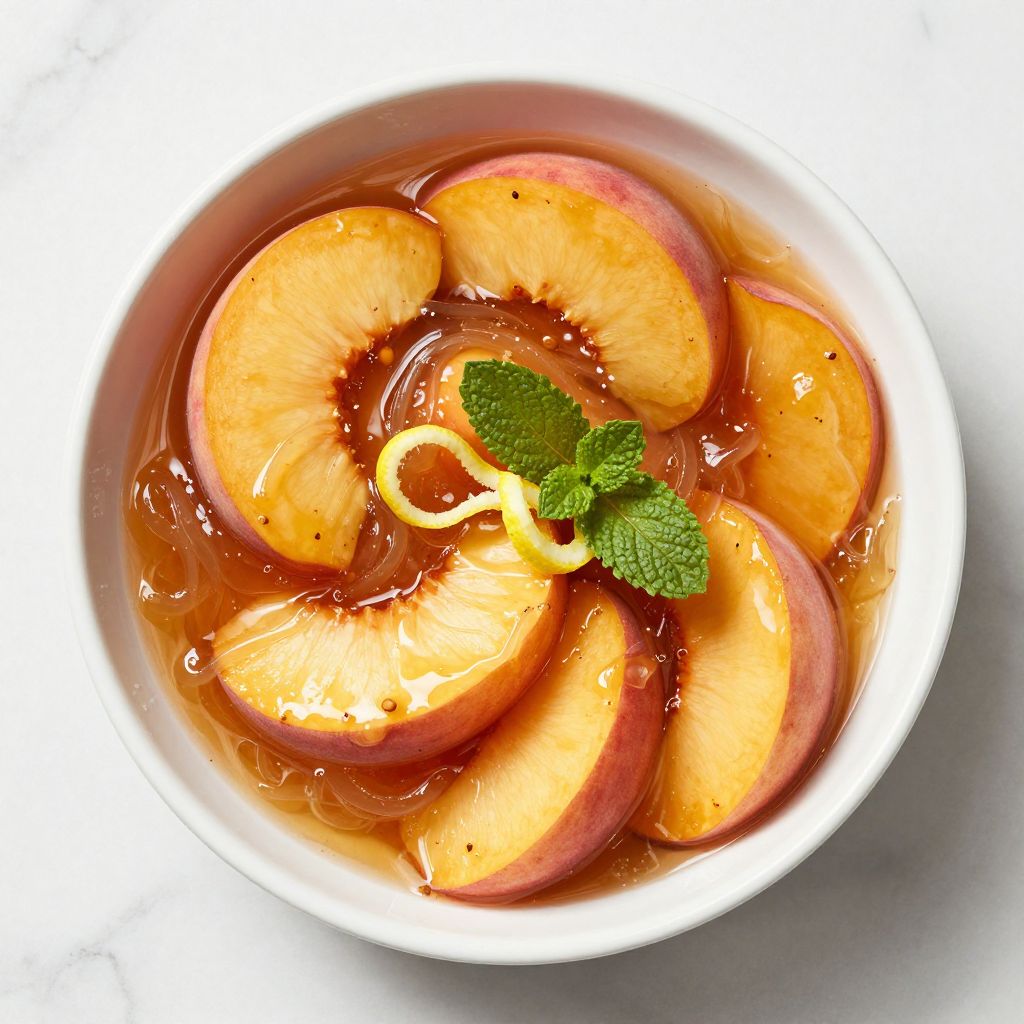
There’s something almost magical about the moment you crack open a jar of homemade peach pie filling and the warm, fragrant steam rises up to greet you. Peach pie filling is the foundation of every stellar peach dessert, and making it from scratch transforms your baking from ordinary to unforgettable.
This recipe delivers that perfect balance of sweet peaches, subtle spice, and just enough thickener to keep your pie from becoming a soupy mess. You’ll end up with filling so good that you’ll want to use it on everything from traditional pies to cobblers, tarts, and even vanilla ice cream.
Best of all, this filling comes together in under an hour and works whether you’re baking immediately or preserving it for later. Once you taste how much better homemade is compared to canned versions, you’ll never go back.
Why You’ll Love This Recipe
This peach pie filling strikes the perfect balance between simplicity and sophistication, delivering results that taste like you spent all day in the kitchen when you actually didn’t. The filling works for any peach dessert you can dream up.
- Fresh peach flavor that actually tastes like peaches, not sugar syrup
- Thickens perfectly without cornstarch cloudiness or flour grittiness
- Ready in under an hour from start to finish
- Can be made ahead and frozen for months
- Works in pies, cobblers, tarts, and even as a topping for breakfast pancakes
My Experience Making This Recipe
The first time I made this filling, I was shocked at how quickly it came together and how little effort it required. I used peak-of-season peaches from the farmers market, and the kitchen smelled absolutely incredible within minutes of them hitting the pot.
My family demolished the pie before it even cooled completely, which told me everything I needed to know about whether this recipe was a keeper. What impressed me most was that the filling stayed thick and scoopable, with no watery bottom layer that ruins so many homemade peach pies.
I’ve now made this recipe at least a dozen times, and I’ve convinced three friends to do the same after they tasted the results. The filling is so good that you can honestly bake it in a simple pie shell without fancy lattice work and still look like a baking hero.
Recipe Overview
- Recipe Name: Homemade Peach Pie Filling
- Servings: 8 servings (makes one 9-inch pie)
- Prep Time: 20 minutes
- Cook Time: 30 minutes
- Total Time: 50 minutes
- Course: Dessert
- Cuisine: American
- Calories per Serving: 145 calories
Equipment You Will Need
- Large pot (6-quart capacity)
- Cutting board
- Sharp chef’s knife
- Wooden spoon or heat-resistant spatula
- Measuring cups and spoons
- Small bowl for mixing
- Whisk or fork
- Colander or fine-mesh strainer
- Kitchen thermometer (optional but helpful)
Ingredients for Peach Pie Filling
- 6 pounds fresh peaches (about 12 to 14 medium peaches)
- 3/4 cup granulated sugar
- 1/4 cup light brown sugar
- 1/4 teaspoon ground nutmeg
- 1/4 teaspoon ground cinnamon
- 1/8 teaspoon ground ginger
- 1/4 teaspoon salt
- 3 tablespoons cornstarch
- 2 tablespoons tapioca starch
- 2 tablespoons fresh lemon juice
- 1 teaspoon vanilla extract
- 1/2 cup water
Ingredient Notes and Substitutions
- Fresh peaches provide natural sweetness and texture that frozen or canned simply cannot match. If fresh peaches aren’t in season, thaw 6 pounds of frozen peaches and drain excess liquid before proceeding.
- Granulated sugar and brown sugar create depth and prevent the filling from tasting one-dimensional. You can use all granulated sugar in a pinch, though you’ll lose a subtle molasses undertone.
- Cornstarch thickens the filling without cloudiness when combined with tapioca starch for stability. Potato starch or arrowroot can replace cornstarch if you need to avoid corn.
- Tapioca starch prevents the filling from breaking down during long storage and adds a silky mouthfeel. Instant tapioca (crushed into powder) or additional cornstarch works as a backup.
- Spices like nutmeg, cinnamon, and ginger complement peach’s natural flavor without overpowering it. Reduce amounts by half if you prefer a more delicate spice profile.
- Lemon juice brightens the peach flavor and prevents the filling from tasting flat or one-note. Fresh lemon juice matters more than bottled here.
How to Make Peach Pie Filling
Step 1: Prepare Your Peaches
Bring a large pot of water to a rolling boil, then score a small X on the bottom of each peach with a sharp knife. Drop the peaches into boiling water for 1 to 2 minutes, then transfer them immediately to an ice bath using a slotted spoon.
This blanching process loosens the skin so it slides off effortlessly, which beats struggling with a vegetable peeler for twenty minutes. Once the peaches cool enough to handle, peel away the skin, then pit and slice each peach into half-inch thick slices.
Step 2: Combine Dry Ingredients
In a small bowl, whisk together the granulated sugar, brown sugar, nutmeg, cinnamon, ginger, salt, cornstarch, and tapioca starch. Combine these ingredients thoroughly so the starches distribute evenly and won’t clump when they hit the liquid.
This step prevents you from ending up with pockets of raw starch floating in your filling, which creates an unpleasant grainy texture.
Step 3: Add Peaches to the Pot
Place your sliced peaches in a large pot and pour the dry mixture over them, stirring gently with a wooden spoon to coat every slice. Let this sit for 5 minutes so the peaches begin releasing their juice and the sugar starts dissolving.
The peaches will look slightly wet and syrupy at the bottom of the pot, which is exactly what you want.
Step 4: Add Liquid Ingredients
Pour in the water, lemon juice, and vanilla extract, stirring everything together gently until the mixture is combined. The liquid will look thin at this point, but don’t worry because it will thicken as it cooks.
Make sure to scrape the bottom and sides of the pot to incorporate any sugar that settled there.
Step 5: Cook Over Medium Heat
Place the pot over medium heat and bring the mixture to a gentle simmer, stirring occasionally with a wooden spoon. You’re looking for small bubbles breaking the surface consistently, not a rolling boil that will cause the filling to splatter everywhere.
The gentle heat allows the peaches to soften without breaking apart into mush, and it gives the starches time to thicken the liquid properly.
Step 6: Monitor the Thickening Process
Continue cooking for 15 to 20 minutes, stirring every 2 to 3 minutes to prevent sticking on the bottom and to distribute heat evenly. The filling is ready when a spoon dragged through it leaves a brief trail before the liquid flows back together, or when the mixture reaches 220 degrees Fahrenheit on a thermometer.
You want the filling thick enough to hold its shape in a pie without being gluey or paste-like, so this sweet spot matters.
Step 7: Test for Doneness
Drop a small spoonful of hot filling onto a chilled plate and let it cool for 30 seconds, then nudge it with your finger to check the consistency. If it holds together but is still slightly wobbly, it’s perfect; if it’s too runny, simmer for another 3 to 5 minutes and test again.
This cold plate test is the most reliable way to check if your filling will set properly once it cools completely in the pie.
Step 8: Cool Before Using
Remove the pot from heat and let the filling cool to room temperature before transferring it to a pie shell or storing it. Pouring hot filling into a raw pie crust will partially cook the bottom and create a soggy, gummy layer instead of a crispy crust.
If you’re making the filling ahead of time, spreading it on a baking sheet and refrigerating it will speed up cooling significantly.
Pro Tip: Make the filling a day ahead and refrigerate it, then add it to your pie shell just before baking; this gives you more control over crust texture and filling temperature.
Tips for the Best Peach Pie Filling
- Choose peaches that yield slightly to pressure but aren’t mushy, and smell fragrant. Rock-hard peaches won’t have good flavor, but overripe ones will fall apart during cooking.
- Combine cornstarch with tapioca starch instead of using one alone, as this combination provides better stability and prevents the filling from weeping after a few days. The two starches reinforce each other’s strengths.
- Stir the filling every few minutes during cooking to distribute heat evenly and prevent the bottom from scorching. Scorched filling tastes bitter and will ruin an otherwise perfect pie.
- Use fresh lemon juice, not bottled, as bottled versions often taste flat and won’t brighten the peach flavor effectively. Even half a lemon’s worth of juice will make a noticeable difference.
- Don’t skip the cooling step, no matter how eager you are to bake the pie. Hot filling will absorb into the crust and create a soggy bottom that no one enjoys.
- If your filling looks too thin even after cooking, whisk together 1 tablespoon of cornstarch with 2 tablespoons of cold water, then stir it into the hot filling and cook for 2 more minutes. This emergency thickener works every time.
Common Mistakes to Avoid
- Overcooking the filling causes the peaches to break down into mush and the filling to become gluey and paste-like. Aim for a filling that’s thick enough to hold its shape but still contains recognizable peach pieces.
- Using only one type of thickener can result in filling that either weeps liquid after a few days or turns grainy and cloudy. The combination of cornstarch and tapioca starch provides the best texture and stability.
- Pouring hot filling directly into a pie shell partially cooks the crust and creates a soggy, gummy bottom layer. Always cool the filling to room temperature first, or chill it in the refrigerator.
- Skipping the blanching step for peach peeling leads to tough bits of peel in your filling that nobody wants to bite into. Take the extra five minutes to blanch and ice bath your peaches properly.
- Using underripe peaches produces filling that tastes tart and one-dimensional instead of rich and flavorful. Buy peaches when they smell fragrant and yield slightly to gentle pressure.
Serving Suggestions
The most obvious pairing is baked inside a traditional pie with a flaky pastry crust, but this filling deserves exploration beyond that single application. Think creatively about how to showcase those gorgeous peachy flavors.
- Bake in a double-crust or lattice-topped pie and serve warm with vanilla ice cream or whipped cream
- Layer into a peach cobbler with buttery biscuit topping and brown sugar crumble
- Spread over crispy phyllo sheets to create an elegant peach tart
- Swirl into vanilla or Greek yogurt cheesecake for an unexpected twist
- Top breakfast pancakes or waffles with a generous spoonful for an elevated weekend breakfast
Variations to Try
- Brown sugar peach filling: Replace all granulated sugar with 1 cup of packed light brown sugar for a deeper, molasses-forward flavor that pairs beautifully with bourbon. This variation is perfect for a more sophisticated dessert.
- Spiced peach filling: Add 1/4 teaspoon of ground cardamom and 1/8 teaspoon of ground clove for an exotic spice profile. These warm spices elevate the peach flavor and create a more complex, interesting filling.
- Peach and raspberry filling: Replace 1 pound of peaches with fresh raspberries and add 1 tablespoon of raspberry jam for extra depth. The tartness of raspberries balances the peaches’ sweetness perfectly.
- Bourbon peach filling: Add 2 tablespoons of bourbon whiskey and reduce the water to 1/4 cup. The bourbon adds warmth and sophistication, though the alcohol cooks off during the process.
- Honey peach filling: Replace 1/4 cup of granulated sugar with 1/4 cup of honey for a softer sweetness and more delicate flavor profile. Honey creates a slightly different texture that some bakers prefer.
Dietary Adaptations
- Gluten-free: This recipe is naturally gluten-free as written, making it safe for anyone avoiding gluten. Just ensure your cornstarch and tapioca starch come from certified gluten-free sources if you’re sensitive to cross-contamination.
- Dairy-free: The filling itself contains no dairy, though you’ll want to pair it with non-dairy whipped cream or coconut ice cream if serving with the pie. This recipe works perfectly for vegan and dairy-free baking.
- Vegan: This filling is already vegan, but you’ll need to pair it with a vegan pie crust for a completely plant-based dessert. Use vegan butter in your pastry and this becomes a fully vegan peach pie.
- Low-carb or keto: Replace the sugars with erythritol or monk fruit sweetener at a 1:1 ratio, though the filling will be less thick. You may need to add an extra tablespoon of cornstarch to achieve the right consistency.
- Paleo: Omit the cornstarch and tapioca starch, then thicken with 2 tablespoons of arrowroot powder instead. Arrowroot powder provides similar thickening power without grains.
Storage and Reheating
Refrigerator
Store leftover filling in an airtight container for up to 5 days in the refrigerator. The filling will thicken further as it cools, which is perfectly normal and actually desirable for pie-baking purposes.
- Cool completely before transferring to storage containers
- Cover tightly to prevent it from absorbing refrigerator odors
- Use a clean spoon each time you scoop to prevent contamination
Freezer
Frozen filling keeps for up to 3 months when stored in airtight freezer containers or heavy-duty freezer bags. Freezing actually preserves the texture better than refrigerating for extended periods.
- Leave at least 1/2 inch of headspace in containers for expansion
- Label with the date so you remember when you made it
- Thaw overnight in the refrigerator before using in a pie
Reheating
If you need to warm up chilled or frozen filling before baking, place it in a pot over low heat and stir frequently until it reaches room temperature. Never microwave the filling, as this creates hot spots and can cause the peaches to burst unevenly.
- Heat gently over low heat, stirring every minute or so
- Warm only until it reaches room temperature, not hot
- Allow to cool slightly before transferring to your pie shell
Nutrition Information
| Nutrient | Amount |
|---|---|
| Calories | 145 |
| Total Fat | 0.5g |
| Saturated Fat | 0g |
| Carbohydrates | 36g |
| Fiber | 2g |
| Sugar | 33g |
| Protein | 1g |
| Sodium | 75mg |
| Cholesterol | 0mg |
These values are estimates based on standard USDA nutrition databases for the ingredients listed. Actual nutritional content may vary slightly depending on the specific brands and varieties you use.
Frequently Asked Questions
Can I make this filling with frozen peaches?
Absolutely, and frozen peaches work great when fresh ones aren’t in season. Thaw them first, drain any excess liquid, and proceed with the recipe as written, though the filling may be slightly less vibrant in color.
What if my filling turns out too thin?
Whisk together 1 tablespoon of cornstarch with 2 tablespoons of cold water to create a slurry, then stir it into the hot filling and cook for 2 more minutes. This emergency fix reliably thickens runny filling every time.
How far ahead can I make this filling?
Make the filling up to 3 days ahead and refrigerate it, or freeze it for up to 3 months. Making it ahead actually impro
Homemade Peach Pie Filling

This peach pie filling delivers the perfect balance of sweet peaches, subtle spice, and just enough thickener to keep your pie from becoming a soupy mess. Ready in under an hour, this filling works whether you’re baking immediately or preserving it for later. The filling stays thick and scoopable with no watery bottom layer.
- Large pot (6-quart capacity)
- Cutting board
- Sharp chef’s knife
- Wooden spoon or heat-resistant spatula
- Measuring cups and spoons
- Small bowl for mixing
- Whisk or fork
- Colander or fine-mesh strainer
- Kitchen thermometer (optional but helpful)
Main
- 6 pounds fresh peaches (about 12 to 14 medium peaches)
- 3/4 cup granulated sugar
- 1/4 cup light brown sugar
- 1/4 teaspoon ground nutmeg
- 1/4 teaspoon ground cinnamon
- 1/8 teaspoon ground ginger
- 1/4 teaspoon salt
- 3 tablespoons cornstarch
- 2 tablespoons tapioca starch
- 2 tablespoons fresh lemon juice
- 1 teaspoon vanilla extract
- 1/2 cup water
- Bring a large pot of water to a rolling boil, then score a small X on the bottom of each peach with a sharp knife. Drop the peaches into boiling water for 1 to 2 minutes, then transfer them immediately to an ice bath using a slotted spoon. Once the peaches cool enough to handle, peel away the skin, then pit and slice each peach into half-inch thick slices.
- In a small bowl, whisk together the granulated sugar, brown sugar, nutmeg, cinnamon, ginger, salt, cornstarch, and tapioca starch. Combine these ingredients thoroughly so the starches distribute evenly and won’t clump when they hit the liquid.
- Place your sliced peaches in a large pot and pour the dry mixture over them, stirring gently with a wooden spoon to coat every slice. Let this sit for 5 minutes so the peaches begin releasing their juice and the sugar starts dissolving.
- Pour in the water, lemon juice, and vanilla extract, stirring everything together gently until the mixture is combined. Make sure to scrape the bottom and sides of the pot to incorporate any sugar that settled there.
- Place the pot over medium heat and bring the mixture to a gentle simmer, stirring occasionally with a wooden spoon. Continue cooking for 15 to 20 minutes, stirring every 2 to 3 minutes to prevent sticking on the bottom. The filling is ready when a spoon dragged through it leaves a brief trail before the liquid flows back together, or when the mixture reaches 220 degrees Fahrenheit on a thermometer.
- Drop a small spoonful of hot filling onto a chilled plate and let it cool for 30 seconds, then nudge it with your finger to check the consistency. If it holds together but is still slightly wobbly, it’s perfect; if it’s too runny, simmer for another 3 to 5 minutes and test again.
- Remove the pot from heat and let the filling cool to room temperature before transferring it to a pie shell or storing it. If you’re making the filling ahead of time, spreading it on a baking sheet and refrigerating it will speed up cooling significantly.
Make the filling a day ahead and refrigerate it, then add it to your pie shell just before baking for more control over crust texture and filling temperature. Store leftover filling in an airtight container for up to 5 days in the refrigerator, or freeze for up to 3 months. If frozen, thaw overnight in the refrigerator before using. If filling is too thin, whisk together 1 tablespoon of cornstarch with 2 tablespoons of cold water, then stir into the hot filling and cook for 2 more minutes.