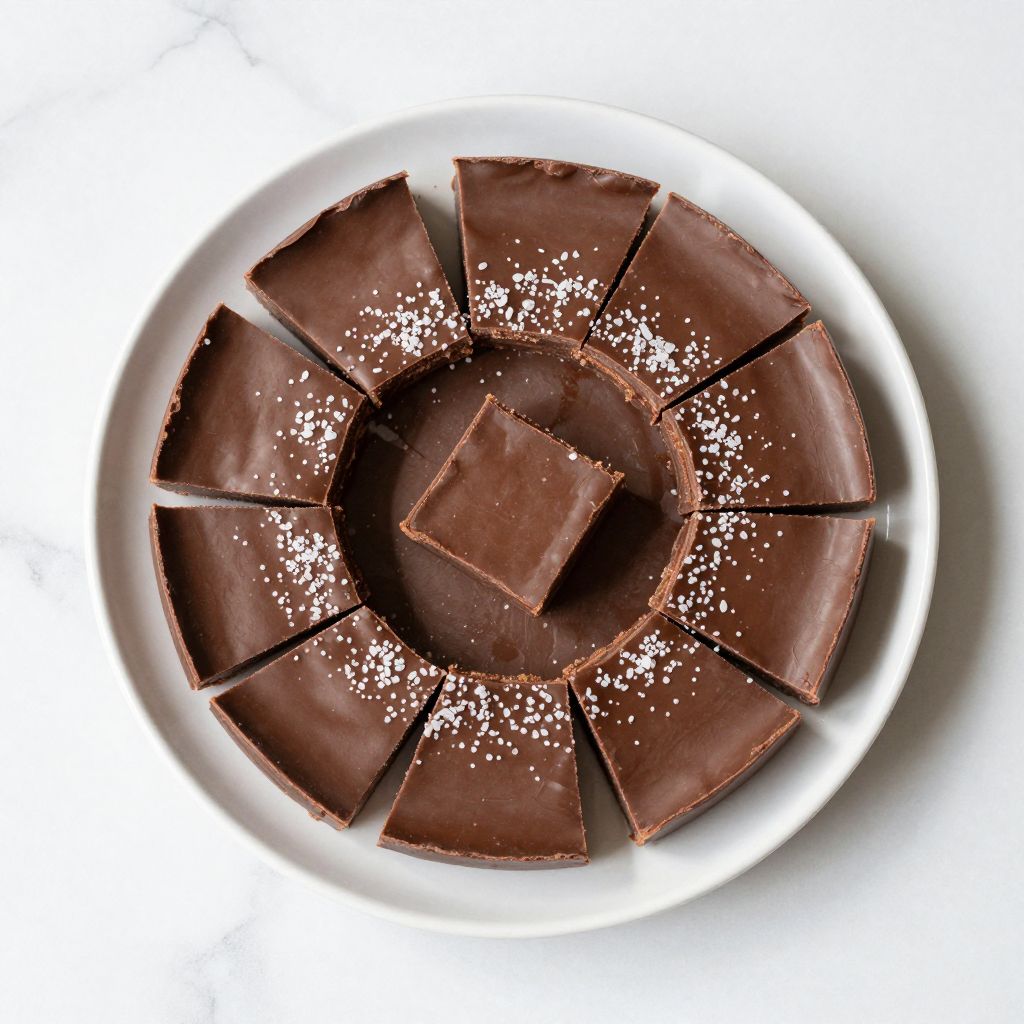
The smell of chocolate and butter melting together on the stove is pure nostalgia, and it takes you straight back to your grandmother’s kitchen on a lazy Sunday afternoon. Old fashioned fudge is the kind of homemade candy that feels like a small luxury, yet requires nothing more than a handful of ingredients and a few minutes of your time.
What makes this recipe special is its simplicity paired with a silky, melt-in-your-mouth texture that store-bought fudge can never quite match. You don’t need a candy thermometer or advanced cooking skills to pull this off, just patience and attention during the crucial cooling stage.
Why You’ll Love This Recipe
This fudge comes together in under 30 minutes from start to finish, and the results taste like you spent hours in the kitchen.
- Uses just 4 basic ingredients you likely have on hand right now
- No candy thermometer needed; instead you use a simple cold water test
- Produces rich, fudgy squares with the perfect snap and creamy interior
- Makes an impressive homemade gift that costs pennies to produce
- Works perfectly for beginner candy makers and seasoned home cooks alike
My Experience Making This Recipe
I first made this fudge on a whim during a cold January evening when a craving for something sweet hit hard. Within 20 minutes, I had a pan of the most decadent chocolate fudge sitting on my counter, and I couldn’t stop myself from eating three pieces in a row.
My sister tasted it the next day and asked if I’d bought it from some fancy chocolatier, which made me laugh out loud. The truth is, there’s nothing fancy about the process, but the results feel completely indulgent and special.
What really impressed me was how forgiving the recipe turned out to be once I understood the technique. Even when I got a bit distracted and let the mixture sit longer than planned, it still set up perfectly with that signature fudgy texture.
Recipe Overview
- Recipe Name: Old Fashioned Fudge
- Servings: 16 pieces
- Prep Time: 10 minutes
- Cook Time: 8 minutes
- Total Time: 2 hours 18 minutes (includes cooling)
- Course: Dessert/Candy
- Cuisine: American
- Calories per Serving: 135
Equipment You Will Need
- Heavy-bottomed saucepan (at least 2-quart capacity)
- Wooden spoon or silicone spatula for stirring
- Candy/deep-fry thermometer (optional but helpful)
- 8×8 inch square baking pan
- Parchment paper or butter for lining the pan
- Small bowl filled with ice water for the cold water test
- Cutting board and sharp knife for portioning
Ingredients for Old Fashioned Fudge
- 2 cups granulated sugar
- 3/4 cup unsweetened cocoa powder
- 1/2 cup whole milk
- 1/4 cup unsalted butter
- 1 teaspoon vanilla extract
- Pinch of sea salt
Ingredient Notes and Substitutions
- Granulated sugar: This is the backbone of fudge and dissolves evenly to create a smooth texture. You can substitute with light brown sugar for a slightly deeper caramel note, though this will darken the final color.
- Unsweetened cocoa powder: Using quality cocoa powder makes a huge difference in flavor depth. Dutch-process cocoa will give you a darker, earthier taste compared to natural cocoa, which tastes brighter and more fruity.
- Whole milk: This creates the creamy texture fudge is known for. You can replace it with heavy cream for extra richness, though this will make the fudge slightly firmer and less fudgy.
- Unsalted butter: Using unsalted butter lets you control the salt level precisely. Salted butter works, but reduce the added salt to a quarter teaspoon to avoid an overly salty result.
- Vanilla extract: This rounds out the chocolate flavor and adds complexity. Almond extract can replace it for a nuttier character, though use only half a teaspoon since almond flavor is more intense.
How to Make Old Fashioned Fudge
Step 1: Line Your Pan
Cut a piece of parchment paper slightly larger than your 8×8 inch pan and press it into the corners, letting it overhang the sides. This makes it incredibly easy to lift the entire block of fudge out after it sets, saving you from messy scraping and cleanup.
Step 2: Combine Dry Ingredients
Pour the sugar and cocoa powder into your saucepan and whisk them together thoroughly with a fork or small whisk. Combining them dry first prevents lumps from forming when you add the milk, which would create a grainy texture in your finished fudge.
Step 3: Add the Milk
Pour the milk into the pan with the sugar and cocoa mixture, stirring constantly until you have a smooth, lump-free paste. This step takes a minute or two of patience, but it’s worth getting everything fully incorporated before applying heat.
Step 4: Melt and Heat
Add the butter to the pan and place it over medium heat, stirring occasionally as everything melts together. Once the mixture is smooth and the butter is fully incorporated, stop stirring and let it heat undisturbed, as this prevents sugar crystals from forming prematurely.
Step 5: Reach the Right Temperature
Heat the mixture until it reaches 236 to 238 degrees Fahrenheit on a candy thermometer, which takes about 5 to 8 minutes depending on your stove. If you don’t have a thermometer, use the cold water test: drop a tiny bit of the hot mixture into a glass of ice water and see if it forms a soft ball that flattens under gentle pressure.
Step 6: Remove from Heat
Once you’ve reached the target temperature, immediately pull the pan off the heat and set it on a cool surface like your counter or a cooling rack. Leaving it on the heat even a few seconds longer can push the mixture past the ideal stage, resulting in fudge that’s too firm or grainy.
Step 7: Cool to Room Temperature
Let the fudge mixture sit undisturbed at room temperature for about 30 minutes until it’s warm but no longer hot to the touch. Cooling it to room temperature is crucial because pouring hot fudge into the pan will cause it to set unevenly, and you’ll get a layer on top that’s harder than the inside.
Step 8: Stir in Flavorings
Once the mixture has cooled, stir in the vanilla extract and salt, mixing thoroughly until everything is evenly distributed. These final additions brighten the chocolate flavor and balance the sweetness without overpowering the batch.
Step 9: Pour and Set
Pour the fudge into your prepared pan, spreading it evenly with a spatula so the thickness is consistent throughout. Let it sit at room temperature for about an hour until it’s firm enough to cut, then lift it out using the parchment paper overhang.
Step 10: Cut into Squares
Place the fudge block on a cutting board and use a sharp, warm knife to cut it into 16 equal squares, wiping the blade between cuts to keep the edges clean. Warming your knife under hot water and drying it quickly gives you neat, professional-looking pieces.
Pro Tip: The cold water test is your best friend if you don’t own a candy thermometer; a soft ball that flattens with light pressure means you’ve hit the perfect stage.
Tips for the Best Old Fashioned Fudge
- Use a heavy-bottomed pan to distribute heat evenly and prevent hot spots that can cause scorching or uneven cooking.
- Don’t skip the cooling step at room temperature; rushing this part is the most common reason fudge turns out grainy instead of smooth.
- Keep your ingredients measured and ready before you start cooking so you can work quickly once the mixture reaches temperature.
- Store your fudge in an airtight container with parchment between layers to prevent sticking and absorbing moisture from the air.
- Make sure your pan is lined generously; even an inch of overhang on each side saves you from struggling to remove the finished fudge.
- If your kitchen is very warm, place the fudge in a cool room or even the refrigerator to set faster without affecting the texture.
Common Mistakes to Avoid
- Stirring after the mixture reaches temperature causes sugar crystals to form, resulting in grainy, sandy-textured fudge instead of smooth and creamy.
- Pouring hot fudge into the pan creates uneven layers where the top sets hard while the inside stays soft and refuses to cut cleanly.
- Using low-quality cocoa powder or melted chocolate chips instead of pure cocoa leaves you with a muddy flavor that doesn’t taste like real fudge.
- Skipping the cold water test and guessing at temperature leads to fudge that’s either too soft and sticky or too hard and brittle.
- Using salted butter without adjusting the salt measurement makes your fudge taste more like a salty candy than balanced chocolate fudge.
Serving Suggestions
Serve your fudge at room temperature for the best texture and flavor, or slightly chilled if you prefer a firmer bite. A single piece pairs beautifully with hot coffee, tea, or even a cold glass of milk for an afternoon snack.
- Enjoy it plain as an after-dinner sweet that doesn’t require any accompaniment
- Pair it with a strong espresso or Americano to balance the richness
- Serve alongside vanilla ice cream for an elegant dessert combination
- Give it as a gift in a small box with parchment layering for a thoughtful homemade present
- Crumble a piece into vanilla yogurt for a simple but indulgent breakfast treat
Variations to Try
- Salted Chocolate Fudge: Add an extra quarter teaspoon of fleur de sel or sea salt on top of the finished fudge before it fully sets, creating a sweet and salty contrast that highlights the chocolate.
- Peanut Butter Swirl: Before pouring the fudge into the pan, add two tablespoons of peanut butter to the hot mixture and swirl it through gently to create ribbons of peanut flavor throughout.
- Espresso Dark Chocolate: Dissolve one teaspoon of instant espresso powder in the milk before adding it to the dry ingredients, deepening the chocolate flavor with coffee notes.
- Maple Walnut Fudge: Replace the vanilla with one teaspoon of maple extract and fold in a quarter cup of finely chopped toasted walnuts after cooling to room temperature.
- Mint Chocolate Fudge: Add a quarter teaspoon of peppermint extract instead of vanilla, or add a few drops of pure peppermint oil mixed with a tiny bit of cream for a refreshing minty bite.
Dietary Adaptations
- Dairy-Free: Substitute the milk with unsweetened oat milk or almond milk and use dairy-free butter, though the texture will be slightly lighter and less rich.
- Vegan: Use plant-based butter and non-dairy milk as above, ensuring your cocoa powder and sugar are vegan-certified if this matters to your dietary needs.
- Gluten-Free: This recipe is naturally gluten-free, though check your cocoa powder label to confirm no cross-contamination during processing.
- Low-Carb/Keto: Replace granulated sugar with a one-to-one sugar substitute like erythritol or monk fruit, though you may need to adjust the cooking time slightly and expect a different final texture.
Storage and Reheating
Refrigerator
Store your fudge in an airtight container with parchment paper between layers to prevent the pieces from sticking to each other. Properly stored fudge lasts up to two weeks in the refrigerator, and chilled fudge actually has a firmer, more satisfying snap when you bite into it.
- Keep it in an airtight container to prevent it from absorbing odors from other foods
- Place parchment between layers so pieces don’t stick together
- Store in a cool area of the refrigerator away from the door where temperatures fluctuate
Freezer
Fudge freezes beautifully and actually improves the texture since the cold creates an even firmer set. You can keep it frozen for up to three months in an airtight container with parchment layering.
- Wrap the container in an extra layer of plastic wrap to protect against freezer burn
- Label the container with the date so you remember when you made it
- Thaw at room temperature for about 15 minutes before serving if you prefer softer fudge
Reheating
Fudge doesn’t need reheating since it’s meant to be eaten at room temperature or chilled. If your fudge has hardened too much in the freezer, simply let it sit on your counter for 15 to 20 minutes until it reaches your preferred texture.
- Never microwave fudge, as the heat can cause the cocoa butter to separate
- Remove from the freezer and let it rest at room temperature for the best results
- Once thawed, consume within a few days for the best flavor and texture
Nutrition Information
| Nutrient | Amount |
|---|---|
| Calories | 135 |
| Total Fat | 5g |
| Saturated Fat | 3g |
| Carbohydrates | 24g |
| Fiber | 1g |
| Sugar | 21g |
| Protein | 1g |
| Sodium | 25mg |
| Cholesterol | 8mg |
These values are approximate and based on standard ingredient measurements. Individual nutrition may vary depending on the specific brands and substitutions you use.
Frequently Asked Questions
Can I Use a Candy Thermometer Instead of the Cold Water Test?
Absolutely, and if you have one, it takes the guesswork out of knowing when your fudge is ready. Heat the mixture to 236 to 238 degrees Fahrenheit for that perfect soft-ball consistency that creates the fudgy texture you want.
What Happens If I Cook the Mixture Past 238 Degrees?
Cooking it too long takes you into hard-ball territory, which means your fudge will set up too firm and won’t have that smooth, melt-in-your-mouth quality. If this happens, you can salvage it by adding a tablespoon of cream and reheating gently, though the texture will never be quite the same.
Can I Make This Fudge Ahead of Time?
Yes, this recipe is perfect for making several days in advance since it keeps so well in the refrigerator or freezer. Store it in an airtight container, and it tastes just as good a week later as it does fresh.
Why Is My Fudge Grainy Instead of Smooth?
Graininess usually means sugar crystals formed during cooking, which happens when you stir after reaching temperature or when the mixture cools too quickly. Next time, resist the urge to stir once you stop heating, and let it cool slowly at room temperature.
Can I Add Nuts or Other Mix-Ins to This Recipe?
Yes, fold in up to half a cup of chopped nuts, dried fruit, or crushed cookies after the fudge reaches room temperature and before you pour it into the pan. Just avoid adding anything wet, as moisture will interfere with the setting process.
What’s the Difference Between This and Fudgy Brownies?
Fudge is pure candy made from sugar, cocoa, and butter cooked to a specific temperature, while brownies are a baked cake product with flour and eggs. Fudge has a denser, more intense chocolate flavor and a completely different texture.
Final Thoughts
Making old fashioned fudge at home gives you something store-bought candy simply cannot match: the satisfaction of creating something truly indulgent with your own hands and a handful of basic ingredients. This recipe proves that the best desserts don’t require fancy equipment or complicated techniques, just an understanding of what happens when you heat sugar to just the right temperature.
Try making this fudge this week, and you’ll understand why people have been passing this recipe down through generations. Once you taste the difference between homemade and store-bought, you’ll never go back to anything else.
Explore More Sweet Treats
If you loved making this classic fudge, you might also enjoy exploring other simple homemade candy recipes that deliver impressive results with minimal effort.
Try making peanut butter fudge for a creamy variation, or venture into the world of old-fashioned candies with potato candy for something completely different and surprisingly delicious.
Old Fashioned Fudge
A simple old fashioned fudge recipe made with just four ingredients for a silky, melt-in-your-mouth texture, no candy thermometer required.
- Heavy-bottomed saucepan (2-quart capacity)
- Wooden spoon or silicone spatula
- Candy or deep-fry thermometer (optional)
- 8×8 inch square baking pan
- Parchment paper or butter for lining the pan
- Small bowl with ice water
- Cutting board and sharp knife
Main
- 2 cups granulated sugar
- 3/4 cup unsweetened cocoa powder
- 1/2 cup whole milk
- 1/4 cup unsalted butter
- 1 teaspoon vanilla extract
- Pinch of sea salt
- Line an 8×8 inch pan with parchment paper, letting it overhang the sides.
- In a heavy-bottomed saucepan, whisk together 2 cups granulated sugar and 3/4 cup unsweetened cocoa powder until well combined.
- Add 1/2 cup whole milk to the saucepan and stir constantly over medium heat until smooth and lump-free, about 1–2 minutes.
- Stir in 1/4 cup unsalted butter and continue stirring until the butter is melted and the mixture is smooth, about 2 minutes.
- Stop stirring and let the mixture cook undisturbed until it reaches 236–238°F (soft-ball stage) on a candy thermometer, about 5–8 minutes. Or use the cold water test.
- Remove the saucepan from heat immediately and set it on a cool surface.
- Let the mixture cool at room temperature for about 30 minutes, until warm but not hot to the touch.
- Stir in 1 teaspoon vanilla extract and a pinch of sea salt until evenly distributed.
- Pour the fudge into the prepared pan and spread evenly with a spatula. Let it set at room temperature for about 1 hour.
- Lift the set fudge using the parchment overhang and cut into 16 squares with a sharp, warm knife, wiping the blade between cuts.
Store in an airtight container with parchment between layers. Keeps up to two weeks in the refrigerator or up to three months in the freezer.