
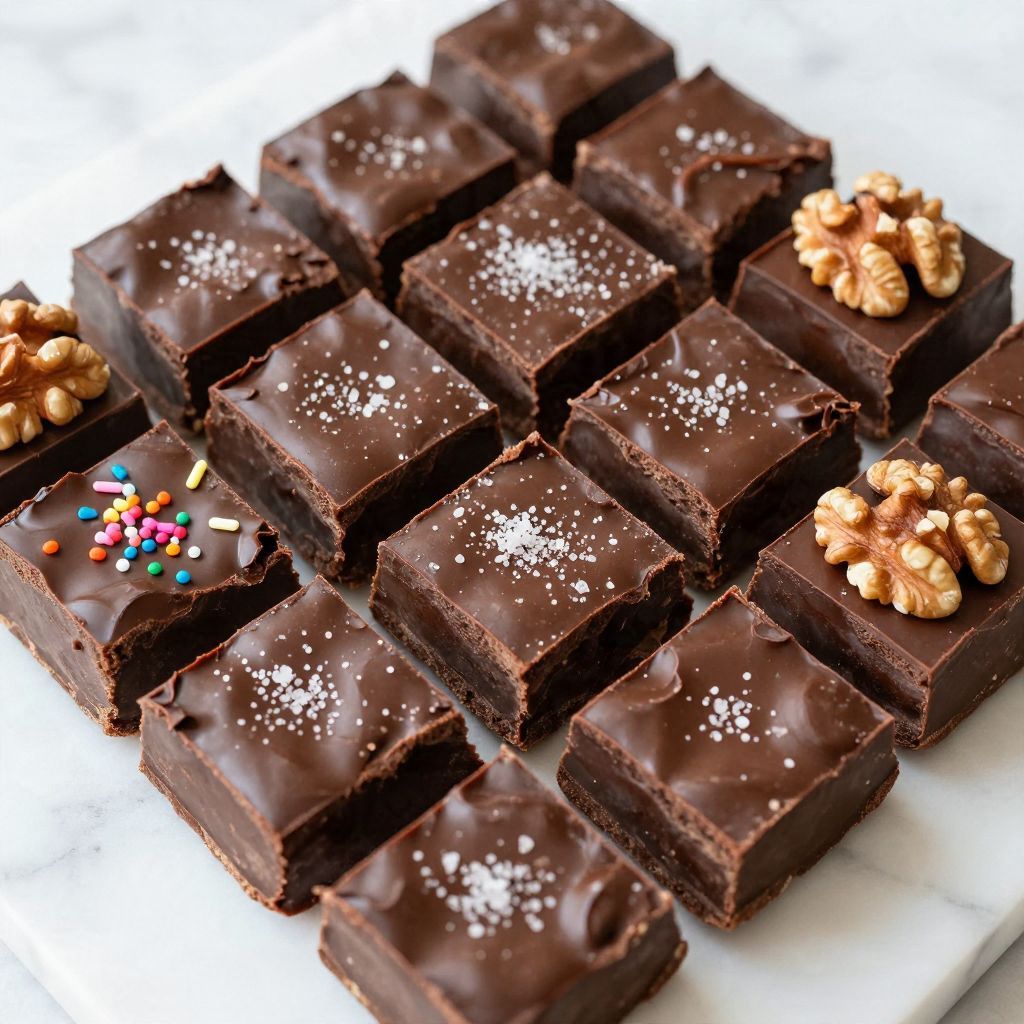
Imagine the rich, creamy sweetness of fudge melting in your mouth, all made in a matter of minutes. This microwave fudge recipe is a lifesaver for those who crave a decadent treat without spending hours in the kitchen.
With its smooth texture and chocolatey goodness, this fudge is perfect for parties, gifts, or just a cozy night in. Plus, it requires minimal ingredients and effort, making it a fantastic go-to for busy days.
Why You’ll Love This Recipe
This microwave fudge recipe is a total winner for several reasons.
- Quick and easy to prepare, taking only minutes.
- Rich flavor that satisfies your sweet tooth.
- Customizable with various mix-ins and toppings.
- Perfect for gifting or sharing at gatherings.
- No candy thermometer or complicated techniques required.
My Experience Making This Recipe
The first time I made this fudge, I was amazed at how little effort it took. I melted the chocolate and sweetened condensed milk in the microwave, and within moments, I had a luscious mixture that smelled divine.
When I tasted it, I couldn’t believe I made it myself. The texture was velvety and the chocolate flavor was intense, making it hard to resist going back for seconds.
Recipe Overview
- Recipe Name: Microwave Fudge
- Servings: 16
- Prep Time: 5 minutes
- Cook Time: 3 minutes
- Total Time: 8 minutes
- Course: Dessert
- Cuisine: American
- Calories per Serving: 150
Equipment You Will Need
- Microwave-safe bowl
- Rubber spatula
- 9×9-inch square baking dish
- Parchment paper (optional)
- Measuring cups and spoons
Ingredients for Microwave Fudge
- 2 cups chocolate chips (semi-sweet or dark)
- 1 can (14 ounces) sweetened condensed milk
- 1 teaspoon vanilla extract
- Optional: nuts, sprinkles, or sea salt for topping
Ingredient Notes and Substitutions
- Chocolate chips: They provide the base flavor. You can substitute with white chocolate or butterscotch chips for a different taste.
- Sweetened condensed milk: This adds creaminess. You could use evaporated milk with added sugar in a pinch.
- Vanilla extract: Enhances flavor. Almond extract could work, but it will change the taste profile.
How to Make Microwave Fudge
Step 1: Prepare the Baking Dish
Line a 9×9-inch baking dish with parchment paper or lightly grease it. This will help you easily remove the fudge later.
Step 2: Combine Ingredients
In a microwave-safe bowl, mix the chocolate chips and sweetened condensed milk. This combination will create a smooth, creamy fudge.
Step 3: Microwave the Mixture
Heat the bowl in the microwave on high for 1 minute. This initial heating allows the chocolate to begin melting.
Step 4: Stir the Mixture
After 1 minute, take it out and stir well. This helps to combine the melted chocolate with the condensed milk thoroughly.
Step 5: Return to Microwave
Put the bowl back in the microwave and heat for another 30 seconds. This additional heating ensures all the chocolate is melted.
Step 6: Final Stir
Remove the bowl and stir again until the mixture is completely smooth. This step is key for achieving that velvety texture.
Step 7: Add Vanilla Extract
Stir in the vanilla extract, mixing well. This adds an extra layer of flavor that complements the chocolate.
Step 8: Pour into Baking Dish
Pour the fudge mixture into the prepared baking dish, spreading it evenly. This is where you can sprinkle on any optional toppings if desired.
Pro Tip: Let the fudge cool completely before cutting it into squares for the best texture.
Tips for the Best Microwave Fudge
- Use high-quality chocolate for a richer flavor.
- Don’t overheat the chocolate, or it may seize up.
- For a creamier fudge, add a tablespoon of butter.
- Chill the fudge in the refrigerator for quicker setting.
- Experiment with different toppings to elevate your fudge.
Common Mistakes to Avoid
- Overheating the chocolate can lead to a gritty texture.
- Not stirring well may leave lumps in your fudge.
- Skipping the cooling step can make the fudge too soft to cut.
- Using low-quality chocolate results in bland fudge.
Serving Suggestions
This fudge makes for a fantastic treat on its own, but it pairs well with coffee or tea. Here are some delightful serving ideas:
- Serve with a scoop of vanilla ice cream.
- Top with whipped cream and berries.
- Enjoy alongside your favorite hot beverage.
- Gift in a decorative box for a charming present.
Variations to Try
- Mint chocolate fudge: Add peppermint extract for a refreshing twist.
- Peanut butter fudge: Swirl in creamy peanut butter before setting.
- White chocolate raspberry fudge: Add fresh raspberries for a fruity touch.
- Cookie dough fudge: Fold in edible cookie dough chunks for extra fun.
Dietary Adaptations
- Gluten-free: Use gluten-free chocolate chips.
- Dairy-free: Substitute with coconut milk and dairy-free chocolate.
- Vegan: Opt for vegan chocolate chips and coconut milk.
- Low-carb/keto: Use sugar-free chocolate and a keto-friendly sweetener.
Storage and Reheating
Refrigerator
Store fudge in an airtight container in the refrigerator. This helps maintain its freshness and texture.
- Can last up to 2 weeks.
- Cut into squares for easy snacking.
Freezer
To freeze, wrap fudge tightly in plastic wrap and then in foil. This will keep it safe from freezer burn.
- Can be frozen for up to 3 months.
- Thaw in the refrigerator before serving.
Reheating
To reheat, microwave for a few seconds until slightly warm. This can make the fudge extra gooey.
- Be careful not to overheat.
- Enjoy warm fudge with ice cream for a dessert delight.
Nutrition Information
| Nutrient | Amount |
|---|---|
| Calories | 150 |
| Total Fat | 7g |
| Saturated Fat | 4g |
| Carbohydrates | 21g |
| Fiber | 1g |
| Sugar | 18g |
| Protein | 2g |
| Sodium | 30mg |
| Cholesterol | 5mg |
This information is an estimate and may vary based on specific brands used.
Frequently Asked Questions
Can I make this fudge ahead of time?
Yes, this fudge can be made a few days in advance and stored in the fridge.
What can I substitute for chocolate chips?
You can use white chocolate chips or even carob chips for a different flavor.
How should I store leftover fudge?
Keep it in an airtight container in the refrigerator for optimal freshness.
Why is my fudge too soft?
If it’s too soft, it may not have cooled completely or was not heated enough.
Can I add ingredients to the fudge?
Absolutely! Add nuts, dried fruits, or even sprinkles for extra flavor and texture.
Final Thoughts
This microwave fudge recipe is a simple way to indulge your sweet cravings. With just a few ingredients and minimal effort, you can create a delightful treat that impresses everyone.
So gather your ingredients and give this fudge a try; you won’t regret it. For more deliciousness, check out my peanut butter fudge recipe or try a classic vanilla fudge recipe for variety!
Microwave Fudge
Ingredients
Equipment
Method
- Line a 9x9-inch baking dish with parchment paper or lightly grease it.
- In a microwave-safe bowl, mix the chocolate chips and sweetened condensed milk.
- Heat the bowl in the microwave on high for 1 minute.
- After 1 minute, take it out and stir well.
- Put the bowl back in the microwave and heat for another 30 seconds.
- Remove the bowl and stir again until the mixture is completely smooth.
- Stir in the vanilla extract, mixing well.
- Pour the fudge mixture into the prepared baking dish, spreading it evenly.