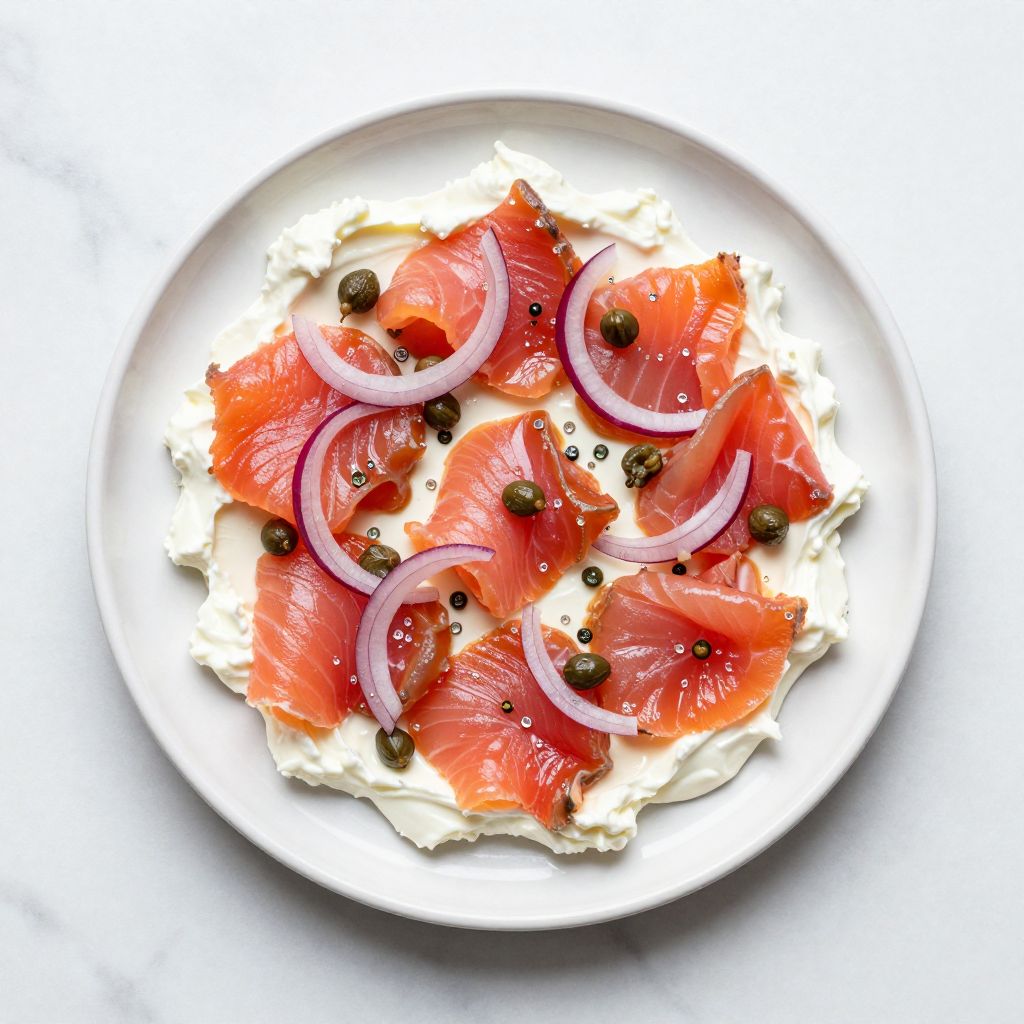
There’s something almost magical about the moment you slice into a bagel and see silky, coral-pink lox draped across a generous schmear of cream cheese, capers scattered like jewels, and thin red onion slices catching the light.
Making homemade lox feels like an indulgence reserved for fancy delis and upscale brunch spots, but the truth is simpler than you’d think. This recipe transforms fresh salmon into that signature cured delicacy in just a few days with nothing more than salt, sugar, and patience.
What makes this recipe special is how the salt and sugar work together to draw moisture out of the fish while deepening its flavor, creating that tender, sliceable texture you crave. You’ll end up with restaurant-quality lox that costs a fraction of store-bought versions and tastes infinitely fresher.
Why You’ll Love This Recipe
Homemade lox is a game-changer for weekend breakfasts, special dinners, and impressing guests who think you’ve suddenly become a professional charcuterie expert.
- Quick cure time: ready in 3 to 4 days, far faster than traditional curing methods
- Minimal ingredients: just salmon, salt, sugar, and optional dill
- Restaurant-quality taste: deeper, fresher flavor than most store-bought versions
- Versatile uses: serve on bagels, crackers, salads, or pasta dishes
- Impressive presentation: guests genuinely believe you’ve mastered professional techniques
My Experience Making This Recipe
I’ll admit I was nervous the first time I cured salmon at home. The idea of leaving raw fish sitting on my counter felt slightly wrong, even though I’d read every food safety article out there.
Three days later, I sliced into that beautiful fillet and tasted something that made all my doubt vanish. The flavor was brighter and cleaner than any store-bought lox I’d had, with a silky texture that practically melted on my tongue.
I’ve since made this recipe a dozen times, and it never fails to impress at brunch gatherings. My friends always ask if I’ve secretly opened a deli in my kitchen when they taste it.
Recipe Overview
- Recipe Name: Homemade Cured Lox
- Servings: 8 to 10
- Prep Time: 20 minutes
- Cure Time: 3 to 4 days
- Total Time: 3 days 20 minutes
- Course: Appetizer or Breakfast
- Cuisine: Jewish-American
- Calories per Serving: 180
Equipment You Will Need
- Sharp fillet knife or sashimi knife
- Cutting board
- Paper towels
- Shallow dish or baking pan
- Plastic wrap
- Kitchen scale (optional but helpful)
- Small bowl for mixing cure
Ingredients for Homemade Cured Lox
- Fresh salmon fillet: 2 pounds, skin-on, preferably wild-caught
- Kosher salt: 3 tablespoons
- Granulated sugar: 3 tablespoons
- Fresh dill: 2 tablespoons, finely chopped (optional)
- Black peppercorns: 1 teaspoon, cracked (optional)
- Lemon zest: from 1 lemon (optional)
Ingredient Notes and Substitutions
- Kosher salt: Its larger crystals distribute evenly and dissolve more slowly than table salt, which prevents over-salting. You can substitute sea salt at a 1:1 ratio, though watch carefully since it dissolves faster.
- Granulated sugar: Sugar balances the salt’s intensity and helps create the characteristic tender texture of lox. Brown sugar works as a substitute but will give a slightly deeper, molasses-tinged flavor.
- Fresh dill: This herb adds a classic aromatic note that enhances the salmon’s natural flavor. Omit it entirely if you prefer a pure, unadorned taste, or swap in 1 teaspoon of dried dill.
- Salmon fillet: Wild-caught Pacific salmon (sockeye, chinook, or coho) works best because it has better texture than farm-raised varieties. If wild salmon isn’t available, quality farm-raised works fine as a substitute.
How to Make Homemade Cured Lox
Step 1: Check and Prepare the Salmon
Remove the salmon from the refrigerator and examine the flesh for any remaining pin bones. Use your fillet knife or tweezers to gently pull out any bones you find, as they’ll be unpleasant to bite into in the finished lox.
Pat the salmon completely dry with paper towels, paying special attention to the skin side and the flesh. Moisture is the enemy of proper curing, and a dry starting point ensures the cure works efficiently.
Step 2: Mix the Cure
Combine kosher salt, granulated sugar, fresh dill (if using), cracked peppercorns (if using), and lemon zest (if using) in a small bowl. Stir well until the mixture is evenly combined, breaking up any clumps of dill or zest.
The cure works by drawing moisture out of the salmon through osmosis. Getting the ingredients well-mixed ensures the salt and sugar work evenly across the entire fillet.
Step 3: Line Your Curing Dish
Line a shallow dish or baking pan with plastic wrap, letting the edges hang over the sides. This prevents the cure from sticking to the dish and makes cleanup infinitely easier.
The plastic wrap creates a barrier that also helps you flip the salmon more easily during the curing process. Make sure the wrap is smooth and covers the entire bottom surface.
Step 4: Apply the Cure to the Salmon
Place the salmon skin-side down on the plastic wrap. Rub half of the cure mixture directly onto the flesh side of the salmon, pressing gently so it adheres and makes full contact with the surface.
The cure needs direct contact with the flesh to work properly. Don’t be shy about rubbing it in; you want a thick, even coating that covers the entire fillet.
Step 5: Flip and Cure the Other Side
Fold the plastic wrap up over the cured side and gently flip the entire fillet so the skin side is now facing up. Unfold the wrap and apply the remaining cure to the skin side, pressing it in firmly.
Coating both sides ensures the salt and sugar can work throughout the fillet. The skin side cures more slowly, but it still benefits from the cure mixture.
Step 6: Wrap and Refrigerate
Fold the plastic wrap completely over the salmon so it’s fully enclosed. Place the whole thing in the coldest part of your refrigerator, ideally at 38 degrees Fahrenheit or lower.
Cold temperatures slow bacterial growth while the cure works its magic. Keep the salmon here for the next 3 to 4 days, undisturbed.
Step 7: Check Progress and Flip if Desired
After 24 hours, you can carefully open the plastic wrap and peek at your salmon. You’ll notice liquid pooling around the fillet; this is normal and exactly what should be happening.
You can flip the salmon once after the second day if you want extra-even curing, though this step is optional. Most home cooks skip it with excellent results.
Step 8: Rinse and Taste Test
After 3 to 4 days, remove the salmon from the refrigerator and unwrap it carefully. Rinse the entire fillet under cold running water, gently rubbing away any excess cure with your fingers.
Pat it dry with fresh paper towels and taste a tiny piece from the thickest part of the fillet. If it tastes perfectly balanced between salt and sweetness, you’re done curing.
Step 9: Slice and Serve
Using a very sharp, thin-bladed knife (a sashimi knife is ideal), slice the lox on a sharp angle against the grain. Aim for slices about one-eighth inch thick, holding the knife at a 45-degree angle as you cut.
The thin slices are what give lox its characteristic silky texture. Work slowly and let the knife do the work rather than sawing, which damages the delicate flesh.
Pro Tip: Your lox is now ready to enjoy immediately, or you can wrap the whole fillet tightly in plastic wrap and refrigerate it for up to a week before slicing.
Tips for the Best Homemade Cured Lox
- Use a very sharp knife for slicing, as dull blades will tear the delicate cured flesh instead of creating clean slices. A sashimi knife or thin-bladed fillet knife works beautifully for this task.
- Don’t skip the rinsing step after curing, as excess salt on the surface can make the final product overly salty. Gentle rinsing removes the surface salt while leaving the perfectly cured interior intact.
- Taste-test before you finish curing to find your ideal salt level, since everyone’s preferences differ slightly. Some people prefer a bolder cure while others like something more delicate.
- Keep your refrigerator cold during the curing process, as temperatures above 40 degrees increase food safety risks. A dedicated lox setup in a cold spot works better than a warmer refrigerator shelf.
- Slice only what you plan to use immediately, and wrap the remaining fillet tightly to prevent oxidation. Sliced lox exposed to air will develop unpleasant off-flavors much faster than a whole fillet.
- If you prefer a less salty cure, reduce the salt to 2.5 tablespoons, though this will slightly extend the curing time to 4 to 5 days.
Common Mistakes to Avoid
- Using wet salmon: Moisture on the surface prevents proper salt contact and creates mushy lox instead of the silky texture you want. Always start with a completely dry fillet.
- Not enough cure: Skimping on the salt and sugar mixture means uneven curing and unpredictable results. Use the exact amounts listed; they’re calculated specifically for a 2-pound fillet.
- Curing too long: Leaving salmon in the cure for more than 5 days creates an unpleasantly salty, jerky-like texture. Most recipes hit perfection at 3 to 4 days.
- Forgetting to rinse: Excess cure left on the surface makes the final product taste overly salty and unbalanced. Rinsing is not optional if you want restaurant-quality results.
- Slicing too thick: Thick slices of lox become chewy instead of silky and tender. Always aim for one-eighth inch slices cut at a sharp angle.
Serving Suggestions
The best part about homemade lox is how versatile it becomes once it’s made. Serve it on everything from traditional bagels to unexpected dishes that showcase its delicate flavor and silky texture.
- Classic bagel breakfast: Toasted everything bagel with cream cheese, lox slices, thinly sliced red onion, capers, and fresh dill
- Brunch salad: Mixed greens with lox ribbons, cucumber, red onion, capers, and a light lemon vinaigrette
- Elegant appetizer platter: Lox arranged on thin rye toast points with mustard, cornichons, and fresh herbs
- Pasta dish: Toss lox ribbons with angel hair pasta, crème fraiche, fresh dill, and lemon juice just before serving
- Breakfast scramble: Fold thin lox strips into scrambled eggs with fresh dill and a dollop of sour cream
Variations to Try
- Spiced lox: Add 1 teaspoon of crushed coriander seeds, 1 teaspoon of crushed juniper berries, and 1 teaspoon of black peppercorns to the cure for a more complex, herbaceous flavor. This creates a Scandinavian-inspired cure that pairs beautifully with rye bread.
- Maple-cured lox: Replace half the granulated sugar with pure maple syrup and reduce the salt to 2.5 tablespoons. The result has a subtle sweetness that works especially well for brunch entertaining.
- Gin and juniper lox: Add 1 tablespoon of juniper berries and 1 teaspoon of gin (or omit the gin) to the cure for a more sophisticated flavor. This variation pairs wonderfully with rye crackers and smoked salmon-adjacent flavors.
- Citrus-cured lox: Add zest from 2 lemons, 1 lime, and 1 orange to the cure instead of just one lemon. The bright citrus notes create a lighter, more refreshing version that’s perfect for spring and summer entertaining.
- Wasabi-spiked lox: Mix 1 teaspoon of wasabi powder into the cure for a subtle heat that builds as you chew. This creates an unexpected kick that pairs beautifully with crispy rice crackers.
Dietary Adaptations
- Gluten-free: Lox itself is naturally gluten-free, so serve it with gluten-free bagels or crackers to keep the whole meal compliant with no changes to the recipe.
- Dairy-free: Skip the cream cheese and serve lox on toasted bread with dairy-free butter, avocado, or olive oil for a delicious dairy-free interpretation.
- Paleo and Whole30: Lox is naturally compliant with both diets when made with this recipe using just salt, sugar, and optional herbs.
- Low-carb and keto: Serve lox on a bed of cucumber slices, lettuce leaves, or crispy zucchini chips instead of bagels to keep carbs minimal.
Storage and Reheating
Refrigerator
Store your cured lox fillet wrapped tightly in plastic wrap or in an airtight container in the coldest part of your refrigerator. Whole lox keeps for up to 2 weeks, though sliced lox keeps for only 3 to 4 days before quality declines.
- Wrap tightly to prevent oxidation and flavor degradation
- Keep in the coldest shelf, ideally at 38 degrees or lower
- Slice only what you need immediately to preserve the rest
Freezer
Freeze whole, tightly wrapped lox for up to 3 months for excellent results. Defrost in the refrigerator overnight before slicing and serving.
- Wrap in plastic wrap then aluminum foil to prevent freezer burn
- Label with the date so you know when it was frozen
- Thaw slowly in the refrigerator rather than at room temperature
Reheating
Lox is eaten cold and never reheated, as heat destroys its delicate texture. Serve it straight from the refrigerator at about 40 to 45 degrees for the best silky texture.
- Slice just before serving for the freshest taste
- Let it sit at room temperature for 5 to 10 minutes if your fridge runs very cold
- Never warm lox, as this causes the texture to become mushy and unappetizing
Nutrition Information
| Nutrient | Amount |
|---|---|
| Calories | 180 |
| Total Fat | 11 grams |
| Saturated Fat | 2 grams |
| Carbohydrates | 0 grams |
| Fiber | 0 grams |
| Sugar | 0 grams |
| Protein | 22 grams |
| Sodium | 520 milligrams |
| Cholesterol | 65 milligrams |
Nutritional values are approximate and based on a 2-pound salmon fillet yielding 8 to 10 servings. Actual values vary based on exact fillet size and how much surface cure remains after rinsing.
Frequently Asked Questions
Can I use frozen salmon to make lox?
Yes, frozen salmon works beautifully for this recipe. Thaw it completely in the refrigerator before starting the cure, making sure it’s absolutely dry before applying the salt and sugar mixture.
How do I know when my lox is perfectly cured?
Taste a tiny piece from the thickest part of the fillet after 3 days. It should taste balanced between salt and sweet, with no raw fish flavor at the center and a silky texture throughout the piece.
Can I make lox without the optional dill and spices?
Absolutely. A simple cure of just salt and sugar creates a pure, unadulterated lox that lets the salmon’s natural flavor shine. Add herbs and spices only if you want those flavors present.
Is it safe to cure fish at home?
Yes, when you follow proper food safety guidelines. Keep your salmon at 38 degrees or colder during the entire cure, start with high-quality fresh fish, and consume it within 2 weeks of finishing the cure.
What’s the difference between lox and smoked salmon?
Lox is cured with salt and sugar, while smoked salmon undergoes both curing and smoking. This recipe creates cured lox, which has a silky, tender texture and pure salmon flavor without any smoke notes.
Can I slice lox and store it in the freezer?
You can, though it’s better to freeze the whole fillet and slice it after thawing. Sliced lox doesn’t freeze quite as well, and whole fillets preserve their texture and flavor more effectively.
What if my lox tastes too salty?
Rinse it more thoroughly under cold water, gently rubbing the surface to remove excess salt. If it’s still too salty, you can soak the fillet in cold water for 30 minutes, changing the water halfway through.
Final Thoughts
Making lox at home transforms a simple piece of salmon into something that tastes like a luxury ingredient, yet costs far less than store-bought versions. The process is surprisingly straightforward, requiring just a few basic ingredients and a little patience.
You’ll find yourself making this recipe again and again once you taste how much better homemade lox can be. Each batch gets easier, and you’ll soon be the person everyone asks for recommendations when they try to replicate your lox at home.
Ready to explore more seafood recipes that will impress your friends and family? Check out our collection of fresh fish dishes, including this ahi tuna recipe for a stunning seared preparation, or try this salmon loaf recipe for a comforting baked salmon dish that’s perfect for weeknight dinners.
Homemade Cured Lox

Silky, coral-pink salmon cured with salt and sugar for 3 to 4 days to create restaurant-quality lox at home.
- Sharp fillet knife or sashimi knife
- Cutting board
- Paper towels
- Shallow dish or baking pan
- Plastic wrap
- Kitchen scale (optional)
- Small bowl for mixing cure
Main
- Fresh salmon fillet: 2 pounds (skin-on, preferably wild-caught)
- Kosher salt: 3 tablespoons
- Granulated sugar: 3 tablespoons
- Fresh dill: 2 tablespoons (finely chopped (optional))
- Black peppercorns: 1 teaspoon (cracked (optional))
- Lemon zest: from 1 lemon (optional)
- Step 1: Remove any remaining pin bones from the salmon using a fillet knife or tweezers, then pat the fillet completely dry with paper towels.
- Step 2: In a small bowl, mix kosher salt, granulated sugar, fresh dill (if using), cracked peppercorns (if using), and lemon zest (if using) until evenly combined.
- Step 3: Line a shallow dish or baking pan with plastic wrap, letting the edges hang over the sides to simplify cleanup.
- Step 4: Place the salmon skin-side down on the plastic wrap and rub half of the cure mixture evenly onto the flesh side.
- Step 5: Fold the plastic wrap up over the salmon, flip the fillet so the skin side is up, then unwrap and apply the remaining cure to the skin side.
- Step 6: Wrap the fillet completely in plastic wrap and refrigerate in the coldest spot at 38°F (3°C) for 3 to 4 days, undisturbed.
- Step 7: (Optional) After 24 hours, you can unwrap briefly to flip the fillet for extra-even curing, then rewrap and continue curing.
- Step 8: After 3 to 4 days, remove the salmon from the refrigerator, unwrap, rinse under cold water to remove excess cure, and pat dry.
- Step 9: Using a very sharp, thin-bladed knife, slice the lox at a 45° angle against the grain into 1/8-inch-thick pieces and serve immediately or refrigerate up to 1 week.
Your lox is ready to enjoy immediately, or wrap tightly and refrigerate for up to 1 week before slicing.