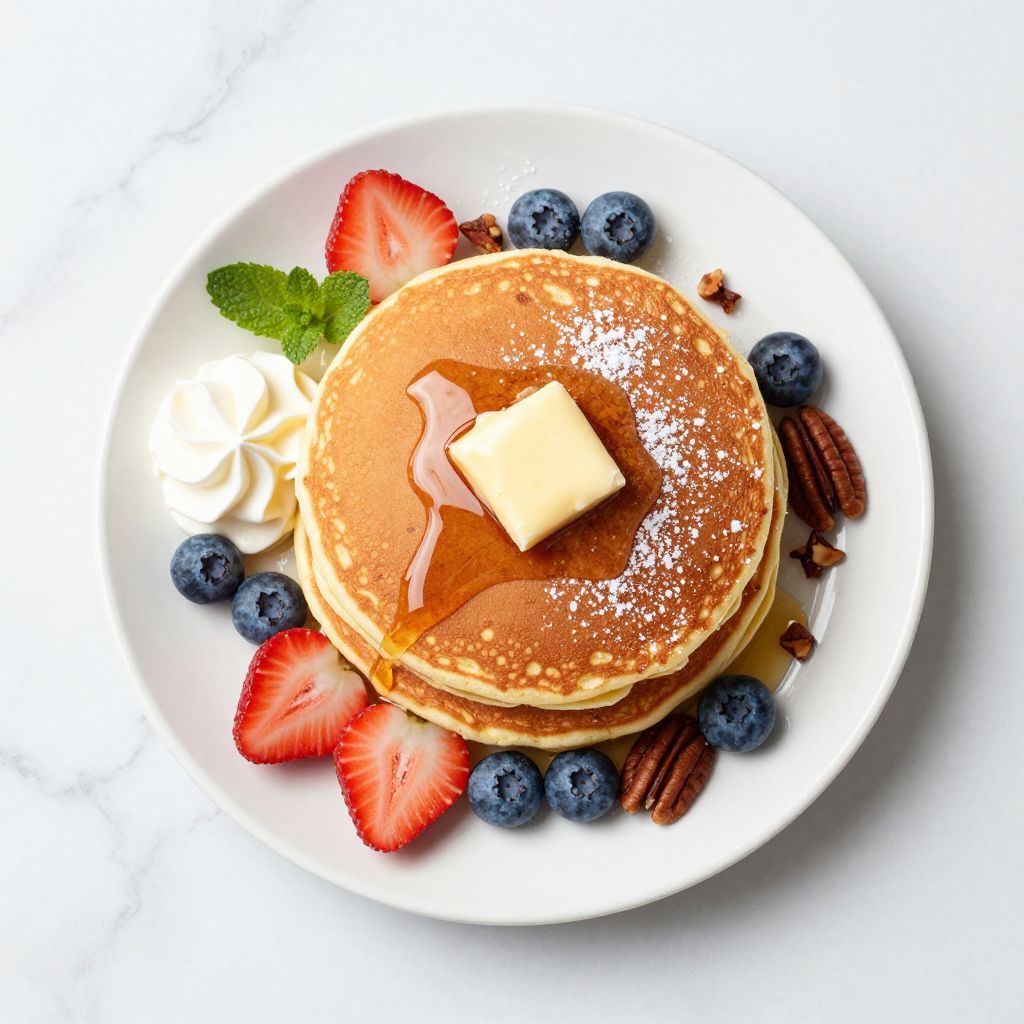
There’s something magical about the smell of pancakes hitting a hot griddle on a lazy weekend morning. IHOP pancakes have that signature fluffy texture and subtle sweetness that keeps people coming back for more, and the good news is you can nail this recipe right in your own kitchen.
These pancakes deliver that restaurant-quality fluffiness with a tender crumb and just enough sweetness without being cloying. Making them at home means you control the ingredients, skip the crowds, and enjoy unlimited refills whenever you want.
Why You’ll Love This Recipe
This recipe captures the essence of IHOP’s beloved pancakes with simple ingredients and straightforward technique. You’ll have fluffy, golden pancakes on the table in less than 30 minutes.
- Light and airy texture that melts in your mouth.
- Just sweet enough without tasting overly sugary.
- Works perfectly for weekend breakfasts or quick weekday mornings.
- Easy to double or triple for feeding a crowd.
- Pairs beautifully with fresh fruit, whipped cream, or classic butter and syrup.
My Experience Making This Recipe
I first made these pancakes on a Sunday morning when my kids were begging for “the fluffy ones from IHOP.” I was skeptical that I could replicate that specific texture at home, but within minutes of mixing the batter, I knew I had nailed it.
The moment I flipped those pancakes and saw the golden-brown edges with tiny bubbles forming on top, I felt that familiar restaurant magic happening in my own kitchen. My family devoured them without syrup at first, just to taste the subtle vanilla and buttery richness.
What surprised me most was how forgiving this recipe is. Minor variations in mixing time or heat don’t derail the results, making it perfect for both beginners and experienced cooks.
Recipe Overview
- Recipe Name: IHOP-Style Buttermilk Pancakes
- Servings: 12 pancakes (serves 3 to 4 people)
- Prep Time: 10 minutes
- Cook Time: 15 minutes
- Total Time: 25 minutes
- Course: Breakfast
- Cuisine: American
- Calories per Serving: 180 calories per pancake
Equipment You Will Need
- Large mixing bowl
- Medium mixing bowl
- Whisk
- Measuring cups and spoons
- Griddle or large nonstick skillet
- Spatula
- Ladle or 1/4-cup measuring cup for portioning batter
- Paper towels
- Plate for keeping pancakes warm
Ingredients for IHOP-Style Pancakes
- All-purpose flour: 1 3/4 cups
- Granulated sugar: 2 tablespoons
- Baking powder: 2 teaspoons
- Salt: 1/2 teaspoon
- Buttermilk: 1 1/2 cups
- Whole milk: 1/4 cup
- Eggs: 2 large
- Butter: 3 tablespoons melted, plus more for the griddle
- Vanilla extract: 1/2 teaspoon
Ingredient Notes and Substitutions
- Buttermilk: This creates the signature tang and tender crumb that makes IHOP pancakes distinctive. If you don’t have buttermilk on hand, whisk together regular milk with a tablespoon of lemon juice or vinegar and let it sit for five minutes.
- All-purpose flour: It provides the right balance of structure and tenderness for fluffy pancakes. You can substitute with cake flour for an even lighter result, though this may require slightly less flour by weight.
- Baking powder: This leavening agent creates lift and those signature fluffy air pockets throughout the pancakes. There’s no good substitute here, so don’t skip it.
- Eggs: They bind the ingredients and contribute to structure and fluffiness. You cannot omit them in this recipe.
- Melted butter: This adds richness and helps create a tender crumb with a slightly crispy exterior. Vegetable oil will work if you’re out of butter, but the flavor won’t be quite as rich.
How to Make IHOP-Style Pancakes
Step 1: Combine the Dry Ingredients
In a large mixing bowl, whisk together the flour, sugar, baking powder, and salt. Make sure to break up any lumps in the flour and distribute the baking powder evenly so your pancakes rise uniformly.
Step 2: Prepare the Wet Ingredients
In a medium mixing bowl, whisk together the buttermilk, whole milk, eggs, melted butter, and vanilla extract until well combined. The mixture should be smooth with no streaks of egg white visible.
Step 3: Create the Batter
Pour the wet ingredients into the dry ingredients and gently stir with a whisk until just combined. The batter will look slightly lumpy, which is exactly what you want; overmixing develops gluten and creates tough, dense pancakes instead of fluffy ones.
Step 4: Let the Batter Rest
Allow the batter to sit for two to three minutes on the counter while you preheat your griddle. This resting time lets the flour fully hydrate and helps the baking powder activate, which contributes to better rise and fluffier results.
Step 5: Preheat the Griddle
Heat your griddle or skillet over medium-high heat for two to three minutes until a drop of water sizzles and evaporates on contact. The right temperature is critical; too low and you’ll get pale, rubbery pancakes, while too high will burn the outside before the inside cooks.
Step 6: Butter the Griddle
Once hot, lightly butter the entire cooking surface with a paper towel dipped in melted butter. This creates those golden-brown edges and crispy spots that make IHOP pancakes so craveable.
Step 7: Pour the Batter
Using a ladle or 1/4-cup measuring cup, pour batter onto the hot griddle, leaving about an inch between each pancake to prevent them from fusing together. You should hear a gentle sizzle as the batter hits the heat.
Step 8: Watch for Bubbles
Let the pancakes cook undisturbed for about two minutes until you see bubbles forming on the surface and the edges look set but not brown. These bubbles are a signal that it’s time to flip and that the inside is cooking properly.
Step 9: Flip and Finish Cooking
Flip each pancake carefully using a spatula and cook for another 60 to 90 seconds until the bottom is golden brown. The second side cooks faster, so watch closely to prevent burning.
Step 10: Transfer and Keep Warm
Place finished pancakes on a plate and cover loosely with foil to keep them warm while you finish cooking the remaining batter. Repeat the process with the remaining batter, buttering the griddle between batches as needed.
Pro Tip: Don’t flip pancakes more than once; resist the urge to press down with your spatula, which squeezes out air and makes them dense instead of fluffy.
Tips for the Best IHOP-Style Pancakes
- Use room-temperature ingredients for better mixing and more consistent results. Cold buttermilk and eggs can create lumps in the batter.
- Measure flour correctly by spooning it into the measuring cup and leveling with a knife rather than scooping directly from the bag, which packs the flour and makes pancakes dense.
- Keep your griddle temperature consistent by adjusting the heat between batches if needed; if edges burn too quickly, lower the temperature slightly.
- Don’t prep the batter more than five minutes before cooking, as baking powder starts losing potency once mixed with wet ingredients.
- Stack cooked pancakes on a wire rack rather than directly on a plate to prevent them from becoming steamy and soggy on the bottom.
- Add fresh berries or chocolate chips to the batter just before cooking if you want mix-ins without overmixing the batter.
Common Mistakes to Avoid
- Overmixing the batter: Stirring too much develops gluten, which creates tough, rubbery pancakes instead of light and fluffy ones. Mix only until the ingredients are just combined.
- Using cold ingredients: Cold buttermilk and eggs create lumps and prevent the batter from mixing smoothly, resulting in uneven texture and rise.
- Cooking on heat that’s too low: This produces pale, dense pancakes that taste rubbery instead of fluffy and golden brown.
- Flipping too early: Flipping before bubbles form breaks the structure and prevents proper rise, so wait for that visual signal.
- Pressing down with the spatula: This squeezes out all the air pockets and creates dense, flat pancakes instead of fluffy ones.
Serving Suggestions
These pancakes shine with both classic and creative toppings that complement their subtle vanilla and buttery flavor. Stack them high and let everyone customize their plate.
- Butter and warm maple syrup with a sprinkle of fleur de sel for a refined take on the classic combination.
- Fresh berries like strawberries, blueberries, or raspberries with a dollop of whipped cream.
- Crispy bacon or sausage links on the side for a savory breakfast contrast.
- Cinnamon-sugar and a drizzle of honey for warm, cozy sweetness.
- Greek yogurt with granola and fresh fruit for a protein-packed breakfast.
Variations to Try
- Blueberry Pancakes: Fold one cup of fresh or frozen blueberries into the batter just before cooking. Frozen berries work great and won’t make the batter too wet if you don’t thaw them first.
- Chocolate Chip Pancakes: Sprinkle chocolate chips onto each pancake immediately after pouring the batter onto the griddle, allowing them to melt slightly into the pancake as it cooks.
- Banana Pancakes: Mash one ripe banana and fold it into the batter for natural sweetness and moisture. You may need to reduce the buttermilk slightly since banana adds liquid.
- Cinnamon Roll Pancakes: Swirl a cinnamon-sugar mixture into the batter with a toothpick after pouring, then top with cream cheese glaze after cooking.
- Pecan Pancakes: Toast one cup of chopped pecans and fold them into the batter for crunch and nutty flavor that pairs beautifully with maple syrup.
Dietary Adaptations
- Gluten-Free: Replace all-purpose flour with a one-to-one gluten-free flour blend, though you may need to add a tablespoon of water to the batter since gluten-free flours absorb differently. The result will be slightly less fluffy but still delicious.
- Dairy-Free: Substitute buttermilk with unsweetened almond milk mixed with lemon juice, and use dairy-free butter in place of regular butter. The flavor will be milder, but the texture remains fluffy.
- Vegan: Replace eggs with a flax egg made from ground flaxseed and water, and use plant-based butter and milk alternatives. Note that vegan pancakes tend to be slightly less fluffy than traditional ones.
- Low-Carb/Keto: Use almond flour or coconut flour instead of all-purpose flour, replace sugar with a keto-friendly sweetener, and keep the rest of the recipe the same. Expect a denser texture, and you may need to add extra baking powder for lift.
Storage and Reheating
Refrigerator
Store cooled pancakes in an airtight container separated by parchment paper to prevent sticking. They’ll keep for up to four days.
- Stack pancakes with parchment between each one before sealing the container.
- Keep them away from other foods that might release moisture.
Freezer
Pancakes freeze beautifully for up to two months when properly stored. This makes them perfect for quick breakfasts on busy mornings.
- Cool pancakes completely before freezing to prevent condensation.
- Lay pancakes flat on a baking sheet to freeze individually, then transfer to a freezer bag for storage.
- Label the bag with the date so you know how long they’ve been frozen.
Reheating
Reheat pancakes gently to restore their fluffy texture without drying them out. The method you choose depends on how many you’re warming up.
- Toaster: Place pancakes in a regular toaster on the lowest setting for a quick warm-up with slightly crispy edges.
- Oven: Arrange pancakes on a baking sheet, cover with foil, and warm at 325 degrees Fahrenheit for five to ten minutes.
- Microwave: Place one or two pancakes on a damp paper towel and microwave for 20 to 30 seconds for fastest reheating.
Nutrition Information
| Nutrient | Amount |
|---|---|
| Calories | 180 |
| Total Fat | 6 grams |
| Saturated Fat | 3.5 grams |
| Carbohydrates | 26 grams |
| Fiber | 0.5 grams |
| Sugar | 4 grams |
| Protein | 5 grams |
| Sodium | 310 milligrams |
| Cholesterol | 35 milligrams |
Nutrition values are approximate and based on standard USDA ingredient data. Individual pancakes may vary slightly depending on exact portion size and any mix-ins or toppings you add.
Frequently Asked Questions
Can I Make the Batter the Night Before?
You can prepare the dry ingredients the night before in a covered bowl, but mix the wet ingredients and combine them with the dry mixture just before cooking. Doing this ensures maximum lift from the baking powder.
Why Are My Pancakes Rubbery?
Rubbery pancakes usually result from overmixing the batter, which develops too much gluten, or cooking on heat that’s too low. Mix only until combined and ensure your griddle is hot enough to create a gentle sizzle.
How Do I Know When My Griddle Is at the Right Temperature?
The water droplet test is most reliable: a drop of water should sizzle and evaporate within a second or two. If it evaporates instantly, the heat is too high; if it just sits there, it needs more heat.
Can I Substitute Regular Milk for Buttermilk?
Not directly, since regular milk won’t provide the tang that helps create fluffy pancakes. Make a substitute by mixing milk with lemon juice or vinegar and letting it sit for five minutes before using.
What’s the Best Way to Keep Pancakes Warm While I Cook?
Place finished pancakes on a wire rack and cover loosely with foil rather than stacking them directly on a plate. This prevents the bottom from becoming steamy and soggy while keeping them warm.
Can I Use Pancake Mix Instead of Making Batter from Scratch?
You can, but homemade batter gives you better control over ingredients and often produces fluffier, fresher-tasting results. That said, a quality pancake mix can save time and still deliver decent pancakes.
Final Thoughts
Making IHOP-style pancakes at home is easier than you might think, and the results are honestly better than what you’d get waiting in line at the restaurant. Once you nail this recipe, you’ll find yourself making these pancakes regularly for lazy weekends, special breakfasts, or whenever the craving strikes.
These pancakes prove that restaurant favorites don’t have to stay at the restaurant. Mix a batch this weekend and see why your family will be asking you to make them again and again.
IHOP-Style Buttermilk Pancakes
These pancakes deliver that restaurant-quality fluffiness with a tender crumb and just enough sweetness without being cloying. Making them at home means you control the ingredients, skip the crowds, and enjoy unlimited refills whenever you want.
- Large mixing bowl
- Medium mixing bowl
- Whisk
- Measuring cups and spoons
- Griddle or large nonstick skillet
- Spatula
- Ladle or 1/4 cup measuring cup for portioning batter
- Paper towels
- Plate for keeping pancakes warm
Main
- 1 3/4 cups all-purpose flour
- 2 tablespoons granulated sugar
- 2 teaspoons baking powder
- 1/2 teaspoon salt
- 1 1/2 cups buttermilk
- 1/4 cup whole milk
- 2 large eggs
- 3 tablespoons butter (melted, plus more for the griddle)
- 1/2 teaspoon vanilla extract
- In a large mixing bowl, whisk together the flour, sugar, baking powder, and salt. Make sure to break up any lumps in the flour and distribute the baking powder evenly so your pancakes rise uniformly.
- In a medium mixing bowl, whisk together the buttermilk, whole milk, eggs, melted butter, and vanilla extract until well combined. The mixture should be smooth with no streaks of egg white visible.
- Pour the wet ingredients into the dry ingredients and gently stir with a whisk until just combined. The batter will look slightly lumpy, which is exactly what you want; overmixing develops gluten and creates tough, dense pancakes instead of fluffy ones.
- Allow the batter to sit for 2 to 3 minutes on the counter while you preheat your griddle. This resting time lets the flour fully hydrate and helps the baking powder activate, which contributes to better rise and fluffier results.
- Heat your griddle or skillet over medium-high heat for 2 to 3 minutes until a drop of water sizzles and evaporates on contact. The right temperature is critical; too low and you’ll get pale, rubbery pancakes, while too high will burn the outside before the inside cooks.
- Once hot, lightly butter the entire cooking surface with a paper towel dipped in melted butter. This creates those golden-brown edges and crispy spots that make IHOP pancakes so craveable.
- Using a ladle or 1/4-cup measuring cup, pour batter onto the hot griddle, leaving about an inch between each pancake to prevent them from fusing together. You should hear a gentle sizzle as the batter hits the heat.
- Let the pancakes cook undisturbed for about 2 minutes until you see bubbles forming on the surface and the edges look set but not brown. These bubbles are a signal that it’s time to flip and that the inside is cooking properly.
- Flip each pancake carefully using a spatula and cook for another 60 to 90 seconds until the bottom is golden brown. The second side cooks faster, so watch closely to prevent burning.
- Place finished pancakes on a plate and cover loosely with foil to keep them warm while you finish cooking the remaining batter. Repeat the process with the remaining batter, buttering the griddle between batches as needed.
Don’t flip pancakes more than once; resist the urge to press down with your spatula, which squeezes out air and makes them dense instead of fluffy. Use room-temperature ingredients for better mixing and more consistent results. Measure flour correctly by spooning it into the measuring cup and leveling with a knife rather than scooping directly from the bag. Store cooled pancakes in an airtight container separated by parchment paper for up to 4 days in the refrigerator or freeze for up to 2 months.