You open the fridge craving hummus, only to realize you’re completely out of tahini and the store feels like a journey you’re not ready to take. Hummus without tahini isn’t just a backup plan; it’s a creamy, flavorful dip that stands proudly on its own, delivering that silky texture and bold taste you love without the sesame paste. This version uses clever ingredient swaps that keep the dip rich and satisfying while opening up new flavor possibilities.
The beauty of this recipe lies in its simplicity and adaptability. You can whip it up in under 10 minutes with pantry staples, and the result is just as smooth and addictive as traditional hummus.
Why You’ll Love This Recipe
This tahini-free hummus proves you don’t need specialty ingredients to create something genuinely delicious. It’s budget-friendly, allergen-conscious, and incredibly versatile for different flavor profiles.
- Ready in under 10 minutes with minimal cleanup
- Costs a fraction of store-bought hummus and uses pantry staples
- Naturally nut-free and perfect for those with sesame allergies
- Silky-smooth texture that rivals any restaurant version
- Easily customizable with different oils and seasonings
My Experience Making This Recipe
I stumbled onto this recipe during a midnight snack attack when my tahini jar was tragically empty. The first batch came together so quickly that I questioned whether I’d missed a step, but one taste confirmed I’d accidentally discovered my new go-to hummus.
The texture surprised me most: using a good quality olive oil creates that luxurious, creamy consistency you’d swear came from tahini. My sister, who avoids sesame due to allergies, nearly cried with joy when she could finally enjoy hummus at family gatherings again.
The lemon and garlic shine through more brightly without tahini’s earthy flavor competing for attention. Every batch disappears within days at my house, usually straight from the container with whatever vegetables I can grab first.
Recipe Overview
- Recipe Name: Hummus Without Tahini
- Servings: 8 servings (about 2 cups)
- Prep Time: 10 minutes
- Cook Time: 0 minutes
- Total Time: 10 minutes
- Course: Appetizer, Snack
- Cuisine: Middle Eastern
- Calories per Serving: 98 calories
Equipment You Will Need
- Food processor or high-powered blender
- Measuring cups and spoons
- Can opener
- Rubber spatula
- Serving bowl
- Colander or strainer
Ingredients for Hummus Without Tahini
- 1 can (15 ounces) chickpeas, drained and rinsed
- 3 tablespoons extra virgin olive oil, plus more for drizzling
- 3 tablespoons fresh lemon juice (about 1 large lemon)
- 2 cloves garlic, peeled
- 1/2 teaspoon ground cumin
- 1/2 teaspoon salt, or to taste
- 1/4 teaspoon paprika
- 3 to 5 tablespoons cold water, as needed for consistency
- 1/4 teaspoon black pepper
Ingredient Notes and Substitutions
- Chickpeas: These provide the creamy base and protein for your hummus. You can use homemade cooked chickpeas for an even smoother texture, just use 1.5 cups cooked.
- Extra virgin olive oil: This replaces tahini’s richness and adds fruity flavor notes. Substitute with avocado oil for a milder taste, though you’ll lose some of that Mediterranean character.
- Fresh lemon juice: Brightness and acidity balance the richness and prevent a flat flavor. Bottled lemon juice works in a pinch, but fresh gives noticeably better flavor.
- Garlic: Raw garlic adds sharp, pungent flavor that mellows slightly when blended. Use roasted garlic for a sweeter, more mellow taste, or reduce to 1 clove if you’re sensitive to raw garlic.
- Ground cumin: This spice adds earthy, warm notes that are traditional in hummus. Swap with ground coriander for a more citrusy, floral flavor profile.
- Cold water: Ice-cold water helps create an ultra-creamy, fluffy texture through emulsification. Room temperature water works but won’t achieve quite the same silkiness.
How to Make Hummus Without Tahini
Step 1: Prepare the Chickpeas
Drain the canned chickpeas in a colander and rinse them thoroughly under cold water for about 30 seconds. This removes excess sodium and the slightly metallic taste from the canning liquid, giving you a cleaner flavor foundation.
Step 2: Blend the Garlic and Lemon
Add the garlic cloves and lemon juice to your food processor and pulse for about 10 seconds until the garlic is finely minced. Starting with these two ingredients allows the garlic to mellow slightly in the acidic lemon juice, preventing an overly harsh raw garlic flavor in your finished hummus.
Step 3: Add the Chickpeas and Spices
Add the drained chickpeas, cumin, salt, paprika, and black pepper to the food processor. Pulse 5 to 6 times to break down the chickpeas into a coarse paste before processing continuously, which prevents the motor from straining and creates a more even texture.
Step 4: Process Until Smooth
Run the food processor continuously for 1 to 2 minutes, scraping down the sides halfway through with a rubber spatula. This extended processing time is critical for breaking down the chickpeas completely and creating that smooth, creamy texture you want in great hummus.
Step 5: Stream in the Olive Oil
With the food processor running, slowly drizzle the olive oil through the feed tube in a steady stream over about 30 seconds. This gradual incorporation allows the oil to emulsify properly with the chickpeas, creating richness and helping achieve that silky consistency tahini normally provides.
Step 6: Add Cold Water
Add 3 tablespoons of ice-cold water and process for another 30 seconds. Check the consistency; if you want it lighter and fluffier, add another tablespoon or two of cold water and process again until you reach your desired texture.
Step 7: Taste and Adjust
Stop the processor and taste your hummus, checking for seasoning balance. Add more salt if it tastes flat, more lemon juice if it needs brightness, or a bit more cumin if you want deeper flavor, then pulse briefly to incorporate any additions.
Step 8: Serve and Garnish
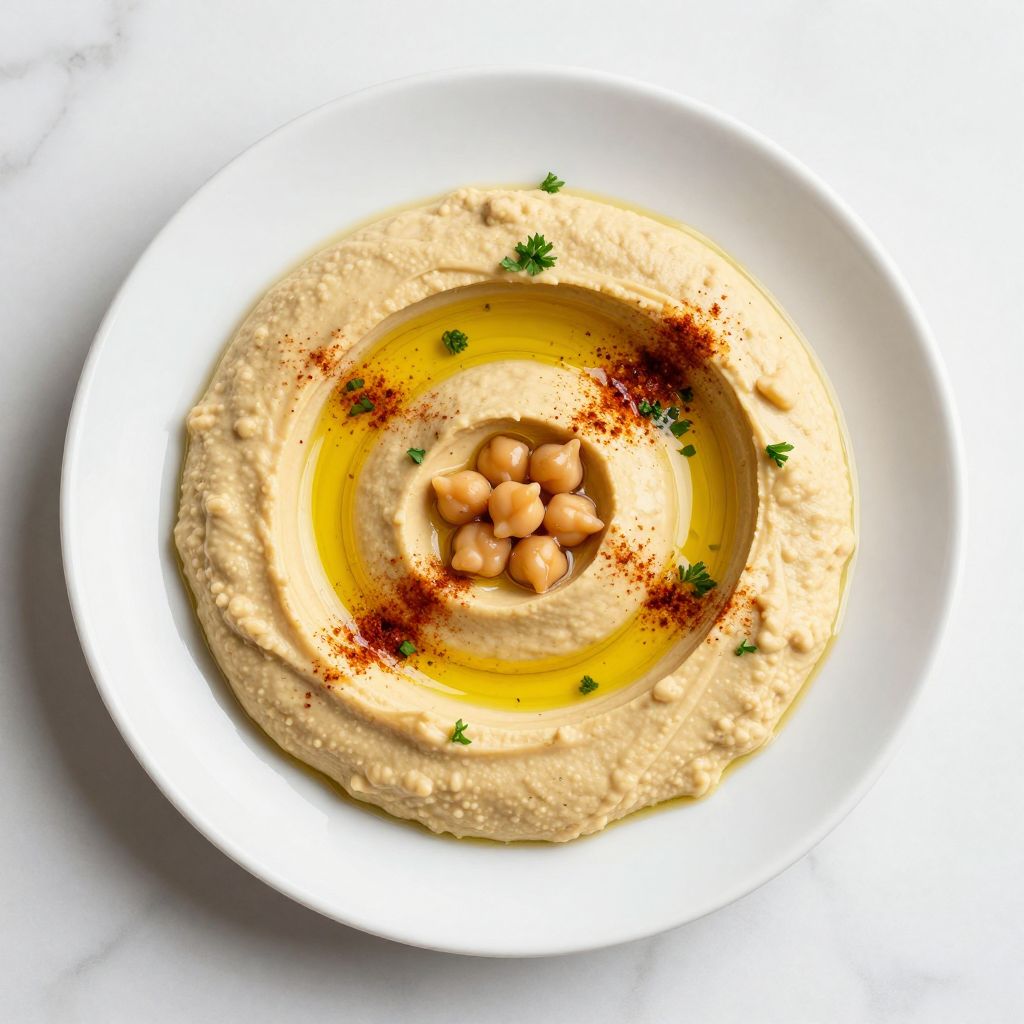
Transfer the hummus to a serving bowl and use the back of a spoon to create a shallow well in the center. Drizzle with additional olive oil and sprinkle with extra paprika or a few whole chickpeas for a classic presentation that looks as good as it tastes.
Pro Tip: For ultra-silky hummus, peel the chickpeas before blending. It takes 5 extra minutes but transforms the texture from good to restaurant-quality smooth. Just pinch each chickpea between your fingers and the skins slip right off.
Tips for the Best Hummus Without Tahini
- Use high-quality extra virgin olive oil since it’s replacing tahini as the primary fat. The oil’s flavor will shine through, so choose one you’d happily dip bread into straight from the bottle.
- Let your food processor run longer than you think necessary. What seems smooth after 1 minute becomes luxuriously creamy after 3 to 4 minutes of processing.
- Add the cold water gradually rather than all at once. You can always add more, but you can’t take it out if your hummus becomes too thin.
- Reserve a few tablespoons of chickpea cooking liquid (aquafaba) if using home-cooked beans. It adds body and helps achieve perfect consistency better than plain water.
- Taste your hummus at room temperature before serving. Flavors dull when cold, so if you’re refrigerating it, season slightly more aggressively than you think necessary.
- Make hummus ahead and let it rest for 30 minutes before serving. The flavors meld and develop complexity as the garlic mellows and the spices bloom.
Common Mistakes to Avoid
- Using warm or room-temperature water instead of cold water results in a dense, heavy texture rather than the light, fluffy consistency you want.
- Adding all the olive oil at once instead of streaming it in prevents proper emulsification and can make the hummus greasy or separated.
- Skipping the initial garlic and lemon blend leaves you with harsh garlic chunks and uneven flavor distribution throughout the hummus.
- Not scraping down the sides of the food processor means unblended chickpea chunks remain while the rest over-processes into an uneven texture.
- Under-seasoning because you’re afraid of overdoing it leaves you with bland hummus that tastes like nothing more than pureed beans.
Serving Suggestions
This tahini-free hummus works beautifully as a dip, spread, or even a base for bowl-style meals. Its clean, bright flavor pairs perfectly with both raw and roasted vegetables.
- Serve with warm pita bread, pita chips, or crispy crackers for classic dipping
- Spread on sandwiches or wraps as a creamy, protein-rich alternative to mayonnaise
- Pair with fresh vegetable crudités like carrots, cucumbers, bell peppers, and cherry tomatoes
- Use as a base for grain bowls topped with roasted vegetables, falafel, and fresh herbs
- Serve alongside grilled meats or kebabs as a cooling, tangy accompaniment
Variations to Try
- Roasted Red Pepper Hummus: Add 1/2 cup roasted red peppers (drained if jarred) during step 3 for a sweet, smoky flavor and beautiful coral color.
- Spicy Harissa Hummus: Stir in 1 to 2 tablespoons harissa paste during blending for North African heat and complex spice notes that add serious depth.
- Herb-Loaded Hummus: Blend in 1/2 cup fresh cilantro, parsley, or basil during the final minute for a vibrant green color and fresh, garden-bright flavor.
- Roasted Garlic Hummus: Replace raw garlic with 4 to 5 cloves of roasted garlic for a mellow, sweet, caramelized flavor without any harsh bite.
- Sun-Dried Tomato Hummus: Add 1/4 cup oil-packed sun-dried tomatoes for intense umami flavor and a gorgeous russet color that looks stunning on any mezze platter.
Dietary Adaptations
- Gluten-Free: This hummus is naturally gluten-free as written, just ensure you serve it with gluten-free crackers, vegetables, or certified gluten-free pita bread.
- Dairy-Free: Already completely dairy-free with no modifications needed, making it perfect for those with lactose intolerance or following a dairy-free diet.
- Vegan: This recipe is 100% plant-based and vegan as written, with no animal products whatsoever in the ingredient list.
- Low-Carb/Keto: Chickpeas are high in carbs, so substitute with 2 cups steamed cauliflower for a low-carb version, though the flavor and texture will differ significantly from traditional hummus.
Storage and Reheating
Refrigerator
Store hummus in an airtight container in the refrigerator for up to 5 days. Pour a thin layer of olive oil over the surface before sealing to prevent the top from drying out and forming a skin.
- Always use a clean spoon when serving to prevent contamination
- The hummus may thicken in the fridge; stir in a tablespoon of cold water or olive oil to restore creamy consistency
- Bring to room temperature 20 minutes before serving for best flavor
Freezer
Freeze hummus in airtight containers or freezer bags for up to 3 months. Leave about an inch of headspace in containers since hummus expands slightly when frozen.
- Freeze in smaller portions (1 cup each) for easier thawing and single-use servings
- Label containers with the date and any flavor variations
- Thaw overnight in the refrigerator rather than at room temperature
- Stir well after thawing and add a splash of olive oil if the texture seems grainy
Reheating
Hummus is best served cold or at room temperature and doesn’t require reheating. If you want to serve it warm, gently heat it in a small saucepan over low heat, stirring constantly.
- Warm hummus can be delicious drizzled over roasted vegetables or grilled meats
- Avoid microwaving, which can cause separation and an oily texture
Nutrition Information
| Nutrient | Amount |
|---|---|
| Calories | 98 |
| Total Fat | 6g |
| Saturated Fat | 1g |
| Carbohydrates | 9g |
| Fiber | 2g |
| Sugar | 1g |
| Protein | 3g |
| Sodium | 147mg |
| Cholesterol | 0mg |
Nutritional values are approximate and based on one serving (1/4 cup). Actual values may vary depending on specific ingredients and brands used.
Frequently Asked Questions
Can I use dried chickpeas instead of canned?
Absolutely, and many people prefer the texture of home-cooked chickpeas. Cook 3/4 cup dried chickpeas until very tender (almost falling apart), which takes about 1.5 to 2 hours, and use 1.5 cups of the cooked beans in place of the canned.
Why is my hummus grainy instead of smooth?
You likely didn’t process it long enough or your chickpeas weren’t soft enough to begin with. Run the food processor for a full 3 to 4 minutes, and if using canned chickpeas, choose a brand known for softer beans or try peeling them before blending.
Can I make this hummus ahead of time?
Yes, hummus actually tastes better the next day after the flavors have time to meld together. Make it up to 3 days ahead and store it covered in the refrigerator, then bring it to room temperature before serving for the best flavor and texture.
What can I use instead of olive oil?
Avocado oil works wonderfully and provides neutral flavor that lets the other ingredients shine. You could try toasted sesame oil for a nutty flavor similar to tahini, but use only 1 tablespoon mixed with 2 tablespoons of a neutral oil since it’s quite strong.
How can I make my hummus creamier?
The secret is processing time and ice-cold water, which creates a light, whipped texture through emulsification. Let your food processor run for at least 3 minutes total, adding the cold water gradually, and don’t be shy with the olive oil since it replaces tahini’s creaminess.
Can I reduce the garlic for a milder flavor?
Definitely, especially if you’re sensitive to raw garlic or serving this to kids. Start with just 1 small clove and taste before adding more, or use 1/4 teaspoon of garlic powder for a gentler garlic presence without the sharp bite.
Final Thoughts
This tahini-free hummus proves that sometimes limitations lead to delicious discoveries. You get all the creamy, satisfying goodness of traditional hummus with ingredients you probably already have in your kitchen.
Whether you’re out of tahini, avoiding sesame, or just curious about trying something different, this recipe delivers big flavor without compromise. Grab your food processor and make a batch today; your snack game is about to level up considerably.
Hummus Without Tahini
Ingredients
Equipment
Method
- Drain the canned chickpeas in a colander and rinse them thoroughly under cold water for about 30 seconds. This removes excess sodium and the slightly metallic taste from the canning liquid.
- Add the garlic cloves and lemon juice to your food processor and pulse for about 10 seconds until the garlic is finely minced. This allows the garlic to mellow slightly in the acidic lemon juice.
- Add the drained chickpeas, cumin, salt, paprika, and black pepper to the food processor. Pulse 5 to 6 times to break down the chickpeas into a coarse paste.
- Run the food processor continuously for 1 to 2 minutes, scraping down the sides halfway through with a rubber spatula. This extended processing time creates a smooth, creamy texture.
- With the food processor running, slowly drizzle the olive oil through the feed tube in a steady stream over about 30 seconds. This allows the oil to emulsify properly with the chickpeas.
- Add 3 tablespoons of ice-cold water and process for another 30 seconds. Check the consistency; if you want it lighter and fluffier, add another tablespoon or two of cold water and process again.
- Stop the processor and taste your hummus, checking for seasoning balance. Add more salt, lemon juice, or cumin as needed, then pulse briefly to incorporate any additions.
- Transfer the hummus to a serving bowl and use the back of a spoon to create a shallow well in the center. Drizzle with additional olive oil and sprinkle with extra paprika or a few whole chickpeas.


