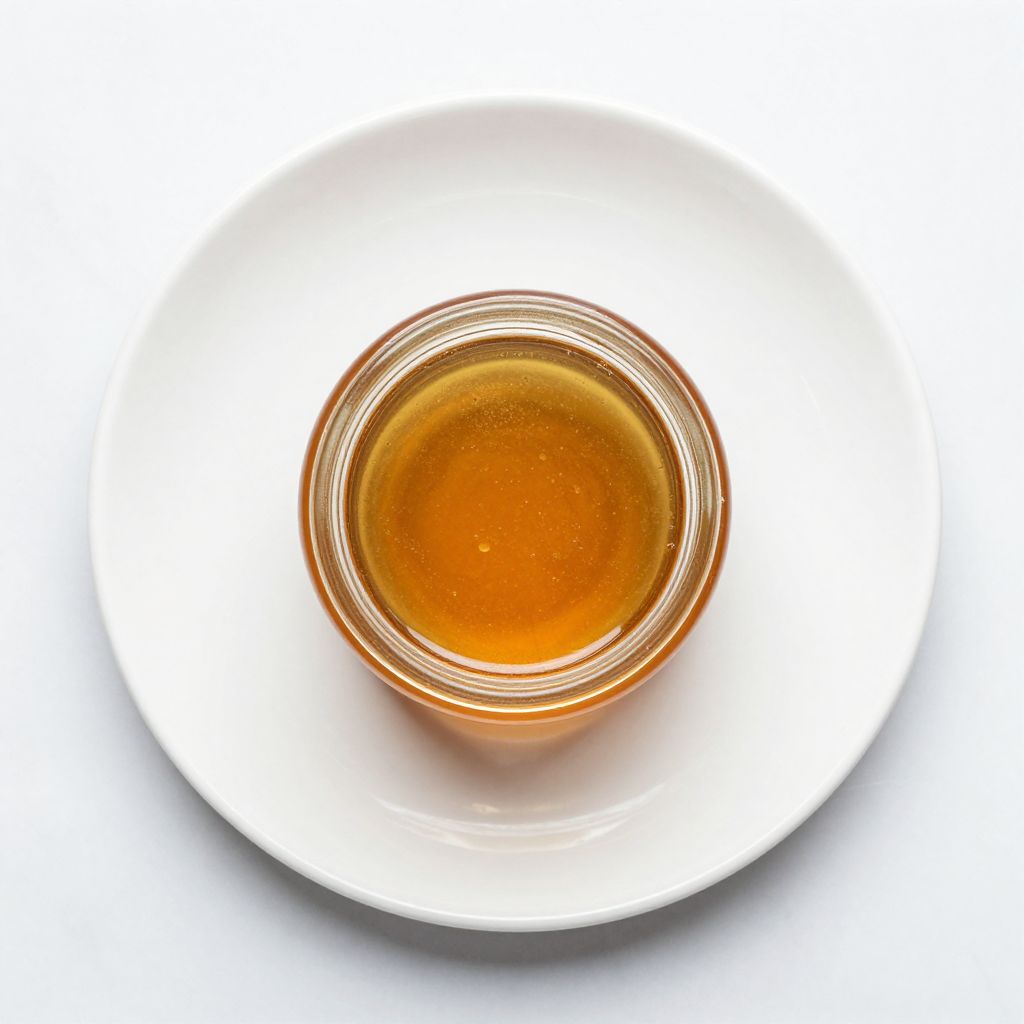
honey syrup recipe
Picture yourself drizzling golden honey syrup over warm pancakes on a lazy Sunday morning, watching it pool into every crevice and make everything taste like pure comfort. Honey syrup is one of those magical kitchen staples that transforms breakfast, desserts, and even cocktails with minimal effort and maximum flavor. What makes this recipe special is how it combines the natural sweetness of honey with a silky texture that pours like a dream and never crystallizes.
This is the kind of recipe you’ll make once and then keep a jar in your pantry permanently. It takes just minutes to prepare, requires only two ingredients, and tastes infinitely better than anything you’d buy from a grocery store shelf.
Why You’ll Love This Recipe
Honey syrup is the secret weapon that every home cook needs in their arsenal. Once you make it, you’ll wonder why you waited so long to try it.
- Takes less than 5 minutes from start to finish with zero complicated steps
- Uses only two simple ingredients you probably already have at home
- Never hardens or crystallizes, so it stays perfectly pourable indefinitely
- Works beautifully on pancakes, waffles, ice cream, desserts, and even in warm beverages
- Costs just pennies to make compared to fancy bottled syrups
My Experience Making This Recipe
I discovered this recipe completely by accident when I ran out of maple syrup one Saturday morning and had a bunch of honey sitting in my pantry. I figured mixing it with water might create something usable, and I was honestly shocked at how much better it worked than I expected.
The texture transformed from thick and sticky to smooth and drizzle-friendly, and my kids actually preferred it to the real thing. What really sold me was realizing I could make a fresh batch in the time it takes to brew coffee, and it keeps for weeks without any special storage tricks.
Now I keep a jar in the fridge at all times, and my breakfast game has never been the same. The fact that you can customize the flavor by adding vanilla or cinnamon makes it even better.
Recipe Overview
- Recipe Name: Honey Syrup
- Servings: Makes about 1 cup
- Prep Time: 2 minutes
- Cook Time: 3 minutes
- Total Time: 5 minutes
- Course: Condiment or Topping
- Cuisine: American
- Calories per Serving: 64 calories (per 1 tablespoon serving)
Equipment You Will Need
- Small saucepan
- Measuring cups and spoons
- Whisk or wooden spoon for stirring
- Glass jar with a lid for storage
- Funnel (optional but helpful for pouring)
Ingredients for Honey Syrup
- 1 cup raw or regular honey
- 1/4 cup water
Ingredient Notes and Substitutions
- Raw honey has a richer, more complex flavor with floral notes that regular honey lacks. If you prefer a milder, cleaner honey taste, use regular processed honey instead.
- Water dilutes the honey to create the perfect pouring consistency without affecting flavor. If you want a thicker syrup, use 3 tablespoons of water instead; for thinner consistency, add up to 1/3 cup.
How to Make Honey Syrup
Step 1: Gather Your Ingredients
Measure out 1 cup of honey and 1/4 cup of water before you turn on the heat. Having everything ready means this recipe moves incredibly fast and you won’t scramble once things get warm.
Step 2: Combine Honey and Water in Saucepan
Pour the honey into a small saucepan, then add the water directly to it. You do not need to warm anything yet; just get everything in one spot first.
Step 3: Heat Over Medium-Low Heat
Turn the burner to medium-low and let the mixture warm gently for about 2 to 3 minutes. Low heat prevents the honey from burning and ensures the water integrates smoothly instead of creating hot spots.
Step 4: Stir Continuously
Use a whisk or wooden spoon to stir the mixture constantly as it heats up. Stirring helps the water incorporate evenly with the honey and prevents any clumping or separation.
Step 5: Watch for Slight Steaming
When you see light steam rising from the surface and the mixture looks slightly thinner, you’re done heating. You should not bring it to a boil; this recipe only needs warmth to reach the right consistency.
Step 6: Remove from Heat
Take the saucepan off the heat and let it cool for about 1 minute at room temperature. Removing it from heat stops the cooking process immediately and prevents any browning.
Step 7: Transfer to Storage Jar
Pour the syrup into a clean glass jar using a funnel if you have one to avoid spilling. Glass jars protect the syrup from absorbing flavors and work far better than plastic for long-term storage.
Step 8: Let Cool Completely
Allow the syrup to cool to room temperature before sealing the jar, which usually takes about 15 to 20 minutes. Sealing while still warm can create condensation inside the jar, which is never ideal.
Pro Tip: If you want flavored honey syrup, add 1/2 teaspoon of vanilla extract or a pinch of cinnamon right before pouring into the jar. The flavoring infuses beautifully as the syrup cools.
Tips for the Best Honey Syrup
- Do not skip the water entirely, even if you want thick syrup; the water is what creates that smooth, pourable texture that crystallized honey never achieves on its own.
- Store the syrup in a glass jar with a tight lid to keep it fresh and prevent it from absorbing refrigerator odors.
- If your syrup thickens up in the fridge, simply microwave the jar for 10 to 15 seconds or set it in warm water until it reaches pouring consistency again.
- Use raw honey for the most interesting flavor profile, but regular honey works just fine if that’s what you have available.
- Make a double or triple batch and store it in multiple jars so you always have some on hand for unexpected breakfast inspiration.
- Warm the syrup slightly before pouring over ice cream or cold desserts to prevent it from hardening on contact.
Common Mistakes to Avoid
- Boiling the syrup causes it to thicken too much and can damage some of the delicate honey flavors you’re trying to preserve.
- Using too little water creates syrup that’s too thick and won’t pour smoothly, defeating the whole purpose of making it in the first place.
- Sealing the jar while the syrup is still hot traps steam inside and creates moisture that can lead to crystallization.
- Storing the syrup in plastic containers allows it to absorb flavors from other foods and doesn’t insulate against temperature changes as well as glass does.
- Forgetting to stir while heating leads to uneven mixing and pockets of pure water that don’t integrate properly.
Serving Suggestions
This honey syrup shines brightest when you pour it generously over warm foods that will soak up every drop. The possibilities are genuinely endless once you start thinking about where honey syrup actually belongs.
- Drizzle over fluffy pancakes or crispy waffles for the ultimate breakfast upgrade
- Swirl into plain yogurt with granola for a naturally sweet breakfast bowl
- Pour warm over vanilla ice cream or frozen yogurt for simple but elegant dessert
- Stir into warm oatmeal along with cinnamon and nuts for extra sweetness and nutrition
- Mix into hot tea or warm milk for a soothing bedtime drink with natural sweetness
Variations to Try
- Vanilla Honey Syrup: Add 1/2 teaspoon vanilla extract to the cooled syrup for a warm, aromatic flavor that pairs beautifully with breakfast foods.
- Cinnamon Honey Syrup: Stir in 1/4 teaspoon ground cinnamon while the syrup is still warm to create a cozy spiced version perfect for oatmeal and coffee drinks.
- Lemon Honey Syrup: Add 1 tablespoon fresh lemon juice to brighten the sweetness and create a more refreshing topping for desserts and beverages.
- Brown Butter Honey Syrup: Brown 2 tablespoons of butter in the saucepan first, then add the honey and water for a richer, more complex flavor.
- Spiced Honey Syrup: Combine honey and water with a tiny pinch of nutmeg, ginger, and clove for a warming version that tastes like autumn in a jar.
Dietary Adaptations
- Gluten-Free: This recipe is naturally gluten-free since it contains only honey and water with no grain-based ingredients whatsoever.
- Dairy-Free: The base recipe contains no dairy at all, though you can add vegan butter if making the brown butter variation.
- Vegan: This recipe is not vegan due to the honey content, but you can substitute pure maple syrup thinned with water for a vegan-friendly alternative.
- Low-Carb/Keto: Traditional honey syrup contains natural sugars, so it is not suitable for strict keto diets, but you can use keto sweeteners like erythritol as a substitute.
Storage and Reheating
Refrigerator
Honey syrup keeps perfectly in the fridge for up to 3 months in a sealed glass jar. Cold storage actually helps prevent any unwanted crystallization and keeps the texture smooth.
- Store in an airtight glass jar on a shelf away from strong-smelling foods
- Check that the lid is sealed tightly to prevent evaporation
- The syrup may thicken slightly in the cold, which is completely normal
Freezer
Freezing honey syrup is possible but generally unnecessary since it keeps so well refrigerated. If you do choose to freeze it, use a freezer-safe glass jar and leave about an inch of headspace.
- Thaw in the refrigerator overnight before using
- The texture may separate slightly after thawing, but stirring restores the smooth consistency
Reheating
Cold syrup pours sluggishly, so warming it slightly before use makes a big difference. You have several quick options for getting it back to the perfect pouring consistency.
- Microwave the sealed jar for 10 to 15 seconds until it reaches room temperature
- Set the jar in warm water for 2 to 3 minutes for a gentler reheating method
- Pour the syrup into a small saucepan and warm over low heat for 1 to 2 minutes
Nutrition Information
| Nutrient | Amount |
|---|---|
| Calories | 64 |
| Total Fat | 0g |
| Saturated Fat | 0g |
| Carbohydrates | 17g |
| Fiber | 0g |
| Sugar | 16g |
| Protein | 0g |
| Sodium | 2mg |
| Cholesterol | 0mg |
These values are approximate and based on one tablespoon serving of standard honey syrup. Variations with added ingredients will have different nutritional profiles.
Frequently Asked Questions
Can I use this syrup on cold foods?
Yes, but warm it slightly first so it doesn’t harden or become too thick. Cold syrup thickens significantly and won’t pour smoothly over chilled items.
How long does honey syrup actually last?
Properly stored in a sealed glass jar in the fridge, it keeps for up to 3 months without any issues. Honey’s natural preservative properties mean this syrup stays safe far longer than most homemade condiments.
Why did my syrup crystallize?
Crystallization usually happens when syrup is stored in the cold without enough water content or when it was sealed while still hot. Simply warm it gently to restore the smooth texture.
Can I add flavoring extracts to this recipe?
Absolutely, add 1/2 to 1 teaspoon of vanilla, almond, or peppermint extract right before jarring. The syrup will taste amazing with almost any extract you enjoy.
What’s the difference between honey syrup and regular honey?
Regular honey is thick and sticky, while honey syrup pours smoothly because the added water creates a lighter consistency. Honey syrup covers food more evenly and tastes less intensely sweet.
Is this recipe the same as honey butter?
No, honey butter uses butter as an ingredient and has a completely different texture and flavor profile. Honey syrup uses only honey and water, making it lighter and more versatile.
Can I make this without heating it?
You can skip heating if you stir very thoroughly for several minutes, but gentle warming helps the water and honey integrate much more smoothly and quickly. Heating makes the process nearly instant.
Final Thoughts
Making your own honey syrup is one of those small kitchen wins that pays dividends every single time you use it. You’ll find yourself reaching for the jar constantly once you realize how much better homemade tastes compared to store-bought versions.
Try this recipe this weekend and keep a batch in your fridge from now on. Your pancake breakfasts, desserts, and warm beverages will thank you for it.
If you enjoy making simple homemade syrups, you might also want to explore making a hot honey recipe for spicy chicken dishes or try a elderberry syrup recipe for cold and flu season. Both are just as easy and equally rewarding to have on hand in your kitchen.
Honey Syrup
A simple homemade honey syrup combining honey and water to create a smooth, pourable syrup that never crystallizes.
- Small saucepan
- Measuring cups and spoons
- Whisk or wooden spoon
- Glass jar with lid
- Funnel (optional)
Main
- 1 cup raw or regular honey
- 1/4 cup water
- Measure out 1 cup raw or regular honey and 1/4 cup water and place them in a small saucepan.
- Heat the saucepan over medium-low heat for 2 to 3 minutes, stirring constantly with a whisk or wooden spoon to combine and prevent burning.
- Watch for light steam and a thinner consistency, but avoid bringing the mixture to a boil.
- Remove the saucepan from heat and let the syrup cool at room temperature for 1 minute.
- Using a funnel if desired, pour the syrup into a clean glass storage jar.
- Allow the syrup to cool completely (about 15 to 20 minutes) before sealing to prevent condensation.
Store in a sealed glass jar in the refrigerator for up to 3 months. Warm gently before use if the syrup thickens.