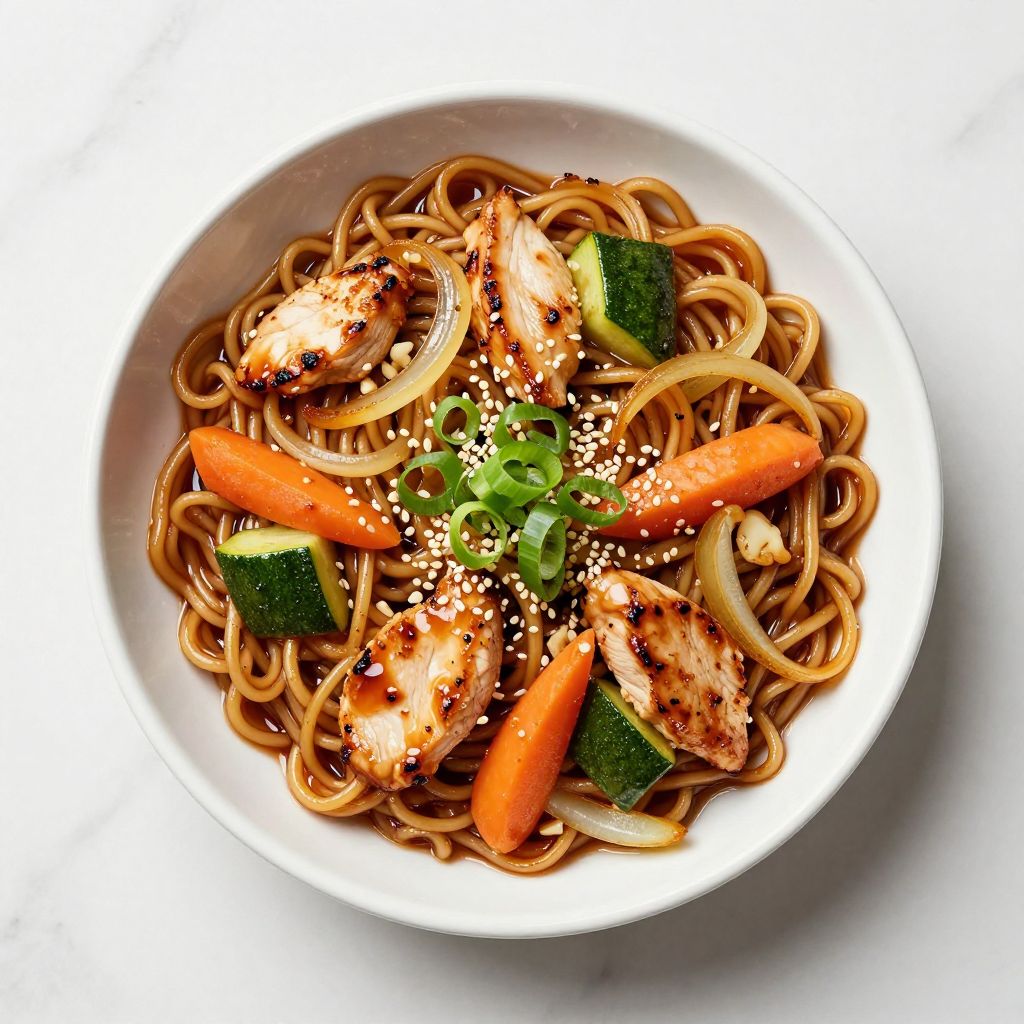
Picture this: you’re sitting at a hibachi grill, watching the chef work magic with lightning-fast movements, and suddenly those noodles hit the hot steel with a satisfying sizzle that makes your stomach rumble.
Hibachi noodles bring that restaurant energy into your kitchen without the hefty bill or the wait. This recipe captures all the theatrical flair and addictive flavors of the real deal, with crispy edges, tender centers, and a perfectly balanced sauce that clings to every strand.
What makes this version so special is how quickly it comes together and how forgiving it is. You don’t need fancy equipment or restaurant-grade skills to nail the smoky, savory taste you crave, just a good pan, hot heat, and a willingness to stir constantly.
Why You’ll Love This Recipe
Hibachi noodles deliver restaurant-quality results in under 20 minutes of active cooking time. The combination of crispy, slightly charred noodles and a savory-sweet sauce keeps you coming back for more.
- Quick enough for weeknight dinners but impressive enough for company
- Highly customizable with proteins and vegetables you already have on hand
- Creates that authentic teppanyaki experience right on your stovetop
- Leftovers reheat beautifully and taste even better the next day
- Budget-friendly way to satisfy cravings without ordering takeout
My Experience Making This Recipe
The first time I made hibachi noodles at home, I was shocked at how closely they matched what I’d paid $16 for at the restaurant down the street. My cast iron skillet got screaming hot, the noodles started to char, and suddenly my kitchen smelled like a professional hibachi grill.
I’ve since made this recipe dozens of times, tweaking the sauce ratios and experimenting with different protein and vegetable combinations. Every single time, the result is a crowd-pleaser that makes people ask if I’m secretly a hibachi chef.
The best part? Watching people’s faces light up when they taste how crispy the noodles get and how perfectly the sauce coats each bite. It’s theater and comfort food rolled into one.
Recipe Overview
- Recipe Name: Hibachi Noodles
- Servings: 4
- Prep Time: 15 minutes
- Cook Time: 12 minutes
- Total Time: 27 minutes
- Course: Main Dish
- Cuisine: Japanese
- Calories per Serving: 380
Equipment You Will Need
- Large cast iron skillet or flat-top griddle
- Two wooden spatulas or metal spatulas
- Small mixing bowl for the sauce
- Measuring spoons and cups
- Whisk or fork for combining sauce
- Colander for draining noodles
- Paper towels for oil application
Ingredients for Hibachi Noodles
- Ramen noodles: 1 pound (about 4 blocks, discard seasoning packets)
- Butter: 3 tablespoons
- Vegetable oil: 2 tablespoons
- Chicken breast or shrimp: 12 ounces, diced small
- Onion: 1 large, thinly sliced
- Zucchini: 1 medium, diced
- Carrots: 1 cup, diced small
- Garlic cloves: 3, minced
- Soy sauce: 4 tablespoons
- Oyster sauce: 2 tablespoons
- Sesame oil: 1 tablespoon
- Mirin: 1 tablespoon
- White pepper: 1/4 teaspoon
- Green onions: 2, sliced, for garnish
- Sesame seeds: 1 teaspoon, for garnish
Ingredient Notes and Substitutions
- Ramen noodles: These thin noodles crisp up beautifully and absorb sauce perfectly. Substitute with thin spaghetti or chow mein noodles if needed, though the texture won’t be identical.
- Butter and vegetable oil combination: Butter adds richness while oil prevents burning at high heat. Use all oil if you prefer, but you’ll lose some of that restaurant-style depth.
- Soy sauce: This is the backbone of the sauce, delivering saltiness and umami. Low-sodium soy sauce works if you prefer less salt, just reduce the measurement slightly.
- Oyster sauce: This adds sweetness and body to the sauce. Fish sauce works in a pinch but tastes more pungent and requires less quantity (reduce to 1 tablespoon).
- Mirin: This sweet rice wine creates glossy sauce and subtle sweetness. Honey or brown sugar (use 2 teaspoons) can replace it, though the flavor profile shifts slightly toward caramel.
- Sesame oil: A little goes a long way here, adding nutty aroma. Skip it if you have a sesame allergy, but your dish loses that signature hibachi character.
How to Make Hibachi Noodles
Step 1: Cook the Noodles
Bring a large pot of salted water to a rolling boil, then add all four ramen blocks broken into chunks. Cook for 3 minutes until just barely tender, not soft. The noodles will finish cooking on the griddle, so they need to retain some firmness now.
Drain the noodles in a colander and spread them on a clean kitchen towel or paper towels to dry for a couple of minutes. Moisture is your enemy when you’re trying to create crispy, charred edges, so this step matters.
Step 2: Prepare Your Sauce
While the noodles cook, whisk together the soy sauce, oyster sauce, mirin, and sesame oil in a small bowl. Stir until the mirin fully dissolves and everything looks smooth and glossy.
Taste the sauce and adjust to your preference. If it tastes too salty, add a splash of water. If it’s not flavorful enough, add a few more drops of soy sauce.
Step 3: Prepare All Your Ingredients
Dice your protein into small, bite-sized pieces so it cooks quickly on the hot surface. Slice the onion thinly, dice the zucchini and carrots into small pieces, and mince the garlic.
Having everything prepped and within arm’s reach is essential because once you start cooking, you’ll be moving fast. This is not a recipe where you pause to chop mid-way through.
Step 4: Heat Your Skillet or Griddle
Place your cast iron skillet or flat-top griddle over medium-high heat for 2 minutes. You want it hot enough that a drop of water sizzles on contact, but not so hot it smokes aggressively.
The right temperature prevents sticking while still creating that beautiful char on the noodles. If your pan isn’t hot enough, the noodles will steam instead of crisp up.
Step 5: Cook the Protein
Add 1 tablespoon of butter and 1 tablespoon of vegetable oil to the hot skillet, then immediately add your diced chicken or shrimp. Spread it out in a single layer and let it cook untouched for 2 minutes so it develops color.
Use your spatula to chop and stir the protein, breaking it into smaller pieces as it cooks. Season with a pinch of white pepper and cook for another 2 minutes until cooked through. Transfer to a clean plate.
Step 6: Cook the Vegetables
Add the remaining butter and oil to the same skillet, then toss in the onions, carrots, and zucchini. Stir frequently for about 4 minutes until the vegetables soften and the onions start to caramelize slightly.
You want some color on the vegetables without turning them to mush. Push them to the sides of the skillet if needed to give them space to caramelize rather than steam.
Step 7: Add the Noodles and Garlic
Push the vegetables to the sides and add the drained noodles to the center of the skillet in a single layer. Spread the minced garlic over the noodles and let them sit undisturbed for 2 minutes so the bottom gets crispy and golden.
This is where the magic happens. That contact with the hot surface creates the charred, crispy texture that makes hibachi noodles so addictive.
Step 8: Combine and Sauce
Toss the noodles with the vegetables and garlic, breaking up any clumps with your spatula. Pour the sauce over everything and toss constantly for 2 minutes so the sauce coats every noodle and everything heats through.
Return the cooked protein to the skillet and toss everything together for another 30 seconds. The noodles should look glossy and slightly darkened from the sauce, and everything should be steaming hot.
Step 9: Taste and Adjust
Remove the skillet from heat and taste a bite. Add more white pepper if it needs heat, or a splash of soy sauce if it needs more saltiness.
Remember that flavors taste less intense right after cooking, so a tiny adjustment now works better than overseasoning from the start.
Pro Tip: The key to restaurant-quality hibachi noodles is hot heat and dry noodles; don’t skip drying them after cooking, and keep your pan screaming hot throughout the entire process.
Tips for the Best Hibachi Noodles
- Use a cast iron skillet rather than a non-stick pan, as it retains heat better and creates superior char. Non-stick coatings can degrade under the high heat you need for crispy noodles.
- Don’t crowd the pan; if you’re doubling the recipe, work in batches instead. Overcrowding lowers the temperature and creates steam instead of char.
- Keep your heat consistent on medium-high throughout cooking. Turning it up too high burns the noodles before vegetables finish cooking; too low creates steamed noodles instead of crispy ones.
- Slice vegetables uniformly so they cook at the same rate. Unevenly sized pieces lead to some being overdone while others remain crunchy.
- Have your sauce mixed and ready before you start cooking. Adding cold sauce to hot noodles is fine, but having it prepared prevents any fumbling that interrupts your cooking rhythm.
- Taste frequently and adjust seasoning as you go. Every soy sauce brand tastes slightly different, and personal preference matters here.
Common Mistakes to Avoid
- Cooking the noodles too long before the griddle: Overcooked noodles fall apart when you toss them on the hot surface instead of maintaining their shape and getting crispy.
- Skipping the drying step: Wet noodles steam instead of char, and you’ll never get that crispy texture that makes this dish special.
- Adding sauce too early: If you sauce the noodles before they char, you’re essentially boiling them in the liquid instead of letting them crisp up first.
- Using a non-stick skillet: These pans simply don’t get hot enough to create the char and texture you’re after, and you lose the restaurant authenticity.
- Chopping ingredients too large: Bite-sized pieces cook quickly and distribute evenly; large chunks take forever and throw off your timing.
Serving Suggestions
Hibachi noodles taste fantastic on their own but shine even more with the right accompaniments. Serve them fresh off the griddle while everything is hot and the noodles are still crispy.
- Top with a fried egg and extra green onions for a richer, more filling meal
- Serve alongside edamame or a light cucumber salad to balance the richness
- Pair with gyoza or spring rolls for a complete hibachi experience
- Drizzle with extra sesame oil and sprinkle with furikake seasoning for extra umami
- Serve in a bowl with a side of extra sauce for people who like their noodles saucier
Variations to Try
- Vegetarian Hibachi Noodles: Skip the protein and add an extra cup of mixed vegetables like broccoli, snap peas, and mushrooms. The sauce provides enough umami to keep everything satisfying.
- Spicy Version: Add 1 teaspoon of sriracha to your sauce and sprinkle the finished dish with red pepper flakes. This creates a nice heat that builds as you eat.
- Seafood Medley: Use a mix of shrimp and scallops instead of just one protein, or add both for an elegant version that feels restaurant-worthy.
- Brown Butter and Sage: Replace some of your butter with brown butter and add a few sage leaves to the pan for a more sophisticated flavor profile that still feels familiar.
- Pineapple Hibachi Noodles: Add 1/2 cup of diced fresh pineapple and 1 tablespoon of fish sauce to the sauce for a sweet and tangy variation inspired by Thai cuisine.
Dietary Adaptations
- Gluten-Free: Use certified gluten-free tamari instead of soy sauce and ensure your oyster sauce is gluten-free. Ramen noodles contain gluten, so swap them for rice noodles or chickpea noodles that match the thin, delicate texture.
- Dairy-Free: Replace butter with extra vegetable oil or coconut oil for cooking. The dish stays delicious, though you lose a touch of richness.
- Vegan: Skip the protein and add tofu cubes, chickpeas, or extra vegetables instead. Use vegetable broth mixed into your sauce for extra depth, and skip any fish-based sauces.
- Low-Carb or Keto: Replace ramen noodles with zucchini noodles or shirataki noodles to keep carbs minimal. The dish becomes lighter but still satisfying.
Storage and Reheating
Refrigerator
Store leftover hibachi noodles in an airtight container for up to 3 days. They keep best when noodles and sauce are stored together, as this prevents them from drying out.
- Keep in an airtight container on the coldest shelf
- Don’t store garnishes separately unless they’re wet; they’ll get soggy
- Eat within 3 days for best texture and food safety
Freezer
Hibachi noodles freeze reasonably well for up to 2 months, though the texture of the noodles becomes softer after thawing. This is still delicious but lacks the crispiness of the original.
- Cool completely before freezing to prevent condensation
- Use a freezer-safe container or heavy-duty freezer bag
- Label with the date for easy reference
Reheating
For best results, reheat leftover hibachi noodles on the stovetop in a hot skillet with a splash of water or a teaspoon of sesame oil. This restores some of the texture that the refrigerator strips away.
- Stovetop reheating in a hot skillet takes 3 to 4 minutes and works best
- Microwave is faster but results in softer noodles; heat in 1-minute intervals
- Add fresh green onions and sesame seeds after reheating to brighten flavors
Nutrition Information
| Nutrient | Amount |
|---|---|
| Calories | 380 |
| Total Fat | 14g |
| Saturated Fat | 5g |
| Carbohydrates | 42g |
| Fiber | 3g |
| Sugar | 6g |
| Protein | 24g |
| Sodium | 1020mg |
| Cholesterol | 68mg |
Nutritional values are calculated per serving based on four servings total and using chicken breast as the protein. Values vary slightly based on your specific ingredient brands and any adjustments you make.
Frequently Asked Questions
Can I make hibachi noodles ahead of time?
You can prep all your ingredients ahead, but you should cook the noodles fresh to maintain that crispy texture. Making the entire dish an hour or two early results in soft, steamed noodles instead of the crispy version you’re after.
What if I don’t have mirin?
Use 2 teaspoons of honey or brown sugar mixed with 1 teaspoon of water instead. The sauce won’t have quite the same subtle sweetness, but it tastes good and works well.
Can I use fresh noodles instead of ramen?
Hibachi Noodles
Restaurant-quality hibachi noodles with crispy edges, tender centers, and a perfectly balanced savory-sweet sauce. This quick and easy recipe brings the theatrical flair of teppanyaki cooking into your kitchen, delivering addictive flavors in under 30 minutes without fancy equipment.
- Large cast iron skillet or flat-top griddle
- Two wooden spatulas or metal spatulas
- Small mixing bowl for the sauce
- Measuring spoons and cups
- Whisk or fork for combining sauce
- Colander for draining noodles
- Paper towels for oil application
Main
- 1 pound ramen noodles (about 4 blocks, discard seasoning packets)
- 3 tablespoons butter
- 2 tablespoons vegetable oil
- 12 ounces chicken breast or shrimp (diced small)
- 1 large onion (thinly sliced)
- 1 medium zucchini (diced)
- 1 cup carrots (diced small)
- 3 garlic cloves (minced)
- 4 tablespoons soy sauce
- 2 tablespoons oyster sauce
- 1 tablespoon sesame oil
- 1 tablespoon mirin
- 1/4 teaspoon white pepper
- 2 green onions (sliced, for garnish)
- 1 teaspoon sesame seeds (for garnish)
- Bring a large pot of salted water to a rolling boil, then add all four ramen blocks broken into chunks. Cook for 3 minutes until just barely tender, not soft. Drain the noodles in a colander and spread them on a clean kitchen towel or paper towels to dry for a couple of minutes.
- While the noodles cook, whisk together the soy sauce, oyster sauce, mirin, and sesame oil in a small bowl. Stir until the mirin fully dissolves and everything looks smooth and glossy. Taste and adjust seasoning if needed.
- Dice your protein into small, bite-sized pieces. Slice the onion thinly, dice the zucchini and carrots into small pieces, and mince the garlic. Have everything prepped and within arm’s reach.
- Place your cast iron skillet or flat-top griddle over medium-high heat for 2 minutes until a drop of water sizzles on contact.
- Add 1 tablespoon of butter and 1 tablespoon of vegetable oil to the hot skillet, then immediately add your diced chicken or shrimp. Spread it out in a single layer and let it cook untouched for 2 minutes so it develops color. Use your spatula to chop and stir the protein, breaking it into smaller pieces as it cooks. Season with a pinch of white pepper and cook for another 2 minutes until cooked through. Transfer to a clean plate.
- Add the remaining butter and oil to the same skillet, then toss in the onions, carrots, and zucchini. Stir frequently for about 4 minutes until the vegetables soften and the onions start to caramelize slightly.
- Push the vegetables to the sides and add the drained noodles to the center of the skillet in a single layer. Spread the minced garlic over the noodles and let them sit undisturbed for 2 minutes so the bottom gets crispy and golden.
- Toss the noodles with the vegetables and garlic, breaking up any clumps with your spatula. Pour the sauce over everything and toss constantly for 2 minutes so the sauce coats every noodle and everything heats through.
- Return the cooked protein to the skillet and toss everything together for another 30 seconds. The noodles should look glossy and slightly darkened from the sauce, and everything should be steaming hot.
- Remove the skillet from heat and taste a bite. Add more white pepper if it needs heat, or a splash of soy sauce if it needs more saltiness. Garnish with sliced green onions and sesame seeds before serving.
The key to restaurant-quality hibachi noodles is hot heat and dry noodles; don’t skip drying them after cooking, and keep your pan screaming hot throughout the entire process. Use a cast iron skillet rather than a non-stick pan for superior char. Leftovers can be stored in an airtight container for up to 3 days and reheat best on the stovetop in a hot skillet.