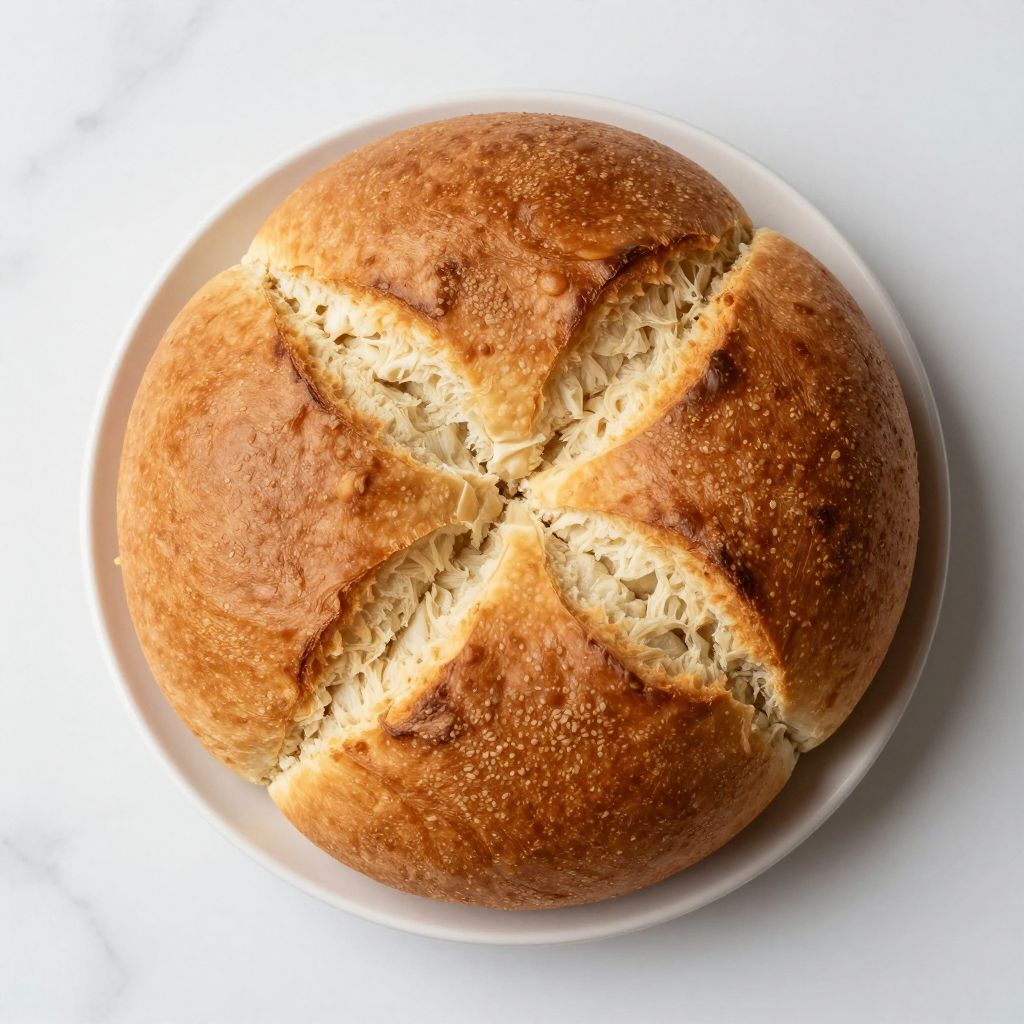
Cuban Bread Recipe
There’s something magical about pulling a loaf of Cuban bread from the oven and hearing that crispy crust crackle as it cools. This isn’t just bread; it’s a taste of history, tradition, and the kind of comfort that fills your kitchen with warmth and anticipation.
Cuban bread is special because it achieves what many home bakers struggle with: a thin, shattering crust wrapped around a soft, pillowy crumb with just enough structure to hold together. Unlike sandwich breads, this loaf demands respect for technique and timing, but the payoff is absolutely worth it.
This recipe guides you through each step with confidence, from mixing a simple dough to mastering the steam technique that gives Cuban bread its signature appearance and texture. Ready to make authentic Cuban bread at home?
Why You’ll Love This Recipe
This Cuban bread recipe delivers bakery-quality results with straightforward, honest ingredients and techniques. Once you nail the process, you’ll find yourself baking loaves every week.
- Crispy, thin crust that shatters under your teeth
- Soft, airy interior with a tender crumb structure
- Simple ingredient list: just flour, water, salt, and yeast
- Perfect for sandwiches, breakfast toast, or eating plain
- Impressive enough to serve guests but approachable for home bakers
My Experience Making This Recipe
I first attempted Cuban bread after eating it fresh from a Miami bakery, convinced I could never replicate that crust at home. My first two tries were dense and pale, missing the crispy exterior entirely.
Then I learned about steam and water spray, and everything changed. The moment that first loaf emerged from the oven with a golden, crackling crust, I understood why this bread holds such a special place in Cuban and Latin American kitchens.
My family now requests this bread instead of store-bought options, and guests always ask what bakery I’m using. Turns out, with patience and proper technique, you absolutely can achieve that authentic result in a home kitchen.
Recipe Overview
- Recipe Name: Cuban Bread
- Servings: 2 loaves
- Prep Time: 15 minutes
- First Rise: 1 hour
- Second Rise: 30 minutes
- Cook Time: 25 minutes
- Total Time: 2 hours 10 minutes
- Course: Bread
- Cuisine: Cuban
- Calories per Serving: 165
Equipment You Will Need
- Large mixing bowl
- Stand mixer with dough hook (or mixing by hand)
- Kitchen scale (highly recommended for accuracy)
- Two baking sheets or one large baking stone
- Dutch oven or covered baking vessel (optional but helpful)
- Spray bottle for water
- Bench scraper or dough cutter
- Instant-read thermometer
- Wire rack for cooling
Ingredients for Cuban Bread
- All-purpose flour: 500 grams (about 4 cups)
- Warm water: 350 milliliters (about 1.5 cups)
- Instant yeast: 2 teaspoons (7 grams)
- Salt: 10 grams (about 2 teaspoons)
- Lard or vegetable shortening: 1 tablespoon (optional but traditional)
Ingredient Notes and Substitutions
- All-purpose flour: The backbone of Cuban bread, providing structure and gluten development. Bread flour works if you want a chewier crumb, but all-purpose yields the authentic softer texture.
- Warm water: Activates yeast and develops the dough properly. Cold water slows fermentation and affects rise timing.
- Instant yeast: Fast-acting and reliable for consistent results. Active dry yeast works as a substitute but may require an extra 15 minutes for rising.
- Salt: Strengthens gluten and controls fermentation speed. Skipping it produces a bland, overspreading dough.
- Lard or shortening: Traditional ingredient that tenderizes the crumb slightly. Omit if desired, though it adds authentic flavor and texture.
How to Make Cuban Bread
Combine 500 grams of flour, 350 milliliters of warm water (around 110 degrees Fahrenheit), 2 teaspoons of instant yeast, and 10 grams of salt in a large bowl. Warm water activates the yeast, while the salt controls fermentation speed and strengthens the gluten network.
If using a stand mixer, attach the dough hook and mix on medium speed for 8 to 10 minutes until the dough comes together and becomes smooth. If mixing by hand, stir vigorously for about 2 minutes, then knead on a clean surface for 10 minutes until the dough feels elastic and slightly tacky.
If using lard or vegetable shortening, add 1 tablespoon to your dough after it’s already mixed. This traditional step tenderizes the crumb and adds subtle flavor that’s characteristic of authentic Cuban bread.
Mix or knead for another 2 to 3 minutes until the lard is fully incorporated and the dough returns to its smooth, elastic state. The dough should feel slightly sticky but hold together without being overly wet.
First Rise
Place the dough in a lightly oiled bowl, cover it with a damp kitchen towel or plastic wrap, and let it rise at room temperature for about 1 hour. The dough should roughly double in size, filling the bowl without overflowing.
Proper rising develops flavor through fermentation and creates the airy crumb structure that makes Cuban bread special. A warm kitchen speeds this process; a cool kitchen may require extra time.
Shape Your Loaves
Turn the risen dough out onto a lightly floured surface and divide it in half with a bench scraper or knife. Shape each half into an oval loaf about 10 to 12 inches long, pulling the dough tight at the seams to create surface tension.
Use your fingers to create a shallow groove or crease running lengthwise down the center of each loaf. This traditional groove gives Cuban bread its distinctive appearance and helps the loaf expand evenly during baking.
Second Rise
Place the shaped loaves on a parchment-lined baking sheet, cover them loosely with a kitchen towel, and let them rise for 30 to 40 minutes. The loaves should puff slightly but still feel springy when gently poked.
Unlike the first rise, this shorter second rise is meant to add volume without developing as much fermentation flavor. Overproofing here results in loaves that spread too much and lose their shape.
Prepare for Baking
About 15 minutes before baking, preheat your oven to 450 degrees Fahrenheit. If you have a baking stone, place it in the oven now so it preheats fully.
Have a spray bottle filled with water ready near your oven. Steam is the secret to achieving that thin, crispy, shattering crust that defines authentic Cuban bread.
Score and Steam
Using a sharp knife or bread lame, score the top of each loaf with a few shallow diagonal cuts, about 1/4 inch deep. These scores guide where the bread expands and add visual appeal.
Carefully transfer the loaves to the preheated baking stone or baking sheet. Immediately spray the inside of the oven walls (not the bread) with water to create steam, then close the oven door quickly to trap the moisture.
Bake with Steam
Bake at 450 degrees Fahrenheit for 20 to 25 minutes, misting the oven with water again at the 10-minute mark. Steam in the first part of baking keeps the crust soft initially, allowing the loaf to expand fully.
The loaves are done when they’re deeply golden brown and sound hollow when tapped on the bottom. An instant-read thermometer inserted into the center should read around 205 to 210 degrees Fahrenheit.
Cool Completely
Transfer the baked loaves to a wire rack and let them cool for at least 30 minutes before slicing. This cooling period allows the crumb to set properly, preventing a gummy interior.
Resist the urge to cut into a still-warm loaf; the moisture hasn’t redistributed evenly yet. Once cooled, that crust will be perfectly crispy, and the interior will slice cleanly without compressing.
Pro Tip: The difference between good Cuban bread and great Cuban bread is steam and oven temperature. Don’t skip the spray bottle step, and make sure your oven is fully preheated to 450 degrees Fahrenheit before the loaves go in.
Tips for the Best Cuban Bread
- Use a kitchen scale to measure flour and water accurately. Volume measurements (cups) can vary by 20 percent depending on how tightly you pack the flour, which directly affects dough hydration and results.
- Keep your water temperature between 105 and 110 degrees Fahrenheit. Water that’s too hot kills the yeast; water that’s too cold slows fermentation and extends rising time.
- Don’t skip the second rise, even though it’s short. This final proof ensures the loaves have enough volume and don’t turn out too dense.
- Create steam immediately after the loaves enter the oven. The first few minutes are critical; steam prevents the crust from setting too quickly and allows the loaf to fully expand.
- Use a baking stone if possible, as it distributes heat evenly and helps develop that signature thin, crispy crust. A preheated stone mimics professional bakery ovens more closely than a sheet pan alone.
- Don’t slice the bread until it’s completely cooled. Even when it feels firm, the crumb is still setting inside, and cutting too early traps steam and creates a gummy texture.
Common Mistakes to Avoid
- Using water that’s too hot or too cold throws off fermentation timing and yeast activity. Warm water (around 110 degrees) is essential for activating instant yeast properly.
- Skipping the steam step results in a thick, bread-like crust instead of that thin, shattering exterior. Steam is non-negotiable for authentic Cuban bread texture.
- Overproofing the dough during either rise causes it to collapse in the oven and produce a flat, dense loaf. Trust the timeline and poke the dough gently to check readiness.
- Using bread flour instead of all-purpose creates a chewier crumb and can produce a tougher final product. All-purpose flour yields the softer, more tender crumb that’s traditional.
- Slicing the bread while still warm allows steam to escape and creates a gummy, underbaked interior. Patience during cooling makes a real difference in the final eating experience.
Serving Suggestions
Cuban bread shines brightest as a warm sandwich or simply toasted with butter and a drizzle of honey. The thin crust and soft interior make it perfect for holding toppings without falling apart or overwhelming the filling.
- Cuban sandwich (Cubano): Fill with roasted pork, ham, Swiss cheese, pickles, and mustard, then toast until crispy
- Breakfast toast: Slice, toast until golden, and top with creamy avocado, a fried egg, and sea salt
- Plain with butter: Sometimes the simplest option is the best; serve warm Cuban bread with soft butter
- Dipping bread: Serve alongside soups, stews, or Spanish bean dishes for scooping and flavor
- Crostini base: Slice and toast for appetizers topped with tomatoes, cheese, or cured meats
Variations to Try
- Whole wheat Cuban bread: Replace 25 percent of the all-purpose flour with whole wheat flour for added nuttiness and nutrition. This substitution slightly darkens the crust and adds a subtle earthiness to the crumb.
- Sesame seed crust: Brush the shaped loaves with a water and egg white mixture, then sprinkle with sesame seeds before baking. The seeds toast beautifully and add a pleasant crunch and nutty flavor.
- Herb-infused version: Add 1 tablespoon of dried oregano or Italian seasoning to the dough during mixing. Herbs complement the bread’s delicate flavor without overpowering its traditional character.
- Garlic Cuban bread: Brush the warm loaves with garlic-infused oil immediately after baking for a savory twist. This works beautifully for sandwiches or as a side to hearty soups.
- Shorter, rounder rolls: Divide the dough into 8 to 10 pieces and shape as round rolls instead of long loaves. Reduce baking time to 15 to 18 minutes, perfect for individual servings or slider-style sandwiches.
Dietary Adaptations
- Gluten-free: Substitute a high-quality gluten-free bread flour blend for all-purpose flour, adding 15 milliliters of extra water to compensate for the blend’s different hydration. The crust texture will differ slightly, but the interior remains soft and tender.
- Dairy-free: This recipe contains no dairy, so it’s naturally dairy-free. If adding variations like garlic oil, ensure you use vegetable or olive oil instead of butter.
- Vegan: Skip the optional lard and use vegetable shortening or coconut oil instead. The crumb texture changes slightly, but the bread remains soft and delicious.
- Low-carb or keto: Use an almond flour and psyllium husk blend in place of all-purpose flour, though results will differ significantly from traditional Cuban bread. This adaptation requires experimentation and may not achieve the same crust quality.
Storage and Reheating
Refrigerator
Store cooled Cuban bread in an airtight container or wrapped tightly in plastic wrap for up to 3 days. The crust softens in the refrigerator due to moisture absorption, so this method works best if you plan to toast the bread.
- Keep loaves whole rather than sliced to minimize surface area exposure
- Place a paper towel in the container to absorb excess moisture
Freezer
Wrap cooled loaves tightly in plastic wrap, then place them in a freezer bag for up to 3 months. Frozen Cuban bread thaws quickly and reheats beautifully, making this the best option for long-term storage.
- Freeze whole loaves rather than sliced pieces for better moisture retention
- Label with the date so you remember when you baked it
Reheating
Thaw frozen bread at room temperature for 2 to 3 hours, then refresh it by spritzing lightly with water and baking at 375 degrees Fahrenheit for 8 to 10 minutes. This method restores crispness to the crust and warms the interior without drying it out.
- Toaster oven method: Slice and toast at 400 degrees for 3 to 4 minutes for a quick crunch
- Skillet method: Heat a dry skillet over medium heat and warm sliced bread for 1 to 2 minutes per side
Nutrition Information
| Nutrient | Amount |
|---|---|
| Calories | 165 |
| Total Fat | 1.5 grams |
| Saturated Fat | 0.3 grams |
| Carbohydrates | 33 grams |
| Fiber | 1 gram |
| Sugar | 0.5 grams |
| Protein | 5 grams |
| Sodium | 390 milligrams |
| Cholesterol | 0 milligrams |
These values are approximate and based on standard nutrition databases. The actual nutrition content may vary depending on specific ingredient brands and any optional additions you make to the recipe.
Frequently Asked Questions
Can I make Cuban bread without a baking stone?
Yes, you can use a standard baking sheet, though results won’t be quite as crispy on the bottom. A preheated baking stone mimics professional ovens more closely and gives superior heat distribution, but a sheet pan still produces delicious bread if you increase steam in the oven.
What if my loaves are too dense?
Dense loaves typically result from overproofing (rising too long), insufficient steam, or water that’s too cool. Make sure your water is between 105 and 110 degrees Fahrenheit, watch your rising times carefully, and don’t skip the steam step when baking.
Can I use active dry yeast instead of instant yeast?
Yes, active dry yeast works as a substitute at a 1:1 ratio, though it may take an extra 10 to 15 minutes to complete each rise. Instant yeast has finer particles and activates slightly faster, but active dry yeast produces equally good results with minor timing adjustments.
How do I know when my dough has risen enough?
Use the poke test: gently press your finger into the dough about half an inch deep. If the indent springs back slowly but doesn’t completely disappear, your dough is perfectly proofed and ready for the next step.
Why is my crust not crispy?
A soft crust usually means insufficient steam or low oven temperature. Make sure your oven reaches 450 degrees Fahrenheit before baking and that you’re misting the oven (not the bread) with water at the start and 10-minute mark. A baking stone also helps achieve maximum crispness.
Can I prepare the dough the night before?
Yes, you can do a slow overnight rise in the refrigerator after shaping the loaves. Let the shaped dough rise in the fridge for 12 to 16 hours, then bring it to room temperature for 30 minutes before scoring and baking. Cold fermentation develops deeper flavor and makes the dough easier to handle.
Final Thoughts
Baking Cuban bread at home transforms your kitchen into a neighborhood bakery, filling the air with that incredible aroma of fresh bread and crusty, golden loaves. Once you master this technique, you’ll find yourself reaching for homemade Cuban bread instead of store-bought options every single time.
This recipe rewards patience and attention to detail without demanding advanced baking skills. Give it a try, trust the process, and prepare to impress yourself and everyone around you with bakery-quality bread made in your own kitchen.
If you’re enjoying baking bread at home, explore related recipes to expand your skillset. Try making fry bread for a completely different texture and technique, or discover the cheesy goodness of Brazilian cheese bread for a delicious variation on traditional bread baking. Each recipe brings its own rewards and satisfaction to your kitchen.
Cuban Bread
A traditional Cuban bread with a thin, crispy crust and soft, pillowy interior, made with simple ingredients and steam baking technique.
- Large mixing bowl
- Stand mixer with dough hook or mixing by hand
- Kitchen scale
- Baking stone or baking sheet
- Dutch oven or covered baking vessel (optional)
- Spray bottle
- Bench scraper
- Instant-read thermometer
- Wire rack
Main
- 500 grams all-purpose flour
- 350 milliliters warm water (110°F)
- 2 teaspoons instant yeast
- 10 grams salt
- 1 tablespoon lard or vegetable shortening (optional)
- Combine 500 grams all-purpose flour, 350 milliliters of warm water (110°F), 2 teaspoons of instant yeast, and 10 grams of salt in a large mixing bowl.
- Mix on medium speed in a stand mixer with a dough hook for 8-10 minutes until the dough is smooth and elastic, or knead by hand for 12 minutes.
- Add 1 tablespoon of lard or vegetable shortening if using and knead for 2-3 minutes until fully incorporated.
- Place the dough in a lightly oiled bowl, cover with plastic wrap, and let rise at room temperature until doubled in size, about 1 hour.
- Turn the dough out onto a floured surface and divide into two equal pieces; shape each into a 10-12 inch oval loaf, creating a shallow groove lengthwise.
- Place loaves on a parchment-lined baking sheet, cover loosely with a kitchen towel, and let rise for 30 minutes until slightly puffy.
- Preheat the oven to 450°F (230°C) with a baking stone or sheet inside for at least 15 minutes, and fill a spray bottle with water for steam.
- Score the top of each loaf with 1/4-inch deep diagonal cuts, transfer to the hot baking surface, spray the oven walls with water to create steam, and close the door quickly.
- Bake at 450°F (230°C) for 20-25 minutes, misting the oven with water again at the 10-minute mark, until loaves are deep golden and the internal temperature reaches 205-210°F.
- Transfer the loaves to a wire rack and cool completely for at least 30 minutes before slicing to set the crumb.
Bread can be stored at room temperature in a bread bag for up to 3 days or frozen for up to 3 months; refresh frozen loaves by baking at 375°F for 8-10 minutes after thawing.