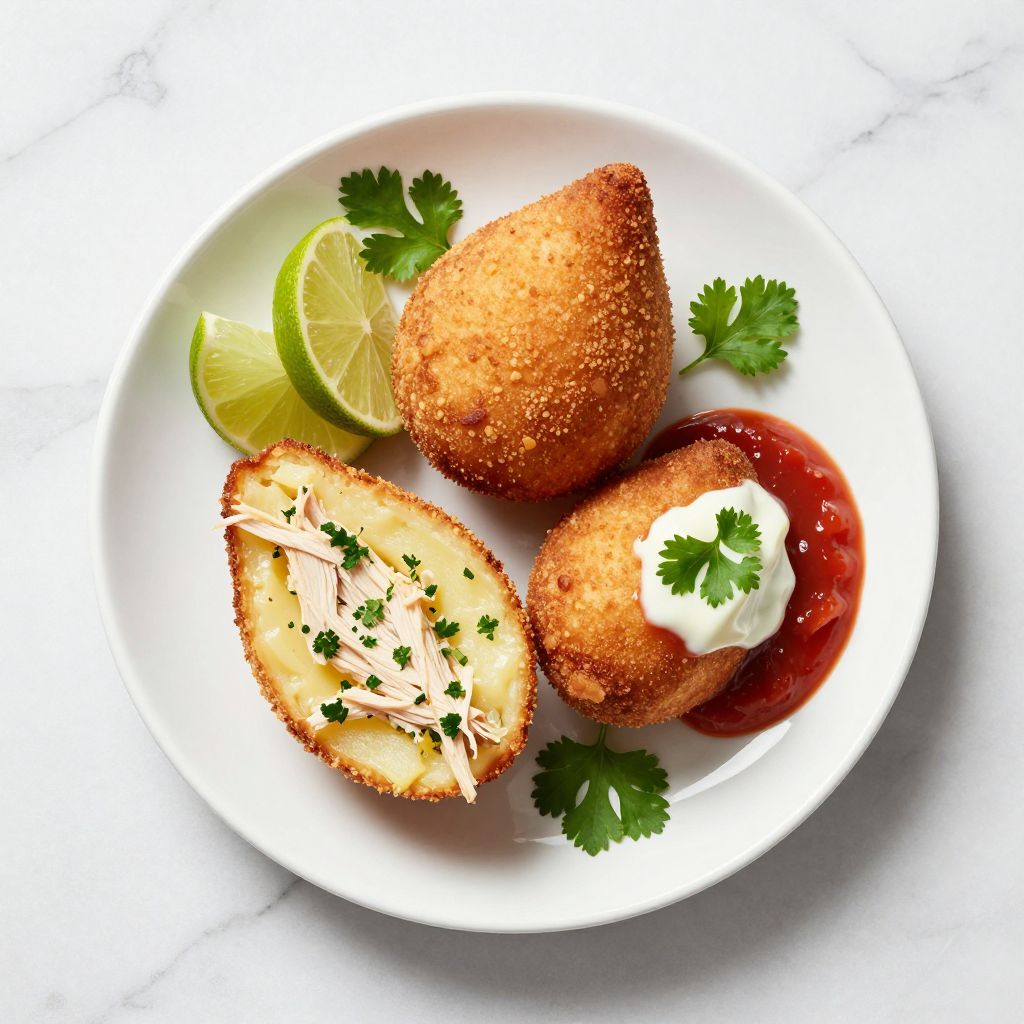
The smell of golden coxinhas frying in hot oil is pure magic, and I still remember the first time I bit into one at a street fair in Brazil and felt the crispy exterior shatter to reveal creamy, savory chicken inside. Coxinha is a beloved Brazilian fried pastry that’s part street food, part party appetizer, and entirely irresistible for anyone who loves comfort food with a crispy edge.
What makes this recipe so special is how simple the filling is to prepare, yet how elegant the finished pastry looks on a plate. The combination of tender shredded chicken, creamy potato-based dough, and that audible crunch when you bite into it makes coxinha a crowd-pleaser that works for casual gatherings or more formal occasions.
Why You’ll Love This Recipe
Coxinha delivers on every level: it’s fun to make, even more fun to eat, and the recipe rewards you with restaurant-quality results in your own kitchen.
- Crispy exterior that shatters when you bite down, with a creamy, savory center
- Comes together faster than you’d expect, especially if you prep components ahead
- Perfect for meal prep, entertaining, or sneaking a few extra into your lunch box
- Flexible enough to customize with different proteins or filling variations
- Freezes beautifully, so you can fry fresh coxinhas whenever the craving hits
My Experience Making This Recipe
The first time I made coxinha at home, I was skeptical about shaping the dough, but a few minutes of practice made it second nature. My hands got sticky, I made a small mess, and I absolutely loved every minute of it.
I fried a batch and my entire kitchen filled with that intoxicating aroma of golden pastry and chicken filling. When I bit into the first one, still steaming hot, I knew I’d nailed it: the dough was light and tender, the filling was flavorful and moist, and the outside was shatteringly crisp.
Now I make coxinhas regularly for potlucks and casual dinners, and they always disappear first from the table. People who’ve never had them before are always amazed that something so impressive came from a home kitchen.
Recipe Overview
- Recipe Name: Brazilian Chicken Coxinha
- Servings: 12 coxinhas (about 4 servings as an appetizer)
- Prep Time: 25 minutes
- Cook Time: 20 minutes
- Total Time: 45 minutes (plus cooling time)
- Course: Appetizer
- Cuisine: Brazilian
- Calories per Serving: 145 calories per coxinha
Equipment You Will Need
- Large pot for boiling potatoes and cooking chicken
- Medium saucepan for making the filling
- Colander for draining potatoes
- Potato ricer or masher
- Large mixing bowl
- Shallow bowls for coating ingredients
- Deep heavy-bottomed pot or Dutch oven for frying
- Candy or deep-fry thermometer
- Slotted spoon or skimmer
- Paper towels for draining fried coxinhas
- Cutting board and knife
- Measuring cups and spoons
Ingredients for Coxinha
For the Dough
- 2 medium potatoes (about 12 ounces), peeled and cubed
- 1 cup chicken broth
- 4 tablespoons butter
- 1 cup all-purpose flour
- 1 egg yolk
- 1 teaspoon salt
- 1/2 teaspoon black pepper
For the Filling
- 2 cups cooked, shredded chicken (about 10 ounces)
- 2 tablespoons butter
- 1/4 cup finely diced onion
- 2 cloves garlic, minced
- 1/4 cup chicken broth
- 1 tablespoon tomato paste
- 1 tablespoon fresh parsley, chopped
- 1/2 teaspoon salt
- 1/4 teaspoon black pepper
For Coating and Frying
- 1 cup all-purpose flour
- 2 eggs
- 1 cup panko breadcrumbs
- Oil for frying (vegetable or canola oil)
Ingredient Notes and Substitutions
- Potatoes: Starchy potatoes absorb liquid better and create a creamier dough texture. You can swap russet potatoes for Yukon golds, though the result will be slightly less fluffy.
- Chicken: Rotisserie chicken saves time and works perfectly here. Leftover cooked chicken from any source works equally well.
- Butter: Dairy-free butter substitute works in both the dough and filling if needed, though it may affect browning slightly.
- Panko breadcrumbs: Regular breadcrumbs create a finer crust; panko gives a lighter, crunchier texture that I prefer for coxinha.
- Egg yolk: Helps bind the dough; you cannot skip this, but you can use a whole egg if that’s what you have on hand.
How to Make Coxinha
Step 1: Cook the Potatoes for the Dough
Place the cubed potatoes in a large pot and cover with cold water by about 2 inches. Bring to a boil over high heat and cook for about 8 to 10 minutes until the potatoes are fork-tender and break apart easily.
Cooking potatoes from cold water ensures they cook evenly throughout, and testing with a fork tells you exactly when they’re done without any guesswork.
Step 2: Drain and Rice the Potatoes
Pour the potatoes into a colander and let all the water drain completely. Pass the hot potatoes through a potato ricer into a large mixing bowl, or mash them thoroughly with a potato masher until smooth and lump-free.
Using a ricer creates a lighter, fluffier dough than mashing, which results in a more tender finished coxinha. If you don’t have a ricer, a masher works fine as long as you break down all the lumps.
Step 3: Make the Dough
While the potatoes are still hot, add the chicken broth, butter, flour, and egg yolk to the bowl. Mix everything together with a wooden spoon or your hands until a soft dough forms, then season with salt and pepper.
The warmth of the potatoes helps the flour hydrate evenly and makes the dough easier to work with. Do not overmix or the dough becomes tough; stir just until no dry flour remains.
Step 4: Let the Dough Cool
Spread the dough on a plate or baking sheet and refrigerate for at least 15 minutes until it’s cool enough to handle. This cooling step makes shaping much easier and prevents your hands from burning.
You can prepare the filling while the dough cools to save time, so you’re ready to shape coxinhas as soon as the dough is ready.
Step 5: Prepare the Filling
Heat 2 tablespoons of butter in a medium saucepan over medium heat and add the diced onion. Saute for about 3 minutes until the onion is soft and starting to turn translucent, then add the garlic and cook for another 30 seconds until fragrant.
Building flavor from aromatics first is essential; sauteing onion and garlic separately from the chicken prevents the filling from being one-note.
Step 6: Finish the Filling
Add the shredded chicken, tomato paste, chicken broth, parsley, salt, and pepper to the pan with the onion and garlic. Stir well and simmer for about 5 minutes until the filling is thick and most of the liquid has reduced.
The filling should be moist but not wet; if too much liquid remains, the coxinha will break apart when you fry it. Taste the filling and adjust seasoning as needed before using.
Step 7: Shape the Coxinhas
Spread some flour on a work surface to prevent sticking. Wet your hands slightly (this prevents the dough from sticking to your fingers), take about 2 tablespoons of dough, and flatten it into a small disc in your palm.
Place about 1 teaspoon of the cooled filling in the center of the dough disc. Gently fold the edges up around the filling and pinch them together at the top to form a closed teardrop or cone shape, then smooth the seams with damp fingers.
Step 8: Set Up Your Breading Station
Place the flour in one shallow bowl, the beaten eggs in another, and the panko breadcrumbs in a third. Line up these bowls in order from left to right for efficient breading.
Having everything organized before you start coating makes the process fast and keeps your workspace from becoming a total mess of egg and crumbs.
Step 9: Coat the Coxinhas
Working with one coxinha at a time, roll it lightly in flour, then dip it into the beaten egg, allowing excess to drip off. Finally, roll it in panko breadcrumbs until completely covered, pressing gently so the coating adheres.
The flour layer helps the egg stick to the dough, and the egg helps the breadcrumbs stick; this three-part coating creates the shatteringly crisp crust you’re after.
Step 10: Heat Your Oil
Fill your deep pot with oil to a depth of about 3 to 4 inches and heat it to 350 degrees Fahrenheit, using a thermometer to check the temperature. Once the oil reaches the target temperature, carefully slide 3 to 4 coxinhas into the hot oil (don’t crowd the pot).
The correct oil temperature is critical: too cool and the coxinha absorbs oil and becomes greasy; too hot and the outside burns before the inside cooks through. Use a thermometer rather than guessing by sight.
Step 11: Fry Until Golden Brown
Fry the coxinhas for about 2 to 3 minutes, turning them occasionally with a slotted spoon, until the coating is deep golden brown all over. Remove them with the slotted spoon and place on a paper towel-lined plate to drain excess oil.
The coxinhas will continue to cook slightly from residual heat after frying, so remove them when they’re just past light golden to avoid over-cooking.
Step 12: Rest and Serve
Allow the coxinhas to cool for about 2 to 3 minutes before eating, as the filling will be extremely hot straight from the fryer. Serve warm with your choice of dipping sauces.
This short resting period prevents burned mouths and allows the exterior to firm up slightly, making each coxinha less likely to fall apart when you pick it up.
Pro Tip: Keep your oil at a steady 350 degrees by frying in small batches and allowing the temperature to recover between batches; this prevents your coxinhas from turning out greasy or unevenly cooked.
Tips for the Best Coxinha
- Make sure your dough is completely cool before shaping; warm dough is sticky and difficult to work with, and it may break apart in the oil.
- Don’t skip the potato ricer if you have one; it creates a noticeably lighter and fluffier dough than mashing alone.
- Keep the filling thick and relatively dry; wet filling leaks out during frying and creates a greasy, broken coxinha.
- Use a thermometer to monitor your oil temperature, and don’t try to fry too many coxinhas at once; small batches maintain consistent temperature and produce evenly cooked results.
- Wet your hands slightly when shaping to prevent the dough from sticking to your fingers, but don’t oversaturate them or the dough becomes difficult to handle.
- Panko breadcrumbs create a lighter crust than regular breadcrumbs; if you prefer a thinner, more delicate coating, use regular breadcrumbs instead.
Common Mistakes to Avoid
- Shaping warm dough: Dough that hasn’t cooled properly is sticky and tears easily, resulting in filling leaking into the oil during frying and a messy, broken coxinha.
- Overfilling the dough: Using too much filling makes it nearly impossible to seal the coxinha properly, and filling bursts out during cooking.
- Oil temperature that’s too low: Coxinhas fried in oil below 350 degrees absorb excess oil and taste greasy rather than crispy.
- Skipping the three-step coating: Leaving out the flour or egg step results in breadcrumbs that don’t adhere properly and fall off during frying.
- Overcrowding the frying pot: Too many coxinhas in the oil at once drops the temperature and prevents even browning, leaving you with unevenly cooked results.
Serving Suggestions
Coxinhas are best served hot or warm, straight from the fryer, with a cooling dipping sauce on the side to balance the richness. They work beautifully as a party appetizer, a casual lunch, or even a simple dinner with a salad on the side.
- Serve with hot sauce or sriracha for a spicy kick that cuts through the richness
- Pair with a cooling cilantro-lime crema or sour cream-based dip
- Accompany with a simple tomato-based sauce for dipping
- Serve alongside fresh lime wedges and a squeeze of lime juice before eating
- Offer with a cold beverage like Brazilian lemonade or a light beer to balance the fried richness
Variations to Try
- Shrimp coxinha: Replace the chicken with cooked, finely chopped shrimp and add a pinch of paprika and lemon zest to the filling for a seafood twist that’s lighter and more delicate.
- Cheese and ham coxinha: Mix shredded cheddar or mozzarella with diced ham in the filling to create a savory, cheese-forward version that’s equally delicious.
- Spicy coxinha: Add diced jalapenos, a pinch of cayenne pepper, or hot sauce to the filling for a version with serious heat that pairs well with cool sour cream.
- Vegetarian coxinha: Replace the chicken with sauteed mushrooms, corn, or black beans mixed with fresh cilantro and lime juice for a meatless option that’s still satisfying.
- Cream cheese and herb coxinha: Mix cream cheese with fresh herbs like parsley, dill, and chives in the filling for a richer, more indulgent flavor profile.
Dietary Adaptations
- Gluten-free: Substitute all-purpose flour with a one-to-one gluten-free flour blend in the dough and use gluten-free breadcrumbs for coating; the texture will be nearly identical, though slightly more delicate.
- Dairy-free: Replace butter with dairy-free butter or coconut oil in the dough and filling; the coxinha will still be crispy and delicious, though slightly less rich.
- Vegan: Use dairy-free butter, replace the egg yolk in the dough with 1 tablespoon of aquafaba (chickpea liquid), and use a vegan egg replacer for coating; the filling works perfectly as-is with plant-based chicken substitute.
- Low-carb or keto: Replace potatoes in the dough with riced cauliflower and use almond flour instead of wheat flour; the texture will be different but still enjoyable for those avoiding carbs.
Storage and Reheating
Refrigerator
Store cooled coxinhas in an airtight container in the refrigerator for up to 4 days. They taste best eaten fresh, but refrigerated coxinhas can be reheated successfully.
- Place in a 350-degree oven for about 8 to 10 minutes to restore crispness
- Reheat in an air fryer at 350 degrees for about 5 to 6 minutes for the crispiest results
- Avoid microwaving, which makes the coating soggy and unappealing
Freezer
Uncooked coxinhas freeze beautifully and can be stored for up to 3 months. Freeze them on a baking sheet in a single layer until solid, then transfer to a freezer bag to save space.
- Fry frozen coxinhas directly from the freezer, adding about 1 to 2 minutes to the frying time
- No need to thaw; they fry perfectly from frozen and develop the same golden, crispy crust
- Cooked coxinhas also freeze well for up to 2 months; thaw in the refrigerator overnight and reheat in the oven
Reheating
The oven and air fryer are your best options for restoring crispness to refrigerated coxinhas. Microwave reheating creates a soggy, unpleasant texture, so avoid that method.
- Oven method: bake at 350 degrees for 8 to 10 minutes until heated through and crispy
- Air fryer method: reheat at 350 degrees for 5 to 6 minutes for the crispiest texture
- Do not microwave; it makes the exterior soggy and unappealing
Brazilian Chicken Coxinha

Coxinha is a beloved Brazilian fried pastry with a crispy exterior and creamy, savory chicken filling. This street food favorite features tender shredded chicken wrapped in a light potato-based dough, coated in panko breadcrumbs, and fried until golden brown.
- Large pot for boiling potatoes and cooking chicken
- Medium saucepan for making the filling
- Colander for draining potatoes
- Potato ricer or masher
- Large mixing bowl
- Shallow bowls for coating ingredients
- Deep heavy-bottomed pot or Dutch oven for frying
- Candy or deep-fry thermometer
- Slotted spoon or skimmer
- Paper towels for draining fried coxinhas
- Cutting board and knife
- Measuring cups and spoons
For the Dough
- 2 medium potatoes (about 12 ounces, peeled and cubed)
- 1 cup chicken broth
- 4 tablespoons butter
- 1 cup all-purpose flour
- 1 egg yolk
- 1 teaspoon salt
- 1/2 teaspoon black pepper
For the Filling
- 2 cups cooked (shredded chicken (about 10 ounces))
- 2 tablespoons butter
- 1/4 cup finely diced onion
- 2 cloves garlic (minced)
- 1/4 cup chicken broth
- 1 tablespoon tomato paste
- 1 tablespoon fresh parsley (chopped)
- 1/2 teaspoon salt
- 1/4 teaspoon black pepper
For Coating and Frying
- 1 cup all-purpose flour
- 2 eggs
- 1 cup panko breadcrumbs
- Oil for frying (vegetable or canola oil)
- Place the cubed potatoes in a large pot and cover with cold water by about 2 inches. Bring to a boil over high heat and cook for about 8 to 10 minutes until the potatoes are fork-tender and break apart easily.
- Pour the potatoes into a colander and let all the water drain completely. Pass the hot potatoes through a potato ricer into a large mixing bowl, or mash them thoroughly with a potato masher until smooth and lump-free.
- While the potatoes are still hot, add the chicken broth, butter, flour, and egg yolk to the bowl. Mix everything together with a wooden spoon or your hands until a soft dough forms, then season with salt and pepper.
- Spread the dough on a plate or baking sheet and refrigerate for at least 15 minutes until it’s cool enough to handle.
- Heat 2 tablespoons of butter in a medium saucepan over medium heat and add the diced onion. Saute for about 3 minutes until the onion is soft and starting to turn translucent, then add the garlic and cook for another 30 seconds until fragrant.
- Add the shredded chicken, tomato paste, chicken broth, parsley, salt, and pepper to the pan with the onion and garlic. Stir well and simmer for about 5 minutes until the filling is thick and most of the liquid has reduced. Let cool.
- Spread some flour on a work surface to prevent sticking. Wet your hands slightly, take about 2 tablespoons of dough, and flatten it into a small disc in your palm.
- Place about 1 teaspoon of the cooled filling in the center of the dough disc. Gently fold the edges up around the filling and pinch them together at the top to form a closed teardrop or cone shape, then smooth the seams with damp fingers. Repeat with remaining dough and filling.
- Place the flour in one shallow bowl, the beaten eggs in another, and the panko breadcrumbs in a third. Line up these bowls in order from left to right for efficient breading.
- Working with one coxinha at a time, roll it lightly in flour, then dip it into the beaten egg, allowing excess to drip off. Finally, roll it in panko breadcrumbs until completely covered, pressing gently so the coating adheres.
- Fill your deep pot with oil to a depth of about 3 to 4 inches and heat it to 350 degrees Fahrenheit, using a thermometer to check the temperature.
- Once the oil reaches the target temperature, carefully slide 3 to 4 coxinhas into the hot oil. Fry for about 2 to 3 minutes, turning them occasionally with a slotted spoon, until the coating is deep golden brown all over.
- Remove them with the slotted spoon and place on a paper towel-lined plate to drain excess oil. Repeat with remaining coxinhas.
- Allow the coxinhas to cool for about 2 to 3 minutes before eating. Serve warm with your choice of dipping sauces.
Keep your oil at a steady 350 degrees by frying in small batches and allowing the temperature to recover between batches. Make sure your dough is completely cool before shaping; warm dough is sticky and difficult to work with. Keep the filling thick and relatively dry; wet filling leaks out during frying. Uncooked coxinhas freeze beautifully for up to 3 months. Fry frozen coxinhas directly from the freezer, adding about 1 to 2 minutes to the frying time.