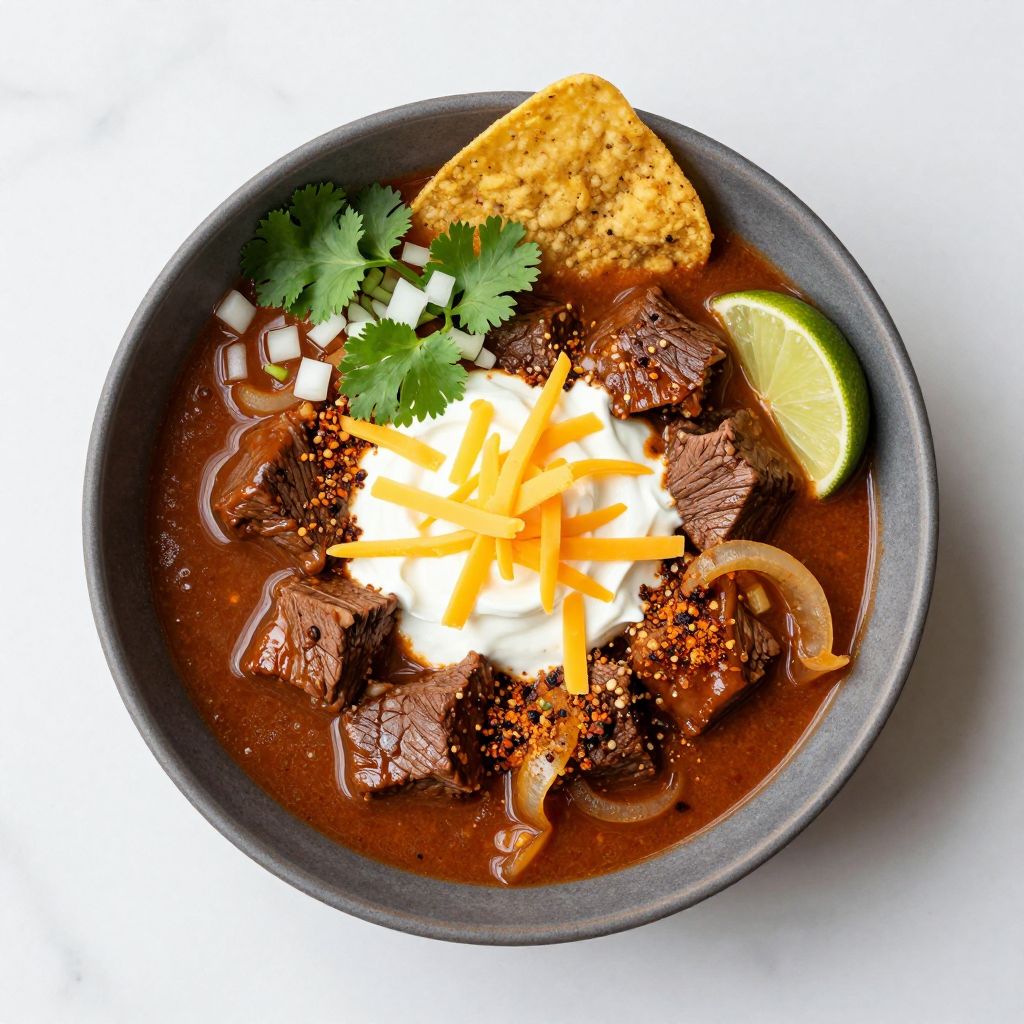
There’s something about a big pot of chili simmering on the stove that makes you feel like you’ve got life figured out, even if just for an evening. Cowboy chili captures that rustic, no-nonsense spirit with hearty beef, bold spices, and just enough heat to keep things interesting without burning your mouth.
This recipe strips away the beans and tomato sauce purists argue about and delivers what a real cowboy would actually eat around a campfire: tender chunks of beef, earthy spices, and a deep, savory flavor that builds with every spoonful. It’s the kind of dish that tastes even better the next day, feeds a crowd without fussing, and works equally well for game day or a quiet weeknight dinner.
Why You’ll Love This Recipe
This cowboy chili delivers serious flavor with minimal stress.
- Hands-off cooking once everything hits the pot, freeing you to handle other tasks or just relax.
- Develops deeper, richer flavors with each hour it simmers, rewarding patience.
- Incredibly forgiving and adaptable, so you can swap ingredients without ruining anything.
- Costs less than takeout and feeds way more people.
- Tastes noticeably better on day two, making it perfect for meal prep.
My Experience Making This Recipe
I first made cowboy chili on a chilly October afternoon when I had beef chuck staring at me from the fridge and three hours of open time. I decided to ignore my usual quick-dinner instincts and commit to the slow simmer, and it was exactly the right call.
The aroma that filled my kitchen by hour two was intoxicating: cumin, chili powder, and caramelized beef creating this warm, inviting scent that had everyone asking what I was cooking. My partner actually paused what he was doing just to hover near the stove, which never happens.
When we finally sat down to eat, the beef was so tender it fell apart with a spoon, and the broth had transformed into something complex and deeply satisfying. The next day’s batch was even better, so I always make double now.
Recipe Overview
- Recipe Name: Cowboy Chili
- Servings: 8 to 10
- Prep Time: 20 minutes
- Cook Time: 2 hours 30 minutes
- Total Time: 2 hours 50 minutes
- Course: Main Course
- Cuisine: American, Tex-Mex
- Calories per Serving: 340
Equipment You Will Need
- Large heavy-bottomed pot or Dutch oven (at least 6 quarts)
- Cutting board
- Sharp chef’s knife
- Wooden spoon for stirring
- Measuring cups and spoons
- Small bowl for spice blending
- Tongs for browning meat
- Paper towels
Ingredients for Cowboy Chili
- 4 pounds beef chuck roast, cut into 1-inch cubes
- 3 tablespoons vegetable oil, divided
- 2 large yellow onions, diced
- 6 cloves garlic, minced
- 4 tablespoons chili powder
- 2 tablespoons ground cumin
- 1 tablespoon smoked paprika
- 1 teaspoon cayenne pepper
- 1 teaspoon black pepper
- 2 teaspoons salt, plus more to taste
- 4 cups beef broth
- 1 cup water
- 2 tablespoons tomato paste
- 1 tablespoon Worcestershire sauce
- 1 teaspoon hot sauce (optional, for extra kick)
Ingredient Notes and Substitutions
- Beef chuck roast: This cut has just enough fat and connective tissue to become incredibly tender during long cooking, creating a naturally rich broth. If unavailable, beef stew meat works in a pinch, though you’ll miss some of that deep, marbled flavor.
- Chili powder: Look for pure chili powder, not a pre-mixed chili seasoning blend, which contains salt and fillers. You can substitute with 3 tablespoons of ancho chili powder for a smoother, less spicy result.
- Smoked paprika: This adds subtle smokiness that evokes a campfire feeling. Regular paprika works if that’s what you have, but the dish loses some character.
- Beef broth: Quality broth makes a real difference here since it’s a main flavor driver. Homemade stock is ideal, but a good low-sodium store brand beats bouillon cubes.
- Tomato paste: This deepens umami and adds slight acidity to balance richness. If you only have canned tomatoes, drain them and use about 1/4 cup puree.
How to Make Cowboy Chili
Step 1: Prep Your Beef and Season It
Cut your beef chuck roast into 1-inch cubes, trimming away any excess surface fat but leaving the interior marbling intact. In a small bowl, combine the chili powder, cumin, smoked paprika, cayenne, black pepper, and salt, then set this spice blend aside so you can grab it quickly once the meat starts browning.
Step 2: Brown the Beef in Batches
Heat 1.5 tablespoons of oil in your large pot over medium-high heat until it shimmers, then add half the beef in a single layer and leave it alone for 3 to 4 minutes. Stir and cook for another 2 to 3 minutes until the meat develops a deep brown crust, which locks in flavor and creates a richer broth.
Transfer the browned beef to a plate, add the remaining oil and beef, and repeat the process. Browning in batches prevents overcrowding, which would steam the meat instead of searing it.
Step 3: Sauté the Aromatics
Return all the browned beef to the pot, then add your diced onions and cook for 4 to 5 minutes, stirring occasionally, until the onions start to soften and pick up some color from the pot. Add the minced garlic and stir constantly for about 1 minute until fragrant, which wakes up the garlic’s flavor without letting it burn.
Step 4: Bloom Your Spices
Pour your prepared spice blend over the beef and onions, then stir constantly for 1 to 2 minutes. This step, called blooming, toasts the spices and releases their essential oils, transforming them from powders into deeply flavored components that coat every piece of meat.
Step 5: Add the Tomato Paste and Worcestershire
Stir in the tomato paste and Worcestershire sauce, mixing well so everything is evenly combined. Cook for another 1 to 2 minutes, allowing the tomato paste to caramelize slightly against the hot pot, which adds subtle sweetness and complexity.
Step 6: Deglaze and Add Liquid
Pour in the beef broth and water, scraping the bottom of the pot with your wooden spoon to release all the flavorful browned bits stuck there. This step, called deglazing, ensures every bit of that concentrated flavor dissolves into your broth rather than staying stuck on the pot.
Step 7: Bring to a Simmer
Increase heat to medium-high and bring the chili to a boil, then immediately reduce heat to low. You want a gentle simmer where small bubbles occasionally break the surface, not a rolling boil that will toughen the meat and cause excess evaporation.
Step 8: Let It Cook Low and Slow
Cover the pot loosely with a lid and let it simmer for 2 to 2.5 hours, stirring occasionally. The beef will transform from tough cubes into tender morsels, and the broth will deepen from a thin liquid into something rich and coating.
Step 9: Adjust Seasoning and Optional Heat
After 2 hours, taste your chili and adjust the salt and pepper as needed. If you want extra heat, stir in 1 teaspoon of hot sauce and let it incorporate for another minute, tasting as you go to hit your preferred level of spice.
Pro Tip: Make cowboy chili a day ahead and refrigerate it overnight; the flavors meld and deepen significantly, and the fat solidifies on top for easy removal if you prefer a leaner bowl.
Tips for the Best Cowboy Chili
- Don’t skip the browning step. Those crusty, caramelized bits on the beef create depth of flavor that simmering alone can never achieve.
- Use a heavy-bottomed pot to distribute heat evenly and prevent hot spots that could scorch the bottom while the sides stay thin.
- Stir occasionally but not constantly; constant stirring can break down the beef into shreds instead of keeping it in chunks.
- Keep the heat low and steady. A rapid boil toughens the meat and causes too much liquid to evaporate, leaving you with less sauce than you want.
- Taste and adjust seasoning in the last 15 minutes, not earlier, since flavors concentrate as the chili reduces.
- Add hot sauce drop by drop near the end rather than dumping it in, so you can dial in exactly the heat level you want.
Common Mistakes to Avoid
- Skipping the browning step: Jumping straight to simmering gives you beef stew, not chili, with pale, boiled-tasting meat instead of complex, caramelized flavor.
- Crowding the pan while browning: Too much meat at once releases steam and cooks the beef instead of searing it, so brown in batches and be patient.
- Cooking at too high a temperature: A rolling boil toughens the beef and evaporates your liquid too quickly, leaving you with less sauce and drier chunks of meat.
- Adding salt too early: Salt draws moisture out of the beef at the start of cooking; add most of your salt near the end when you can taste the final result.
- Using pre-mixed chili seasoning: These blends contain salt, fillers, and inconsistent spice ratios that muddy the flavor compared to mixing your own fresh spices.
Serving Suggestions
Serve your cowboy chili in bowls with toppings on the side so everyone can customize their own. A simple garnish of diced white onion and fresh cilantro brightens each spoonful, while sour cream and sharp cheddar add richness.
- Cornbread or jalapeño cheddar cornbread for mopping up every bit of broth
- Crispy tortilla chips with a squeeze of lime and a sprinkle of cotija cheese
- Over baked potatoes or rice for a heartier, more filling meal
- Alongside a cold pale ale or amber beer that cuts through the richness
- With a simple green salad dressed in lime vinaigrette to balance the heavy spices
Variations to Try
- Texas Red Chili: Omit the tomato paste entirely and use 6 dried red chiles soaked and pureed into the broth, creating a cleaner, less tomatoey flavor that purists prefer.
- Spicy Cowboy Chili: Add 2 teaspoons of cayenne instead of 1, plus 1 diced jalapeno, for a chili that builds heat with each bite and lingers pleasantly on your lips.
- Smoky Whiskey Chili: Deglaze the pot with 1/4 cup bourbon whiskey before adding the broth, which adds subtle oak and caramel notes that complement the beef.
- Brown Chili with Mushrooms: Replace 1 pound of beef with 1 pound of cremini mushrooms, which adds umami depth and creates a more vegetable-forward version that’s less heavy.
- Cowboy Chili with Beans: Add 2 cans of kidney beans in the last 20 minutes of cooking if you want heartier, more filling bowls despite purist protests.
Dietary Adaptations
- Gluten-free: This recipe is naturally gluten-free as written; just verify your beef broth and Worcestershire sauce labels, since some brands contain hidden gluten.
- Dairy-free: Serve without sour cream and cheese toppings, or use dairy-free alternatives like cashew cream and nutritional yeast for similar richness and tang.
- Vegan or vegetarian: Replace the beef with 4 pounds of cubed portobello mushrooms or extra-firm tofu, browning each in oil the same way to build a savory, meaty flavor.
- Low-carb or keto: This chili is already low in carbs and high in protein; skip any cornbread sides and serve in bowls topped with cheese and sour cream instead.
Storage and Reheating
Refrigerator
Cool your chili completely before transferring it to airtight containers, where it will keep for up to 4 days. The flavor actually improves over this time as spices continue to infuse the broth and beef.
- Store in a shallow container so it cools faster and takes up less fridge space
- If a layer of fat solidifies on top, you can remove it for a leaner version or leave it for richer flavor
Freezer
Cowboy chili freezes beautifully for up to 3 months in freezer bags or airtight containers. Leave about 1 inch of headspace in containers since the chili expands slightly as it freezes.
- Flat freezer bags lay stack efficiently and thaw faster than containers
- Portion it into individual servings for grab-and-go lunches throughout the month
Reheating
Thaw frozen chili overnight in the refrigerator, then reheat gently on the stovetop over medium-low heat, stirring occasionally, until warmed through. You can also reheat directly from frozen on the stovetop over low heat for 20 to 30 minutes, stirring often.
- Add a splash of water or broth if the chili seems too thick after storage
- Avoid the microwave, which heats unevenly and can toughen the beef
Nutrition Information
| Nutrient | Amount |
|---|---|
| Calories | 340 |
| Total Fat | 18g |
| Saturated Fat | 7g |
| Carbohydrates | 8g |
| Fiber | 2g |
| Sugar | 3g |
| Protein | 38g |
| Sodium | 950mg |
| Cholesterol | 110mg |
Frequently Asked Questions
Can I make cowboy chili in a slow cooker?
Yes, brown the beef and sauté the onions and garlic on the stovetop as described, then transfer everything to a slow cooker with the remaining ingredients. Cook on low for 6 to 8 hours or on high for 3 to 4 hours until the beef is completely tender.
How much ahead can I prepare this?
You can chop the beef, onions, and garlic up to one day ahead and store them separately in the fridge. The actual cooking process takes about 3 hours from start to finish, but most of that is hands-off simmering time.
What if my chili is too thin?
Let it simmer uncovered for another 20 to 30 minutes to reduce the liquid, or mix 2 tablespoons of cornstarch with 3 tablespoons of cold water and stir it in slowly while simmering. The cornstarch method gives you a thicker broth in just a few minutes.
Why is my beef still tough after 2.5 hours?
Tough beef usually means the heat was too high, causing the meat to seize up, or your pot lacks a tight-fitting lid, allowing liquid to evaporate and the beef to dry out. Check that you’re simmering gently and that your lid fits snugly.
Can I use a different cut of beef?
Beef chuck is ideal for chili because of its fat and connective tissue, but brisket, short ribs, or even ground beef work in different ways. Ground beef cooks much faster (30 minutes instead of 2.5 hours) but gives you a different texture and richness profile.
Is this recipe spicy enough for heat lovers?
Start with the amount called for and taste at the end; you can always add more hot
Cowboy Chili

This cowboy chili captures that rustic, no-nonsense spirit with hearty beef, bold spices, and just enough heat to keep things interesting. It delivers tender chunks of beef, earthy spices, and a deep, savory flavor that builds with every spoonful and tastes even better the next day.
- Large heavy-bottomed pot or Dutch oven (at least 6 quarts)
- Cutting board
- Sharp chef’s knife
- Wooden spoon for stirring
- Measuring cups and spoons
- Small bowl for spice blending
- Tongs for browning meat
- Paper towels
Main
- 4 pounds beef chuck roast (cut into 1-inch cubes)
- 3 tablespoons vegetable oil (divided)
- 2 large yellow onions (diced)
- 6 cloves garlic (minced)
- 4 tablespoons chili powder
- 2 tablespoons ground cumin
- 1 tablespoon smoked paprika
- 1 teaspoon cayenne pepper
- 1 teaspoon black pepper
- 2 teaspoons salt (plus more to taste)
- 4 cups beef broth
- 1 cup water
- 2 tablespoons tomato paste
- 1 tablespoon Worcestershire sauce
- 1 teaspoon hot sauce (optional, for extra kick)
- Cut your beef chuck roast into 1-inch cubes, trimming away any excess surface fat but leaving the interior marbling intact. In a small bowl, combine the chili powder, cumin, smoked paprika, cayenne, black pepper, and salt, then set this spice blend aside.
- Heat 1.5 tablespoons of oil in your large pot over medium-high heat until it shimmers, then add half the beef in a single layer and leave it alone for 3 to 4 minutes. Stir and cook for another 2 to 3 minutes until the meat develops a deep brown crust. Transfer the browned beef to a plate, add the remaining oil and beef, and repeat the process.
- Return all the browned beef to the pot, then add your diced onions and cook for 4 to 5 minutes, stirring occasionally, until the onions start to soften and pick up some color from the pot. Add the minced garlic and stir constantly for about 1 minute until fragrant.
- Pour your prepared spice blend over the beef and onions, then stir constantly for 1 to 2 minutes to bloom the spices and release their essential oils.
- Stir in the tomato paste and Worcestershire sauce, mixing well so everything is evenly combined. Cook for another 1 to 2 minutes, allowing the tomato paste to caramelize slightly against the hot pot.
- Pour in the beef broth and water, scraping the bottom of the pot with your wooden spoon to release all the flavorful browned bits stuck there.
- Increase heat to medium-high and bring the chili to a boil, then immediately reduce heat to low. You want a gentle simmer where small bubbles occasionally break the surface.
- Cover the pot loosely with a lid and let it simmer for 2 to 2.5 hours, stirring occasionally. The beef will transform from tough cubes into tender morsels, and the broth will deepen into something rich and coating.
- After 2 hours, taste your chili and adjust the salt and pepper as needed. If you want extra heat, stir in 1 teaspoon of hot sauce and let it incorporate for another minute.
Make cowboy chili a day ahead and refrigerate it overnight; the flavors meld and deepen significantly, and the fat solidifies on top for easy removal if you prefer a leaner bowl. Don’t skip the browning step as those crusty, caramelized bits on the beef create depth of flavor that simmering alone can never achieve. Keep the heat low and steady throughout the simmering process.