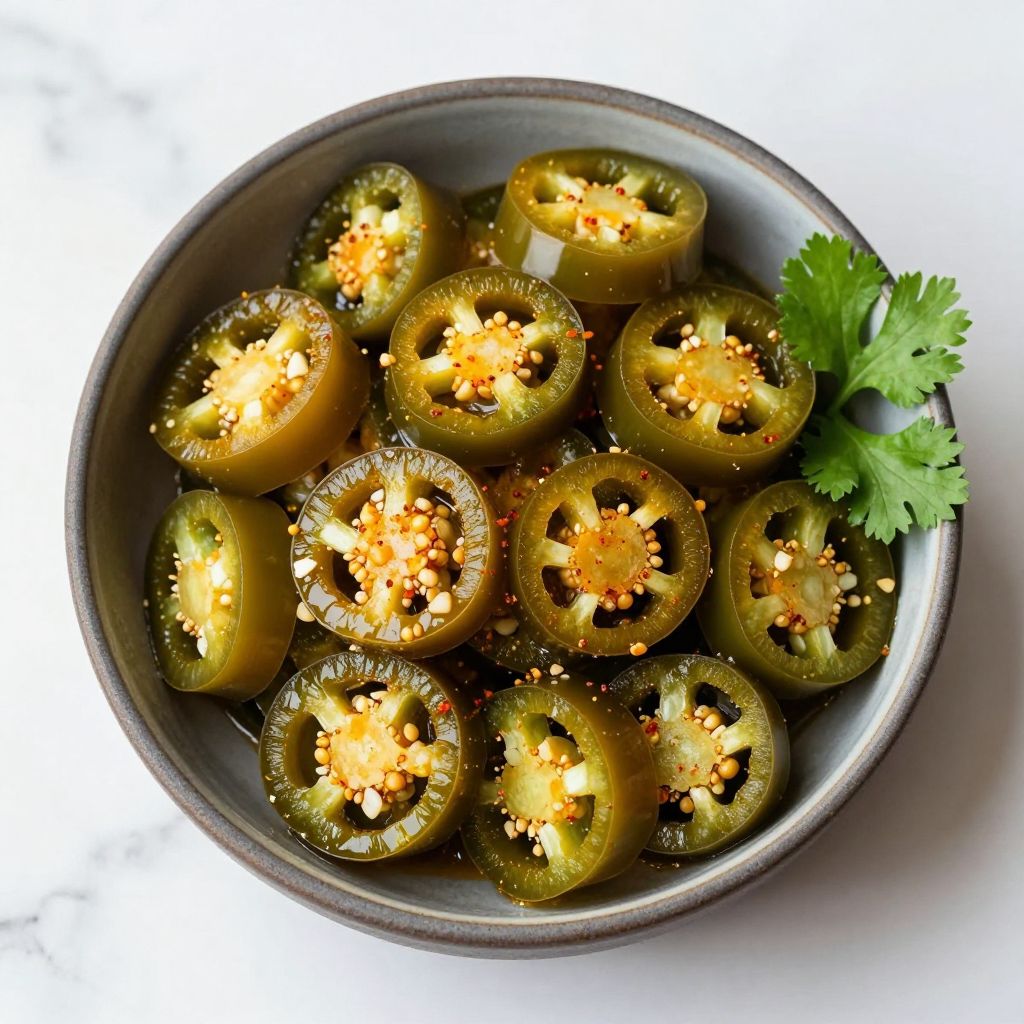
Cowboy candy transforms ordinary jalapeños into sticky, sweet, fiery slices that belong on everything from cream cheese crackers to grilled burgers. This candied jalapeño recipe takes about an hour of hands-on time and rewards you with jars of addictive heat that keep for months. Once you make your first batch, you will wonder why you ever bought the store version.
What Makes This Recipe Worth Your Time
Cowboy candy delivers a flavor punch that no store-bought condiment can match. The balance of sweet, tangy, and spicy hits all the right notes while giving you complete control over the heat level.
- Versatility that works across breakfast, lunch, dinner, and snacks without missing a beat
- Shelf stability lasting up to a year when properly canned, making it perfect for gifting or pantry stocking
- Cost savings of roughly 70% compared to premium jarred versions at specialty stores
- Customizable heat based on the peppers you choose and whether you include the seeds
- Impressive presentation that looks like you spent hours in the kitchen when the process is surprisingly straightforward
A Little Background on This Dish
Cowboy candy originated in the American South and Southwest, where home canning traditions run deep and jalapeños grow abundantly. Ranch cooks discovered that simmering peppers in a spiced sugar syrup created a preserve that could last through long winters without refrigeration.
The name likely comes from the treat’s popularity among cowboys and ranchers who appreciated something with kick that traveled well. Today, cowboy candy has become a farmers market staple and a beloved homemade gift during the holiday season.
My Experience With This Recipe
I started making cowboy candy after receiving a jar from a neighbor and becoming completely hooked. My first attempt resulted in peppers so soft they turned into mush because I let them simmer far too long.
The breakthrough came when I realized the peppers continue cooking in the hot syrup even after you remove the pot from heat. I had been treating them like jam fruit instead of respecting their delicate texture, and my early batches looked more like relish than the glossy coin-shaped slices I wanted.
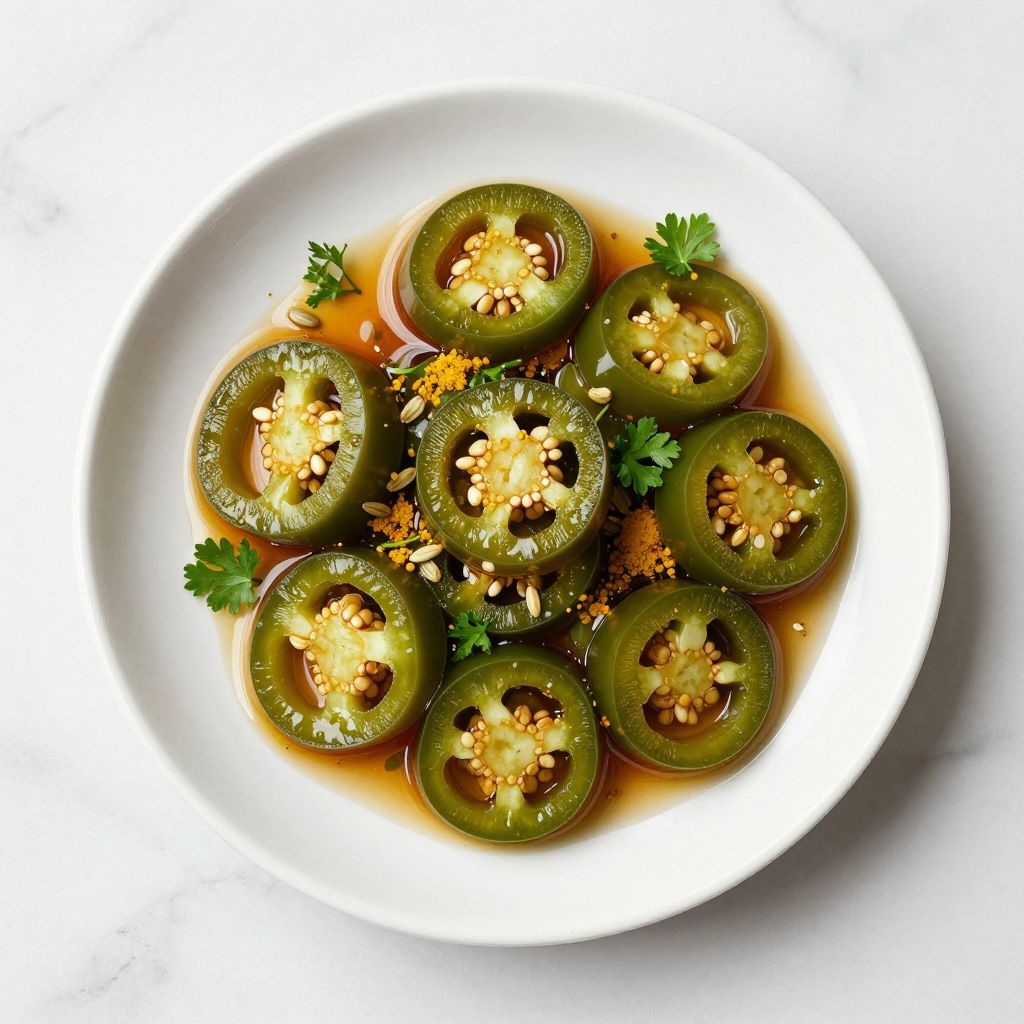
The first successful batch disappeared in two weeks between my family loading it onto burgers and me standing at the fridge eating slices straight from the jar with a fork. That deep amber syrup coating each perfect round told me I had finally cracked it.
Before You Start: Key Things to Know
This recipe suits confident beginners and experienced canners alike. The biggest challenge is managing the heat from slicing two pounds of jalapeños without burning your skin or eyes.
- Difficulty level: Intermediate, requiring basic knife skills and comfort with hot liquids
- Active time vs passive time: 45 minutes of hands-on work plus 15 minutes of simmering and cooling periods
- Most important equipment: A wide, heavy-bottomed pot that allows peppers to cook in a single layer
- Step requiring most attention: The simmer time, which determines whether you get crisp-tender slices or mushy rounds
Recipe at a Glance
- Recipe Name: Cowboy Candy (Candied Jalapeños)
- Yield: 4 half-pint jars (approximately 32 ounces)
- Prep Time: 30 minutes
- Cook Time: 25 minutes
- Total Time: 55 minutes plus cooling
- Resting Time: 2 weeks for optimal flavor development
- Difficulty: Intermediate
- Course: Condiment, Preserve
- Cuisine: American Southern, Tex-Mex
- Calories per Serving: 45 per 2 tablespoon serving
How to Source the Best Ingredients
Ingredient quality directly determines whether your cowboy candy tastes bright and complex or flat and one-dimensional. Fresh peppers with tight skin and a good vinegar make all the difference.
- Jalapeños: Choose firm peppers with smooth, glossy skin and no wrinkles or soft spots; slight striations or “corking” indicate mature heat
- Apple cider vinegar: Select raw, unfiltered vinegar with visible sediment for the most complex tangy flavor
- Granulated sugar: Standard white cane sugar works best; avoid organic sugars with larger crystals that dissolve unevenly
- Garlic: Fresh garlic cloves add depth that granulated garlic cannot replicate; look for firm heads with no green sprouts
Ingredients for Cowboy Candy
For the Peppers
- 2 pounds fresh jalapeño peppers, sliced into 1/4 inch rounds
For the Syrup
- 2 cups apple cider vinegar
- 3 cups granulated sugar
- 1/2 teaspoon turmeric
- 1/2 teaspoon celery seed
- 1 teaspoon granulated garlic
- 1/4 teaspoon cayenne pepper
Smart Substitutions and Swaps
- Jalapeños: These provide the signature mild to medium heat and meaty texture; substitute serranos for more heat or Fresno peppers for fruity sweetness, adjusting quantity down by 25% for serranos
- Apple cider vinegar: This contributes fruity acidity that balances the sugar; white wine vinegar works but creates a sharper, less complex flavor profile
- Granulated sugar: Sugar creates the candy coating and acts as a preservative; reduce by 1/2 cup for less sweetness, but expect thinner syrup and shorter shelf life
- Turmeric: This adds golden color and earthy undertones; omit entirely if unavailable rather than substituting curry powder
- Celery seed: This provides subtle savory depth; mustard seed offers similar texture with a different flavor profile
- Cayenne: This boosts background heat without adding more pepper texture; red pepper flakes work but look less refined in the final product
Tools and Equipment You Will Need
Gathering your equipment before you start prevents scrambling while hot syrup waits. The right tools make this recipe safer and more efficient.
- Large heavy-bottomed pot, 6 quart minimum (distributes heat evenly to prevent scorching)
- Sharp chef’s knife
- Large cutting board
- Nitrile or latex gloves (protects hands from capsaicin burns)
- Slotted spoon
- Canning funnel (keeps jar rims clean for proper sealing)
- 4 half-pint canning jars with new lids and bands
- Jar lifter or sturdy tongs
- Water bath canner or large stockpot with rack
- Clean kitchen towels
- Ladle
How to Make Cowboy Candy
Read through all steps before starting and have your jars sterilized and warm. Slice all jalapeños before heating the syrup so you can work quickly once the cooking begins.
Step 1: Prepare Your Workspace and Peppers
Put on nitrile gloves and slice the jalapeños into uniform 1/4 inch rounds, discarding the stem ends. Keeping the slices consistent ensures even cooking so every piece reaches the same tender texture at the same time.
Watch for any soft or discolored sections and cut those away. Your sliced peppers should look like uniform green coins ready for the syrup.
Step 2: Sterilize the Jars
Place your canning jars in a large pot of water and bring to a boil, keeping them submerged for 10 minutes. Sterilization kills bacteria and prevents spoilage during long-term storage.
Keep the jars hot in the water until ready to fill. Cold jars meeting hot syrup can crack, ruining your work and creating a dangerous mess.
Step 3: Combine the Syrup Ingredients
Add the apple cider vinegar, sugar, turmeric, celery seed, granulated garlic, and cayenne to your heavy-bottomed pot. Stir thoroughly to dissolve the sugar before applying heat.
Combining dry spices with the vinegar and sugar before heating distributes them evenly throughout the syrup. You should see no sugar granules remaining at the bottom of the pot.
Step 4: Bring the Syrup to a Boil
Set the pot over medium-high heat and bring the mixture to a rolling boil, stirring occasionally. The boiling activates the pectin naturally present in the vinegar and sugar, which helps the syrup thicken.
Watch for the mixture to become frothy and rise slightly in the pot. The syrup should look uniform in color with the turmeric fully incorporated.
Step 5: Reduce the Syrup
Once boiling, reduce heat to medium and let the syrup simmer for 5 minutes without the peppers. This concentrates the flavors and begins building the thick, glossy consistency you want coating each slice.
The syrup will deepen slightly in color and reduce by about 15%. Stir occasionally to prevent any sugar from caramelizing on the pot bottom.
Step 6: Add the Jalapeños
Carefully add all the sliced jalapeños to the simmering syrup and stir gently to coat every piece. Work slowly to avoid splashing the hot liquid, which can cause serious burns.
The peppers will release moisture and slightly thin the syrup at first. Watch for the pot to return to a gentle simmer before starting your timer.
Step 7: Simmer the Peppers
Simmer the peppers in the syrup for exactly 4 minutes, stirring gently every minute. This brief cooking time softens the peppers while preserving their satisfying crunch.
Longer cooking creates mushy peppers that fall apart; shorter cooking leaves them raw-tasting. The peppers should look slightly translucent at the edges but still hold their round shape firmly.
Step 8: Remove from Heat and Rest
Take the pot off the heat and let the mixture rest for 5 minutes. Residual heat continues cooking the peppers gently while the syrup begins to thicken as it cools slightly.
The resting period allows flavors to meld and gives the syrup time to coat the peppers more thoroughly. You should notice the syrup becoming visibly thicker and more clingy.
Step 9: Pack the Jars
Using the slotted spoon, transfer the jalapeño slices into the warm sterilized jars, packing them firmly but not crushing them. Fill each jar to within 1/2 inch of the rim with pepper slices.
Packing tightly removes air pockets that can harbor bacteria and cause spoilage. The peppers should fit snugly like stacked coins.
Step 10: Add the Syrup
Ladle the hot syrup over the packed peppers, filling to 1/4 inch from the jar rim. Use a clean chopstick or bubble remover to release any trapped air bubbles by running it along the inside edge of each jar.
The syrup preserves the peppers and creates the signature candy coating. Every pepper slice should be fully submerged with no pieces poking above the liquid line.
Step 11: Seal the Jars
Wipe each jar rim with a clean damp cloth to remove any syrup residue, then place a new lid on top and screw on the band until fingertip tight. Any residue on the rim prevents proper sealing and can cause spoilage.
Listen for a slight pop as the jars begin to seal from the residual heat. The lids should appear slightly concave within a few minutes.
Step 12: Process in Water Bath
Lower the sealed jars into the boiling water bath canner, ensuring they are covered by at least 1 inch of water. Process for 10 minutes at a full rolling boil, then remove with jar lifter and place on a towel-lined counter.
Water bath processing creates a vacuum seal that allows shelf-stable storage at room temperature. You should hear the satisfying pop of each lid sealing within 30 minutes of removal.
Pro Tip: Let your cowboy candy rest for at least 2 weeks before opening the first jar; the flavors need time to meld and the heat to mellow, transforming from sharp and aggressive to smooth and complex.
The Science Behind the Technique
The magic of cowboy candy lies in osmosis and pectin formation. Sugar draws moisture out of the pepper cells through osmosis while the acid in vinegar activates natural pectins that thicken the syrup into a glossy coating.
The brief simmer time matters because capsaicin, the compound that creates heat, becomes more evenly distributed when heated but can degrade if overcooked. Keeping the simmer short preserves the peppers’ cell structure while allowing the syrup to penetrate just enough for flavor without turning them to mush.
Chef Note: The turmeric does more than add color; it contains curcumin, which slightly tempers the perception of heat on your palate without reducing the actual capsaicin content.
Tips for Getting It Right Every Time
- Wear gloves from the moment you touch the first pepper until your hands are thoroughly washed; capsaicin oil lingers invisibly and will burn sensitive skin hours later
- Slice uniformly using a mandoline if you have one, because consistent thickness means every slice finishes cooking at exactly the same moment
- Keep jars hot until the moment you fill them; the temperature difference between jar and syrup matters for both safety and seal integrity
- Never skip the bubble removal step, since trapped air creates gaps where bacteria can survive the canning process
- Let them rest for the full two weeks before sampling; fresh cowboy candy tastes harsh and one-dimensional compared to aged jars
- Save the extra syrup for glazing grilled meats or stirring into barbecue sauce; that liquid gold deserves a second life
Mistakes That Will Ruin Your Dish
- Overcooking the peppers turns them into flavorless mush that disintegrates when you try to pick up a slice
- Using old canning lids prevents proper sealing and creates a food safety risk during storage
- Filling jars to the brim leaves no headspace for the vacuum to form, resulting in failed seals and spoiled product
- Skipping the water bath means your jars are not shelf stable and must be refrigerated and used within three weeks
- Touching your face while handling peppers causes painful capsaicin burns that can last for hours, especially around eyes and lips
Make Ahead and Meal Prep Tips
Cowboy candy is inherently a make-ahead recipe designed for long-term storage. Plan a big batch session when jalapeños are in season and cheap, then enjoy your stash for months.
- Sliced peppers can wait in a covered bowl in the refrigerator for up to 24 hours before cooking if you need to split the project across two days
- Sealed jars improve in flavor for up to 6 months, with peak quality between 2 weeks and 4 months after canning
- Opened jars keep refrigerated for up to 3 months; the high sugar and acid content prevents spoilage even after breaking the seal
- Extra syrup stores separately in the refrigerator for up to 2 months and works as an instant glaze or marinade component
What to Serve With Cowboy Candy
Cowboy candy shines as a condiment that elevates simple foods into memorable bites. Think of it as the secret weapon that makes casual meals feel special.
- Cream cheese and crackers: The classic pairing where cool, tangy cheese meets sweet heat for an irresistible appetizer
- Grilled burgers: A few slices replace pickles and add complexity that standard toppings cannot match
- Pulled pork sandwiches: The sweetness complements smoky meat while the heat cuts through richness
- Scrambled eggs: A breakfast game changer that wakes up the palate better than hot sauce
- Cornbread: Bake slices directly into the batter or serve alongside with butter for a Southern combination
Drink Pairings
A cold lager works best with cowboy candy, its clean finish and carbonation refreshing the palate between bites of sweet heat. The beer’s mild bitterness contrasts beautifully with the candy’s sugar content.
- Wine: Off-dry Riesling or Gewürztraminer, where residual sugar matches the candy while acidity cuts through
- Beer: Mexican lager or American wheat beer, with light body that refreshes rather than competes
- Non-alcoholic: Limeade or agua fresca, where citrus brightness complements the tangy vinegar base
- Hot drink: Sweet iced tea, the traditional Southern pairing that handles spice with grace
Flavour Variations Worth Trying
- Bourbon Cowboy Candy: Add 1/4 cup bourbon to the syrup during the simmer phase. The whiskey adds vanilla and oak notes that make the finished product taste more complex and adult.
- Smoky Cowboy Candy: Replace cayenne with 1/2 teaspoon smoked paprika and add 1/4 teaspoon liquid smoke. The result pairs especially well with grilled meats and barbecue.
- Citrus Cowboy Candy: Add the zest of one orange and one lime to the syrup. The citrus oils brighten the flavor profile and add floral notes that work beautifully on fish tacos.
- Extra Hot Cowboy Candy: Mix jalapeños with equal parts serranos and keep all the seeds. This version delivers serious heat for those who find regular cowboy candy too mild.
- Garlic Lovers Cowboy Candy: Add 6 thinly sliced fresh garlic cloves to simmer with the peppers. The candied garlic pieces become as addictive as the peppers themselves.
How to Adapt This Recipe for Your Diet
- Gluten-free: This recipe contains no gluten as written; verify your vinegar has no added wheat-based ingredients if using flavored varieties
- Dairy-free: Cowboy candy is naturally dairy-free; enjoy it with dairy-free cream cheese for the classic appetizer preparation
- Vegan: No animal products are present in this recipe; it suits plant-based diets without any modifications needed
- Low-carb/Keto: Replace sugar with an equal amount of allulose, which caramelizes similarly; expect slightly thinner syrup and use within 1 month refrigerated since it will not be shelf stable
- High-protein: Pair cowboy candy with protein-rich foods like grilled chicken, eggs, or cottage cheese to create satisfying meals from this condiment
How to Store and Reheat
In the Refrigerator
Store opened jars in the refrigerator with lids tightly sealed. Properly refrigerated cowboy candy maintains quality for up to 3 months after opening.
- Always use a clean utensil to remove portions, preventing contamination from food particles
- Keep the peppers submerged under syrup to prevent the top layer from drying out
In the Freezer
Freezing is not recommended as it breaks down the pepper cell structure and results in mushy texture. The high sugar and acid content makes proper canning a better preservation method.
- If you must freeze, use within 2 months and accept softer texture upon thawing
- Freeze syrup separately in ice cube trays for easy portioning in marinades and sauces
Reheating
Cowboy candy is best served at room temperature or cold. Gentle warming can enhance the syrup’s flow but high heat degrades texture.
- Oven: Warm peppers in a small dish at 200°F for 5 minutes when using as a topping for hot dishes
- Stovetop: Gently warm small portions in a pan over low heat for 2 minutes while basting frequently
- Microwave: Use sparingly in 10 second bursts; microwaving can cause uneven heating that makes some pieces rubbery
Cost Breakdown
Making cowboy candy at home costs roughly one-third the price of premium jarred versions. A single batch provides enough to stock your pantry and give as gifts.
| Ingredient | Estimated Cost |
|---|---|
| Jalapeño peppers (2 lbs) | $4.00 |
| Apple cider vinegar (2 cups) | $1.50 |
| Granulated sugar (3 cups) | $1.00 |
| Spices (turmeric, celery seed, garlic, cayenne) | $0.75 |
| Canning jars and lids | $4.00 |
| Total Per Serving (2 tbsp) | $0.35 |
Nutrition Information
| Nutrient | Amount |
|---|---|
| Calories | 45 |
| Total Fat | 0g |
| Saturated Fat | 0g |
| Trans Fat | 0g |
| Cholesterol | 0mg |
| Sodium | 2mg |
| Total Carbohydrates | 11g |
| Dietary Fiber | 0.5g |
| Total Sugars | 10g |
| Added Sugars | 9g |
| Protein | 0g |
| Vitamin D | 0mcg |
| Calcium | 4mg |
| Iron | 0.2mg |
| Potassium | 35mg |
Nutritional values are estimates based on standard ingredients and may vary depending on specific brands and portion sizes used.
Frequently Asked Questions
Can I use something other than jalapeños?
Yes, serranos create a hotter version while Fresno peppers offer fruity heat. Adjust quantities and expect slightly different texture based on the pepper’s flesh thickness.
Can I make this without a water bath canner?
You can skip the water bath if you plan to refrigerate the jars and use them within 3 weeks. Without proper processing, the jars are not shelf stable at room temperature.
How long does cowboy candy last once opened?
Properly refrigerated, an opened jar keeps for up to 3 months. The high sugar and acid content acts as a natural preservative.
Why did my peppers turn out mushy?
Overcooking is the most common cause; simmering beyond 4 minutes breaks down the cell structure. Using older, softer peppers can worsen the problem.
Can I double this recipe?
Yes, but work in batches to ensure even cooking. A crowded pot prevents proper heat distribution and can result in unevenly cooked peppers.
Why are my jars not sealing?
Common causes include residue on the rim, old lids, or insufficient processing time. Check that your water fully covered the jars by at least 1 inch during processing.
Should I remove the seeds for less heat?
Removing seeds and membranes significantly reduces heat while keeping the flavor. Scrape them out before slicing if you prefer a milder result.
My Final Word
Cowboy candy represents everything I love about home cooking: a simple technique, honest ingredients, and a result that punches way above its weight. That sticky sweet heat turns ordinary meals into something people remember and ask about.
I have made this recipe dozens of times and still look forward to cracking open a new jar. Give it a try when jalapeños are cheap and plentiful, and I promise you will understand why this stuff disappears so fast.
If you make a batch, I would love to hear how it turned out. Drop a comment below or tag Recipe Papa on social media with your creations.
Cowboy Candy (Candied Jalapeños)
Ingredients
Equipment
Method
- Put on nitrile gloves and slice the jalapeños into uniform 1/4 inch rounds, discarding the stem ends. Watch for any soft or discolored sections and cut those away.
- Place your canning jars in a large pot of water and bring to a boil, keeping them submerged for 10 minutes to sterilize. Keep the jars hot in the water until ready to fill.
- Add the apple cider vinegar, sugar, turmeric, celery seed, granulated garlic, and cayenne to your heavy-bottomed pot. Stir thoroughly to dissolve the sugar before applying heat.
- Set the pot over medium-high heat and bring the mixture to a rolling boil, stirring occasionally.
- Once boiling, reduce heat to medium and let the syrup simmer for 5 minutes without the peppers. Stir occasionally to prevent any sugar from caramelizing on the pot bottom.
- Carefully add all the sliced jalapeños to the simmering syrup and stir gently to coat every piece.
- Simmer the peppers in the syrup for exactly 4 minutes, stirring gently every minute. The peppers should look slightly translucent at the edges but still hold their round shape firmly.
- Remove the pot from heat and let the mixture rest for 5 minutes.
- Using the slotted spoon, transfer the jalapeño slices into the warm sterilized jars, packing them firmly but not crushing them. Fill each jar to within 1/2 inch of the rim with pepper slices.
- Ladle the hot syrup over the packed peppers, filling to 1/4 inch from the jar rim. Use a clean chopstick or bubble remover to release any trapped air bubbles by running it along the inside edge of each jar.
- Wipe each jar rim with a clean damp cloth to remove any syrup residue, then place a new lid on top and screw on the band until fingertip tight.
- Lower the sealed jars into the boiling water bath canner, ensuring they are covered by at least 1 inch of water. Process for 10 minutes at a full rolling boil, then remove with jar lifter and place on a towel-lined counter.
- Let the jars cool completely and listen for the satisfying pop of each lid sealing within 30 minutes of removal. Allow cowboy candy to rest for at least 2 weeks before opening for optimal flavor development.