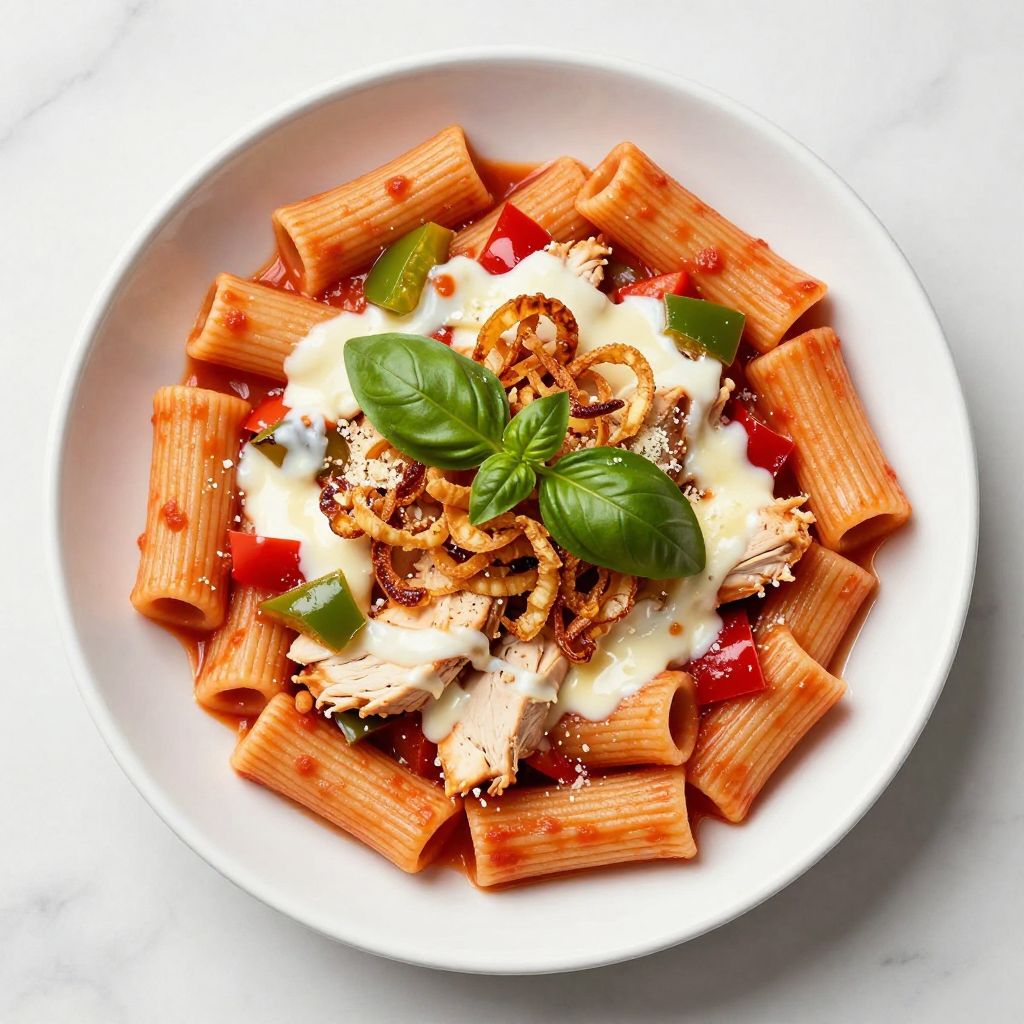
The aroma of tomato sauce simmering with chicken and peppers filling your kitchen is pure comfort food magic. Chicken riggies is a beloved Utica, New York specialty that combines tender pasta, shredded chicken, and a rich, slightly spicy sauce topped with crispy fried onions and melted cheese.
This dish might sound fancy, but it’s surprisingly approachable for home cooks who want to impress without spending hours in the kitchen. The beauty of chicken riggies lies in its perfect balance of creamy, tangy, and savory flavors all in one bite.
Why You’ll Love This Recipe
Chicken riggies delivers restaurant-quality results with straightforward ingredients and techniques you likely already know.
- Loaded with shredded chicken, bell peppers, and a savory tomato-based sauce that coats every piece of pasta
- Topped with crispy fried onions and melted cheese for irresistible texture contrast
- Makes enough to feed a crowd or provides excellent leftovers for meal prep
- Takes about an hour from start to finish, making it a realistic weeknight or weekend dinner
- Works as a main dish that feels special without requiring specialty equipment or hard-to-find ingredients
My Experience Making This Recipe
The first time I made chicken riggies, I was skeptical about the fried onion topping. Once I tasted how those crispy bits against the creamy sauce and melted cheese created pure flavor harmony, I became a believer.
My family devoured it in minutes, which was both thrilling and slightly embarrassing given how many leftovers I’d planned to enjoy. The house smelled incredible for hours afterward, and that’s always a sign you’ve made something worth repeating.
I’ve since made this dish at least a dozen times, and each time I refine small details like using fresher peppers or adjusting the spice level. It’s become one of my go-to recipes when I want to feel like a confident home cook without the stress.
Recipe Overview
- Recipe Name: Chicken Riggies
- Servings: 4 to 6
- Prep Time: 15 minutes
- Cook Time: 45 minutes
- Total Time: 60 minutes
- Course: Main Dish
- Cuisine: American (Utica, New York specialty)
- Calories per Serving: 520
Equipment You Will Need
- Large pot for boiling water and pasta
- Large skillet or Dutch oven
- Wooden spoon for stirring
- Cutting board and sharp knife
- Measuring cups and spoons
- Colander for draining pasta
- 9×13 inch baking dish
- Tongs for handling chicken
- Grater for shredding cheese
Ingredients for Chicken Riggies
- 1 pound chicken breasts, boneless and skinless
- 12 ounces rigatoni pasta or penne
- 3 tablespoons olive oil, divided
- 1 large yellow onion, diced
- 2 bell peppers (red and green), diced
- 4 cloves garlic, minced
- 1 can (28 ounces) crushed tomatoes
- 1 cup chicken broth
- 1/2 cup heavy cream
- 2 teaspoons Italian seasoning
- 1 teaspoon red pepper flakes, or to taste
- Salt and black pepper, to taste
- 2 cups shredded mozzarella cheese
- 1 cup crispy fried onions
- 1/4 cup fresh parmesan cheese, grated
Ingredient Notes and Substitutions
- Chicken breasts provide lean protein and cook quickly. If you prefer more tender meat, use thighs instead, though they’ll require slightly longer cooking time.
- Rigatoni pasta has ridges that catch sauce beautifully. Penne, mostaccioli, or any tube pasta works equally well.
- Heavy cream creates the signature creamy sauce. Sour cream or Greek yogurt can replace it for a tangier version, though the texture will be slightly less rich.
- Crushed tomatoes are the sauce base. Tomato sauce can substitute, though you may need less liquid as it’s already reduced.
- Red pepper flakes add heat and authentic flavor. Omit them entirely if you prefer mild, or use cayenne pepper for different spice distribution.
- Crispy fried onions are non-negotiable for texture. French’s brand works perfectly, or make your own by thinly slicing onions and shallow-frying them in oil until golden.
How to Make Chicken Riggies
Step 1: Cook the Chicken Breasts
Heat 1 tablespoon of olive oil in a large skillet over medium-high heat until it shimmers. Season chicken breasts on both sides with salt and pepper, then place them in the hot skillet.
Cook for 6 to 7 minutes per side until the internal temperature reaches 165 degrees Fahrenheit. This high heat creates a light golden exterior while keeping the meat moist inside, which matters because you’ll shred it later.
Step 2: Shred the Cooked Chicken
Remove the chicken to a clean cutting board and let it rest for 2 to 3 minutes. Using two forks, shred the chicken into bite-sized pieces.
The resting period allows the meat to cool slightly, making shredding easier and preventing the chicken from drying out. Set the shredded chicken aside on a plate.
Step 3: Saute the Vegetables
In the same skillet, add the remaining 2 tablespoons of olive oil and heat over medium heat. Add the diced onion and bell peppers, stirring occasionally for about 5 minutes until they begin to soften.
Soft vegetables release their natural sugars, which adds depth to the sauce. You want them tender but not falling apart, so timing matters here.
Step 4: Add Garlic and Seasonings
Stir in the minced garlic and cook for 1 minute until fragrant. Add the Italian seasoning and red pepper flakes, stirring constantly for about 30 seconds.
Cooking the spices in fat for just a moment activates their oils and distributes flavor evenly throughout the sauce instead of having it clump in spots. This is a simple technique that makes a noticeable difference.
Step 5: Build the Sauce
Pour in the crushed tomatoes and chicken broth, stirring to combine. Bring the mixture to a simmer and let it cook uncovered for 8 to 10 minutes.
Simmering allows the flavors to meld and the sauce to thicken slightly. If you skip this step and rush to the cream, the flavors taste disconnected instead of harmonious.
Step 6: Add Cream and Chicken
Reduce the heat to low and stir in the heavy cream until fully incorporated. Add the shredded chicken back to the skillet and stir gently to coat it in sauce.
Adding cream to a boiling sauce can cause it to break, which is why lowering the heat first prevents that problem. Taste the sauce now and adjust salt, pepper, and red pepper flakes to your preference.
Step 7: Cook the Pasta
While the sauce simmers, bring a large pot of salted water to a rolling boil. Add the rigatoni and cook according to package directions until just al dente, usually 10 to 12 minutes.
Salted pasta water seasons the pasta from within, so don’t skip this step. Cooking to al dente means it will have a slight chew when you bite it, which is important because it cooks further in the oven.
Step 8: Combine Pasta and Sauce
Drain the cooked pasta in a colander and add it directly to the skillet with the chicken sauce. Gently fold everything together until the pasta is evenly coated.
Folding rather than stirring vigorously keeps the pasta from breaking. You want each piece of pasta to pick up sauce, but not turn to mush in the process.
Step 9: Assemble and Bake
Transfer the pasta mixture to a 9×13 inch baking dish, spreading it into an even layer. Sprinkle the shredded mozzarella cheese evenly across the top, then scatter the crispy fried onions over it.
Top with grated parmesan cheese for extra savory depth. Bake at 375 degrees Fahrenheit for 12 to 15 minutes until the cheese melts and begins to brown lightly.
Pro Tip: Don’t overbake the fried onions or they’ll lose their crispness and turn soggy; add them just before baking for maximum crunch that lasts through serving.
Tips for the Best Chicken Riggies
- Use fresh bell peppers rather than pre-cut versions, which lose their crisp texture and bright flavor. Fresh peppers provide better color contrast and cleaner taste in the finished dish.
- Don’t skip salting the pasta water generously. Properly seasoned pasta from the inside out tastes infinitely better than underseasoned pasta later.
- Cook the chicken until just done rather than overcooking it. Overcooked chicken turns dry and stringy when shredded, ruining the texture of the final dish.
- Let the sauce simmer long enough for flavors to develop. Rushing this step results in a sauce that tastes one-dimensional and flat.
- Taste and adjust seasonings before baking. Remember that flavors concentrate as the dish sits, so slightly underseasoning is safer than oversalting.
- Have all ingredients prepped before you start cooking. Mise en place prevents scrambling and ensures you don’t accidentally skip something.
Common Mistakes to Avoid
- Overcooking the pasta before it goes in the oven. Overcooked pasta continues to absorb liquid during baking and turns mushy rather than tender with a slight bite.
- Skipping the resting period after cooking chicken. Cutting into hot chicken causes juices to run out, leaving the meat dry when you shred it.
- Adding cream to a boiling sauce. The high heat can cause cream to separate and curdle, resulting in a grainy, unpleasant texture.
- Using store-bought pre-shredded cheese exclusively. Pre-shredded cheese contains anti-caking agents that prevent smooth melting, though a mix of fresh-shredded and some pre-shredded is fine.
- Neglecting to taste before baking. You can’t adjust seasoning after everything is in the oven, so seasoning as you go is essential.
Serving Suggestions
Chicken riggies is hearty enough to stand alone as a main dish, but a simple side salad or garlic bread elevates the meal. The rich, creamy sauce pairs beautifully with sharp, acidic flavors that cut through the richness.
- Crisp green salad with lemon vinaigrette to provide brightness and contrast
- Garlic bread or toasted ciabatta for soaking up extra sauce
- Roasted broccoli or asparagus for a lighter vegetable side
- Simple arugula salad with shaved parmesan and olive oil
- Steamed green beans with garlic for a classic pairing
Variations to Try
- Spicy version: increase red pepper flakes to 1.5 or 2 teaspoons, and add a pinch of cayenne pepper for lingering heat that builds as you eat.
- Mushroom addition: sauté 8 ounces of sliced mushrooms with the peppers and onions for earthy umami depth that complements the cream sauce beautifully.
- Lighter version: replace heavy cream with half-and-half or even whole milk for fewer calories while maintaining a creamy texture, though the sauce will be slightly less rich.
- Italian sausage swap: replace chicken with 1 pound of browned Italian sausage for a more robust, herbaceous flavor that makes the dish feel different while staying authentic to regional traditions.
- Sun-dried tomato twist: add 1/3 cup chopped sun-dried tomatoes to the sauce for concentrated tomato flavor and slight sweetness that adds complexity.
Dietary Adaptations
- Gluten-free: substitute gluten-free rigatoni pasta and verify that all spice blends are certified gluten-free, as some commercial Italian seasoning blends contain wheat.
- Dairy-free: replace mozzarella with dairy-free cheese alternative and use coconut cream or cashew cream instead of heavy cream, though the flavor will be noticeably different and less authentic.
- Vegan: omit chicken and add extra mushrooms, chickpeas, or tofu for protein, though the dish will taste less rich and more vegetable-forward without the savory depth chicken provides.
- Low-carb/Keto: use zucchini noodles or shirataki noodles instead of pasta, and increase the cream and cheese proportions to maintain richness and caloric density required for keto macros.
Storage and Reheating
Refrigerator
Store leftover chicken riggies in an airtight container for up to 3 days. The pasta will continue to absorb sauce as it sits, so the texture becomes creamier and flavors meld together, which many people prefer.
- Store fried onion topping separately if you want to maintain crispness and add fresh onions when reheating
- Keep cooled before covering to prevent condensation, which makes fried onions soggy
Freezer
Freeze chicken riggies for up to 2 months in a freezer-safe container. The sauce freezes beautifully and actually develops deeper flavor as it sits frozen.
- Cool completely before freezing to prevent ice crystals that damage texture
- Leave 1/2 inch of headspace for expansion
- Label with the date so you remember what you have
Reheating
Thaw frozen chicken riggies in the refrigerator overnight, then reheat gently in a 350-degree oven covered with foil for 20 to 25 minutes until heated through. Add a splash of chicken broth if the pasta seems dry, as it continues absorbing liquid during storage and reheating.
- Don’t use the microwave, which reheats unevenly and creates hot spots that dry out pasta
- Add fresh fried onions and cheese topping right before serving for optimal crispness and flavor
- Stovetop reheating works well too: warm in a covered skillet over medium-low heat for 10 to 15 minutes, stirring occasionally
Nutrition Information
| Nutrient | Amount |
|---|---|
| Calories | 520 |
| Total Fat | 22g |
| Saturated Fat | 10g |
| Carbohydrates | 48g |
| Fiber | 3g |
| Sugar | 8g |
| Protein | 35g |
| Sodium | 890mg |
| Cholesterol | 95mg |
Nutrition values are approximate and based on USDA guidelines for the ingredients listed. Individual values vary based on specific brands used and exact preparation methods.
Frequently Asked Questions
Can I make chicken riggies ahead of time?
Yes, you can assemble the entire dish the night before and refrigerate it unbaked. Bake directly from the refrigerator at 375 degrees for 20 to 25 minutes, adding a few extra minutes since it starts cold.
What if I don’t have crispy fried onions?
You can make your own by thinly slicing onions and shallow-frying them in oil until golden and crispy, then draining on paper towels. Store-bought french fried onions work best, but panko breadcrumbs mixed with melted butter creates a crunchy texture that’s different but still delicious.
Can I use rotisserie chicken instead?
Absolutely, and it actually saves time. Shred one whole rotisserie chicken and skip the initial cooking step, adding it directly when called for in the recipe.
Why is my sauce too thick or too thin?
Adjust thickness by simmering longer to reduce liquid or adding chicken broth if too thick, and adding broth or pasta water if too thin. Sauce should coat the back of a spoon but still flow slightly.
Is this recipe spicy?
The original recipe has mild heat from red pepper flakes. Most people tolerate it well, but if you’re heat-sensitive, reduce the flakes to 1/2 teaspoon or omit entirely.
Can I halve this recipe?
Yes, divide all ingredient amounts by two and use a smaller baking dish. Cooking times remain roughly the same, though the pasta may cook slightly faster and the baking time might be a minute or two shorter.
Chicken Riggies
A beloved Utica, New York specialty that combines tender pasta, shredded chicken, and a rich, slightly spicy tomato-cream sauce topped with crispy fried onions and melted cheese. Restaurant-quality results with straightforward ingredients.
- Large pot for boiling water and pasta
- Large skillet or Dutch oven
- Wooden spoon for stirring
- Cutting board and sharp knife
- Measuring cups and spoons
- Colander for draining pasta
- 9×13 inch baking dish
- Tongs for handling chicken
- Grater for shredding cheese
Main
- 1 pound chicken breasts (boneless and skinless)
- 12 ounces rigatoni pasta or penne
- 3 tablespoons olive oil (divided)
- 1 large yellow onion (diced)
- 2 bell peppers (red and green, diced)
- 4 cloves garlic (minced)
- 1 can (28 ounces crushed tomatoes)
- 1 cup chicken broth
- 1/2 cup heavy cream
- 2 teaspoons Italian seasoning
- 1 teaspoon red pepper flakes (or to taste)
- Salt and black pepper (to taste)
- 2 cups shredded mozzarella cheese
- 1 cup crispy fried onions
- 1/4 cup fresh parmesan cheese (grated)
- Heat 1 tablespoon of olive oil in a large skillet over medium-high heat until it shimmers. Season chicken breasts on both sides with salt and pepper, then place them in the hot skillet. Cook for 6 to 7 minutes per side until the internal temperature reaches 165 degrees Fahrenheit.
- Remove the chicken to a clean cutting board and let it rest for 2 to 3 minutes. Using two forks, shred the chicken into bite-sized pieces. Set the shredded chicken aside on a plate.
- In the same skillet, add the remaining 2 tablespoons of olive oil and heat over medium heat. Add the diced onion and bell peppers, stirring occasionally for about 5 minutes until they begin to soften.
- Stir in the minced garlic and cook for 1 minute until fragrant. Add the Italian seasoning and red pepper flakes, stirring constantly for about 30 seconds.
- Pour in the crushed tomatoes and chicken broth, stirring to combine. Bring the mixture to a simmer and let it cook uncovered for 8 to 10 minutes.
- Reduce the heat to low and stir in the heavy cream until fully incorporated. Add the shredded chicken back to the skillet and stir gently to coat it in sauce. Taste and adjust salt, pepper, and red pepper flakes to your preference.
- While the sauce simmers, bring a large pot of salted water to a rolling boil. Add the rigatoni and cook according to package directions until just al dente, usually 10 to 12 minutes.
- Drain the cooked pasta in a colander and add it directly to the skillet with the chicken sauce. Gently fold everything together until the pasta is evenly coated.
- Preheat oven to 375 degrees Fahrenheit. Transfer the pasta mixture to a 9×13 inch baking dish, spreading it into an even layer. Sprinkle the shredded mozzarella cheese evenly across the top, then scatter the crispy fried onions over it. Top with grated parmesan cheese.
- Bake at 375 degrees Fahrenheit for 12 to 15 minutes until the cheese melts and begins to brown lightly. Serve immediately.
Use fresh bell peppers for better color and flavor. Don’t skip salting the pasta water generously. Cook chicken until just done to avoid dry, stringy texture. Let sauce simmer long enough for flavors to develop. Store leftovers in an airtight container for up to 3 days or freeze for up to 2 months. Add fresh fried onions when reheating for maximum crunch.