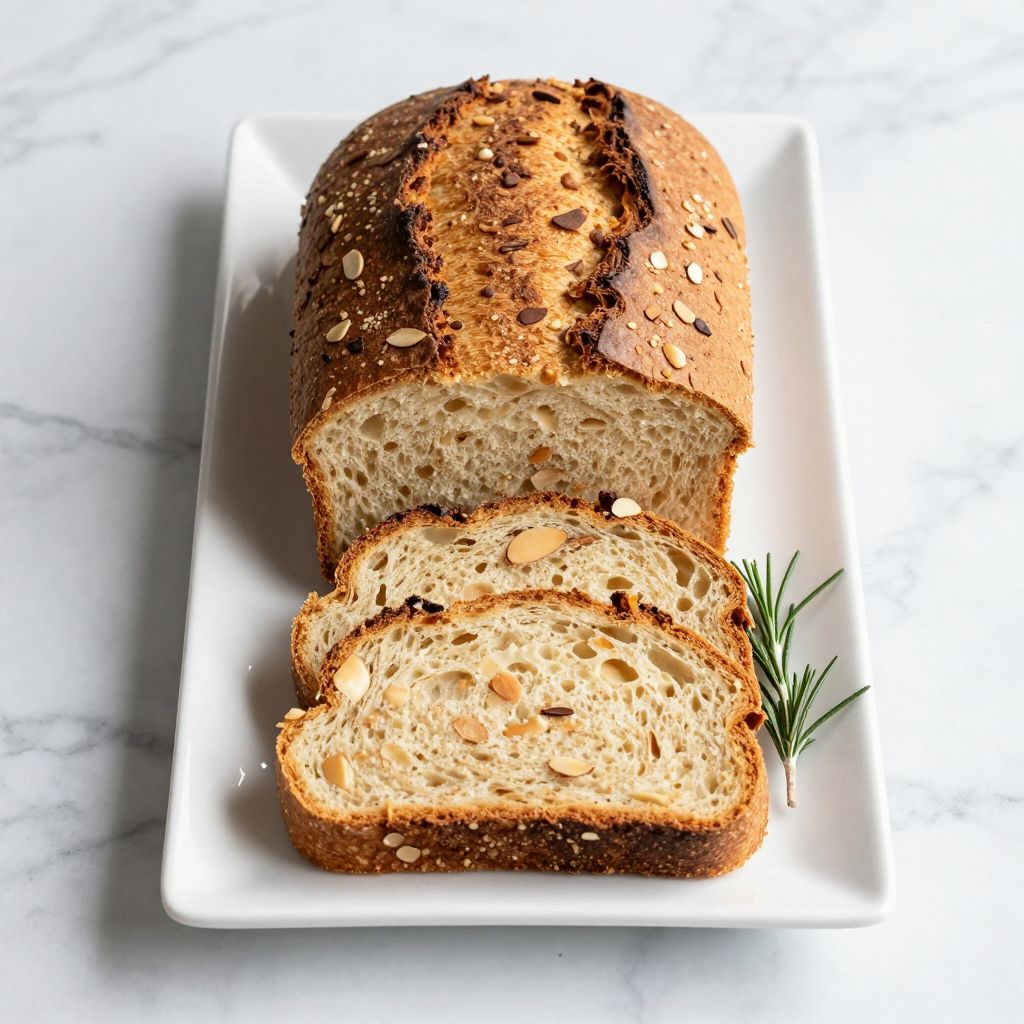
That first slice of warm, freshly baked bread with its golden crust and tender crumb is one of life’s simplest pleasures, and this almond flour bread recipe delivers exactly that without a single grain of wheat. This recipe transforms humble almond flour into a loaf that actually tastes like real bread, not some cardboard substitute you tolerate because of dietary restrictions. The texture is surprisingly soft and moist, the flavor is subtly nutty without being overpowering, and best of all, you can have fresh bread on your table in under an hour.
Whether you’re going low-carb, avoiding gluten, or just want a protein-packed alternative to traditional bread, this recipe checks all the boxes. The beauty lies in its simplicity and the fact that it slices beautifully without crumbling into a sad pile of crumbs.
Why You’ll Love This Recipe
This almond flour bread stands out from other grain-free bread recipes because it delivers real bread texture without any weird aftertaste or strange ingredients. You won’t find xanthan gum or psyllium husk here, just straightforward ingredients that work together perfectly.
- Ready in less than 60 minutes from start to finish
- Only 8 ingredients, most of which you probably have in your pantry
- Slices cleanly without falling apart, perfect for sandwiches or toast
- Packed with protein and healthy fats that keep you satisfied longer
- Naturally gluten-free and grain-free without sacrificing flavor or texture
My Experience Making This Recipe
I’ve made this almond flour bread at least two dozen times, tweaking the proportions until I got the texture just right. The first few attempts were too dense and eggy, but once I figured out the proper ratio of wet to dry ingredients, everything clicked into place.
The smell while it bakes is incredible, filling your kitchen with a warm, nutty aroma that makes waiting for it to cool absolute torture. When I served it to my skeptical family members who claimed they’d never like gluten-free bread, they actually asked for seconds and didn’t believe me when I told them what it was made from.
The texture impressed me most because it has that slight spring you expect from real bread when you press on it. It toasts beautifully, getting crispy edges while staying tender in the middle, which makes it perfect for avocado toast or your morning eggs.
Recipe Overview
- Recipe Name: Almond Flour Bread
- Servings: 12 slices
- Prep Time: 10 minutes
- Cook Time: 45 minutes
- Total Time: 55 minutes
- Course: Bread, Side Dish
- Cuisine: American
- Calories per Serving: 165
Equipment You Will Need
- 8.5 x 4.5 inch loaf pan
- Parchment paper for lining the pan
- Large mixing bowl
- Medium mixing bowl
- Whisk or electric hand mixer
- Rubber spatula for folding
- Measuring cups and spoons
- Cooling rack
Ingredients for Almond Flour Bread
- 2 and 1/2 cups blanched almond flour (not almond meal)
- 6 large eggs at room temperature
- 1/4 cup melted coconut oil or avocado oil
- 1 tablespoon honey or maple syrup
- 1 teaspoon baking soda
- 1/2 teaspoon sea salt
- 1 tablespoon apple cider vinegar
- 1/4 teaspoon garlic powder (optional, for savory bread)
Ingredient Notes and Substitutions
- Blanched almond flour: This creates a light, fine texture without the grittiness of almond meal; almond meal will work but produces a denser, coarser loaf with visible brown flecks.
- Eggs: They provide structure and help the bread rise while keeping it moist; flax eggs or chia eggs don’t work well here as the bread will be too dense and won’t hold together.
- Coconut oil: Adds moisture and helps create a tender crumb; you can substitute melted butter or avocado oil if you prefer a more neutral flavor.
- Baking soda: Creates lift and helps the bread rise properly when combined with the vinegar; baking powder won’t give the same reaction or texture.
- Apple cider vinegar: Reacts with the baking soda to create air pockets and lightness; lemon juice works as a substitute in the exact same amount.
How to Make Almond Flour Bread
Step 1: Prepare Your Pan and Preheat the Oven
Preheat your oven to 350°F and line your 8.5 x 4.5 inch loaf pan with parchment paper, leaving some overhang on the sides for easy removal. This step matters because almond flour bread can stick stubbornly to pans, and the parchment gives you an easy way to lift it out cleanly once baked.
Step 2: Mix the Dry Ingredients
In your large mixing bowl, whisk together the almond flour, baking soda, salt, and garlic powder if using until everything is evenly distributed. Breaking up any lumps in the almond flour now prevents dense pockets in your finished bread, so take an extra minute to make sure it’s smooth.
Step 3: Combine the Wet Ingredients
In your medium bowl, whisk the eggs thoroughly until the yolks and whites are completely combined and slightly frothy. Add the melted coconut oil, honey, and apple cider vinegar, whisking until the mixture is smooth and emulsified rather than separated.
Step 4: Bring It All Together
Pour the wet ingredients into the bowl with the dry ingredients and fold gently with your rubber spatula until just combined. The batter will be thick and slightly sticky, more like a very thick cake batter than traditional bread dough, which is exactly what you want.
Step 5: Transfer to the Pan
Scrape the batter into your prepared loaf pan and smooth the top with your spatula, creating an even surface. Use the spatula to gently tap out any air bubbles and to push the batter into the corners of the pan for an evenly shaped loaf.
Step 6: Bake Until Golden
Place the pan in your preheated oven and bake for 40-45 minutes, until the top is golden brown and a toothpick inserted into the center comes out clean. The bread will puff up while baking and may crack slightly on top, which is completely normal and actually gives it that authentic homemade bread look.
Step 7: Cool Completely Before Slicing
Remove the pan from the oven and let it sit for 10 minutes before using the parchment overhang to lift the loaf out onto a cooling rack. Letting it cool completely is critical because the bread continues to set as it cools, and slicing too early will result in a gummy texture.
Step 8: Slice and Serve
Once completely cool, use a sharp serrated knife to slice the bread into 12 even pieces, using a gentle sawing motion rather than pressing down. The bread should slice cleanly without crumbling, giving you perfect slices ready for toasting, sandwiches, or eating plain with butter.
Pro Tip: Let the bread cool completely, then refrigerate it for 2 hours before slicing for the cleanest, most professional-looking slices that hold together perfectly.
Tips for the Best Almond Flour Bread
- Use room temperature eggs so they incorporate more easily and create a lighter texture; cold eggs can cause the coconut oil to solidify into little clumps.
- Measure your almond flour by spooning it into the measuring cup and leveling it off rather than scooping directly from the bag, which can pack it down and throw off the ratio.
- Line your pan with parchment paper rather than just greasing it because almond flour breads have a tendency to stick stubbornly no matter how much oil you use.
- Don’t skip the apple cider vinegar because it reacts with the baking soda to create the lift and airiness that keeps this from being a dense brick.
- Store the bread in the refrigerator rather than on the counter since almond flour baked goods stay fresher longer when chilled and are less likely to develop mold.
- Toast slices before serving for the best texture and flavor, as toasting brings out the nutty taste and creates those crispy edges everyone loves.
Common Mistakes to Avoid
- Using almond meal instead of blanched almond flour creates a grainy, coarse texture that doesn’t slice well and has an unpleasant mouthfeel.
- Overmixing the batter once the wet and dry ingredients are combined can make the bread tough and dense by developing too much structure.
- Slicing the bread while it’s still warm makes it gummy and causes it to fall apart because the interior hasn’t fully set yet.
- Skipping the parchment paper and just greasing the pan leads to bread that sticks hopelessly and tears apart when you try to remove it.
- Baking at too high a temperature causes the outside to brown too quickly while leaving the inside undercooked and wet.
Serving Suggestions
This almond flour bread works beautifully in any situation where you’d normally use regular bread, from breakfast toast to sandwich base to dinner side. The subtle nutty flavor pairs well with both sweet and savory toppings without overwhelming them.
- Top with mashed avocado, sea salt, and red pepper flakes for a satisfying breakfast or lunch
- Spread with almond butter and sugar-free jam for a protein-packed snack
- Use as sandwich bread with turkey, lettuce, tomato, and your favorite mustard
- Serve alongside soup or chili as a low-carb alternative to cornbread
- Toast and top with cream cheese, smoked salmon, and capers for an elegant brunch option
Variations to Try
- Herb and Garlic Bread: Add 2 teaspoons of Italian seasoning and an extra 1/2 teaspoon of garlic powder to the dry ingredients for a savory loaf that’s perfect with pasta dishes.
- Cinnamon Raisin: Mix in 1 tablespoon of cinnamon and 1/3 cup of raisins to the batter, increasing the honey to 2 tablespoons for a sweeter breakfast bread.
- Everything Bagel: Sprinkle 2 tablespoons of everything bagel seasoning on top of the batter before baking for a savory crust with loads of flavor.
- Seeded Bread: Fold in 3 tablespoons of mixed seeds like sunflower, pumpkin, and sesame for added crunch and nutrition.
- Olive and Rosemary: Add 1/3 cup chopped kalamata olives and 1 tablespoon fresh chopped rosemary for a Mediterranean-inspired version that’s amazing with cheese.
Dietary Adaptations
- Gluten-Free: This recipe is naturally gluten-free since it contains no wheat or grain-based flours, making it safe for celiac disease and gluten sensitivity without any modifications needed.
- Dairy-Free: The recipe as written is already dairy-free when using coconut oil or avocado oil instead of butter, with no impact on texture or flavor.
- Paleo: This bread fits paleo guidelines perfectly with all compliant ingredients, just make sure to use honey instead of maple syrup if you follow strict paleo rules.
- Keto and Low-Carb: With only about 4g net carbs per slice, this bread works for keto diets, though you can reduce the honey to just 1 teaspoon if you need to cut carbs even further.
Storage and Reheating
Refrigerator
Store the completely cooled bread in an airtight container or wrapped tightly in plastic wrap in the refrigerator for up to one week. The texture actually improves after a day in the fridge as the flavors meld together and the crumb sets up even more.
- Slice before storing so you can grab individual pieces as needed
- Place parchment paper between slices if you want to prevent them from sticking together
- Bring to room temperature or toast before eating for the best texture
Freezer
This bread freezes exceptionally well for up to 3 months when properly wrapped. Wrap the whole loaf or individual slices tightly in plastic wrap, then place in a freezer-safe bag, pressing out as much air as possible.
- Freeze individual slices for easy grab-and-go breakfast options
- Label with the date so you remember when you froze it
- Thaw overnight in the refrigerator or toast directly from frozen
Reheating
Toasting is the best way to reheat this bread and brings back that fresh-baked texture. A quick stint in the toaster, toaster oven, or regular oven at 350°F for 5-7 minutes makes it taste like you just baked it.
- Toast slices directly from the refrigerator or freezer for convenience
- Wrap the whole loaf in foil and warm in a 300°F oven for 15 minutes if you want to serve it warm
- Avoid microwaving as it makes the bread rubbery and dense
Nutrition Information
| Nutrient | Amount |
|---|---|
| Calories | 165 |
| Total Fat | 13g |
| Saturated Fat | 3g |
| Carbohydrates | 6g |
| Fiber | 2g |
| Sugar | 2g |
| Protein | 7g |
| Sodium | 195mg |
| Cholesterol | 93mg |
Nutritional values are estimates based on standard ingredient measurements and may vary depending on specific brands used and portion sizes.
Frequently Asked Questions
Can I make this bread without eggs?
Unfortunately, eggs are the structural backbone of this recipe and cannot be successfully replaced with egg substitutes like flax or chia eggs without completely compromising the texture. The eggs provide the binding and lift that makes this bread work, so you’ll need to find a different recipe if you need an egg-free version.
Why is my almond flour bread too dense?
Dense bread usually happens from using almond meal instead of finely ground blanched almond flour, or from packing the flour too tightly when measuring. Make sure you’re spooning the flour into your measuring cup and using room temperature eggs, which incorporate more air into the batter.
Can I make this bread ahead of time?
Absolutely, this bread actually tastes better the next day after the flavors have had time to develop and the texture firms up slightly. Bake it up to 5 days ahead and store it in the refrigerator, or freeze it up to 3 months in advance for ultimate convenience.
How do I keep the bread from sticking to the pan?
Line your loaf pan with parchment paper that hangs over the sides rather than just greasing it, as almond flour has a tendency to stick stubbornly. The parchment creates a foolproof sling that lets you lift the entire loaf out cleanly once it’s cooled.
Can I use this bread to make French toast?
Yes, this bread makes fantastic French toast that’s even more protein-rich than the traditional version. Use slightly stale or toasted slices for the best results, as they’ll hold up better when soaked in the egg mixture without falling apart.
Why does my bread have a strong eggy taste?
An eggy flavor usually means the bread wasn’t baked long enough or the eggs weren’t properly incorporated into the batter. Make sure you’re baking until a toothpick comes out completely clean and whisking the eggs thoroughly before adding them to ensure even distribution.
Final Thoughts
This almond flour bread proves that giving up grains doesn’t mean giving up the joy of fresh, homemade bread. With its tender crumb, satisfying texture, and versatile flavor, it’s a recipe you’ll find yourself making again and again, not because you have to, but because you genuinely want to.
Give this recipe a try and see how easy it is to have fresh, nutritious bread that fits your lifestyle without compromise. Your toaster is about to become your new best friend.
Almond Flour Bread
Ingredients
Equipment
Method
- Preheat your oven to 350°F and line your 8.5 x 4.5 inch loaf pan with parchment paper, leaving some overhang on the sides for easy removal.
- In your large mixing bowl, whisk together the almond flour, baking soda, salt, and garlic powder if using until everything is evenly distributed and any lumps are broken up.
- In your medium bowl, whisk the eggs thoroughly until the yolks and whites are completely combined and slightly frothy. Add the melted coconut oil, honey, and apple cider vinegar, whisking until the mixture is smooth and emulsified.
- Pour the wet ingredients into the bowl with the dry ingredients and fold gently with your rubber spatula until just combined. The batter will be thick and slightly sticky, like a very thick cake batter.
- Scrape the batter into your prepared loaf pan and smooth the top with your spatula, creating an even surface. Use the spatula to gently tap out any air bubbles and push the batter into the corners of the pan.
- Place the pan in your preheated oven and bake for 40-45 minutes, until the top is golden brown and a toothpick inserted into the center comes out clean.
- Remove the pan from the oven and let it sit for 10 minutes before using the parchment overhang to lift the loaf out onto a cooling rack. Let it cool completely before slicing.
- Once completely cool, use a sharp serrated knife to slice the bread into 12 even pieces, using a gentle sawing motion rather than pressing down.


