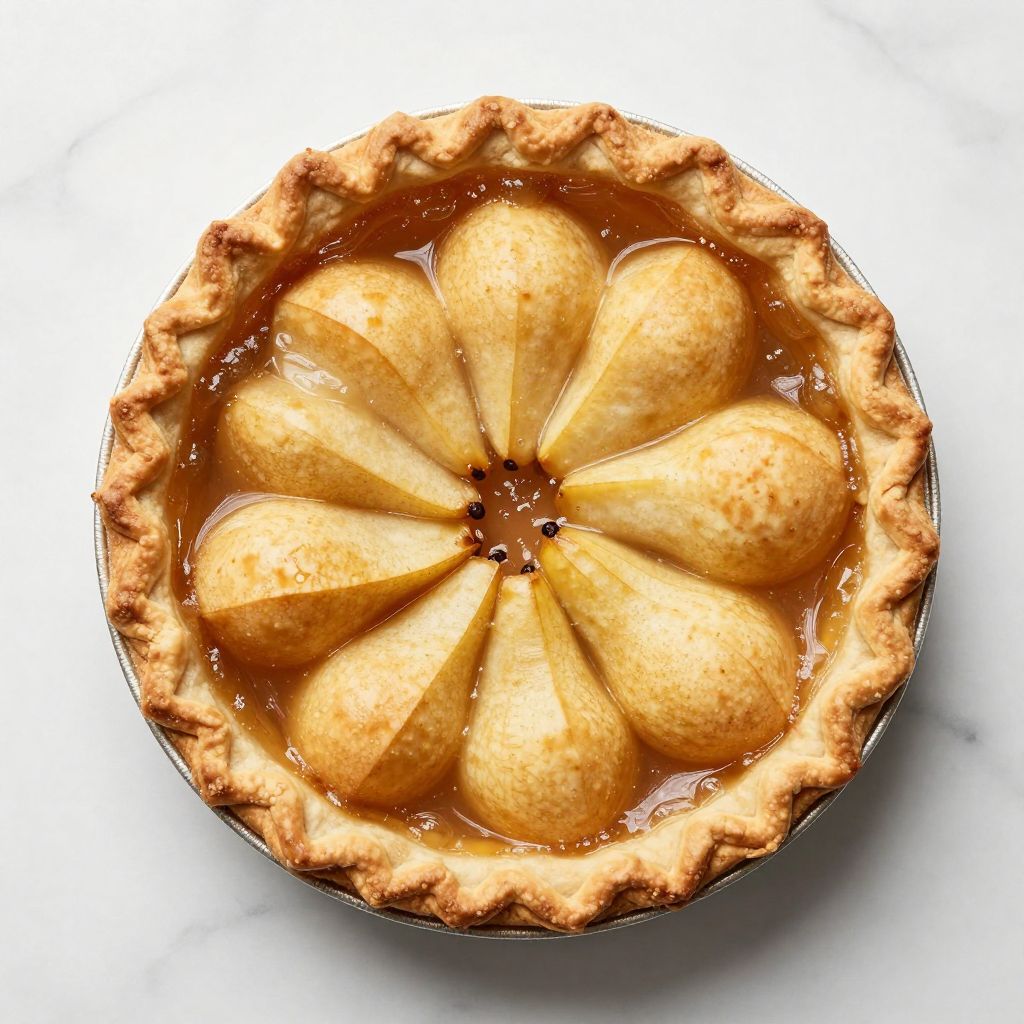
pear pie recipe
There’s something about the smell of pear pie baking that fills a kitchen with pure comfort, a gentle sweetness that makes everyone stop and ask what’s cooking.
Pear pie deserves a spot on your dessert rotation because it’s elegant enough for dinner parties yet simple enough for weeknight baking. The fruit stays tender and juicy while the spices add warmth without overpowering the delicate pear flavor. Whether you’re a seasoned baker or picking up a rolling pin for the first time, this recipe guides you through every step with confidence.
Why You’ll Love This Recipe
This pear pie checks all the boxes for a showstopping dessert that won’t keep you stressed in the kitchen.
- Pears cook down beautifully, creating a naturally sweet filling that needs minimal added sugar
- The spice blend (cinnamon, nutmeg, cardamom) complements pears without competing for attention
- A buttery homemade crust tastes infinitely better than store-bought and impresses your guests
- The pie holds up well for a full day, making it perfect for advance preparation
- It works for casual family dinners or fancy gatherings with equal grace
My Experience Making This Recipe
I’ve made this pie at least fifteen times, and it never fails to deliver. The first time, I was nervous about getting the crust right, but the instructions made it foolproof.
What really won me over was watching the filling bubble at the edges during baking, that telltale sign that everything’s working as planned. The kitchen smells incredible, and when you pull it out, the golden crust practically glows.
My family’s reaction sealed it: half the pie was gone within two hours, and I was already planning the next batch. Friends always ask for the recipe, and I love seeing them succeed with it too.
Recipe Overview
- Recipe Name: Homemade Pear Pie
- Servings: 8 slices
- Prep Time: 20 minutes (plus 30 minutes chill time)
- Cook Time: 50 minutes
- Total Time: 1 hour 40 minutes
- Course: Dessert
- Cuisine: American
- Calories per Serving: 285
Equipment You Will Need
- 9-inch pie dish
- Mixing bowls (at least 2)
- Measuring cups and spoons
- Fork or pastry cutter
- Rolling pin
- Paring knife
- Cutting board
- Large pot or mixing bowl for filling
- Baking sheet (to catch drips)
- Pie weights or dried beans (optional but helpful)
Ingredients for Pear Pie
For the Crust
- 2 and 1/2 cups all-purpose flour
- 1 teaspoon salt
- 1 tablespoon granulated sugar
- 1 cup (2 sticks) cold unsalted butter, cubed
- 6 to 8 tablespoons ice water
For the Filling
- 5 to 6 pounds fresh pears (about 8 medium), peeled, cored, and sliced
- 3/4 cup granulated sugar
- 1/4 cup brown sugar
- 2 tablespoons cornstarch
- 1 teaspoon ground cinnamon
- 1/4 teaspoon ground nutmeg
- 1/4 teaspoon ground cardamom
- 1/4 teaspoon salt
- 1 tablespoon fresh lemon juice
- 1/2 teaspoon vanilla extract
For Assembly and Finishing
- 1 egg, beaten (for egg wash)
- 1 tablespoon water
- 1 tablespoon coarse sugar (optional)
Ingredient Notes and Substitutions
- Pears: Bartlett, Bosc, and Anjou pears all work beautifully in this pie because they soften nicely without turning to mush. If you can’t find fresh pears, use canned pears (drained well) with a slight reduction in added sugar since canned fruit already contains liquid.
- Butter: Cold butter creates those flaky layers everyone craves in a good pie crust. Coconut oil works in a pinch, though the flavor will be slightly different and the texture less tender.
- Cornstarch: This thickens the filling without adding floury taste. Tapioca starch works just as well if you have a sensitivity to corn.
- Cardamom: This spice adds sophistication and pairs beautifully with pear. Skip it if you don’t have it on hand, but I truly recommend picking some up for future baking.
- All-purpose flour: Cake flour will create a more tender crust but may tear more easily, while bread flour creates a sturdier crust that’s less flaky. Stick with all-purpose for the best balance.
How to Make Pear Pie
Step 1: Make the Pie Crust
In a large bowl, whisk together flour, salt, and sugar until combined. Add the cold butter cubes and use a pastry cutter or fork to break them into pea-sized pieces throughout the flour, working quickly so the butter stays cold.
Cold butter creates steam pockets during baking, which gives you those gorgeous flaky layers that make pie crust worth the effort. This step takes about 3 to 4 minutes and your hands will get a bit messy, which is completely normal.
Step 2: Add Ice Water Gradually
Sprinkle the ice water over the mixture one tablespoon at a time, mixing gently with a fork until the dough just comes together. You want it moist enough to hold but not so wet that it sticks excessively to your hands.
Stop adding water once you can pinch the dough and it holds its shape without crumbling. Overworking the dough develops gluten, which makes the crust tough instead of tender, so resist the urge to knead it.
Step 3: Chill the Dough
Divide the dough in half, shape each piece into a disk about 1/2 inch thick, wrap in plastic wrap, and refrigerate for at least 30 minutes. Chilling relaxes the gluten and keeps the butter cold, both essential for a flaky crust.
You can make the dough up to 2 days ahead and refrigerate it, or freeze it for up to 3 months if you’re planning ahead.
Step 4: Prepare the Filling
While the dough chills, peel, core, and slice your pears into 1/4-inch thick slices. In a large bowl, combine granulated sugar, brown sugar, cornstarch, cinnamon, nutmeg, cardamom, and salt.
Add the sliced pears to the sugar mixture along with lemon juice and vanilla extract, tossing gently until every slice is coated. Let the mixture sit for 10 minutes; this allows the pears to release some liquid, which you’ll want to stir back in.
Step 5: Roll Out the Bottom Crust
On a lightly floured surface, roll one disk of dough into a circle about 12 inches in diameter, about 1/8 inch thick. Dust with extra flour as needed to prevent sticking, but don’t overdo it because excess flour makes the crust tough.
Carefully transfer the rolled dough to your pie dish by rolling it around the rolling pin and unrolling it over the dish. Press it gently into the corners and sides without stretching, as stretched dough shrinks during baking.
Step 6: Add the Pear Filling
Pour the pear mixture (including any liquid at the bottom of the bowl) into the pie shell, mounding it slightly in the center. Don’t worry if the filling looks wet; the cornstarch will thicken it as it bakes.
Dot the top with small pieces of cold butter if you’d like, about 1 tablespoon total broken into tiny pieces. This adds richness to the filling and is entirely optional but wonderful if you have it.
Step 7: Top with the Second Crust
Roll out the second disk of dough to the same thickness and size as the first. You can place it whole over the filling for a classic look, or cut it into strips for a lattice top if you’re feeling fancy.
If using a whole crust, trim the overhang to about 1 inch around the edges, then fold the edges under and crimp them with a fork or your fingers to seal. Brush the top with the egg wash (beaten egg mixed with water) for a beautiful golden finish.
Step 8: Cut Vents and Chill
Using a sharp knife, cut 4 to 5 small slits in the top crust to allow steam to escape during baking. This prevents the filling from boiling over and keeps the crust from getting soggy.
Place the assembled pie on a baking sheet (this catches any drips) and refrigerate for 20 minutes while you preheat your oven to 400 degrees Fahrenheit. Chilling helps the crust hold its shape and prevents excessive shrinking.
Step 9: Bake the Pie
Place the pie in the preheated oven and bake for 50 to 60 minutes, until the crust is deep golden brown and you see filling bubbling gently at the vents. The filling bubbles when it’s hot enough for the cornstarch to activate and thicken properly.
If the crust browns too quickly (usually after about 30 minutes), tent it loosely with foil to prevent burning while the filling continues to cook. The pie is done when the internal temperature reaches 190 degrees Fahrenheit at the center, but a visual check works great too.
Step 10: Cool and Set
Remove the pie from the oven and let it cool on a wire rack for at least 2 hours before slicing. This cooling time allows the filling to set completely; cutting into a warm pie results in a runny filling and a messy slice.
The pie will continue to thicken as it cools, so patience here pays off. You can serve it warm with vanilla ice cream if you’d like, but wait until it’s cooled to at least room temperature for the best texture.
Pro Tip: The secret to preventing a soggy bottom crust is baking the pie on the lowest oven rack, which exposes the bottom to direct heat and crisps it up beautifully.
Tips for the Best Pear Pie
- Choose pears that yield slightly to gentle pressure but aren’t mushy, as overripe pears turn to applesauce in the oven. You want pears that hold their shape during cooking.
- Don’t skip the lemon juice, which brightens the filling and prevents the pears from tasting flat or one-dimensional.
- Use a pie shield or foil tent if your crust is browning too fast, since the filling needs the full baking time to thicken properly.
- Let the fully baked pie cool completely before slicing, or use a warm pie to make a delicious mess that still tastes incredible.
- If your filling looks too thick after cooling (rare, but happens), simply slice the pie and serve with whipped cream, which masks it beautifully.
- For extra flavor, add a pinch of ground ginger or a tiny splash of almond extract to the filling, which amplifies the pear flavor.
Common Mistakes to Avoid
- Using warm or soft butter will result in a greasy, tough crust instead of a flaky one. Keep that butter cold from start to finish.
- Adding too much water to the dough creates a wet, sticky crust that shrinks dramatically in the oven. Add water one tablespoon at a time and stop as soon as the dough holds together.
- Skipping the cornstarch or using too little leaves you with a soupy filling that never sets, no matter how long it cools.
- Slicing the pie while it’s still hot results in slices that fall apart because the filling hasn’t gelled. Patience is mandatory here.
- Overworking the dough when mixing the crust develops gluten, making it tough and chewy instead of tender and flaky.
Serving Suggestions
A slice of pear pie shines on its own, but it becomes unforgettable with the right accompaniments. Consider what toppings and beverages will round out your dessert experience.
- Vanilla ice cream is the classic choice, melting into the warm filling and creating something magical
- Whipped cream with a touch of honey adds richness without overwhelming the delicate pear flavor
- Spiced caramel sauce ties together the warm spices in the filling and adds gorgeous presentation
- Serve with a cup of chamomile or herbal tea for a cozy, afternoon-tea vibe
- A glass of dessert wine like Riesling or moscato pairs beautifully with pears and the warm spice blend
Variations to Try
- Ginger Pear Pie: Add 1/2 teaspoon of ground ginger to the filling for a spicier, more warming version that’s perfect for fall and winter.
- Almond Pear Pie: Mix 1/2 cup of sliced almonds with the filling or sprinkle them on top before baking for a nutty texture and flavor boost.
- Pear and Cranberry Pie: Replace 1 pound of pears with fresh or dried cranberries for a tart-sweet combination that’s visually stunning.
- Lattice Top Pie: Cut the top crust into strips and weave them over the filling for an elegant presentation that shows off your baking skills.
- Mini Pear Pies: Divide the filling and dough into individual tartlet pans for single-serving portions that look impressive on a dessert table.
Dietary Adaptations
- Gluten-Free: Use a high-quality gluten-free flour blend (with xanthan gum included) in a 1:1 ratio for the all-purpose flour. The texture will be slightly more crumbly, but the pie will still taste delicious.
- Dairy-Free: Replace the butter with vegan butter or coconut oil in equal amounts for both the crust and filling. The crust won’t be quite as flaky, but dairy-free butter has improved dramatically in recent years.
- Vegan: Use vegan butter, skip the egg wash (or brush with plant-based milk instead), and ensure all other ingredients are vegan-certified. The pie works beautifully vegan with no flavor compromise.
- Low-Carb/Keto: Use a keto flour blend for the crust and replace the sugars with erythritol or monk fruit sweetener in equal amounts. You’ll lose some browning on the crust, but the filling will still work perfectly.
Storage and Reheating
Refrigerator
Store the fully cooled pie covered loosely with foil or plastic wrap in the refrigerator for up to 4 days. The crust may soften slightly, but the flavor deepens as it sits.
- Keep it in the coldest part of your fridge away from strong-smelling foods
- Slice while cold for clean cuts, then let slices come to room temperature before serving
Freezer
Wrap the fully cooled pie tightly in plastic wrap and then foil for up to 3 months in the freezer. This gives you a ready-made dessert whenever you need one.
- Freeze the pie whole, or slice it first and freeze slices individually for grab-and-go portions
- Thaw in the refrigerator overnight before reheating for best results
Reheating
Place the pie (or individual slices) on a baking sheet and warm in a 325-degree Fahrenheit oven for 15 to 20 minutes until heated through. This restores the crust’s crispness and softens the filling without drying it out.
- Cover with foil to prevent the crust from browning too much
- For a single slice, microwave for 30 to 40 seconds, though the texture won’t be quite as good
Nutrition Information
| Nutrient | Amount |
|---|---|
| Calories | 285 |
| Total Fat | 13g |
| Saturated Fat | 8g |
| Carbohydrates | 40g |
| Fiber | 2g |
| Sugar | 24g |
| Protein | 3g |
| Sodium | 180mg |
| Cholesterol | 45mg |
These values are estimates based on standard ingredients and serving sizes. Actual nutrition will vary based on specific brands and portion sizes.
Frequently Asked Questions
Can I make pear pie with canned pears?
Yes, canned pears work perfectly fine in this recipe. Drain them thoroughly and reduce the added sugar by about 2 tablespoons since canned fruit already contains liquid.
How far in advance can I prepare the pie?
You can make the dough up to 2 days ahead and refrigerate it, or assemble the entire pie (unbaked) up to 8 hours ahead and bake it when you’re ready. This makes it incredibly convenient for entertaining.
Why is my pie filling runny after baking?
This usually means the pie didn’t bake long enough for the cornstarch to fully activate, or you used juicy pears that released extra liquid. Try using slightly firmer pears and baking an extra 5 to 10 minutes until the filling visibly bubbles at the vents.
Can I use pear butter instead of fresh pears?
You could try using pear butter as a filling, though it’s quite concentrated and you’d need to adjust the other ingredients significantly. Fresh pears give the best texture and flavor.
What’s the difference between this recipe and apple pie?
Pears are naturally sweeter and more delicate than apples, so they need less sugar and more spice. The filling also breaks down more, creating a smoother texture than chunky apple pie.
Can I use store-bought pie crust to save time?
Absolutely, and there’s no shame in it. Store-bought crust bakes up fine, though homemade crust tastes noticeably better. If you go this route, follow the package instructions for handling and baking time.
Final Thoughts
Making pear pie is one of those baking projects that feels fancy but stays manageable from start to finish. The recipe comes together with straightforward steps, and the result impresses everyone who tastes it.
Whether you’re baking for a special occasion or just a quiet weekend with your family, this pie delivers comfort in every bite. Don’t hesitate to give it a try, and enjoy the beautiful moment when you pull a perfectly golden pie from your oven.
If you love this recipe, explore more delicious dessert options on RecipePapa. Try making apple pie filling for another classic favorite, or branch out into other fruit-based pies that will have your kitchen smelling incredible. Happy baking!
Homemade Pear Pie

An elegant and comforting pear pie with a buttery flaky crust and spiced pear filling, perfect for family dinners and gatherings.
- 9-inch pie dish
- Mixing bowls (at least 2)
- Measuring cups and spoons
- Fork or pastry cutter
- Rolling pin
- Paring knife
- Cutting board
- Large bowl for filling
- Baking sheet
- Pie weights or dried beans (optional)
Main
- 2 and 1/2 cups all-purpose flour
- 1 teaspoon salt
- 1 tablespoon granulated sugar
- 1 cup 2 sticks cold unsalted butter, cubed
- 6 to 8 tablespoons ice water
- 5 to 6 pounds fresh pears (about 8 medium, peeled, cored, and sliced)
- 3/4 cup granulated sugar
- 1/4 cup brown sugar
- 2 tablespoons cornstarch
- 1 teaspoon ground cinnamon
- 1/4 teaspoon ground nutmeg
- 1/4 teaspoon ground cardamom
- 1/4 teaspoon salt
- 1 tablespoon fresh lemon juice
- 1/2 teaspoon vanilla extract
- 1 egg (beaten (for egg wash))
- 1 tablespoon water
- 1 tablespoon coarse sugar (optional)
- In a large bowl, whisk together 2 and 1/2 cups flour, 1 teaspoon salt, and 1 tablespoon sugar.
- Cut in 1 cup cold butter with a pastry cutter until mixture resembles coarse crumbs.
- Gradually add 6 to 8 tablespoons ice water, mixing until dough holds together.
- Divide dough into two disks, wrap in plastic and chill for at least 30 minutes.
- Preheat oven to 400°F and prepare a baking sheet with parchment or foil.
- In a large bowl, combine sliced pears, 3/4 cup granulated sugar, 1/4 cup brown sugar, cornstarch, spices, salt, lemon juice, and vanilla; toss gently.
- Roll out one dough disk to 12-inch circle and fit into a 9-inch pie dish; trim edges.
- Pour pear filling into crust and dot with small pieces of cold butter.
- Roll out second dough disk, place over filling, trim and crimp edges; brush with egg wash and sprinkle coarse sugar.
- Cut 4 to 5 slits in top crust, chill assembled pie for 20 minutes.
- Bake on lowest rack at 400°F for 50 to 60 minutes until crust is golden and filling bubbles, tent with foil if browning too quickly.
- Cool on a wire rack for at least 2 hours before slicing to allow filling to set.
Pie dough can be made up to 2 days ahead or frozen for up to 3 months. Store cooled pie in refrigerator for up to 4 days or freeze whole for 3 months. Reheat slices at 325°F for 15 minutes.