The scent of butter and cream mingling in a hot oven is one of those kitchen smells that makes you stop whatever you’re doing and just breathe it in. English scones deliver that magic every single time, with their golden tops, tender crumb, and that perfect balance between biscuit and cake that makes them utterly irresistible.
What sets this recipe apart is how simple it really is, using just a handful of pantry staples to create something that feels special enough for an afternoon tea yet comforting enough for a lazy Sunday morning. The texture you get here is spot on: crisp on the outside, soft and slightly crumbly inside, ready to soak up clotted cream and jam without falling apart.
Let me walk you through making scones that would make any British grandmother nod in approval.
Why You’ll Love This Recipe
This recipe cuts through all the fuss and gives you bakery-quality scones without any fancy techniques or hard-to-find ingredients. You’ll have warm scones on the table in under 30 minutes from start to finish.
- Ready in less than 30 minutes from mixing bowl to cooling rack
- Uses only 7 basic ingredients you likely have right now
- Produces that classic tall, flaky texture without any complicated folding
- Freezes beautifully so you can bake fresh scones anytime
- Versatile base that works with sweet or savory additions
My Experience Making This Recipe
The first time I made these, I was skeptical about whether such a simple method could really produce proper scones. I’d always assumed you needed cold hands, a marble countertop, and some kind of mystical British baking gene.
Turns out, cold butter and a light touch are really all you need. When I pulled that first batch from the oven, the tops were beautifully golden and the sides had that characteristic straight edge that tells you they rose properly.
I served them still warm with strawberry jam and whipped cream (I didn’t have clotted cream on hand, and honestly, nobody complained). My partner ate three in one sitting and asked if I could make them every weekend, which I took as a pretty solid endorsement.
Recipe Overview
- Recipe Name: English Scones
- Servings: 8 scones
- Prep Time: 15 minutes
- Cook Time: 12 minutes
- Total Time: 27 minutes
- Course: Breakfast, Brunch, Dessert
- Cuisine: British
- Calories per Serving: 245 calories
Equipment You Will Need
- Large mixing bowl
- Pastry cutter or two knives
- 2.5-inch round biscuit cutter or drinking glass
- Baking sheet
- Parchment paper or silicone baking mat
- Measuring cups and spoons
- Small bowl for egg wash
- Pastry brush
- Wire cooling rack
Ingredients for English Scones
- 2 cups all-purpose flour, plus extra for dusting
- 1/4 cup granulated sugar
- 1 tablespoon baking powder
- 1/2 teaspoon salt
- 6 tablespoons unsalted butter, very cold and cut into small cubes
- 2/3 cup heavy cream, plus 1 tablespoon for brushing
- 1 large egg
- 1 teaspoon vanilla extract (optional)
Ingredient Notes and Substitutions
- All-purpose flour: Provides the structure without making the scones tough or dense. You can substitute with a 1:1 gluten-free baking flour, though the texture will be slightly more crumbly.
- Baking powder: Creates those lovely air pockets and the characteristic rise in scones. Make sure yours is fresh (less than 6 months old) or your scones won’t rise properly.
- Unsalted butter: Adds richness and creates flaky layers as it melts during baking. You can use salted butter if needed, just reduce the added salt to 1/4 teaspoon.
- Heavy cream: Gives scones their tender crumb and rich flavor. Whole milk works in a pinch, but the scones will be slightly less rich and tender.
- Granulated sugar: Provides subtle sweetness without making the scones dessert-like. You can reduce to 2 tablespoons for a more savory scone or increase to 1/3 cup for a sweeter version.
How to Make English Scones
Step 1: Prep Your Oven and Pan
Preheat your oven to 400°F and line a baking sheet with parchment paper. Getting the oven properly hot before the scones go in helps them rise quickly and develop that crispy exterior.
Step 2: Mix the Dry Ingredients
Whisk together the flour, sugar, baking powder, and salt in your large mixing bowl until everything is evenly distributed. This step prevents pockets of baking powder or salt from creating uneven texture in your finished scones.
Step 3: Cut in the Butter
Add the cold butter cubes to the flour mixture and use your pastry cutter (or two knives in a crisscross motion) to work the butter into the flour until the mixture resembles coarse breadcrumbs with some pea-sized pieces of butter remaining. Those little butter chunks are what create flaky layers, so don’t overwork it to the point where the butter completely disappears.
Step 4: Prepare the Wet Ingredients
Whisk together the heavy cream, egg, and vanilla extract in a small bowl until smooth. Combining these first makes it easier to distribute them evenly throughout the dough.
Step 5: Bring the Dough Together
Pour the wet ingredients into the flour mixture and stir gently with a fork just until the dough starts to come together. Stop mixing when you still see a few dry streaks, then use your hands to gently press the dough into a cohesive ball.
Step 6: Shape the Dough
Turn the dough out onto a lightly floured surface and gently pat it into a circle about 3/4 inch thick. Resist the urge to knead or overwork the dough, which develops gluten and makes tough scones instead of tender ones.
Step 7: Cut the Scones
Use your biscuit cutter to stamp out scones, pressing straight down without twisting (twisting seals the edges and prevents proper rising). Gather the scraps, gently press them together once, and cut out additional scones until you’ve used all the dough.
Step 8: Apply Egg Wash and Bake
Place the scones on your prepared baking sheet, spacing them about 2 inches apart. Brush the tops lightly with the remaining tablespoon of cream (this creates that gorgeous golden finish) and bake for 12 to 14 minutes until the tops are golden brown and the scones have risen beautifully.
Step 9: Cool Slightly Before Serving
Transfer the scones to a wire rack and let them cool for about 5 minutes before serving. They’re absolutely perfect when still slightly warm, with the butter barely melted inside.
Pro Tip: Freeze your butter for 15 minutes before cutting it into the flour. The colder your butter stays, the flakier your scones will be, because the butter creates steam pockets as it melts in the oven rather than just blending into the dough.
Tips for the Best English Scones
- Handle the dough as little as possible once the wet ingredients go in. Overworking develops gluten, which makes scones tough and dense instead of tender and crumbly.
- Keep all your ingredients cold, especially the butter and cream. You can even chill your mixing bowl and the flour for 15 minutes before starting.
- Don’t skip the egg wash or cream brushing on top. This simple step creates that bakery-worthy golden sheen that makes scones look as good as they taste.
- Cut straight down with your biscuit cutter without twisting. Twisting seals the edges and prevents the scones from rising to their full potential.
- Space scones at least 2 inches apart on the baking sheet. They need room for air to circulate, which helps them bake evenly and develop crispy sides.
- Check for doneness by looking at the sides, not just the top. The sides should look dry and set, not doughy, even if the tops are already golden.
Common Mistakes to Avoid
- Using warm or softened butter instead of cold creates dense, cake-like scones because the butter blends into the dough rather than creating flaky layers.
- Overmixing the dough once the liquid goes in develops too much gluten and results in tough, chewy scones instead of tender ones.
- Rolling the dough too thin makes flat, crispy scones rather than the tall, fluffy ones you want. Aim for at least 3/4 inch thickness.
- Skipping the resting of ingredients at cold temperature can make the dough too soft to handle and causes spreading during baking instead of upward rising.
- Baking at too low a temperature prevents proper rise and creates pale, doughy scones that never develop that crispy exterior.
Serving Suggestions
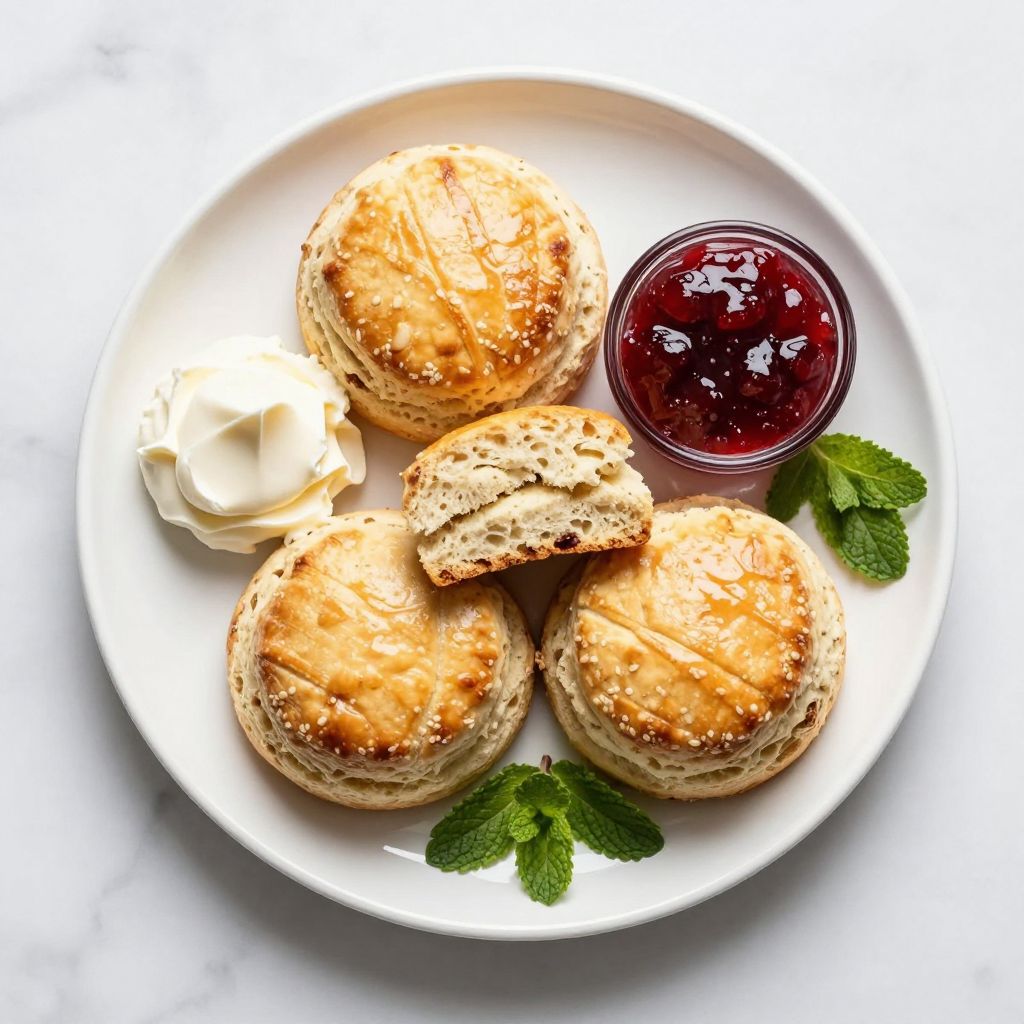
Scones are traditionally served with clotted cream and strawberry jam, but they’re delicious with almost any accompaniment you can imagine. Serve them warm or at room temperature, split horizontally to show off that tender interior.
- Classic clotted cream and strawberry jam for an authentic British cream tea experience
- Lemon curd and whipped cream for a bright, tangy variation
- Butter and honey for a simple, comforting breakfast
- Mascarpone cheese and fresh berries for an Italian-inspired twist
- Salted butter and marmalade for a bittersweet contrast to the scone’s mild sweetness
Variations to Try
- Fruit scones: Fold in 2/3 cup of dried currants, raisins, or chopped dried cranberries after cutting in the butter for traditional fruit scones with little bursts of sweetness throughout.
- Lemon poppy seed: Add 2 tablespoons of poppy seeds and the zest of one lemon to the dry ingredients for a bright, slightly nutty flavor that pairs beautifully with tea.
- Chocolate chip: Mix in 1/2 cup of mini chocolate chips after cutting in the butter for a more dessert-like scone that kids go crazy for.
- Savory cheese and herb: Reduce sugar to 1 tablespoon and add 3/4 cup shredded sharp cheddar and 2 tablespoons fresh chopped herbs for scones that work beautifully with soup or eggs.
- Orange cranberry: Add the zest of one orange and 1/2 cup dried cranberries for a festive variation that’s perfect during the holidays.
Dietary Adaptations
- Gluten-free: Substitute the all-purpose flour with a gluten-free 1:1 baking flour blend that contains xanthan gum. The texture will be slightly more delicate and crumbly but still delicious.
- Dairy-free: Replace the butter with cold coconut oil (measured solid) and use full-fat canned coconut cream instead of heavy cream. The flavor will have a subtle coconut note, but the texture remains quite similar.
- Vegan: Use the dairy-free swaps above and replace the egg with a flax egg (1 tablespoon ground flaxseed mixed with 3 tablespoons water, left to gel for 5 minutes). The rise won’t be quite as dramatic, but the scones will still be tasty.
- Low-carb/Keto: Replace flour with 2 cups almond flour plus 1/4 cup coconut flour, and use a granulated sugar substitute. The texture will be denser and more cake-like rather than flaky, but it scratches the scone itch.
Storage and Reheating
Refrigerator
Store cooled scones in an airtight container at room temperature for up to 2 days. They’ll stay fresh and tender without refrigeration, which can actually dry them out faster.
- Place parchment paper between layers if stacking to prevent sticking
- Refresh in a 300°F oven for 5 minutes before serving to restore some crispness
Freezer
Scones freeze beautifully either baked or unbaked, making them perfect for having fresh scones whenever a craving hits. Frozen baked scones keep for up to 3 months.
- For baked scones: Let cool completely, wrap individually in plastic wrap, then store in a freezer bag
- For unbaked scones: Cut and shape the scones, freeze on a baking sheet until solid, then transfer to a freezer bag
- Bake frozen unbaked scones directly from the freezer, adding 2 to 3 minutes to the baking time
Reheating
The best way to reheat scones is in the oven, which restores their crispy exterior while warming the interior. Avoid the microwave, which makes them rubbery and tough.
- Oven method: Heat at 300°F for 5 to 7 minutes until warmed through
- Toaster oven: Split the scone in half and toast lightly for a crispy texture
- From frozen: Thaw at room temperature for 1 hour, then reheat using the oven method
Nutrition Information
| Nutrient | Amount |
|---|---|
| Calories | 245 |
| Total Fat | 13g |
| Saturated Fat | 8g |
| Carbohydrates | 28g |
| Fiber | 1g |
| Sugar | 7g |
| Protein | 4g |
| Sodium | 285mg |
| Cholesterol | 55mg |
Nutritional values are estimates based on standard ingredient databases and may vary depending on specific brands used and modifications made to the recipe.
Frequently Asked Questions
Can I make the dough ahead of time?
You can shape the scones and refrigerate them unbaked for up to 24 hours before baking, which actually helps them rise even better. Just cover them tightly with plastic wrap and add 1 to 2 minutes to the baking time since they’ll be cold from the fridge.
Why are my scones flat and not fluffy?
Flat scones usually result from old baking powder that’s lost its potency or from overworking the dough, which develops gluten and prevents rising. Check that your baking powder fizzes when mixed with hot water, and handle the dough as little as possible.
Can I use milk instead of heavy cream?
Yes, but your scones will be slightly less rich and tender since cream has a higher fat content. For best results with milk, use whole milk rather than low-fat, and consider adding an extra tablespoon of butter to compensate.
How do I know when the scones are done baking?
The tops should be golden brown and the sides should look set and dry rather than doughy. You can also insert a toothpick into the center; it should come out clean or with just a few crumbs attached.
What’s the difference between scones and biscuits?
Scones typically contain eggs and sometimes sugar, giving them a richer, slightly sweeter flavor and a more cake-like crumb. American biscuits are usually made with just flour, butter, and buttermilk for a more savory, flaky texture.
Should I twist the cutter when cutting scones?
Never twist the cutter because it seals the edges and prevents the scones from rising properly. Press straight down and lift straight up for the best rise and those characteristic layered sides.
Can I add mix-ins to this recipe?
Absolutely, just fold in up to 3/4 cup of dried fruit, chocolate chips, nuts, or cheese after cutting in the butter and before adding the wet ingredients. More than that can weigh down the dough and affect the rise.
Final Thoughts
Making proper English scones at home is one of those simple pleasures that brings a little bit of elegance to any morning or afternoon. The process is quick, the ingredient list is short, and the results are genuinely impressive every single time.
Give this recipe a try next time you want something special for breakfast or when friends drop by unexpectedly. There’s something wonderful about pulling a tray of golden, fragrant scones from the oven and watching them disappear within minutes, and I have a feeling you’ll be making these on repeat once you see how easy they really are.
English Scones
Ingredients
Equipment
Method
- Preheat your oven to 400°F and line a baking sheet with parchment paper.
- Whisk together the flour, sugar, baking powder, and salt in your large mixing bowl until everything is evenly distributed.
- Add the cold butter cubes to the flour mixture and use your pastry cutter (or two knives in a crisscross motion) to work the butter into the flour until the mixture resembles coarse breadcrumbs with some pea-sized pieces of butter remaining.
- Whisk together the heavy cream, egg, and vanilla extract in a small bowl until smooth.
- Pour the wet ingredients into the flour mixture and stir gently with a fork just until the dough starts to come together. Stop mixing when you still see a few dry streaks, then use your hands to gently press the dough into a cohesive ball.
- Turn the dough out onto a lightly floured surface and gently pat it into a circle about 3/4 inch thick.
- Use your biscuit cutter to stamp out scones, pressing straight down without twisting. Gather the scraps, gently press them together once, and cut out additional scones until you've used all the dough.
- Place the scones on your prepared baking sheet, spacing them about 2 inches apart. Brush the tops lightly with the remaining tablespoon of cream and bake for 12 to 14 minutes until the tops are golden brown and the scones have risen beautifully.
- Transfer the scones to a wire rack and let them cool for about 5 minutes before serving.


