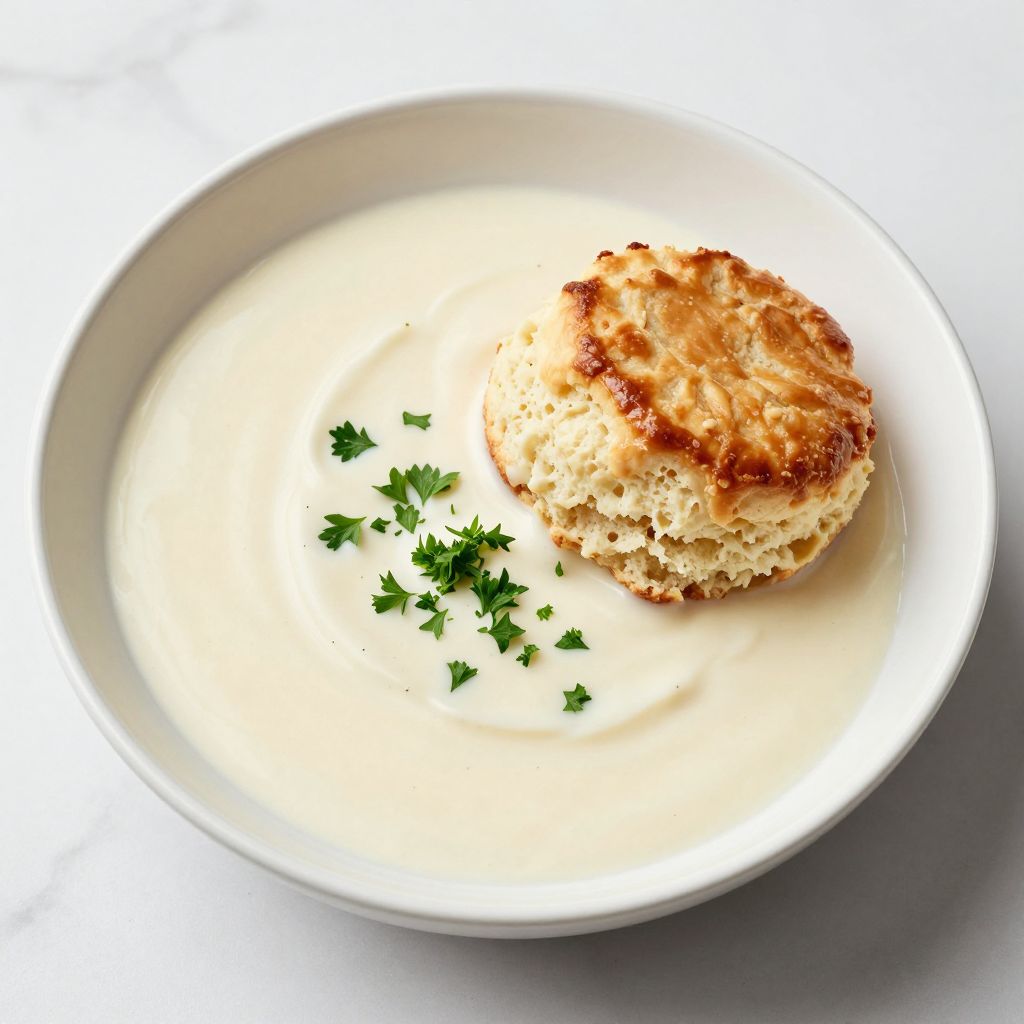
White gravy transforms ordinary biscuits, chicken fried steak, and breakfast plates into something worth waking up early for. This creamy, peppery sauce takes five ingredients and ten minutes, yet most home cooks struggle to get it right.
I have made this gravy hundreds of times, and I am going to show you exactly how to nail it every single time. Let us get into it.
What Makes This Recipe Worth Your Time
This white gravy recipe produces a silky, lump free sauce with a rich flavor that coats the back of a spoon perfectly. It uses pantry staples you already have and requires no special skills.
- Five ingredients you already own: butter, flour, milk, salt, and pepper
- Ten minutes from cold pan to finished gravy with no babysitting required
- Foolproof method that eliminates lumps by building a proper roux first
- Endlessly versatile as a base for biscuits, fried chicken, vegetables, and casseroles
- Budget friendly at roughly forty cents per generous serving
A Little Background on This Dish
White gravy, sometimes called country gravy or sawmill gravy, originated in the lumber camps and farmhouses of the American South. Workers needed cheap, filling food that stretched limited protein, and a flour based gravy over biscuits fit the bill perfectly.
The sawmill name comes from those early logging camps where cooks made this gravy to feed hungry workers before dawn. Today it remains a cornerstone of Southern breakfast tables and diners across the country, proving that simple food done right never goes out of style.
My Experience With This Recipe
I started making white gravy as a broke college student who discovered that biscuits and gravy could feed four people for about two dollars. My early attempts ranged from paste thick enough to patch drywall to thin milk that slid right off the biscuit.
The breakthrough came when I finally understood that the roux needs to cook before adding milk, and that the milk must go in slowly while whisking constantly. I ruined at least a dozen batches with stubborn lumps before that lesson stuck.
The first time I got it right, the gravy had this beautiful glossy sheen and clung to a warm biscuit without running off the edges. My kids now request it every Saturday morning, which tells me more than any compliment could.
Before You Start: Key Things to Know
This recipe suits absolute beginners, though the whisking technique requires your full attention for about three minutes. The only real challenge is adding the milk slowly enough to prevent lumps.
- Difficulty level: Beginner friendly with one technique to master
- Active time vs passive time: All ten minutes are active with constant stirring
- Most important equipment: A flat bottomed whisk or wooden spoon you can move quickly
- Step requiring most attention: Adding the first cup of milk to the roux while whisking
Recipe at a Glance
- Recipe Name: White Gravy
- Yield: 6 servings (about 2 cups total)
- Prep Time: 2 minutes
- Cook Time: 8 minutes
- Total Time: 10 minutes
- Difficulty: Easy
- Course: Sauce, Breakfast
- Cuisine: American Southern
- Calories per Serving: 145
How to Source the Best Ingredients
White gravy has so few ingredients that each one matters significantly. Using quality butter and whole milk makes the difference between good gravy and forgettable gravy.
- Butter: Choose unsalted butter so you control the salt level; look for a deep yellow color indicating higher fat content
- All purpose flour: Any major brand works fine; avoid self rising flour which contains leavening agents
- Whole milk: Full fat milk creates the richest gravy; check the date and choose the freshest carton
- Black pepper: Freshly cracked pepper delivers more flavor than pre ground; look for whole peppercorns
- Salt: Fine sea salt or kosher salt both work; avoid iodized table salt which can taste metallic
Ingredients for White Gravy
- 4 tablespoons unsalted butter
- 1/4 cup all purpose flour (about 30 grams)
- 2 cups whole milk, at room temperature
- 1 teaspoon kosher salt, plus more to taste
- 1/2 teaspoon freshly cracked black pepper, plus more to taste
Smart Substitutions and Swaps
- Butter: Provides richness and flavor to the roux base. Substitute bacon drippings or sausage fat for a more savory, meaty gravy with authentic Southern character.
- All purpose flour: Thickens the gravy and creates the roux structure. Substitute equal parts cornstarch mixed with cold milk, but add it at the end rather than making a roux.
- Whole milk: Creates the creamy body and smooth texture. Substitute half and half for richer gravy or 2% milk for lighter gravy with slightly thinner consistency.
- Kosher salt: Seasons the gravy throughout cooking. Substitute half the amount of fine sea salt or table salt since the crystals are smaller and more concentrated.
- Black pepper: Provides the signature speckled appearance and heat. Substitute white pepper for a smoother look or add a pinch of cayenne for extra kick.
Tools and Equipment You Will Need
Having everything within arm’s reach matters here because the gravy requires constant attention once you start. Measure your ingredients before turning on the heat.
- Medium saucepan or skillet, 10 to 12 inches (heavy bottom prevents scorching)
- Flat bottomed whisk or wooden spoon (flat edge scrapes the pan corners where lumps hide)
- Liquid measuring cup for milk
- Measuring spoons for flour and seasonings
- Ladle or large spoon for serving
How to Make White Gravy
Read through all the steps before you begin and measure out every ingredient. Take the milk out of the refrigerator fifteen minutes early so it reaches room temperature, which helps it incorporate smoothly into the roux.
Step 1: Melt the Butter
Place the saucepan over medium heat and add all four tablespoons of butter. Let it melt completely, swirling the pan occasionally to distribute it evenly across the bottom.
Melting the butter first creates an even fat layer that will combine with the flour uniformly. Starting with cold butter in patches leads to uneven roux development and potential lumps.
Watch for the butter to stop foaming and become completely liquid with no solid pieces remaining. This takes about one to two minutes.
Step 2: Add the Flour
Sprinkle the flour evenly over the melted butter while whisking constantly. Make sure every bit of flour gets incorporated into the butter with no dry spots remaining.
This mixture of fat and flour is called a roux, and it forms the thickening foundation of your gravy. Equal parts fat and flour by volume create the proper ratio for a medium thick gravy.
The mixture should look like wet sand with a smooth, paste like consistency. If you see dry flour pockets, keep whisking until they disappear.
Step 3: Cook the Roux
Continue cooking the roux over medium heat, stirring constantly, for two full minutes. Do not rush this step or skip ahead to adding the milk.
Cooking the roux eliminates the raw flour taste that ruins many homemade gravies. This step also activates the starches that will thicken your milk into a proper sauce.
The roux should turn from pale yellow to a light golden color and develop a slightly nutty aroma. If it starts to brown significantly, reduce your heat.
Step 4: Add the First Addition of Milk
Remove the pan from heat briefly and pour in about one third of the milk, roughly two thirds of a cup. Whisk vigorously and continuously as you pour, scraping the bottom and corners of the pan.
Adding milk gradually allows the starch molecules in the roux to absorb liquid slowly without clumping. Dumping all the milk at once overwhelms the roux and creates lumps that never smooth out.
The mixture will seize up and become very thick, almost like a paste. This is exactly what should happen, so keep whisking until it smooths out.
Step 5: Add the Second Addition of Milk
Return the pan to medium heat and pour in another third of the milk while whisking constantly. Keep the whisk moving in a figure eight pattern to reach all areas of the pan.
Each addition of milk thins the mixture gradually, allowing you to control the final consistency. Adding milk in stages also keeps the temperature stable, preventing the roux from breaking.
The gravy should start to loosen and become pourable, though still thicker than your target consistency.
Step 6: Add the Final Milk and Season
Pour in the remaining milk and add the salt and pepper. Continue whisking over medium heat, making sure to scrape the entire bottom of the pan.
Seasoning now rather than at the end allows the salt to dissolve completely and distribute evenly throughout the gravy. The pepper also releases more flavor when heated in the liquid.
The gravy will look thin at this point, which is correct. It thickens significantly as it heats through in the next steps.
Step 7: Bring to a Simmer
Increase the heat slightly and bring the gravy to a gentle simmer, whisking frequently. You want small bubbles breaking the surface around the edges, not a rolling boil.
Simmering activates the flour starches fully and brings the gravy to its final thickened state. Boiling too hard can cause the milk proteins to separate and create a grainy texture.
Watch for the first bubbles to appear around the edges of the pan, then reduce heat immediately to maintain a gentle simmer.
Step 8: Simmer and Thicken
Let the gravy simmer gently for three to four minutes, whisking every thirty seconds or so. The gravy will thicken noticeably during this time.
Extended simmering allows the starches to fully hydrate and eliminates any remaining raw flour taste. This step also reduces the liquid slightly, concentrating the flavors.
The gravy should coat the back of a spoon and leave a clear trail when you run your finger through it.
Step 9: Test the Consistency
Dip a spoon into the gravy and hold it horizontally. The gravy should coat the spoon evenly and drip slowly, not run off in sheets or cling in thick globs.
Gravy thickens as it cools, so aim for a consistency slightly thinner than your ideal serving texture. You can always simmer it longer, but you cannot undo overthickening without adding more milk.
If the gravy seems too thick, whisk in additional milk one tablespoon at a time until it reaches your desired consistency.
Step 10: Adjust Seasoning
Taste the gravy and add more salt or pepper as needed. Most people underseason their gravy, so be generous with the black pepper especially.
Proper seasoning balances the richness of the butter and milk and brings forward the subtle flavors. Unseasoned gravy tastes flat and one dimensional no matter how good the texture is.
The gravy should taste savory with a noticeable pepper presence but not overly salty. Add salt in small pinches, tasting between each addition.
Step 11: Rest Briefly and Serve
Remove the pan from heat and let the gravy rest for one minute before serving. This brief rest allows the consistency to stabilize and makes serving easier.
Resting gives the starch molecules time to set into their final structure. Serving immediately can result in gravy that seems perfect in the pan but thins out on the plate.
The surface should look glossy and smooth with visible pepper flecks throughout. Serve immediately over warm biscuits, chicken fried steak, or your favorite breakfast items.
Pro Tip: If lumps happen despite your best efforts, pour the gravy through a fine mesh strainer into a clean pan and return it to heat briefly. Nobody has to know.
The Science Behind the Technique
The magic of white gravy happens through starch gelatinization, the process where flour starches absorb liquid and swell when heated. When you cook flour in fat first, you coat each starch granule individually, preventing them from clumping together when liquid arrives.
The roux cooking time matters because raw flour contains enzymes that can break down starches and thin your gravy over time. Two minutes of cooking deactivates these enzymes and ensures your gravy stays thick.
Chef Note: Room temperature milk incorporates into a hot roux more smoothly than cold milk because the temperature shock is less severe, giving you more control over the thickening process.
Tips for Getting It Right Every Time
- Measure your flour precisely because too much creates paste and too little creates thin sauce that never thickens properly
- Keep whisking constantly during the first milk addition since this is when lumps form and set permanently
- Use room temperature milk to prevent the roux from seizing up and creating stubborn lumps in the corners
- Cook the roux fully for the entire two minutes or your finished gravy will taste like raw flour paste
- Season boldly because bland gravy cannot be fixed by adding salt at the table
- Serve immediately since white gravy forms a skin and thickens significantly as it sits
Mistakes That Will Ruin Your Dish
- Adding all the milk at once overwhelms the roux and creates lumps that whisking cannot fix
- Skipping the roux cooking time leaves a raw flour taste that makes the gravy inedible
- Using high heat scorches the milk solids and creates brown specks and burnt flavor throughout
- Walking away from the pan allows the gravy to stick, scorch, and develop a skin on the surface
- Underseasoning produces bland, forgettable gravy that tastes like hot milk with flour
Make Ahead and Meal Prep Tips
White gravy tastes best fresh, but you can make it a few hours ahead for brunch service or meal prep. It requires gentle reheating and a splash of milk to restore its original texture.
- Fresh gravy keeps warm in a covered pan over the lowest heat setting for up to thirty minutes with occasional stirring
- Refrigerated gravy stores in an airtight container for up to three days; press plastic wrap directly onto the surface to prevent skin formation
- Reheating method involves gentle warming over low heat with one to two tablespoons of milk whisked in to restore consistency
- Batch cooking works well if you make the roux ahead and refrigerate it, then add warm milk and finish the gravy when needed
What to Serve With White Gravy
White gravy belongs on a hearty breakfast plate or a comfort food dinner. It works as a sauce, a topping, or a dipping companion for anything crispy and savory.
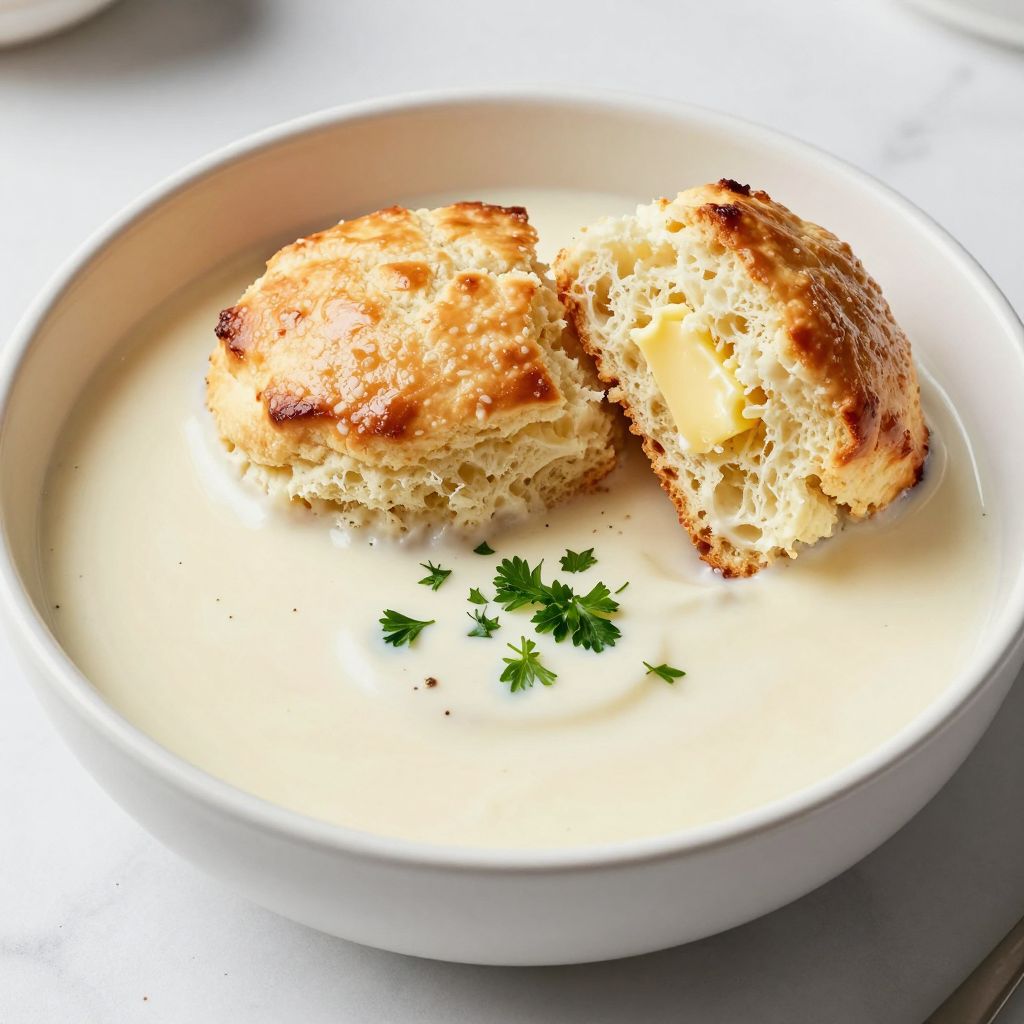
- Buttermilk biscuits: The classic pairing that lets the gravy shine without competing flavors
- Chicken fried steak: The crispy coating absorbs the gravy while the meat stays tender underneath
- Fried chicken: A generous pour over crispy thighs creates the ultimate Southern comfort meal
- Hash browns: The creamy gravy contrasts perfectly with crispy shredded potatoes
- Scrambled eggs: A spoonful of gravy on the side turns simple eggs into a proper breakfast plate
Drink Pairings
A strong cup of black coffee cuts through the richness of white gravy perfectly and remains the traditional breakfast pairing. The bitter notes balance the creamy, savory sauce.
- Wine: A crisp, dry sparkling wine or Champagne cuts through the richness and refreshes the palate
- Beer: An American wheat beer with subtle citrus notes provides effervescence without overpowering the dish
- Non alcoholic: Fresh squeezed orange juice or apple cider adds brightness and acidity to balance the heavy gravy
- Hot drink: Strong black coffee or black tea with no sugar serves as the classic Southern breakfast companion
Flavour Variations Worth Trying
- Sausage gravy: Brown crumbled breakfast sausage in the pan first, then build the roux in the rendered fat. The meat adds protein and smoky depth to every bite.
- Bacon gravy: Cook diced bacon until crispy, remove the pieces, and make the roux in the bacon fat. Sprinkle the bacon bits on top for texture contrast.
- Herb gravy: Add two tablespoons of fresh chopped sage and thyme with the seasonings. The herbs create a more complex flavor profile suited for holiday meals.
- Spicy gravy: Add half a teaspoon of cayenne pepper and a dash of hot sauce to the finished gravy. The heat builds slowly and pairs well with fried chicken.
- Mushroom gravy: Sauté sliced mushrooms in the butter before adding flour, creating an earthy umami rich variation. This version works beautifully over mashed potatoes.
How to Adapt This Recipe for Your Diet
- Gluten free: Substitute a one to one gluten free flour blend for the all purpose flour. Cook the roux slightly longer since gluten free starches take more time to lose their raw taste.
- Dairy free: Use vegan butter and unsweetened oat milk or cashew milk. The gravy will be slightly thinner, so reduce the milk by two tablespoons.
- Vegan: Combine dairy free butter and plant milk with a pinch of nutritional yeast for savory depth. The texture comes close to traditional gravy with proper roux technique.
- Low carb or keto: Substitute almond flour and heavy cream for a lower carb version. The gravy will not thicken as much, so use three tablespoons cream per one tablespoon flour.
- High protein: Stir two tablespoons of unflavored protein powder into the finished gravy off heat. Add it at the end to prevent clumping and grittiness.
How to Store and Reheat
In the Refrigerator
Store leftover gravy in an airtight container with plastic wrap pressed directly onto the surface. It keeps for up to three days.
- Transfer to a container while still warm to prevent skin formation
- Stir before reheating to reincorporate any separated fat
In the Freezer
White gravy freezes adequately but may separate slightly upon thawing. It keeps for up to one month.
- Freeze in portions using ice cube trays, then transfer cubes to a freezer bag
- Thaw overnight in the refrigerator before reheating
Reheating
Stovetop reheating produces the best results and takes about five minutes over low heat. Add milk to restore the original consistency.
- Oven reheating: Place in a covered baking dish at 300°F for fifteen minutes, stirring halfway through
- Stovetop reheating: Warm over low heat, whisking in one to two tablespoons of milk to restore smooth texture
- Microwave reheating: Heat in thirty second intervals, stirring between each; expect slightly uneven texture and use this method only when necessary
Cost Breakdown
Making white gravy at home costs a fraction of restaurant prices and uses ingredients you likely have on hand. A batch large enough for six people runs under three dollars total.
| Ingredient | Estimated Cost |
|---|---|
| Unsalted butter (4 tbsp) | $0.50 |
| All purpose flour (1/4 cup) | $0.05 |
| Whole milk (2 cups) | $0.60 |
| Kosher salt | $0.02 |
| Black pepper | $0.05 |
| Total Per Serving | $0.40 |
Nutrition Information
| Nutrient | Amount |
|---|---|
| Calories | 145 |
| Total Fat | 10g |
| Saturated Fat | 6g |
| Trans Fat | 0g |
| Cholesterol | 30mg |
| Sodium | 340mg |
| Total Carbohydrates | 9g |
| Dietary Fiber | 0g |
| Total Sugars | 4g |
| Added Sugars | 0g |
| Protein | 3g |
| Vitamin D | 1mcg |
| Calcium | 100mg |
| Iron | 0.5mg |
| Potassium | 130mg |
Nutritional values are estimates based on standard ingredients and may vary depending on specific brands and exact portion sizes used.
Frequently Asked Questions
Can I use a different type of milk?
You can use 2% milk for a lighter gravy, but avoid skim milk since it produces a thin, watery result. Half and half or heavy cream makes richer gravy but increases calories significantly.
Can I make this gravy ahead of time?
Yes, make it up to three hours ahead and keep it warm over very low heat, stirring occasionally. For longer storage, refrigerate and reheat with added milk.
How long does white gravy last in the refrigerator?
Properly stored white gravy keeps for three days in an airtight container. Press plastic wrap directly onto the surface to prevent a thick skin from forming.
Why is my gravy lumpy and how do I fix it?
Lumps form when flour clumps meet liquid before getting coated in fat. Strain the gravy through a fine mesh sieve into a clean pan to remove lumps.
Can I double or halve this recipe?
This recipe scales perfectly in either direction. Keep the ratio of one tablespoon butter to one tablespoon flour to one half cup milk.
Why does my gravy taste like raw flour?
You did not cook the roux long enough before adding milk. Always cook the butter and flour mixture for a full two minutes, stirring constantly.
What is the difference between white gravy and country gravy?
The terms are interchangeable in most regions. Some cooks call it country gravy when made with meat drippings and white gravy when made with butter.
My Final Word
This white gravy delivers exactly what it promises: a creamy, peppery sauce that makes everything it touches taste better. The technique is simple once you understand the why behind each step.
I have tested this method through countless Saturday breakfasts and weeknight dinners, and it produces consistent results every time. Make it once, and you will never need another white gravy recipe.
Give it a try this weekend and let me know how it turns out. Drop a comment below or tag us on social media with your biscuits and gravy creation.
White Gravy
Ingredients
Equipment
Method
- Place the saucepan over medium heat and add all four tablespoons of butter. Let it melt completely, swirling the pan occasionally to distribute it evenly across the bottom. This takes about one to two minutes.
- Sprinkle the flour evenly over the melted butter while whisking constantly. Make sure every bit of flour gets incorporated into the butter with no dry spots remaining.
- Continue cooking the roux over medium heat, stirring constantly, for two full minutes until it turns from pale yellow to a light golden color and develops a slightly nutty aroma.
- Remove the pan from heat briefly and pour in about one third of the milk (roughly two thirds of a cup). Whisk vigorously and continuously as you pour, scraping the bottom and corners of the pan.
- Return the pan to medium heat and pour in another third of the milk while whisking constantly in a figure eight pattern to reach all areas of the pan.
- Pour in the remaining milk and add the salt and pepper. Continue whisking over medium heat, making sure to scrape the entire bottom of the pan.
- Increase the heat slightly and bring the gravy to a gentle simmer with small bubbles breaking the surface around the edges, not a rolling boil.
- Let the gravy simmer gently for three to four minutes, whisking every thirty seconds, until it thickens and coats the back of a spoon.
- Test the consistency by dipping a spoon into the gravy. It should coat the spoon evenly and drip slowly. If too thick, whisk in additional milk one tablespoon at a time.
- Taste the gravy and adjust salt and pepper as needed. Be generous with the black pepper.
- Remove the pan from heat and let the gravy rest for one minute before serving immediately over warm biscuits, chicken fried steak, or your favorite breakfast items.