The smell of cinnamon-laced milk simmering on the stove takes me straight back to my grandmother’s kitchen, where a pot of creamy rice pudding always meant comfort was minutes away. This recipe for rice pudding transforms humble pantry staples into a dessert that feels like a warm hug, with tender grains suspended in silky sweetness and just enough spice to make things interesting.
What makes this version special is its foolproof method that prevents scorching while delivering that dreamy, spoonable consistency every single time. The slow simmer coaxes out the rice’s natural starch, creating a luxurious texture without any fancy techniques or hard-to-find ingredients.
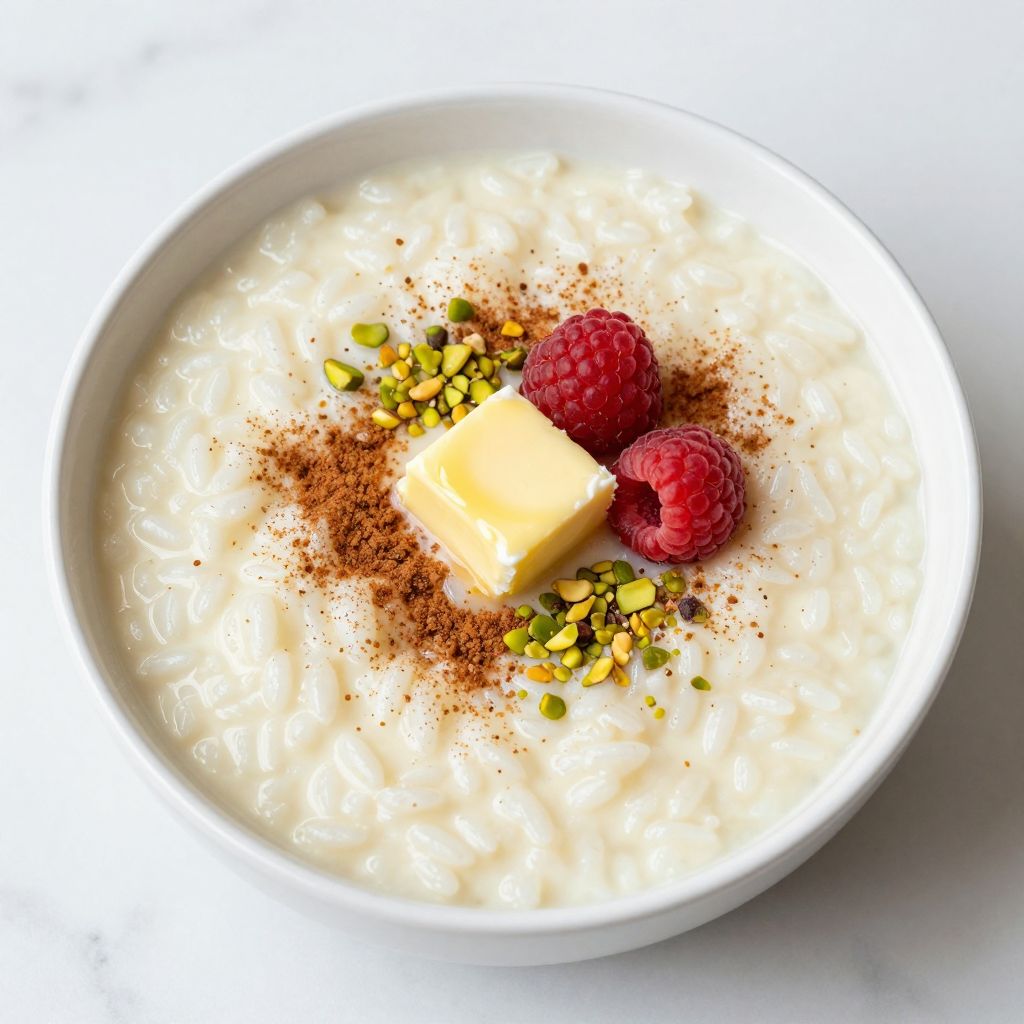
Whether you serve it warm with a pat of butter melting on top or chilled with fresh berries, this rice pudding adapts to your mood and the season. Let me show you how to nail this classic dessert that deserves a comeback in your regular rotation.
Why You’ll Love This Recipe
This rice pudding hits the sweet spot between nostalgic comfort food and elegant dessert worthy of company. The creamy texture and gentle sweetness make it ridiculously satisfying without being too heavy.
- Uses basic ingredients you probably already have in your pantry
- Ready in under an hour with mostly hands-off cooking time
- Works beautifully as breakfast, dessert, or a midnight snack
- Easily customizable with different spices, fruits, and toppings
- Tastes even better the next day after the flavors meld together
My Experience Making This Recipe
The first time I made this rice pudding, I was skeptical that something so simple could deliver real restaurant-quality results. But watching the rice slowly absorb the sweetened milk and transform into something creamy and luxurious converted me into a true believer.
I brought a big bowl to a potluck dinner, worried it might seem too plain next to fancier desserts. It disappeared before the chocolate cake did, and three people asked for the recipe before the night ended.
Now I make a double batch whenever I cook it because my family raids the fridge for cold spoonfuls at all hours. The subtle vanilla and cinnamon flavors get more pronounced after a day in the refrigerator, making the leftovers somehow even better than the fresh batch.
Recipe Overview
- Recipe Name: Classic Creamy Rice Pudding
- Servings: 6
- Prep Time: 5 minutes
- Cook Time: 45 minutes
- Total Time: 50 minutes
- Course: Dessert
- Cuisine: American
- Calories per Serving: 285
Equipment You Will Need
- Heavy-bottomed medium saucepan (3-quart capacity)
- Wooden spoon or silicone spatula
- Measuring cups and spoons
- Fine-mesh strainer (optional, for rinsing rice)
- Serving bowls or ramekins
- Whisk
Ingredients for Classic Creamy Rice Pudding
- 3/4 cup white short-grain rice (such as Arborio or sushi rice)
- 4 cups whole milk
- 1/2 cup granulated sugar
- 1/4 teaspoon salt
- 2 large egg yolks
- 1 teaspoon vanilla extract
- 1/2 teaspoon ground cinnamon
- 2 tablespoons unsalted butter
- 1/4 cup heavy cream
- Ground nutmeg for garnish (optional)
Ingredient Notes and Substitutions
- Short-grain rice: The high starch content creates that signature creamy texture. You can substitute long-grain white rice, but the pudding will be less creamy and more separate in texture.
- Whole milk: The fat content is key for richness and prevents the pudding from tasting watery. You can use 2% milk with an extra 1/4 cup of heavy cream to compensate for reduced fat.
- Granulated sugar: Dissolves smoothly and sweetens without adding competing flavors. Light brown sugar works as a substitute and adds a subtle caramel note.
- Egg yolks: They thicken the pudding and add silky richness to the final texture. Cornstarch (2 tablespoons) can replace the eggs for an egg-free version, though you’ll lose some richness.
- Vanilla extract: Pure vanilla adds depth and rounds out the sweetness beautifully. Vanilla bean paste or half a scraped vanilla bean provides even more intense flavor.
- Heavy cream: This final addition makes the pudding extra luscious and smooth. Half-and-half can substitute if that’s what you have, though the result will be slightly less rich.
How to Make Classic Creamy Rice Pudding
Step 1: Rinse and Prep the Rice
Place the rice in a fine-mesh strainer and rinse under cold water for about 30 seconds, swirling it around with your hand. This removes excess surface starch that could make your pudding gummy rather than creamy.
Shake off the excess water and set the rice aside. This quick rinse step makes a noticeable difference in the final texture, giving you distinct grains rather than a gloppy mess.
Step 2: Start the Rice and Milk Mixture
Combine the rinsed rice, milk, sugar, and salt in your heavy-bottomed saucepan over medium heat. Stir gently to dissolve the sugar and prevent the rice from settling and sticking to the bottom.
Bring the mixture to a gentle simmer, watching carefully because milk can boil over quickly if you’re not paying attention. The heavy-bottomed pan distributes heat evenly and helps prevent scorching, which would ruin the delicate flavor.
Step 3: Simmer the Rice
Reduce the heat to low and let the rice simmer gently, uncovered, for 35 to 40 minutes. Stir every 5 to 7 minutes to prevent sticking and ensure even cooking.
The rice should absorb most of the liquid and become tender, while the mixture thickens noticeably. The low, slow simmer allows the rice to release its starch gradually, creating that creamy consistency without breaking down the grains completely.
Step 4: Temper the Egg Yolks
In a small bowl, whisk the egg yolks until smooth and slightly pale. Slowly drizzle about 1/2 cup of the hot rice mixture into the yolks while whisking constantly.
This tempering process gradually raises the temperature of the eggs so they don’t scramble when you add them to the hot pudding. Taking this extra minute prevents chunks of cooked egg from ruining your silky pudding.
Step 5: Add the Tempered Eggs
Pour the tempered egg mixture back into the saucepan with the rice, stirring constantly. Continue cooking over low heat for another 3 to 4 minutes, stirring continuously.
The pudding will thicken noticeably as the eggs cook and the mixture coats the back of your spoon. Keep the heat low during this step because high heat will cause the eggs to curdle and create an unpleasant texture.
Step 6: Finish with Butter and Flavorings
Remove the pan from the heat and stir in the butter, vanilla extract, and cinnamon until the butter melts completely. The residual heat is perfect for melting the butter and blooming the spices without cooking off the vanilla’s delicate flavor.
The butter adds a final layer of richness and gives the pudding a gorgeous sheen. You’ll notice the aroma becoming more complex and inviting as these final ingredients incorporate.
Step 7: Add the Heavy Cream
Fold in the heavy cream gently but thoroughly, transforming the pudding into something truly luxurious. The cream loosens the texture slightly and adds a velvety mouthfeel that makes each spoonful feel indulgent.
The pudding will look thinner than you might expect at this point, but it thickens considerably as it cools. Trust the process and resist the urge to cook it longer, which would make it too thick later.
Step 8: Cool and Serve
Transfer the rice pudding to individual serving bowls or one large serving dish. If you prefer to prevent a skin from forming on top, press plastic wrap directly onto the surface of the pudding.
Let it cool at room temperature for 20 minutes, then refrigerate if you prefer it cold, or serve it warm right away. Sprinkle a pinch of ground nutmeg or extra cinnamon on top just before serving for a beautiful finishing touch.
Pro Tip: Stir the pudding occasionally during the first 15 minutes of cooling to release steam and prevent a thick skin from forming on top. This simple habit keeps the texture consistently smooth throughout.
Tips for the Best Classic Creamy Rice Pudding
- Use short-grain rice like Arborio for the creamiest results, as its high starch content creates that signature texture without needing extra thickeners.
- Stir regularly but not constantly during the simmering phase; too much stirring breaks down the rice grains and makes the pudding gluey instead of creamy.
- Keep the heat low and steady throughout cooking to prevent scorching, which leaves a bitter taste that permeates the entire batch.
- Add a strip of lemon zest to the milk while simmering for a subtle brightness that balances the richness, then remove it before adding the eggs.
- Taste and adjust the sugar before adding the eggs, since sweetness preferences vary and it’s your last chance to modify it easily.
- Let the pudding rest for at least 15 minutes before serving warm, allowing the flavors to settle and the texture to stabilize perfectly.
Common Mistakes to Avoid
- Cooking over high heat causes the milk to scorch on the bottom and creates an unpleasant burnt flavor that ruins the whole batch.
- Adding the eggs directly to the hot mixture without tempering will create scrambled egg pieces throughout your pudding instead of silky smoothness.
- Using long-grain rice instead of short-grain produces a thinner, less creamy pudding because it contains less starch to create that luxurious texture.
- Skipping the butter at the end leaves you with pudding that tastes flat and lacks that rich, rounded flavor that makes it truly special.
- Overcooking the pudding makes it too thick when warm, and it becomes almost solid and gummy when chilled rather than spoonable and creamy.
Serving Suggestions
This rice pudding shines on its own, but a few thoughtful additions can elevate it from simple comfort food to something memorable. Consider the temperature and texture contrasts when choosing accompaniments.
- Top with fresh berries like raspberries or sliced strawberries for a tart contrast to the creamy sweetness
- Drizzle with warm caramel sauce or dulce de leche for an extra-decadent dessert experience
- Sprinkle toasted sliced almonds or chopped pistachios on top for satisfying crunch and nutty flavor
- Serve alongside a small glass of sweet dessert wine like Moscato or port for an elegant ending to dinner
- Add a dollop of lightly sweetened whipped cream and a sprinkle of cinnamon for classic presentation
Variations to Try
- Coconut rice pudding: Replace 2 cups of the milk with full-fat coconut milk and add 1/2 cup toasted coconut flakes for tropical richness. The coconut flavor pairs beautifully with mango or pineapple chunks stirred in at the end.
- Chocolate rice pudding: Stir in 1/2 cup of chopped dark chocolate or chocolate chips during the last 5 minutes of cooking for a rich, pudding-meets-hot-chocolate experience. The chocolate melts into the warm mixture and creates something truly indulgent.
- Chai-spiced version: Replace the cinnamon with 1 teaspoon of chai spice blend (or mix cinnamon, cardamom, ginger, and cloves) for a warming, aromatic twist. This version tastes incredible served warm on cold evenings.
- Orange blossom rice pudding: Add 1 tablespoon of orange blossom water with the vanilla and garnish with chopped pistachios for a Middle Eastern-inspired treat. The floral notes add sophisticated complexity without overwhelming the dish.
- Maple pecan version: Replace half the sugar with pure maple syrup and fold in 1/2 cup of toasted chopped pecans at the end for an autumn-inspired variation. The maple adds depth while the pecans provide textural contrast.
Dietary Adaptations
- Gluten-free: This recipe is naturally gluten-free as written, since rice and dairy contain no gluten. Just verify that your vanilla extract is gluten-free, as some brands use grain alcohol in processing.
- Dairy-free: Use full-fat coconut milk or oat milk in place of dairy milk and coconut cream instead of heavy cream, with vegan butter substituting for regular butter. The texture will be slightly different but still delicious, though coconut milk adds distinct flavor.
- Vegan: Follow the dairy-free adaptations above and replace the egg yolks with 2 tablespoons of cornstarch mixed with 3 tablespoons of cold non-dairy milk for thickening. You’ll lose some richness but gain a version everyone can enjoy.
- Low-carb/Keto: This recipe doesn’t adapt well to keto since rice is the star ingredient, but you can make a cauliflower rice pudding using riced cauliflower, though the texture and taste will be completely different from traditional rice pudding.
Storage and Reheating
Refrigerator
Store rice pudding in an airtight container in the refrigerator for up to 5 days. The pudding thickens considerably when chilled, which is actually how many people prefer it.
- Press plastic wrap directly onto the surface before sealing to prevent skin formation
- Stir in a splash of milk when serving if you want to loosen the consistency
- The flavors deepen and improve after 24 hours in the fridge
Freezer
Freezing rice pudding is possible but not ideal, as the texture changes and becomes slightly grainy when thawed. If you must freeze it, use it within 2 months.
- Freeze in individual portions for easier thawing and serving
- Thaw overnight in the refrigerator rather than at room temperature
- Stir vigorously and add extra cream when reheating to restore smoothness
Reheating
Reheat rice pudding gently to avoid scorching or making it too thick. The microwave works well for individual portions, while the stovetop is better for larger amounts.
- Add 2 to 3 tablespoons of milk per serving before reheating to restore creaminess
- Microwave in 30-second intervals, stirring between each, until warmed through
- On the stovetop, use low heat and stir constantly to prevent sticking and scorching
Nutrition Information
| Nutrient | Amount |
|---|---|
| Calories | 285 |
| Total Fat | 11g |
| Saturated Fat | 7g |
| Carbohydrates | 39g |
| Fiber | 0g |
| Sugar | 21g |
| Protein | 7g |
| Sodium | 150mg |
| Cholesterol | 90mg |
Nutritional values are approximate and will vary based on specific ingredients used and portion sizes. This recipe provides a moderate amount of protein and calcium from the dairy while delivering satisfying comfort food energy.
Frequently Asked Questions
Can I use leftover cooked rice instead of uncooked rice?
You can use cooked rice, but reduce the cooking time to 15 to 20 minutes and start with less milk (about 3 cups). The texture won’t be quite as creamy since cooked rice can’t release as much starch, but it works in a pinch for using up leftovers.
Can I make this rice pudding ahead of time?
Absolutely, and it’s actually better when made a day ahead because the flavors develop and meld together beautifully. Just store it covered in the fridge and add a splash of milk before serving if it has thickened too much.
Why is my rice pudding too runny or too thick?
Rice pudding thickens substantially as it cools, so it should look slightly thinner than your desired consistency when hot. If it’s too thick after cooling, stir in milk a tablespoon at a time; if too thin, return it to low heat and simmer for a few more minutes while stirring.
Can I eliminate the eggs from this recipe?
Yes, simply omit the eggs and add 2 tablespoons of cornstarch mixed with 3 tablespoons of cold milk during
Classic Creamy Rice Pudding
Ingredients
Equipment
Method
- Place the rice in a fine-mesh strainer and rinse under cold water for about 30 seconds, swirling it around with your hand. Shake off the excess water and set the rice aside.
- Combine the rinsed rice, milk, sugar, and salt in your heavy-bottomed saucepan over medium heat. Stir gently to dissolve the sugar and prevent the rice from settling and sticking to the bottom.
- Bring the mixture to a gentle simmer, watching carefully because milk can boil over quickly if you're not paying attention.
- Reduce the heat to low and let the rice simmer gently, uncovered, for 35 to 40 minutes. Stir every 5 to 7 minutes to prevent sticking and ensure even cooking. The rice should absorb most of the liquid and become tender, while the mixture thickens noticeably.
- In a small bowl, whisk the egg yolks until smooth and slightly pale. Slowly drizzle about 1/2 cup of the hot rice mixture into the yolks while whisking constantly to temper them.
- Pour the tempered egg mixture back into the saucepan with the rice, stirring constantly. Continue cooking over low heat for another 3 to 4 minutes, stirring continuously until the pudding thickens noticeably.
- Remove the pan from the heat and stir in the butter, vanilla extract, and cinnamon until the butter melts completely.
- Fold in the heavy cream gently but thoroughly.
- Transfer the rice pudding to individual serving bowls or one large serving dish. If you prefer to prevent a skin from forming on top, press plastic wrap directly onto the surface of the pudding.
- Let it cool at room temperature for 20 minutes, then refrigerate if you prefer it cold, or serve it warm right away. Sprinkle a pinch of ground nutmeg or extra cinnamon on top just before serving.


