
Picture this: a creamy, dreamy banana pudding that takes you straight back to childhood, but with a twist that will make your taste buds dance. This Not Your Mama’s Banana Pudding recipe elevates the classic dessert with layers of rich flavor, a delightful crunch, and just the right amount of sweetness, perfect for any occasion.
Why You’ll Love This Recipe
This pudding is a showstopper that combines nostalgia with a fresh perspective.
- Decadent layers of flavor that surprise and delight.
- Quick to prepare, making it perfect for last-minute gatherings.
- A crowd-pleaser that appeals to both kids and adults.
- Versatile enough to customize with your favorite add-ins.
My Experience Making This Recipe
Making this banana pudding was a delightful experience from start to finish. The aroma of fresh bananas and vanilla wafting through my kitchen made me feel like a kid again, eagerly anticipating dessert.
When I served it, the oohs and aahs from my family confirmed that this was no ordinary pudding. The combination of textures and flavors left everyone wanting more and asking for seconds.
Recipe Overview
- Recipe Name: Not Your Mama’s Banana Pudding
- Servings: 8
- Prep Time: 20 minutes
- Cook Time: 10 minutes
- Total Time: 30 minutes
- Course: Dessert
- Cuisine: American
- Calories per Serving: 250
Equipment You Will Need
- Medium saucepan
- Whisk
- Mixing bowls
- 9×13 inch baking dish
- Rubber spatula
Ingredients for Not Your Mama’s Banana Pudding
- 2 cups whole milk
- 1 cup heavy cream
- 3/4 cup granulated sugar
- 1/3 cup cornstarch
- 1/4 teaspoon salt
- 1 teaspoon vanilla extract
- 4 ripe bananas, sliced
- 1 box vanilla wafers
- 1/2 cup crushed graham crackers (for topping)
Ingredient Notes and Substitutions
- Whole milk: Used for creaminess; substitute with almond milk for a dairy-free option.
- Heavy cream: Adds richness; can be replaced with coconut cream for a lighter version.
- Granulated sugar: Sweetens the pudding; honey or maple syrup can be used as natural alternatives.
- Vanilla extract: Enhances flavor; use pure vanilla for a more robust taste.
How to Make Not Your Mama’s Banana Pudding
Step 1: Combine Dry Ingredients
In a medium saucepan, whisk together the cornstarch, sugar, and salt. This step is essential for ensuring your pudding thickens properly without lumps.
Step 2: Mix in Milk and Cream
Add the whole milk and heavy cream to the dry ingredients in the saucepan. Whisk until smooth, ensuring that there are no dry pockets of cornstarch.
Step 3: Cook the Mixture
Place the saucepan over medium heat, stirring constantly until the mixture thickens and starts to bubble. This usually takes about 5 to 10 minutes; patience is key here.
Step 4: Add Vanilla
Once thickened, remove from heat and stir in the vanilla extract. This little addition will elevate the flavor profile and add warmth to the pudding.
Step 5: Layer the Pudding
In a 9×13 inch baking dish, layer half of the vanilla wafers on the bottom. This creates a crunchy base that contrasts beautifully with the creamy pudding.
Step 6: Add Bananas and Pudding
Top the wafers with half of the sliced bananas, then pour half of the pudding over the bananas. Repeat the layers with the remaining wafers, bananas, and pudding.
Step 7: Chill the Pudding
Cover the dish with plastic wrap and refrigerate for at least 2 hours. Chilling helps the flavors meld and allows the pudding to set perfectly.
Step 8: Serve and Enjoy
Before serving, sprinkle crushed graham crackers on top for added texture. This final touch makes the pudding irresistible and adds a delightful crunch.
Pro Tip: Make the pudding a day ahead for even better flavor and texture.
Tips for the Best Not Your Mama’s Banana Pudding
- Use ripe bananas for maximum sweetness and flavor.
- Layering the pudding immediately after cooking can result in a softer texture.
- For extra flair, add a dollop of whipped cream on top before serving.
- Experiment with different toppings like chocolate shavings or toasted coconut.
- Store leftovers in an airtight container to keep them fresh and delicious.
Common Mistakes to Avoid
- Skipping the chilling step can result in a runny pudding.
- Using unripe bananas will give a less sweet flavor.
- Not stirring the mixture while cooking can lead to lumps.
- Overcooking the pudding can make it grainy; keep an eye on it.
Serving Suggestions
This pudding pairs wonderfully with a variety of side dishes or drinks.
- Serve with a side of fresh fruit for a refreshing contrast.
- Pair with a scoop of vanilla ice cream for an indulgent treat.
- Enjoy alongside a cup of coffee or tea for a delightful afternoon snack.
- Top with chocolate sauce for an extra rich dessert.
Variations to Try
- Add chocolate pudding between the layers for a chocolate-banana twist.
- Incorporate peanut butter for a rich, nutty flavor that complements the bananas.
- Use almond milk and coconut cream for a dairy-free version.
- Mix in some crushed pineapple for a tropical flair.
Dietary Adaptations
- Gluten-free: Use gluten-free vanilla wafers for a safe option.
- Dairy-free: Substitute all dairy products with plant-based alternatives.
- Vegan: Ensure all ingredients are vegan-friendly for a guilt-free treat.
- Low-carb/Keto: Use sugar alternatives and keto-friendly cookies.
Storage and Reheating
Refrigerator
Store any leftovers in the refrigerator for up to 3 days.
- Keep covered to maintain freshness.
- Layered pudding may soften over time, so consume it sooner rather than later.
Freezer
Freezing is not recommended as it may alter the texture.
- If necessary, freeze the pudding without bananas for up to 2 months.
- Thaw in the refrigerator before serving.
Reheating
Reheat gently in the microwave if needed, but expect texture changes.
- Microwave in short bursts, stirring in between.
- Avoid overheating to prevent separation.
Nutrition Information
| Nutrient | Amount |
|---|---|
| Calories | 250 |
| Total Fat | 10g |
| Saturated Fat | 5g |
| Carbohydrates | 38g |
| Fiber | 1g |
| Sugar | 20g |
| Protein | 4g |
| Sodium | 160mg |
| Cholesterol | 30mg |
This information is an estimate and may vary based on specific ingredients used.
Frequently Asked Questions
Can I make this pudding ahead of time?
Yes, making it a day ahead allows the flavors to meld beautifully.
What can I use instead of vanilla wafers?
Graham crackers or any cookie of your choice can work well in this recipe.
How do I store leftovers?
Keep any remaining pudding in an airtight container in the refrigerator for up to 3 days.
My pudding turned out runny. What happened?
This can occur if the pudding mixture was not cooked long enough to thicken properly.
Can I use frozen bananas?
It’s best to use fresh bananas for the best texture, but thawed frozen bananas can work in a pinch.
Final Thoughts
There you have it, a delightful twist on a classic that will impress everyone at your next gathering. Give this Not Your Mama’s Banana Pudding recipe a try, and I promise it will become a favorite.
If you enjoyed this recipe, explore more delicious options like banana bread with oil or a keto banana bread recipe to keep your baking adventures going.
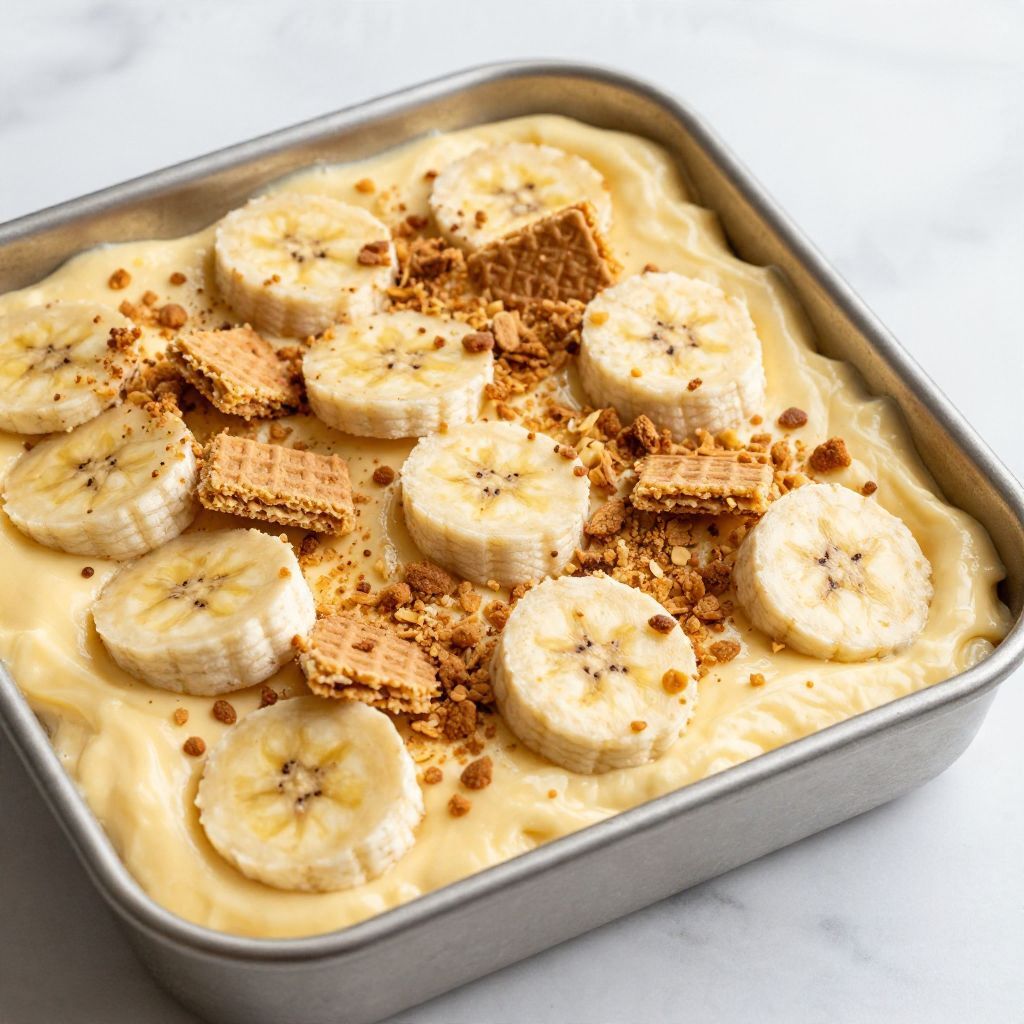
Not Your Mama's Banana Pudding
Ingredients
Equipment
Method
- In a medium saucepan, whisk together the cornstarch, sugar, and salt.
- Add the whole milk and heavy cream to the dry ingredients in the saucepan. Whisk until smooth.
- Place the saucepan over medium heat, stirring constantly until the mixture thickens and starts to bubble, about 5 to 10 minutes.
- Remove from heat and stir in the vanilla extract.
- In a 9x13 inch baking dish, layer half of the vanilla wafers on the bottom.
- Top the wafers with half of the sliced bananas, then pour half of the pudding over the bananas.
- Repeat the layers with the remaining wafers, bananas, and pudding.
- Cover the dish with plastic wrap and refrigerate for at least 2 hours.
- Before serving, sprinkle crushed graham crackers on top.