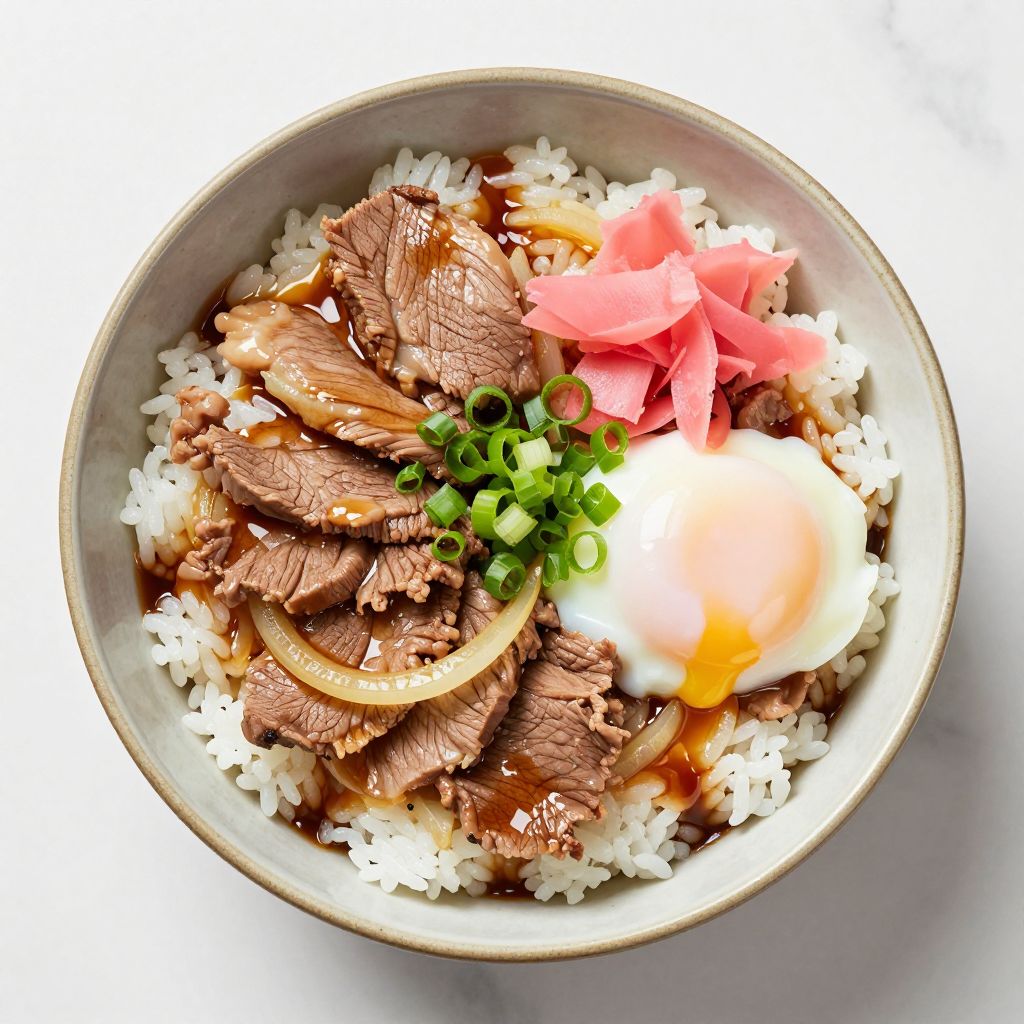
Gyudon delivers the kind of deep, savory comfort that makes you wonder why you ever bothered with takeout. This Japanese beef bowl combines thinly sliced beef, sweet onions, and a soy-mirin broth over steaming rice in under 30 minutes. Perfect for busy weeknights when you want something that tastes like it took hours but didn’t.
What Makes This Recipe Worth Your Time
Gyudon sits at the intersection of speed, flavor, and genuine satisfaction. You get restaurant-quality results with pantry staples and minimal hands-on effort.
- Ready in 25 minutes from cutting board to table, making it faster than delivery
- One pan cleanup means you spend more time eating and less time scrubbing
- Kid-approved flavor with a naturally sweet and savory profile that picky eaters actually request
- Affordable protein that stretches a pound of beef across four generous servings
- Infinitely adaptable to whatever vegetables you need to use up in your fridge
A Little Background on This Dish
Gyudon literally translates to “beef bowl” in Japanese, and it became a nationwide staple through chains like Yoshinoya starting in the late 1800s. What began as quick sustenance for Tokyo’s working class evolved into one of Japan’s most beloved fast foods.
The genius lies in the balance of flavors: soy sauce provides salt and umami, mirin adds sweetness and sheen, and dashi brings depth without heaviness. This combination of ingredients creates a broth that transforms simple sliced beef into something genuinely craveable.
My Experience With This Recipe
I first made gyudon on a Tuesday when the kids had soccer practice and I had exactly zero motivation to cook anything complicated. The promise of a complete meal in one pan with ingredients I already had felt almost too good to be true.
My early attempts produced beef that was tough and broth that tasted flat and one-dimensional. I kept cooking the meat too long and adding the ingredients in the wrong order, which meant everything came out muddled instead of distinct.
The version that finally worked filled our kitchen with that sweet-savory steam that makes everyone wander in asking when dinner will be ready. The beef was silky, the onions had just enough bite, and my youngest asked for seconds before I’d even sat down.
Before You Start: Key Things to Know
This recipe suits beginners and experienced cooks alike, though slicing the beef thinly requires a bit of knife confidence. The biggest challenge is resisting the urge to overcook the meat.
- Difficulty level: Easy, with one technique (thin slicing) that benefits from practice
- Active time vs passive time: About 15 minutes of active cooking and 10 minutes of simmering
- Most important equipment: A wide skillet or shallow pan that fits all the beef in one layer
- Step requiring most attention: Adding the beef at the end and knowing when to stop cooking it
Recipe at a Glance
- Recipe Name: Gyudon (Japanese Beef Bowl)
- Yield: 4 servings
- Prep Time: 10 minutes
- Cook Time: 15 minutes
- Total Time: 25 minutes
- Resting Time: None required
- Difficulty: Easy
- Course: Main dish
- Cuisine: Japanese
- Calories per Serving: 485
How to Source the Best Ingredients
The short ingredient list means each component carries significant weight in the final flavor. Choosing well here makes the difference between good and memorable.
- Beef: Look for ribeye or chuck with visible marbling throughout; the fat melts during cooking and keeps the meat tender
- Onions: Choose yellow onions that feel heavy for their size with tight, papery skins and no soft spots
- Soy sauce: Use naturally brewed soy sauce (check the label for “brewed”) rather than hydrolyzed versions for better depth
- Mirin: Seek hon mirin (true mirin) with alcohol content listed; avoid “mirin seasoning” which contains corn syrup
- Dashi: Instant dashi granules work perfectly; Hondashi is the most widely available quality brand
Ingredients for Gyudon
For the Beef and Onions
- 1 pound beef ribeye or chuck, sliced 1/8 inch thick against the grain
- 1 large yellow onion, halved and sliced into 1/4 inch crescents
- 1 tablespoon neutral oil (vegetable or grapeseed)
For the Braising Liquid
- 1 cup water
- 1/4 cup soy sauce
- 3 tablespoons mirin
- 2 tablespoons sake (or dry white wine)
- 1 tablespoon sugar
- 1 teaspoon dashi granules
For Serving
- 4 cups cooked short grain rice, hot
- 4 eggs, optional (raw, poached, or soft boiled)
- Pickled ginger (beni shoga), for garnish
- Green onions, thinly sliced, for garnish
Smart Substitutions and Swaps
- Beef ribeye: This cut provides fat and tenderness that keeps the meat silky. Substitute with flank steak or sirloin, but expect slightly chewier results and consider marinating briefly in a pinch of baking soda.
- Mirin: True mirin adds sweetness, sheen, and complexity to the sauce. Substitute with 1 tablespoon sugar plus 2 tablespoons sake or dry sherry per 3 tablespoons mirin called for.
- Sake: Sake contributes acidity and helps tenderize the meat. Dry white wine or dry sherry works as a replacement with minimal flavor difference.
- Dashi granules: Dashi provides the umami backbone of the entire dish. Substitute with 1/2 teaspoon fish sauce plus 1/2 teaspoon mushroom powder, or use low sodium chicken broth instead of water.
- Short grain rice: The sticky texture helps absorb the braising liquid and makes eating with chopsticks easier. Long grain rice works but absorbs less sauce and changes the eating experience.
- Yellow onion: Yellow onions offer the ideal balance of sweetness and structure after cooking. Sweet onions like Vidalia will turn very soft, while white onions stay firmer and sharper.
Tools and Equipment You Will Need
Gathering your equipment before you start ensures the fast cooking process goes smoothly. Gyudon moves quickly once the pan heats up, so you need everything within reach.
- Large skillet or shallow pan, 12 inches (wider surface area means faster reduction and better browning)
- Sharp chef’s knife (thin slicing requires a blade that glides through meat without tearing)
- Cutting board
- Measuring cups and spoons
- Small bowl for mixing the braising liquid
- Rice cooker or pot for rice
- Tongs or wooden spoon
- Serving bowls
How to Make Gyudon
Read through all the steps before you begin and have your rice already cooked and staying warm. The beef cooks in just minutes, so you want everything else ready to go.
Step 1: Freeze the Beef Briefly
Place the beef in the freezer for 20 minutes before slicing. The cold firms up the meat just enough to allow clean, thin cuts without the beef squishing or tearing under your knife.
Thin slices cook quickly and absorb more flavor from the braising liquid. Thick or uneven pieces will cook unevenly and turn tough in some spots while staying rare in others.
The beef is ready when it feels firm to the touch but not frozen solid. You should be able to press your finger into it with resistance.
Step 2: Slice the Beef Against the Grain
Identify the direction of the muscle fibers running through the beef, then cut perpendicular to them in slices about 1/8 inch thick. Use long, smooth strokes rather than sawing motions.
Cutting against the grain shortens those tough muscle fibers, which means each bite will feel tender rather than chewy. This matters more for quick-cooked dishes where the meat does not have time to break down slowly.
Properly sliced beef will look like thin ribbons that almost drape over your knife. If the slices hold their shape rigidly, they are too thick.
Step 3: Prepare the Onion
Cut the onion in half through the root, peel it, and slice each half into 1/4 inch crescents following the natural lines from root to tip. Keep the slices relatively uniform so they cook at the same rate.
Crescent cuts create pieces that soften but hold their shape in the braising liquid. Diced onions would dissolve and make the sauce cloudy instead of clean.
You should have about 2 cups of sliced onion that looks like thin half-moons piled loosely.
Step 4: Mix the Braising Liquid
Combine the water, soy sauce, mirin, sake, sugar, and dashi granules in a small bowl. Whisk until the sugar and dashi dissolve completely.
Mixing the liquid in advance ensures even distribution of all the seasonings. Adding them separately to the hot pan risks uneven seasoning and potential burning of the sugar.
The liquid should smell balanced between salty, sweet, and savory with no single note dominating. Taste it; if it seems one-dimensional, you likely missed an ingredient.
Step 5: Cook the Onions
Heat the oil in a large skillet over medium heat until shimmering, then add the sliced onions. Stir occasionally and cook for about 5 minutes until they soften and turn translucent.
Starting with the onions alone allows them to release their moisture and begin caramelizing before the liquid goes in. This builds a sweeter, more complex base flavor for the entire dish.
The onions are ready when they look glassy and have reduced in volume by about half. A few golden edges are perfect; burnt black spots mean your heat is too high.
Step 6: Add the Braising Liquid
Pour the prepared braising liquid into the pan with the onions. Stir once to combine, then increase heat to medium high and bring the liquid to a boil.
Starting with a boil ensures the alcohol in the sake and mirin cooks off, leaving behind only the flavor without any harsh boozy taste. The boiling also helps the sugar dissolve fully into the sauce.
Look for active bubbles across the entire surface of the liquid, not just at the edges. The aroma should shift from sharp alcohol to rounded sweetness.
Step 7: Simmer the Onions
Reduce the heat to medium low and let the onions simmer in the braising liquid for 8 minutes. Do not stir constantly; let them sit in the liquid and absorb flavor.
This simmering time allows the onions to become silky and take on the sweet-savory character of the sauce. Rushing this step produces onions that taste like they are just sitting in sauce rather than flavored by it.
The onions are done when they look slightly collapsed and the liquid has reduced by about a third. A spoon dragged across the pan should leave a brief trail.
Step 8: Add the Beef
Spread the sliced beef in a single layer over the simmering onions, pushing the pieces into the liquid. Do not stir or flip the beef yet.
Placing the beef in a single layer ensures even cooking and allows the thin slices to cook gently from below while the steam cooks them from above. Piling the beef means the bottom pieces overcook while the top stays raw.
The beef should turn from red to grayish pink around the edges within the first minute. If it sizzles aggressively, your heat is too high.
Step 9: Gently Turn the Beef
After 1 minute, use tongs to gently turn each piece of beef so the raw side faces down. Work quickly but carefully to avoid breaking up the delicate slices.
Turning only once prevents the beef from releasing too much moisture and becoming tough. The goal is tender, almost silky beef that has absorbed braising liquid, not gray, squeezed-out meat.
Each slice should show a grayish exterior with just a hint of pink remaining in the center. If you see large patches of bright red, give it another 30 seconds before proceeding.
Step 10: Finish Cooking
Let the beef cook undisturbed for 1 more minute, then immediately remove the pan from heat. The residual heat will finish cooking the beef without toughening it.
Carryover cooking continues working even off the heat, so pulling the pan slightly early prevents overcooked meat. Thin sliced beef goes from perfect to rubbery in about 30 seconds of extra cooking.
The finished beef should look uniformly grayish pink with no raw red spots and feel supple when you press it with tongs. If it springs back firmly, you have gone too far.
Step 11: Assemble the Bowls
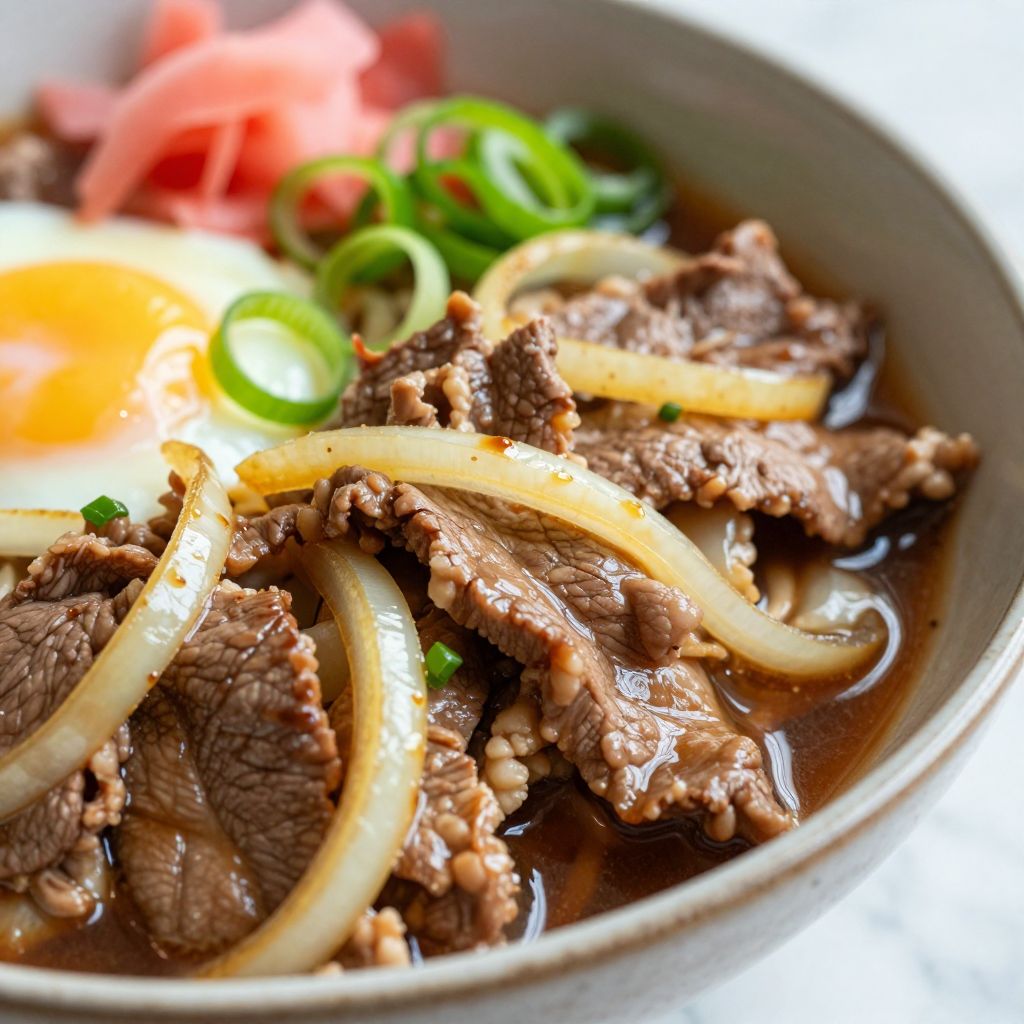
Divide the hot rice among four serving bowls, pressing it gently into the bottom. Spoon the beef and onions over the rice, then ladle the braising liquid generously over everything.
The hot rice absorbs the flavorful braising liquid, turning each bite into a combination of textures and tastes. Skimping on the liquid means dry rice at the bottom of the bowl.
Each bowl should have a glossy, saucy appearance with the beef and onions partially submerged. The rice should look wet, not swimming.
Step 12: Add Toppings and Serve
Top each bowl with your choice of egg (raw, poached, or soft boiled), pickled ginger, and sliced green onions. Serve immediately while everything is steaming hot.
The raw egg is traditional and creates a rich, creamy coating when stirred into the hot rice and meat. The pickled ginger provides a bright acidic contrast that cuts through the richness.
A properly assembled bowl will have steam rising from the surface and the egg yolk should be centered for visual appeal if you are feeling fancy.
Pro Tip: If using a raw egg, make a small well in the center of the beef before placing the egg. The surrounding heat gently warms the yolk while keeping it runny, creating that silky richness when you break it and mix everything together.
The Science Behind the Technique
The key to tender gyudon beef lies in understanding how heat affects muscle proteins. When beef cooks above 140°F, the proteins begin to contract and squeeze out moisture, which is why overcooked meat turns dry and tough.
By slicing the beef thin and cooking it gently in barely simmering liquid, you keep the internal temperature in the sweet spot where proteins set but have not yet squeezed tight. The braising liquid also provides moisture that the meat absorbs, essentially replacing any juices lost during cooking.
Chef Note: If your beef always turns out tough, the problem is almost certainly heat, not time. Lower the flame and trust the gentle simmer to do the work.
Tips for Getting It Right Every Time
- Chill your beef before slicing; the 20 minute freeze makes the difference between clean cuts and ragged shreds
- Mix seasonings first in a bowl rather than adding them one by one to avoid uneven flavor distribution
- Keep the simmer gentle once the beef goes in; aggressive bubbling toughens the meat faster than anything
- Use a wide pan so the beef can spread in a single layer; overcrowding causes steaming instead of proper cooking
- Taste the broth before adding the beef and adjust soy sauce or sugar if needed; your specific brands may vary in intensity
- Serve immediately once assembled; gyudon does not hold well and the beef continues cooking in residual heat
Mistakes That Will Ruin Your Dish
- Slicing beef too thick results in chewy, tough pieces that never achieve that melt-in-your-mouth texture no matter how gently you cook them
- Boiling instead of simmering squeezes all the moisture from the beef and turns it gray, stringy, and unappetizing
- Skipping the sake leaves the sauce flat and one-dimensional without the subtle acidity that brightens the dish
- Cooking the beef too long is the single most common error; those thin slices need only 2 to 3 minutes total
- Using cold rice prevents proper sauce absorption and makes the entire bowl feel disjointed rather than unified
Make Ahead and Meal Prep Tips
Gyudon works best made fresh, but you can prep components in advance to make weeknight cooking nearly instant. The braising liquid holds particularly well and actually improves as the flavors meld.
- Braising liquid: Mix up to 5 days ahead and store refrigerated in a sealed container; shake or stir before using
- Sliced onions: Cut up to 2 days ahead and store in an airtight container in the refrigerator
- Sliced beef: Slice up to 24 hours ahead and store in a single layer between parchment paper, tightly wrapped and refrigerated
- Cooked rice: Prepare fresh or use leftover rice reheated with a splash of water to restore moisture
What to Serve With Gyudon
Gyudon stands alone as a complete meal, but a few simple sides transform it into something that feels like a proper Japanese set meal. Keep accompaniments light and fresh to balance the rich, savory bowl.
- Miso soup: The light, umami broth provides warmth and rounds out the meal without competing with the beef
- Quick pickled cucumbers: The cold, vinegary crunch offers textural contrast and palate refreshment between bites
- Steamed edamame: Salted soybeans add protein and give hands something to do while the bowl cools slightly
- Simple green salad: Dressed with rice vinegar and sesame, the freshness cuts through the richness
- Gyoza: Pan-fried dumplings turn gyudon into a more substantial dinner for bigger appetites
Drink Pairings
A cold Japanese lager like Asahi or Sapporo is my go-to pairing for gyudon because the crisp carbonation and clean finish refresh the palate between bites of rich, savory beef. The mild bitterness complements rather than competes with the sweet soy broth.
- Wine pairing: A chilled, off-dry Riesling with bright acidity balances the sweetness of the mirin and stands up to the soy
- Beer pairing: Japanese rice lager or a light pilsner; the effervescence and clean finish cleanse the palate between bites
- Non-alcoholic pairing: Chilled barley tea (mugicha) offers a toasty, slightly bitter note that pairs traditionally with Japanese meals
- Hot drink pairing: Green tea, particularly genmaicha with its roasted rice notes, complements the savory flavors beautifully
Flavour Variations Worth Trying
- Spicy Gyudon: Add 1 tablespoon of gochujang or a drizzle of chili oil to the braising liquid before cooking. The heat builds throughout eating and makes the dish feel more warming in cold weather.
- Mushroom Gyudon: Add 4 ounces of sliced shiitake mushrooms with the onions in step 5. The mushrooms contribute extra umami and a meaty chew that makes the dish feel more substantial.
- Cheese Gyudon: Top the finished bowl with a handful of shredded mozzarella and briefly torch or broil until melted. This fusion version is popular in Japan and adds a creamy, stretchy element kids love.
- Kimchi Gyudon: Stir 1/2 cup of chopped kimchi into the onions before adding the braising liquid. The fermented tang and subtle heat create a Korean-Japanese fusion that tastes like it belongs on a menu.
- Garlic Gyudon: Add 4 minced garlic cloves to the onions in the last minute before the braising liquid. The garlic perfumes the entire dish and makes it even more aromatic and savory.
How to Adapt This Recipe for Your Diet
- Gluten-free: Replace regular soy sauce with tamari or coconut aminos; ensure your dashi granules are also gluten-free (some contain wheat). Flavor remains nearly identical with good quality tamari.
- Dairy-free: The recipe is naturally dairy-free as written; skip the cheese variation and focus on traditional toppings.
- Vegetarian or vegan: Replace beef with firm tofu sliced thin or use king oyster mushrooms sliced to resemble scallops; use vegetable dashi or mushroom broth. The texture differs but the flavor profile remains satisfying.
- Low-carb or keto: Serve over cauliflower rice or shredded cabbage instead of white rice; reduce sugar to 1 teaspoon or substitute with a keto sweetener. Total carbs drop significantly while keeping the essential flavors.
- High-protein: Double the beef portion and add a second egg to each bowl. You can also add silken tofu cubes to the braising liquid for extra protein without changing the flavor.
How to Store and Reheat
In the Refrigerator
Store the beef, onions, and braising liquid together in an airtight container for up to 3 days. Keep the rice stored separately to prevent it from absorbing all the liquid and becoming mushy.
- Let the mixture cool completely before refrigerating to prevent condensation
- The fat from the beef will solidify on top; this is normal and will melt again when reheated
In the Freezer
Gyudon freezes reasonably well for up to 2 months, though the beef texture becomes slightly less silky after thawing. Freeze in portion-sized containers for easy single-serving meals.
- Freeze the beef mixture and rice in separate containers
- Thaw overnight in the refrigerator before reheating
Reheating
Gentle reheating over low heat preserves the beef texture best; high heat will finish toughening the meat. Add a splash of water if the sauce has thickened too much during storage.
- Oven reheating: Place in a covered baking dish at 300°F for 15 minutes; this is the gentlest method
- Stovetop reheating: Warm over low heat in a covered pan, stirring occasionally; the best balance of speed and quality
- Microwave reheating: Use 50% power in 30 second intervals; effective but watch carefully as microwaves heat unevenly and can create tough spots
Cost Breakdown
Making gyudon at home costs a fraction of restaurant prices while using better quality ingredients. A single bowl at a Japanese restaurant typically runs $12 to $15, making this homemade version about one-third the price.
| Ingredient | Estimated Cost |
|---|---|
| Beef ribeye (1/4 lb per serving) | $3.50 |
| Yellow onion | $0.25 |
| Short grain rice | $0.40 |
| Soy sauce, mirin, sake | $0.30 |
| Dashi granules | $0.10 |
| Egg and garnishes | $0.45 |
| Total Per Serving | $5.00 |
Nutrition Information
| Nutrient | Amount |
|---|---|
| Calories | 485 |
| Total Fat | 18g |
| Saturated Fat | 7g |
| Trans Fat | 0g |
| Cholesterol | 125mg |
| Sodium | 890mg |
| Total Carbohydrates | 48g |
| Dietary Fiber | 2g |
| Total Sugars | 8g |
| Added Sugars | 4g |
| Protein | 32g |
| Vitamin D | 1mcg |
| Calcium | 45mg |
| Iron | 4mg |
| Potassium | 480mg |
Nutritional values are estimates based on typical ingredients and serving sizes. Actual values will vary based on specific brands, meat fat content, and portion sizes used.
Frequently Asked Questions
Can I use a different cut of beef if ribeye is too expensive?
Chuck roast, flank steak, or sirloin all work, though they will be slightly less tender. Slice them extra thin and avoid overcooking to compensate for the lower fat content.
Can I make the braising liquid ahead of time?
Absolutely. Mix it up to 5 days in advance and refrigerate. The flavors actually meld and improve with time.
How long does leftover gyudon keep in the fridge?
The beef and onion mixture keeps for 3 days refrigerated. Store it separately from the rice for best results.
Why is my beef tough even though I followed the timing?
Your heat is likely too high. The liquid should barely simmer, not boil. Reduce to the lowest setting that maintains gentle bubbles.
Can I double this recipe for a larger group?
Yes, but use two pans rather than crowding one. Overcrowding causes the beef to steam and toughen rather than cook gently in the braising liquid.
Is it safe to eat a raw egg on top?
Use pasteurized eggs if you have concerns, or substitute with a soft boiled or poached egg. The traditional raw egg is safe with fresh, quality eggs from a trusted source.
Can I serve this over noodles instead of rice?
Gyudon over udon noodles is a popular variation called niku udon. The braising liquid works beautifully as a noodle broth with the same beef and onion topping.
My Final Word
Gyudon delivers an incredible return on a small investment of time and effort. That sweet, savory broth soaking into fluffy rice with silky slices of beef on top is the kind of meal that makes a regular weeknight feel a little special.
I have made this recipe dozens of times and it never fails to satisfy. Give it a try and adjust the sweetness or soy to match your own taste; that is how you make it yours.
If you make this gyudon, I would love to hear how it turned out. Drop a comment below or tag me on social media with your results.
Gyudon (Japanese Beef Bowl)
Ingredients
Equipment
Method
- Place the beef in the freezer for 20 minutes before slicing. The cold firms up the meat just enough to allow clean, thin cuts.
- Identify the direction of the muscle fibers running through the beef, then cut perpendicular to them in slices about 1/8 inch thick using long, smooth strokes.
- Cut the onion in half through the root, peel it, and slice each half into 1/4 inch crescents following the natural lines from root to tip.
- Combine the water, soy sauce, mirin, sake, sugar, and dashi granules in a small bowl. Whisk until the sugar and dashi dissolve completely.
- Heat the oil in a large skillet over medium heat until shimmering, then add the sliced onions. Stir occasionally and cook for about 5 minutes until they soften and turn translucent.
- Pour the prepared braising liquid into the pan with the onions. Stir once to combine, then increase heat to medium high and bring the liquid to a boil.
- Reduce the heat to medium low and let the onions simmer in the braising liquid for 8 minutes without stirring constantly.
- Spread the sliced beef in a single layer over the simmering onions, pushing the pieces into the liquid. Do not stir or flip the beef yet.
- After 1 minute, use tongs to gently turn each piece of beef so the raw side faces down. Work quickly but carefully.
- Let the beef cook undisturbed for 1 more minute, then immediately remove the pan from heat.
- Divide the hot rice among four serving bowls, pressing it gently into the bottom. Spoon the beef and onions over the rice, then ladle the braising liquid generously over everything.
- Top each bowl with your choice of egg (raw, poached, or soft boiled), pickled ginger, and sliced green onions. Serve immediately while everything is steaming hot.