Fry bread delivers that irresistible combination of crispy golden exterior and pillowy soft interior that no store-bought bread can match. This Native American staple transforms simple pantry ingredients into warm, satisfying flatbread in under an hour. Whether you top it with savory taco fillings or drizzle it with honey, this recipe will become your new go-to comfort food.
What Makes This Recipe Worth Your Time
This fry bread recipe uses a specific resting technique and oil temperature control that produces consistent results every single time. You get restaurant-quality texture with ingredients you already have in your kitchen.
- Five basic ingredients you already own: flour, baking powder, salt, water, and oil
- Ready in 45 minutes from mixing bowl to table with minimal active hands-on time
- Incredibly versatile as a base for Indian tacos, dessert, or eaten warm with butter
- Freezer-friendly dough that lets you prep ahead for busy weeknight meals
- Kid-approved texture that even picky eaters devour without complaint
A Little Background on This Dish
Fry bread originated with the Navajo people in 1864 during the Long Walk, when the U.S. government forced tribes to march hundreds of miles to Bosque Redondo. The government provided only basic commodities like flour, lard, and sugar, and Native Americans created fry bread as a survival food from these limited rations.
Today, fry bread holds deep cultural significance across many Native American communities while also representing a painful history. It has evolved into a beloved comfort food served at powwows, family gatherings, and restaurants throughout the American Southwest and beyond.
My Experience With This Recipe
I first tried fry bread at a state fair about fifteen years ago and immediately wanted to recreate it at home. That first attempt produced dense, greasy discs that my family politely choked down before suggesting we order pizza instead.
The breakthrough came when I stopped overworking the dough and learned to trust the oil temperature. I kept kneading until the dough felt smooth like pasta dough, which developed too much gluten and made the bread tough and chewy instead of tender.
The night I finally got it right, the kitchen smelled like a county fair and my kids stood at the stove waiting for each piece to come out of the oil. That warm, slightly chewy texture with crispy edges told me I had cracked the code, and now I want to share every detail so you can skip my learning curve.
Before You Start: Key Things to Know
This recipe suits beginners who have basic comfort with frying in oil. The biggest challenge is maintaining consistent oil temperature throughout the cooking process.
- Difficulty level: Easy to intermediate, with attention needed during frying
- Time breakdown: 15 minutes active prep, 15 minutes resting, 15 minutes frying
- Critical equipment: A heavy bottomed pot or Dutch oven that holds heat steadily
- Focus point: Shaping the dough and monitoring oil temperature require your full attention
Recipe at a Glance
- Recipe Name: Classic Fry Bread
- Yield: 8 pieces
- Prep Time: 15 minutes
- Cook Time: 15 minutes
- Total Time: 45 minutes
- Resting Time: 15 minutes
- Difficulty: Easy
- Course: Side dish or main
- Cuisine: Native American
- Calories per Serving: 285
How to Source the Best Ingredients
Ingredient quality matters more than you might expect for such a simple recipe. The flour and fat you choose directly affect the texture and flavor of your finished bread.
- All-purpose flour: Look for a mid-protein flour around 10 to 12 percent protein; avoid bread flour which creates tough results
- Baking powder: Check the expiration date and test freshness by dropping a teaspoon in hot water; it should bubble vigorously
- Salt: Fine table salt or fine sea salt dissolves evenly; coarse salt leaves pockets of saltiness
- Frying oil: Choose vegetable oil, canola oil, or refined peanut oil with a high smoke point; avoid olive oil
Ingredients for Fry Bread
For the Dough
- 2 cups all-purpose flour, plus extra for dusting
- 1 tablespoon baking powder
- 1 teaspoon salt
- 1 tablespoon vegetable oil or melted lard
- 3/4 cup warm water, approximately 110°F
For Frying
- 3 cups vegetable oil or enough to reach 1 inch depth in your pot
Smart Substitutions and Swaps
- All-purpose flour: Creates structure and chew in the bread; substitute with a gluten-free 1:1 baking flour blend but expect slightly denser results
- Baking powder: Provides lift and creates the signature puffiness; no true substitute exists, but ensure yours is fresh
- Vegetable oil in dough: Adds tenderness and flavor; swap with melted butter, lard, or shortening for richer taste
- Warm water: Activates the baking powder and hydrates the flour; substitute with warm milk for softer, richer bread
- Frying oil: Must have a high smoke point above 400°F; use canola, peanut, or refined avocado oil interchangeably
Tools and Equipment You Will Need
Gathering your equipment before you start prevents scrambling while dough rests or oil heats. The right tools make frying safer and more consistent.
- Large mixing bowl
- Wooden spoon or sturdy spatula
- Heavy bottomed pot or Dutch oven (holds heat steady during frying)
- Instant-read or candy thermometer (critical for maintaining 350°F oil)
- Spider strainer or slotted spoon (drains oil quickly and safely)
- Wire cooling rack set over a sheet pan
- Paper towels
- Rolling pin or your hands for shaping
- Clean kitchen towel for covering dough
How to Make Fry Bread
Read through all steps before you begin and bring your water to the correct temperature. Your baking powder should be fresh and your frying station set up with everything within reach.
Step 1: Combine Dry Ingredients
Whisk together the flour, baking powder, and salt in a large mixing bowl until fully combined. Use a fork or whisk to break up any lumps in the baking powder.
Even distribution of the leavening agent ensures every piece of fry bread puffs consistently. Clumps of baking powder create bitter spots and uneven rise.
The mixture should look uniformly white with no visible clumps or streaks.
Step 2: Add the Fat
Add the tablespoon of vegetable oil or melted lard to the dry ingredients. Use your fingertips to rub the fat into the flour until the mixture resembles coarse sand.
This step coats flour particles with fat, which shortens gluten strands and creates tender bread. Skipping this produces tougher, chewier fry bread.
The mixture should hold together briefly when squeezed, then crumble apart.
Step 3: Add Warm Water
Make a well in the center of the flour mixture and pour in the warm water. Stir with a wooden spoon until a shaggy dough forms and no dry flour remains visible.
Warm water activates the baking powder immediately and makes the dough easier to bring together. Cold water slows the reaction and produces less lift.
The dough will look rough and slightly sticky at this stage.
Step 4: Knead Briefly
Turn the dough onto a lightly floured surface and knead for exactly 2 minutes using the heel of your hand. Fold the dough over itself, push down, rotate, and repeat.
Brief kneading develops just enough gluten for structure without making the bread tough. Overworking creates dense, chewy fry bread that fights back when you bite it.
Stop when the dough feels smooth but still slightly tacky, springs back gently when poked.
Step 5: Rest the Dough
Shape the dough into a ball and place it back in the bowl. Cover with a clean kitchen towel and let rest for 15 minutes at room temperature.
Resting relaxes the gluten you just developed, making the dough easier to stretch without snapping back. It also allows the baking powder to begin producing gas bubbles throughout.
After resting, the dough will feel softer and more pliable when you press it.
Step 6: Heat the Oil
Pour oil into your heavy bottomed pot to a depth of 1 inch. Place over medium heat and bring to 350°F, monitoring with your thermometer.
Consistent oil temperature creates the signature texture: crispy outside, soft inside. Too hot and the outside burns before the inside cooks; too cool and the bread absorbs excess oil.
The oil should shimmer slightly and a tiny piece of dough dropped in should sizzle immediately and float.
Step 7: Divide the Dough
Turn the rested dough onto a floured surface and divide into 8 equal pieces. Roll each piece into a ball between your palms.
Equal portions ensure even cooking times across all pieces. One oversized piece surrounded by smaller ones means some will overcook while others stay raw inside.
Each ball should be roughly the size of a golf ball, about 2 ounces.
Step 8: Shape the Fry Bread
Working with one ball at a time, flatten it between your palms into a disc about 6 inches in diameter and 1/4 inch thick. Poke a small hole in the center with your finger.
The thin, even disc cooks through quickly and puffs dramatically. The center hole releases steam and prevents the bread from ballooning unevenly or bursting.
The disc should be thin enough to see light through the thinnest spots but not so thin it tears.
Step 9: Fry the First Side
Carefully lower one shaped disc into the 350°F oil, sliding it in away from you to prevent splashing. Fry for 1 to 2 minutes until the bottom turns golden brown.
The immediate contact with hot oil sets the exterior and begins the puffing process. Dropping too many pieces at once drops the oil temperature and produces greasy bread.
The bread should puff within seconds and the edges will turn golden, bubbles will appear across the surface.
Step 10: Flip and Finish
Use your spider strainer or slotted spoon to gently flip the fry bread. Cook the second side for another 1 to 2 minutes until evenly golden.
Both sides need equal time in direct contact with the hot oil to develop that satisfying crunch. Uneven cooking leaves soft, pale spots that turn soggy quickly.
The finished bread should be deep golden brown on both sides with no pale patches.
Step 11: Drain Properly
Lift the fry bread from the oil and hold it over the pot for 5 seconds to let excess oil drip off. Transfer to a wire rack set over a sheet pan.
Draining on a rack keeps the bottom crispy by allowing air circulation. Paper towels can trap steam against the bread, making it soggy.
Properly drained fry bread will not leave an oil slick on your plate.
Step 12: Repeat and Serve
Continue shaping and frying the remaining dough pieces, checking oil temperature between batches and adjusting heat as needed. Serve the fry bread warm.
Fresh fry bread tastes best within 30 minutes of cooking while still warm and crispy. The texture changes significantly as it cools and sits.
Finished fry bread should be golden, slightly puffed, and make a subtle crackling sound when you press it gently.
Pro Tip: Let your oil temperature recover to 350°F between each piece of fry bread; rushing produces greasy, undercooked centers that ruin the entire experience.
The Science Behind the Technique
The magic of fry bread happens through rapid steam expansion inside the dough. When the wet dough hits the hot oil, water instantly converts to steam and pushes against the quickly-setting exterior, creating that distinctive puffy texture.
The baking powder releases carbon dioxide gas that adds to this lift, while the fat in the dough creates tender layers by coating gluten strands. Temperature control is everything because it determines whether steam escapes gradually for perfect texture or bursts through for a flat, dense result.
Chef Note: The center hole acts as a steam vent that prevents catastrophic bubbling and ensures even cooking from edge to center.
Tips for Getting It Right Every Time
- Test your baking powder by dropping a teaspoon in hot water before starting; flat fry bread usually traces back to dead leavening
- Shape your dough pieces only when you are ready to fry them; shaped discs left sitting become gummy and stick to surfaces
- Keep a thermometer in the oil constantly rather than checking occasionally; temperature drops faster than you expect
- Resist the urge to crowd the pot with multiple pieces; fry one or two at a time maximum
- Adjust your heat between batches; most stovetops need slight increases as cooking progresses
- Use your hands instead of a rolling pin for shaping; rolling compresses the dough and reduces puffiness
Mistakes That Will Ruin Your Dish
- Overworking the dough develops excess gluten and produces tough, chewy bread that lacks the tender bite you want
- Skipping the rest time makes the dough fight back during shaping and results in uneven thickness and poor puffing
- Frying in cold oil allows the dough to absorb grease before the exterior sets, creating heavy, soggy bread
- Making the dough too thick leaves raw, doughy centers even when the outside looks perfectly golden
- Forgetting the center hole causes unpredictable ballooning that leads to uneven cooking and burnt spots
Make Ahead and Meal Prep Tips
Fry bread works beautifully for meal prep when you know the right stopping points. The dough holds well, but fried bread must be served fresh for the best texture.
- Prepared dough: Wrap tightly in plastic and refrigerate up to 24 hours; bring to room temperature for 20 minutes before shaping
- Portioned dough balls: Arrange on a floured sheet pan, cover, and refrigerate up to 8 hours; shape and fry directly from cold
- Frozen dough: Freeze portioned balls on a sheet pan, then transfer to a freezer bag for up to 1 month; thaw overnight in the refrigerator
- Dry mix: Combine flour, baking powder, and salt in a jar; store at room temperature up to 3 months for quick assembly
What to Serve With Fry Bread
Fry bread shines as the foundation for a casual family dinner or the centerpiece of a build-your-own taco night. Its neutral flavor profile pairs with both savory and sweet toppings.
- Indian taco toppings: Seasoned ground beef, pinto beans, shredded lettuce, diced tomatoes, and sour cream create the classic combination
- Honey butter: Whipped butter mixed with honey transforms fry bread into an irresistible dessert or snack
- Green chile stew: The bread soaks up the flavorful broth while maintaining its structure
- Powdered sugar and cinnamon: A simple dusting turns plain fry bread into fair-style dessert
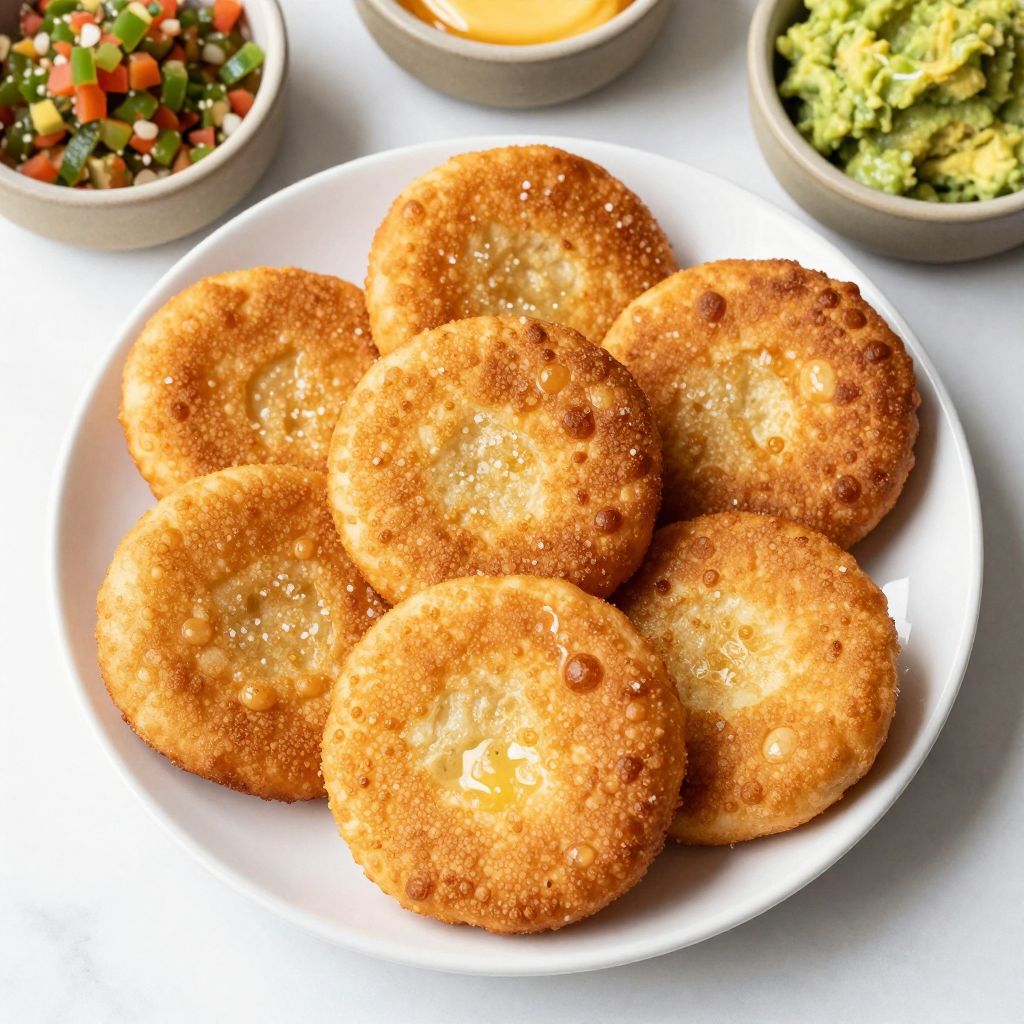
- Fresh salsa and guacamole: The crispy bread provides perfect contrast to cool, creamy dips
Drink Pairings
A cold Mexican lager with a lime wedge complements the richness of fried bread while cutting through any residual oiliness. The light, crisp carbonation refreshes your palate between bites.
- Wine: A dry Riesling or Grüner Veltliner with bright acidity balances the fried richness
- Beer: Mexican lagers, wheat beers, or light pilsners provide refreshing contrast to the hearty bread
- Non-alcoholic: Fresh-squeezed lemonade or agua fresca complements savory and sweet preparations equally
- Hot drink: Mexican hot chocolate pairs beautifully with cinnamon-sugar topped fry bread for dessert
Flavour Variations Worth Trying
- Savory herb: Add 2 tablespoons of dried herbs like rosemary and thyme to the flour; the finished bread carries subtle earthy notes perfect for sopping up stews
- Cheesy garlic: Mix 1/4 cup grated Parmesan and 1 teaspoon garlic powder into the dough; creates a more complex flavor that stands alone as an appetizer
- Sweet cinnamon: Add 2 tablespoons sugar and 1 teaspoon cinnamon to the flour; produces dessert-ready bread without needing toppings
- Green chile: Fold 1/4 cup drained diced green chiles into the finished dough; adds subtle heat and Southwestern character
- Blue corn: Replace half the flour with blue cornmeal; creates stunning purple-gray bread with nutty, earthy flavor
How to Adapt This Recipe for Your Diet
- Gluten-free: Use a 1:1 gluten-free baking flour blend and add 1/2 teaspoon xanthan gum; the texture will be slightly more crumbly but still satisfying
- Dairy-free: This recipe contains no dairy as written; ensure your oil choice has no butter additives
- Vegan: The basic recipe is already vegan; use vegetable oil rather than lard for the dough fat
- Lower-carb: No true low-carb version exists due to the flour base; consider serving smaller portions as a treat rather than a daily staple
- Higher-protein: Add 2 tablespoons of unflavored protein powder to the flour; expect slightly denser results but reasonable texture
How to Store and Reheat
In the Refrigerator
Store cooled fry bread in an airtight container or resealable bag at room temperature for up to 2 days. Refrigeration accelerates staling and is not recommended for the cooked bread.
- Layer pieces between parchment paper to prevent sticking
- Squeeze out excess air before sealing to minimize moisture loss
In the Freezer
Cooked fry bread freezes reasonably well for up to 1 month but loses some crispness. Freeze raw dough portions for better results.
- Wrap individual pieces tightly in plastic wrap, then place in a freezer bag
- Label with the date and use within 4 weeks for best quality
Reheating
A hot oven produces the best reheated texture by re-crisping the exterior. Microwave reheating works in a pinch but produces softer results.
- Oven method: Place on a baking sheet at 375°F for 5 to 7 minutes until warm and slightly crispy; best method
- Stovetop method: Warm in a dry skillet over medium heat for 2 minutes per side; good crispness
- Microwave method: Heat for 15 to 20 seconds on high; use only when time is critical as texture suffers significantly
Cost Breakdown
Making fry bread at home costs a fraction of restaurant prices and uses pantry staples most cooks already own. This recipe produces eight generous pieces for less than the cost of a single restaurant serving.
| Ingredient | Estimated Cost |
|---|---|
| All-purpose flour (2 cups) | $0.30 |
| Baking powder (1 tablespoon) | $0.15 |
| Salt (1 teaspoon) | $0.02 |
| Vegetable oil for dough (1 tablespoon) | $0.05 |
| Vegetable oil for frying (3 cups) | $1.50 |
| Total Per Serving | $0.25 |
Nutrition Information
| Nutrient | Amount |
|---|---|
| Calories | 285 |
| Total Fat | 14g |
| Saturated Fat | 1.5g |
| Trans Fat | 0g |
| Cholesterol | 0mg |
| Sodium | 380mg |
| Total Carbohydrates | 35g |
| Dietary Fiber | 1g |
| Total Sugars | 0g |
| Added Sugars | 0g |
| Protein | 4g |
| Vitamin D | 0mcg |
| Calcium | 85mg |
| Iron | 2mg |
| Potassium | 45mg |
Nutritional values are estimates based on standard ingredients and may vary depending on specific brands, exact measurements, and portion sizes used.
Frequently Asked Questions
Can I use self-rising flour instead of all-purpose flour with baking powder?
Yes, substitute 2 cups self-rising flour and omit both the baking powder and salt since self-rising flour contains both. The results will be nearly identical.
Can I make the dough the night before?
Absolutely, wrap the dough tightly and refrigerate for up to 24 hours. Let it sit at room temperature for 20 minutes before shaping and frying.
How long does fry bread stay fresh?
Fry bread tastes best within hours of frying but stays acceptable for 2 days stored at room temperature in an airtight container. The texture becomes progressively chewier over time.
Why did my fry bread come out flat and dense?
Flat fry bread usually results from expired baking powder or overworked dough. Test your baking powder freshness and knead for no more than 2 minutes.
How do I double this recipe for a crowd?
Simply double all ingredients and mix in a larger bowl. Fry in small batches to maintain oil temperature and expect the full process to take about 45 minutes longer.
Do I have to poke a hole in the center?
The hole helps steam escape and promotes even cooking, but some cooks skip it for a puffier, more balloon-like result. Try both methods and see which texture you prefer.
Can I bake fry bread instead of frying it?
Baking produces a completely different texture closer to flatbread or naan. If you want to try it, bake at 450°F for 8 to 10 minutes, but the result will not have that signature crispy fried exterior.
My Final Word
There is something deeply satisfying about pulling golden, puffy fry bread from the oil and watching your family gather around the stove. This recipe delivers that perfect contrast of crispy and tender that makes every bite worth the calories.
I have made this dozens of times and the method holds up whether I am cooking for two or a crowd. Give it a try this weekend and do not stress about perfection on your first batch; the learning curve is short and even imperfect fry bread disappears fast.
Drop a comment below if you try this recipe or have a family variation you swear by. I love hearing how other home cooks make this dish their own.

Classic Fry Bread
Ingredients
Equipment
Method
- Whisk together the flour, baking powder, and salt in a large mixing bowl until fully combined. Use a fork or whisk to break up any lumps in the baking powder.
- Add the tablespoon of vegetable oil or melted lard to the dry ingredients. Use your fingertips to rub the fat into the flour until the mixture resembles coarse sand.
- Make a well in the center of the flour mixture and pour in the warm water. Stir with a wooden spoon until a shaggy dough forms and no dry flour remains visible.
- Turn the dough onto a lightly floured surface and knead for exactly 2 minutes using the heel of your hand. Fold the dough over itself, push down, rotate, and repeat. Stop when the dough feels smooth but still slightly tacky.
- Shape the dough into a ball and place it back in the bowl. Cover with a clean kitchen towel and let rest for 15 minutes at room temperature.
- Pour oil into your heavy bottomed pot to a depth of 1 inch. Place over medium heat and bring to 350°F, monitoring with your thermometer.
- Turn the rested dough onto a floured surface and divide into 8 equal pieces. Roll each piece into a ball between your palms, about the size of a golf ball.
- Working with one ball at a time, flatten it between your palms into a disc about 6 inches in diameter and 1/4 inch thick. Poke a small hole in the center with your finger.
- Carefully lower one shaped disc into the 350°F oil, sliding it in away from you to prevent splashing. Fry for 1 to 2 minutes until the bottom turns golden brown.
- Use your spider strainer or slotted spoon to gently flip the fry bread. Cook the second side for another 1 to 2 minutes until evenly golden.
- Lift the fry bread from the oil and hold it over the pot for 5 seconds to let excess oil drip off. Transfer to a wire rack set over a sheet pan.
- Continue shaping and frying the remaining dough pieces, checking oil temperature between batches and adjusting heat as needed. Serve the fry bread warm.