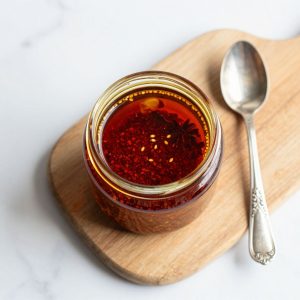
Chili seasoning you mix yourself in two minutes will change how you think about every pot of chili you make from now on. This blend of cumin, paprika, and dried chilies delivers a depth that no packet from the spice aisle can match. Once you nail this recipe, you will never go back.
What Makes This Recipe Worth Your Time
Store bought chili seasoning packets hide fillers, excess sodium, and stale spices behind convenient packaging. This homemade version puts you in control of every ingredient and every flavor note.
- Freshness that translates directly into bolder, more complex flavor in your finished chili
- Complete control over salt levels and heat intensity to suit your family’s preferences
- Cost savings of roughly 70% compared to buying individual packets over time
- No fillers like maltodextrin, silicon dioxide, or anti-caking agents
- Customizable heat from mild enough for kids to fiery enough for spice lovers
A Little Background on This Dish
Chili seasoning as we know it traces back to Texas in the 1800s, where dried chilies and cumin defined the regional stew called chili con carne. San Antonio’s famous “chili queens” sold bowls of the stuff from open air stands, each with her own secret spice blend.
The commercial chili powder packet arrived in the early 1900s when William Gebhardt began selling his pre-mixed blend in Texas. Home cooks have been trying to replicate and improve on that convenience ever since, and the best versions always start with whole or freshly ground spices.
My Experience With This Recipe
I started making my own chili seasoning about fifteen years ago when I realized the packets tasted like dust compared to what I remembered from my grandmother’s kitchen. Her chili had layers of flavor I could not replicate, and I finally figured out her secret was grinding her own spices fresh.
My first attempts were disasters. I went way too heavy on the cayenne and made a batch so hot that nobody in the house could eat more than three bites without reaching for the milk.
The version I landed on after many rounds of testing hits that sweet spot where adults find it satisfying and kids do not run from the table. The smell of toasted cumin and paprika hitting a hot pot of beef still makes the whole family wander into the kitchen asking when dinner will be ready.
Before You Start: Key Things to Know
This recipe suits absolute beginners and takes about five minutes from start to finish. The only real challenge is measuring accurately so your blend stays balanced batch after batch.
- Difficulty level: Beginner friendly with no cooking required
- Active time vs passive time: Five minutes of active measuring and mixing with zero passive time
- Most important equipment: A set of accurate measuring spoons and a clean, dry jar
- Step requiring most attention: Toasting the cumin if you choose to do so, since it burns within seconds of becoming fragrant
Recipe at a Glance
- Recipe Name: Homemade Chili Seasoning
- Yield: About 1/2 cup (enough for 4 batches of chili)
- Prep Time: 5 minutes
- Cook Time: 0 minutes
- Total Time: 5 minutes
- Difficulty: Beginner
- Course: Seasoning Blend
- Cuisine: Tex Mex, American
- Calories per Serving: 24 calories per 2 tablespoon serving
How to Source the Best Ingredients
Spice quality determines everything in a blend this simple. Stale spices from the back of your cabinet will produce a flat, disappointing result no matter how good your technique.
- Chili powder: Look for a deep brick red color with no brown or grey tones, which indicate oxidation and age
- Ground cumin: Smell it before buying if possible; fresh cumin has a warm, earthy aroma while stale cumin smells like cardboard
- Smoked paprika: Spanish pimentón offers the richest smoke flavor; check the tin date and avoid anything older than a year
- Garlic powder: Choose pure garlic powder without added salt; it should smell pungent and slightly sweet
- Cayenne pepper: Bright orange red indicates freshness; dull brown cayenne has lost most of its heat and flavor
Ingredients for Chili Seasoning
For the Spice Blend
- 3 tablespoons chili powder
- 2 tablespoons ground cumin
- 1 tablespoon smoked paprika
- 1 tablespoon garlic powder
- 1 tablespoon onion powder
- 2 teaspoons dried oregano, crushed between your fingers
- 1 teaspoon cayenne pepper (adjust to taste)
- 1 teaspoon black pepper, freshly ground
- 1 teaspoon kosher salt (optional, or add to chili directly)
- 1/2 teaspoon coriander, ground
Smart Substitutions and Swaps
- Chili powder: Provides the base flavor and color for the entire blend. Substitute ancho chile powder for a milder, fruitier profile or chipotle powder for smoky heat.
- Smoked paprika: Adds depth and a subtle smokiness. Regular sweet paprika works but loses that campfire quality; add a tiny pinch of liquid smoke to your chili to compensate.
- Cumin: Delivers the earthy warmth essential to Tex Mex flavor. Caraway seeds offer a similar flavor family but taste distinctly different; use half the amount if substituting.
- Cayenne pepper: Controls the heat level of the blend. Red pepper flakes, crushed fine, work in a pinch; use 1.5 times the amount for similar heat.
- Garlic powder: Provides a savory backbone without moisture. Fresh minced garlic adds moisture that causes clumping; add fresh garlic directly to your chili instead.
- Dried oregano: Brings an herbal note that balances the warmth. Mexican oregano tastes more authentic; Italian oregano works but tastes slightly sweeter.
Tools and Equipment You Will Need
Gather everything before you start measuring. Accuracy matters here since small variations throw off the flavor balance significantly.
- Measuring spoons (a complete set including 1/2 teaspoon)
- Small mixing bowl (glass or metal keeps static from making spices stick)
- Small whisk or fork for blending
- Airtight glass jar or container for storage (keeps spices fresh longer than plastic)
- Masking tape and marker for labeling with the date
- Optional: spice grinder or mortar and pestle if toasting and grinding whole cumin
How to Make Chili Seasoning
Read through all the steps before you start and make sure your spice jars are open and accessible. If you want to toast your cumin for extra depth, do that first and let it cool completely before measuring.
Step 1: Prepare Your Workspace
Clear a clean, dry section of counter and set out your mixing bowl, measuring spoons, and all spice containers. Line them up in the order you will use them so you do not lose track of what you have already added.
A dry workspace prevents clumping and keeps your blend from absorbing any ambient moisture. This organization step saves frustration and ensures accuracy.
You will know you are ready when every spice container sits within arm’s reach and your bowl is bone dry inside.
Step 2: Measure the Chili Powder Base
Scoop 3 level tablespoons of chili powder into your mixing bowl. Level each spoon with a straight edge like the back of a knife to ensure consistency between batches.
Chili powder forms the foundation of this blend and provides the dominant flavor note. Too much makes the blend one dimensional; too little leaves it tasting like generic taco seasoning.
The chili powder should form a small mound in the center of your bowl with a rich, brick red color.
Step 3: Add the Cumin
Measure 2 level tablespoons of ground cumin and add them to the bowl. If you toasted whole cumin seeds, grind them now and measure the resulting powder.
Cumin provides the earthy, almost nutty warmth that makes chili taste like chili. This spice separates authentic Tex Mex flavor from generic spiced meat.
Fresh cumin smells warm and inviting the moment it hits the bowl. If you smell nothing, your cumin is too old.
Step 4: Incorporate the Smoked Paprika
Add 1 level tablespoon of smoked paprika to the bowl. Scrape any paprika clinging to the measuring spoon into the bowl; this spice loves to stick.
Smoked paprika introduces a subtle campfire quality that builds complexity without adding heat. It also deepens the red color of your finished chili.
Watch for the color in your bowl to shift from pure red toward a darker, more complex hue as the paprika integrates.
Step 5: Add the Aromatics
Measure 1 tablespoon each of garlic powder and onion powder and add them to the bowl. Tap the measuring spoons gently to release any powder stuck in the curve.
These dried aromatics provide the savory depth that makes your chili taste slow cooked even when it is not. They also help the seasoning adhere to meat during browning.
The mixture should now smell noticeably more complex and savory than the chili powder alone.
Step 6: Crush and Add the Oregano
Measure 2 teaspoons of dried oregano into your palm, then crush it between your fingers directly over the bowl. Let the flakes fall into the mixture along with any oils released from your fingers.
Crushing oregano releases the volatile oils trapped in the dried leaves. These oils evaporate quickly, which is why you crush right before adding rather than in advance.
You should smell the bright, slightly minty aroma of the oregano immediately when you crush it.
Step 7: Add the Heat Components
Add 1 teaspoon of cayenne pepper and 1 teaspoon of freshly ground black pepper to the bowl. Start with less cayenne if you are sensitive to heat; you can always add more to individual batches of chili later.
Cayenne provides the upfront, sharp heat while black pepper adds a slower, more rounded warmth at the back of your throat. Together they create a heat profile with dimension.
The color of your mixture will shift slightly toward orange as the cayenne incorporates.
Step 8: Finish With Coriander and Salt
Add 1/2 teaspoon of ground coriander and 1 teaspoon of kosher salt (if using) to the bowl. Coriander is subtle but adds a citrus brightness that lifts all the other flavors.
Salt is optional in the blend because many cooks prefer to season their chili at the end when they can taste and adjust. Including it here ensures even distribution if you choose to add it.
All components should now be in the bowl, forming a multi colored mound of spices.
Step 9: Whisk Until Completely Combined
Use a small whisk or fork to stir the spices together for at least 60 seconds. Scrape down the sides and bottom of the bowl halfway through to catch any spices hiding in the corners.
Thorough mixing ensures every spoonful of the finished blend contains the same ratio of flavors. Uneven mixing means inconsistent chili batches.
The blend should be completely uniform in color with no visible streaks of individual spices.
Step 10: Transfer to an Airtight Container
Pour the finished blend into a clean, dry glass jar. Tap the jar gently on the counter to settle the contents and eliminate air pockets.
Glass protects the volatile oils in your spices better than plastic, which can absorb aromas and allow oxidation over time. An airtight seal is critical for freshness.
The jar should be no more than three quarters full to allow room for shaking before each use.
Step 11: Label With the Date
Write the current date on a piece of masking tape and affix it to the jar. This simple step tells you exactly how old your blend is every time you reach for it.
Homemade spice blends stay potent for about 6 months before they begin to fade. After that point, you will need to use more to achieve the same flavor impact.
Store the labeled jar in a cool, dark cabinet away from your stove’s heat.
Step 12: Test the Blend
Sprinkle a tiny pinch of the finished blend onto your tongue to evaluate the balance. Notice the order in which you taste the flavors: warmth, salt, heat, smoke.
This taste test tells you whether your blend needs adjustment before you commit a whole pot of chili to it. Make notes on what to tweak for your next batch.
The finish should be warm and complex, not simply hot or salty. If heat dominates, reduce cayenne next time.
Pro Tip: Toast your cumin seeds in a dry skillet over medium heat for 90 seconds before grinding them. This single extra step adds a depth of flavor that separates good chili from unforgettable chili.
The Science Behind the Technique
The magic of chili seasoning lies in how the fat soluble flavor compounds in each spice interact when they hit hot oil or meat fat. Cumin’s essential oils contain cuminaldehyde, which only fully releases its earthy aroma when heated with fat.
The capsaicin in cayenne bonds with fat molecules, which is why chili made with fattier meat carries heat more evenly through every bite. Blooming your spice blend in hot oil before adding liquid extracts maximum flavor from every component.
Chef Note: Adding your chili seasoning to hot fat for 30 seconds before adding any liquid can increase flavor intensity by up to 40% compared to adding it after the liquid.
Tips for Getting It Right Every Time
- Level every measurement with a straight edge rather than eyeballing; small variations compound when you have ten ingredients.
- Buy whole cumin seeds and grind them fresh if you want the biggest flavor upgrade from a single change.
- Store in glass rather than plastic to prevent the oils from degrading and the blend from absorbing off flavors.
- Make double batches since the time investment is nearly identical and you will use it faster than you expect.
- Smell your spices before measuring; if they smell like nothing, they will taste like nothing.
- Shake the jar vigorously before each use since some settling occurs even with thorough initial mixing.
Mistakes That Will Ruin Your Dish
- Using stale spices produces a flat, dusty blend that tastes like every disappointing packet you have ever used.
- Over measuring cayenne creates a blend so hot it masks every other flavor and makes the chili inedible for most people.
- Adding the blend to cold fat fails to bloom the spices and leaves flavor locked inside the powder.
- Storing near the stove exposes your blend to heat and steam that degrade the volatile oils within weeks.
- Skipping the salt entirely then forgetting to season your chili later results in a flat tasting final dish.
Make Ahead and Meal Prep Tips
This seasoning blend is designed for make ahead convenience and actually improves slightly over the first 24 hours as the flavors marry. Keep a jar in your pantry and making chili becomes a weeknight reality instead of a weekend project.
- The complete blend can be made up to 6 months ahead and stored in an airtight container in a cool, dark place.
- Pre measured portions of 2 tablespoons each can be stored in small bags for grab and go chili nights.
- Larger batches up to quadruple the recipe work perfectly; just use a larger bowl and whisk longer to ensure even distribution.
- Gift jars make excellent presents; attach a card with the recipe and storage instructions for the recipient.
What to Serve With Chili Seasoning
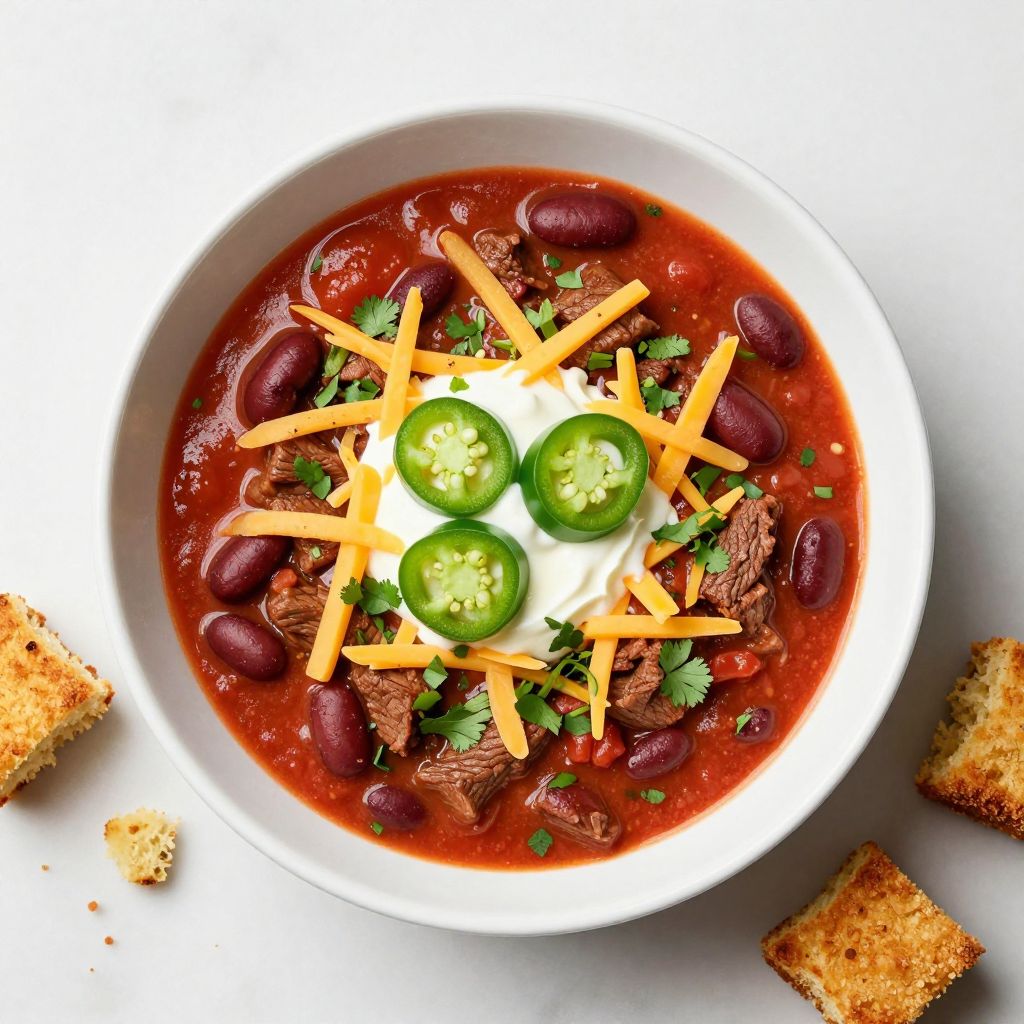
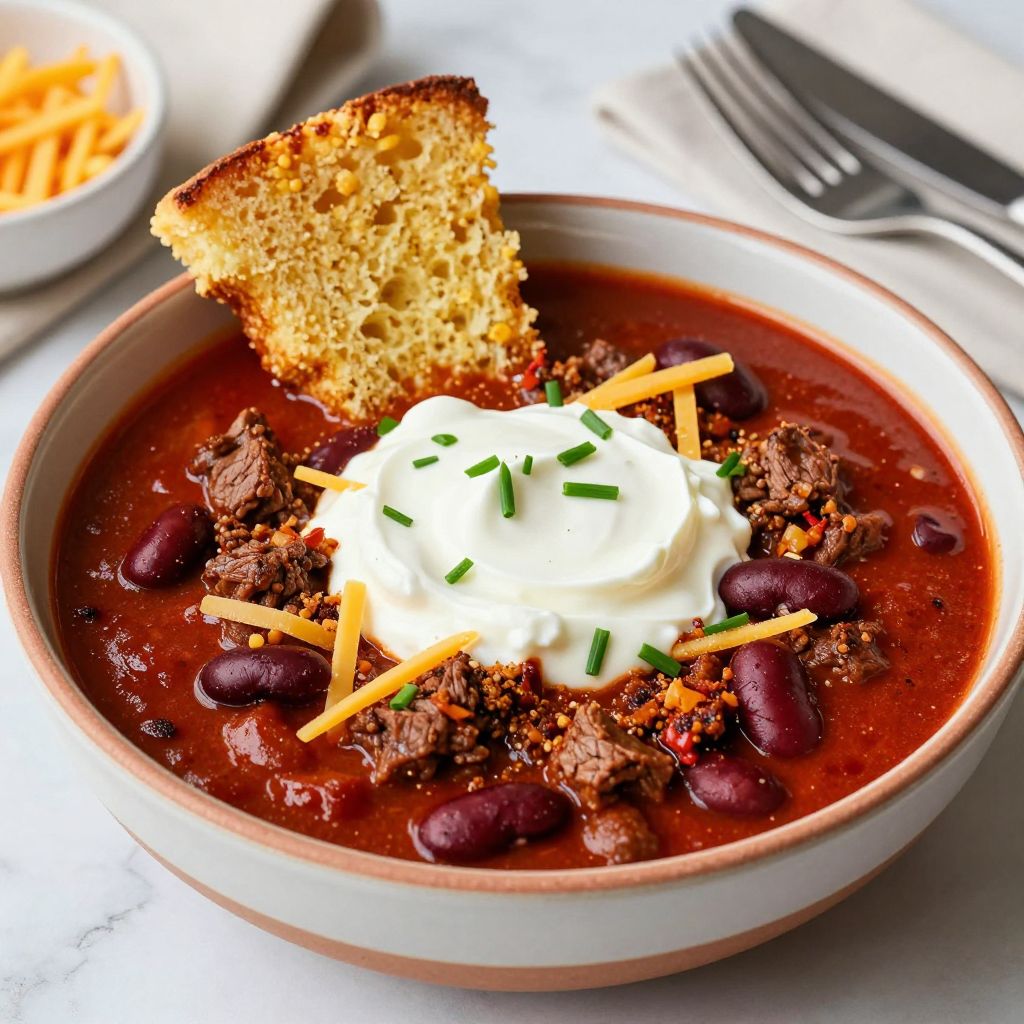
This seasoning shines brightest in a classic pot of beef chili served for casual family dinners or game day gatherings. It also works beautifully as a rub for grilled meats or stirred into ground meat for tacos.
- Cornbread: The subtle sweetness cuts through the spice and the crumbly texture soaks up the chili liquid perfectly.
- Shredded cheddar: Sharp cheddar melted on top adds richness and helps temper heat for sensitive palates.
- Sour cream: A cool, tangy dollop balances the warmth and adds a creamy element to each bite.
- Pickled jalapeños: The vinegar brightness and extra heat layer work for those who want more punch.
- Saltine crackers: Old school and perfect for adding texture and scooping up every last bit from the bowl.
Drink Pairings
A cold Mexican lager with a lime wedge is my go to pairing for chili made with this seasoning. The crisp carbonation cleanses your palate between bites while the light malt sweetness complements the cumin and smoke.
- Wine: A bold Zinfandel with jammy fruit notes stands up to the spice and echoes the smoky paprika undertones.
- Beer: An amber ale with caramel malt character bridges the gap between light lagers and the richness of the chili.
- Non alcoholic: Agua fresca made with watermelon and lime cools the palate and refreshes between bites.
- Hot drink: Mexican hot chocolate with cinnamon plays surprisingly well with leftover chili on cold nights.
Flavour Variations Worth Trying
- Texas Red: Double the chili powder and add 1 tablespoon of ancho chile powder for a deeper, more complex heat. The flavor becomes richer and more authentically Texan.
- Smoky Chipotle: Replace the cayenne with 2 teaspoons of chipotle powder for a smokier, more rounded heat. The finish becomes earthier with a lingering warmth.
- Mild Family Style: Omit the cayenne entirely and add an extra teaspoon of smoked paprika. The blend becomes kid friendly while keeping full flavor.
- Coffee Rubbed: Add 1 tablespoon of finely ground dark roast coffee for a competition style depth. The bitterness adds complexity without any coffee taste in the finished chili.
- Southwestern: Add 1 teaspoon each of ground cinnamon and cocoa powder for a mole inspired profile. The warmth becomes more complex with subtle sweet undertones.
How to Adapt This Recipe for Your Diet
- Gluten free: This blend is naturally gluten free as written; just verify your individual spice containers were not processed on shared equipment with wheat products.
- Dairy free: The blend contains no dairy; use it freely and simply skip any cheese or sour cream toppings on your finished chili.
- Vegan or vegetarian: The seasoning itself is completely plant based; use it with beans, lentils, or plant based meat crumbles instead of beef.
- Low carb or keto: This blend adds negligible carbohydrates per serving; use it with fatty ground beef and skip the beans for a keto friendly chili.
- High protein: The blend pairs perfectly with lean ground turkey or bison for a higher protein, lower fat chili option.
How to Store and Reheat
In the Refrigerator
Store the dry blend in an airtight container at room temperature, not in the refrigerator. Refrigerator humidity can cause clumping and degrade the spices faster than cool, dry pantry storage.
- Keep the jar away from light and heat sources like windows or the stove
- Check for clumping monthly and break up any lumps with a fork before they harden
In the Freezer
Freezing is unnecessary and not recommended for this spice blend. The low moisture content keeps it shelf stable, and freezer condensation when thawing can introduce damaging moisture.
- If you must freeze, use a vacuum sealed bag to eliminate air exposure
- Thaw the sealed bag at room temperature for several hours before opening to prevent condensation
Reheating
Spice blends do not require reheating, but finished chili made with this blend reheats beautifully. Medium low heat on the stove produces the best texture.
- Oven reheating: Cover the chili and heat at 325°F for 20 minutes, stirring halfway, for even results without scorching
- Stovetop reheating: Warm over medium low heat with a splash of water or broth, stirring frequently, for the best texture
- Microwave reheating: Heat in short 90 second bursts, stirring between, but expect some texture degradation; use only when time is critical
Cost Breakdown
Making your own chili seasoning costs a fraction of buying packets, especially when you calculate how many batches of chili one jar of this blend will season. The upfront spice investment pays for itself within two months of regular use.
| Ingredient | Estimated Cost |
|---|---|
| Chili powder (3 tbsp) | $0.45 |
| Ground cumin (2 tbsp) | $0.30 |
| Smoked paprika (1 tbsp) | $0.35 |
| Garlic powder (1 tbsp) | $0.15 |
| Onion powder (1 tbsp) | $0.12 |
| Dried oregano (2 tsp) | $0.08 |
| Cayenne, black pepper, coriander, salt | $0.15 |
| Total Per Serving (2 tbsp) | $0.40 |
Nutrition Information
| Nutrient | Amount |
|---|---|
| Calories | 24 |
| Total Fat | 1g |
| Saturated Fat | 0g |
| Trans Fat | 0g |
| Cholesterol | 0mg |
| Sodium | 200mg |
| Total Carbohydrates | 4g |
| Dietary Fiber | 2g |
| Total Sugars | 0g |
| Added Sugars | 0g |
| Protein | 1g |
| Vitamin D | 0mcg |
| Calcium | 20mg |
| Iron | 2mg |
| Potassium | 120mg |
Nutritional values are estimates based on standard ingredient data and will vary depending on specific brands and portion sizes used in your kitchen.
Frequently Asked Questions
Can I use regular paprika instead of smoked paprika?
Yes, but you will lose the smoky depth that makes this blend special. Add a tiny drop of liquid smoke to your chili to compensate for the missing smokiness.
Can I make this blend ahead and how long will it keep?
This blend keeps its full potency for 6 months in an airtight container stored in a cool, dark place. After 6 months it remains safe but loses intensity, requiring larger amounts.
How much of this seasoning should I use per pound of meat?
Use 2 tablespoons of this blend per pound of ground meat for a standard batch of chili. Adjust up or down after your first batch based on your family’s preferences.
Why does my blend clump up in the jar?
Clumping happens when moisture gets into the container, usually from a wet measuring spoon or storing near steam. Always use completely dry spoons and keep the jar away from the stove.
Can I double or halve this recipe?
Absolutely, this recipe scales linearly with no adjustments needed. Double works perfectly; just use a larger bowl and whisk thoroughly to ensure even distribution.
Should I add the salt to the blend or to my chili separately?
Either approach works, but adding salt directly to your chili gives you more control over the final seasoning. I include it in the blend for convenience when I am in a hurry.
Can I use this blend as a dry rub for grilled meat?
This blend works wonderfully as a rub for beef, pork, or chicken before grilling. Pat the meat dry, coat generously with the blend, and let it sit for 30 minutes before grilling.
My Final Word
A jar of this chili seasoning sitting in your pantry changes the entire equation of weeknight cooking. That depth of flavor, that warm complexity from cumin and smoke and just enough heat, turns a simple pot of chili into something your family requests again and again.
I have tested this blend dozens of times over the years, adjusting the ratios until everything clicked into place. Give it one try and I am confident you will never reach for a packet again.
If you make this blend, I would love to hear how it turned out. Drop a comment below or tag us on social media with your chili night photos. Your feedback helps other home cooks decide to give it a shot, and nothing makes my day like seeing this recipe show up in someone else’s kitchen.
Homemade Chili Seasoning
Ingredients
Equipment
Method
- Clear a clean, dry section of counter and set out your mixing bowl, measuring spoons, and all spice containers. Line them up in the order you will use them.
- Scoop 3 level tablespoons of chili powder into your mixing bowl. Level each spoon with a straight edge like the back of a knife.
- Measure 2 level tablespoons of ground cumin and add them to the bowl.
- Add 1 level tablespoon of smoked paprika to the bowl, scraping any paprika clinging to the measuring spoon.
- Measure 1 tablespoon each of garlic powder and onion powder and add them to the bowl.
- Measure 2 teaspoons of dried oregano into your palm, then crush it between your fingers directly over the bowl.
- Add 1 teaspoon of cayenne pepper and 1 teaspoon of freshly ground black pepper to the bowl.
- Add 1/2 teaspoon of ground coriander and 1 teaspoon of kosher salt (if using) to the bowl.
- Use a small whisk or fork to stir the spices together for at least 60 seconds. Scrape down the sides and bottom of the bowl halfway through.
- Pour the finished blend into a clean, dry glass jar. Tap the jar gently on the counter to settle the contents.
- Label the jar with the current date. Store in a cool, dark cabinet away from heat. Use 2 tablespoons per pound of meat for chili.