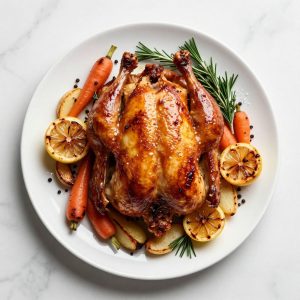
Chicken stock transforms ordinary weeknight dinners into something your family asks for again. This golden, aromatic liquid takes about 4 hours of mostly hands off time, costs almost nothing to make, and freezes beautifully for months.
Once you taste the difference between homemade and store bought, you will never go back. Let me show you exactly how I make it.
What Makes This Recipe Worth Your Time
Homemade chicken stock delivers a depth of flavor and body that no carton can match. The gelatin from the bones creates a richness that transforms every soup, sauce, and braise it touches.
- Fraction of the cost of store bought stock when you use bones from roasted chickens you were going to throw away
- Zero preservatives or sodium levels you cannot control, making it perfect for family cooking
- Unmatched body from natural gelatin that makes sauces silky and soups satisfying
- Freezes for six months so you always have restaurant quality stock on hand
- Uses kitchen scraps like vegetable trimmings and herb stems you would otherwise discard
A Little Background on This Dish
Stock making traces back thousands of years to when cooks discovered that simmering bones in water extracted flavor, nutrients, and gelatin. French cuisine formalized the technique in the 18th century, naming it fond because it formed the foundation of classical cooking.
Every culture that raises chickens developed its own version. Chinese cooks add ginger and scallions, Jewish grandmothers swear by dill and parsnips, and Italian nonnas keep it simple with celery and onion.
My Experience With This Recipe
I started making chicken stock about fifteen years ago when I realized I was throwing away perfectly good carcasses after roasting Sunday chickens. It seemed wasteful, and my grandmother would have been horrified.
My early batches came out thin and pale because I kept adding too much water and not roasting the bones first. I also learned the hard way that boiling instead of simmering creates cloudy, greasy stock that looks like dishwater.
The first time I got it right, the kitchen smelled like the best restaurant I had ever walked into. My kids wandered in asking what was for dinner, and I had to explain it was just the foundation for next week’s meals.
Before You Start: Key Things to Know
This recipe suits complete beginners, though patience matters more than skill. The biggest challenge is leaving it alone and resisting the urge to stir or crank up the heat.
- Difficulty level: Easy, but requires occasional attention over several hours
- Active vs passive time: About 20 minutes active work spread across 4 hours of simmering
- Most important equipment: A heavy bottomed stockpot of at least 8 quarts capacity
- Step requiring most attention: Maintaining a bare simmer and skimming foam during the first hour
Recipe at a Glance
- Recipe Name: Chicken Stock
- Yield: 3 quarts (12 servings)
- Prep Time: 15 minutes
- Cook Time: 4 hours
- Total Time: 4 hours 15 minutes
- Resting Time: Overnight for fat separation (optional)
- Difficulty: Easy
- Course: Base, Pantry Staple
- Cuisine: Universal
- Calories per Serving: 40
How to Source the Best Ingredients
The quality of your bones determines the quality of your stock. Great stock starts at the butcher counter or your own freezer stash of saved carcasses.
- Chicken bones: Look for bones with some meat still attached, joints with cartilage, and backs or necks if available; raw bones from a butcher work beautifully, but saved roasted carcasses add deeper flavor
- Onions: Choose firm, heavy onions with dry papery skins and no soft spots or green sprouts
- Carrots: Select firm carrots with bright orange color; avoid limp or rubbery specimens
- Celery: Look for crisp, tight stalks with fresh leaves; the leaves add excellent flavor
- Fresh herbs: Choose parsley and thyme with perky leaves and no slime; dried herbs work but deliver less complexity
Ingredients for Chicken Stock
For the Stock Base
- 4 pounds chicken bones, including backs, necks, wings, and carcasses
- 1 pound chicken wings or drumsticks for extra gelatin
- 5 quarts cold water
For the Aromatics
- 2 large yellow onions, quartered with skin on
- 3 large carrots, cut into 3 inch pieces
- 4 celery stalks with leaves, cut into 3 inch pieces
- 1 head garlic, halved crosswise
- 1 bunch fresh parsley stems
- 6 sprigs fresh thyme
- 2 bay leaves
- 1 teaspoon whole black peppercorns
Smart Substitutions and Swaps
- Chicken bones: Provide the collagen and flavor base; substitute turkey bones for a slightly richer stock, or use a whole chicken cut into pieces if you have no bones saved
- Yellow onions: Add sweetness and depth; substitute leeks for a more delicate flavor or shallots for a subtler result
- Carrots: Contribute natural sweetness and color; parsnips make an excellent substitute with a slightly earthier flavor
- Celery: Provides savory backbone; fennel stalks work as a substitute but add anise notes
- Fresh thyme: Adds herbal complexity; dried thyme works at one third the quantity but tastes less bright
- Parsley: Contributes fresh, clean notes; substitute cilantro stems for an Asian style stock
- Bay leaves: Add subtle earthy flavor; skip entirely if unavailable rather than substituting
Tools and Equipment You Will Need
Gather everything before you start. Stock making involves hot liquids and long cooking times, so having the right tools within reach keeps you safe and organized.
- Large stockpot, 8 to 12 quart capacity (heavy bottom prevents scorching)
- Fine mesh strainer (essential for clear stock)
- Cheesecloth or clean kitchen towels (for final straining)
- Large ladle
- Slotted spoon or spider strainer (for skimming foam)
- Large heatproof bowl or second pot
- Fat separator or shallow container for chilling
- Storage containers or freezer bags
- Sheet pan (if roasting bones first)
How to Make Chicken Stock
Read through all steps before starting. If using raw bones, consider roasting them first for deeper flavor; bring roasted bones to room temperature before adding cold water.
Step 1: Prepare the Bones
If roasting bones, spread them on a sheet pan in a single layer and roast at 400°F for 45 minutes until golden brown. For saved carcasses, break them into smaller pieces that fit comfortably in your pot.
Roasting triggers the Maillard reaction, creating hundreds of new flavor compounds that give stock a richer, more complex taste. Raw bones produce a lighter, cleaner stock suitable for delicate soups.
The bones are ready when they turn deep golden and smell intensely savory. You should see rendered fat pooling on the pan.
Step 2: Prepare the Aromatics
Quarter the onions through the root end, leaving the papery skin attached. Cut carrots and celery into large 3 inch pieces; precision does not matter here.
Large pieces extract flavor slowly and evenly over the long cooking time. Small pieces would turn mushy and release starches that cloud the stock.
The aromatics are ready when everything sits in rough, large chunks. No need for careful knife work.
Step 3: Combine Bones and Water
Place the bones in your stockpot and cover with 5 quarts of cold water. The water should cover the bones by about 2 inches.
Starting with cold water allows proteins to release slowly and coagulate into foam that you can skim away. Hot water would seal proteins into the liquid and create permanent cloudiness.
The water level should sit 2 inches above the bones. Add more cold water if needed to achieve this.
Step 4: Bring to a Gentle Simmer
Set the pot over medium high heat and bring the water slowly to a simmer. This should take about 30 minutes; do not rush it.
Gradual heating gives proteins time to rise to the surface as foam rather than dispersing throughout the liquid. Fast heating creates cloudy, muddy stock.
Watch for small bubbles forming at the bottom of the pot and rising lazily. The surface should barely quiver, not roll.
Step 5: Skim the Foam
As the stock approaches a simmer, gray and brownish foam will collect on the surface. Use a slotted spoon or ladle to remove this foam every few minutes for the first 30 minutes.
This foam consists of blood proteins and impurities from the bones. Removing it produces a cleaner, clearer, better tasting stock.
The foam is ready to stop skimming when it turns from gray and thick to white and thin. A small amount of white foam throughout cooking is normal.
Step 6: Add the Aromatics
After skimming, add the onions, carrots, celery, garlic, parsley, thyme, bay leaves, and peppercorns. Push them gently beneath the surface.
Adding aromatics after the initial skim prevents vegetable particles from mixing with the foam you are trying to remove. The vegetables also benefit from the already warm liquid.
Everything should sit submerged or mostly submerged. Press down on any floating pieces with your spoon.
Step 7: Maintain the Simmer
Reduce heat to low and maintain a bare simmer for 3 to 4 hours. Only one or two bubbles should break the surface every few seconds.
A gentle simmer extracts gelatin and flavor without emulsifying fat into the liquid. Boiling creates greasy, cloudy stock and breaks down aromatics into unpleasant mush.
Check the simmer every 30 minutes. Adjust heat as needed; your stove’s low setting may still be too high.
Step 8: Check Water Level
Monitor the liquid level throughout cooking. If it drops below the solids, add just enough hot water to keep everything covered.
Exposed bones oxidize and can develop off flavors. However, too much water dilutes the final stock, so add only what is necessary.
The bones should stay barely submerged throughout. A small amount of evaporation concentrates flavor and is desirable.
Step 9: Taste and Adjust Time
After 3 hours, taste the stock with a clean spoon. It should taste savory, full bodied, and distinctly chickeny, though it will lack salt.
Longer cooking extracts more gelatin and deepens flavor up to a point. Beyond 4 to 5 hours, flavor begins to turn flat and bones start contributing bitter notes.
The stock is ready when it tastes rich and leaves a slight coating on your tongue. If it tastes thin, continue simmering.
Step 10: Remove From Heat
Turn off the heat and let the stock rest for 15 minutes before straining. This allows fine particles to settle.
Immediate straining disturbs particles that would otherwise sink. Resting produces clearer stock with less sediment.
The surface should become still and any floating fat will pool together for easier removal.
Step 11: Strain the Stock
Set a fine mesh strainer over a large pot or heatproof container. Line it with cheesecloth for the clearest result. Ladle the stock through carefully.
Pouring disturbs sediment; ladling keeps it at the bottom of the pot. The cheesecloth catches fine particles the strainer would miss.
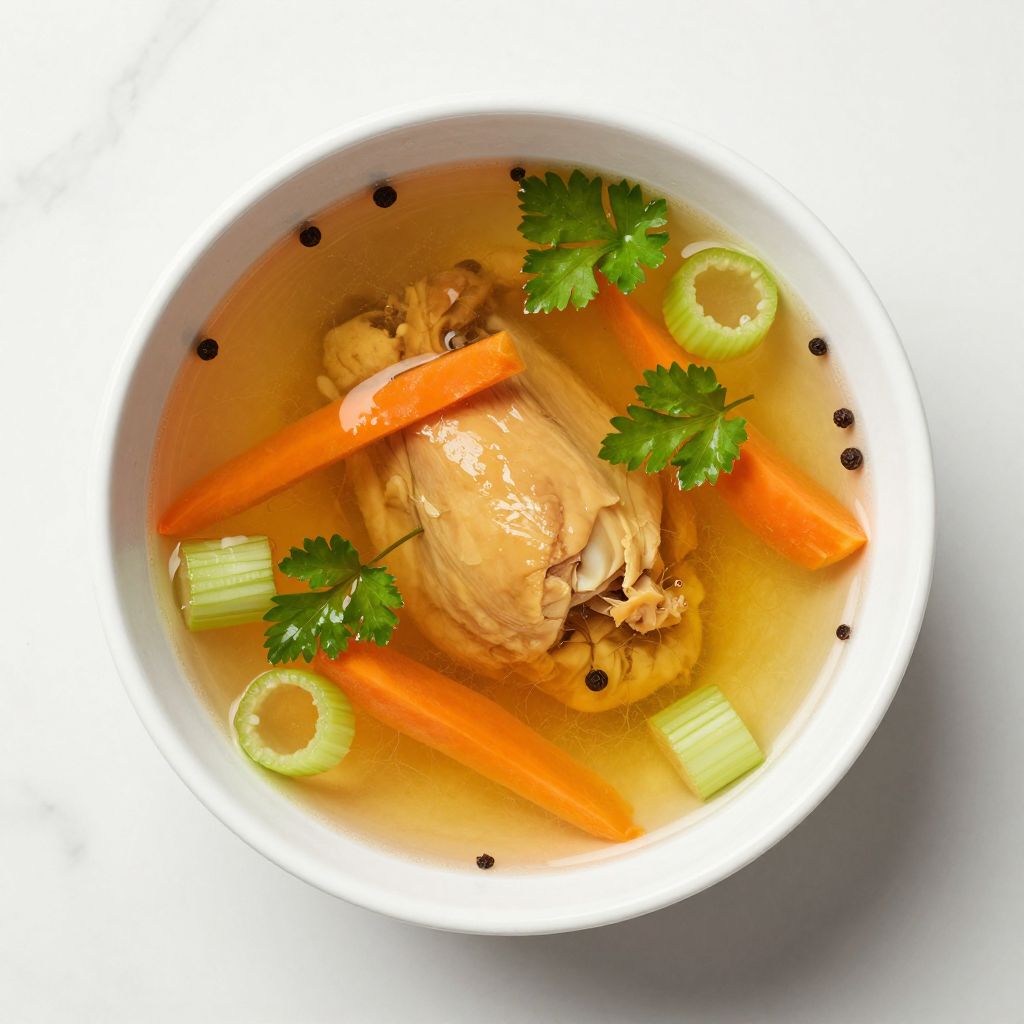
The strained stock should look golden and relatively clear. Discard all solids; they have given everything to the stock.
Step 12: Cool and Defat
Transfer the strained stock to a shallow container and cool to room temperature within an hour, then refrigerate overnight. The fat will solidify on top.
Rapid cooling prevents bacterial growth in the danger zone between 40°F and 140°F. Shallow containers cool faster than deep ones.
After chilling, a solid layer of yellow fat should cap the stock. Lift it off in sheets and discard it or save it for cooking.
Pro Tip: Save the solidified chicken fat in your freezer. Called schmaltz in Jewish cooking, it makes the best fried potatoes and matzo balls you have ever tasted.
The Science Behind the Technique
The magic of stock making lies in collagen extraction. Chicken bones, joints, and skin contain collagen that breaks down into gelatin when heated in water over time, giving stock its silky body and lip coating richness.
Temperature control determines your success. Gelatin extraction happens best between 180°F and 200°F; boiling at 212°F emulsifies fat into the liquid and agitates particles that make stock cloudy.
Chef Note: Test your finished stock by chilling a small amount in the refrigerator; properly made stock will set into a soft gel that liquefies again when warmed.
Tips for Getting It Right Every Time
- Never add salt to stock; you will season the final dishes that use it, and reducing salted stock creates overly salty results
- Save vegetable scraps in a freezer bag throughout the week; onion ends, carrot peels, and celery leaves all contribute flavor
- Use a thermometer if you struggle to maintain the right simmer; aim for 190°F to 200°F
- Avoid cruciferous vegetables like broccoli, cabbage, or Brussels sprouts, which turn bitter and sulfurous
- Add a splash of vinegar (about one tablespoon) to help extract minerals from bones, though this is optional
- Cool quickly by setting the container in an ice bath if you need to refrigerate within a few hours
Mistakes That Will Ruin Your Dish
- Boiling the stock: Creates cloudy, greasy liquid with muted flavors and unpleasant texture
- Skipping the skim: Leaves impurities that make stock taste murky and look unappetizing
- Using too much water: Results in thin, weak stock that cannot stand up in recipes
- Overcooking beyond 5 hours: Extracts bitter compounds from bones and turns vegetables into mush
- Stirring frequently: Disturbs sediment and fat, creating permanent cloudiness throughout the stock
Make Ahead and Meal Prep Tips
Chicken stock is the ultimate make ahead ingredient. I make a big batch monthly and portion it into containers sized for different uses.
- Bones: Collect and freeze carcasses for up to 3 months until you have enough for a batch
- Finished stock: Refrigerate for up to 5 days or freeze for up to 6 months in airtight containers
- Ice cube portions: Freeze stock in ice cube trays for easy additions to pan sauces and sautés
- Concentrate: Reduce strained stock by half for a space saving demi glace that reconstitutes with water
What to Serve With Chicken Stock
Stock is not a dish you serve on its own but rather the foundation for countless recipes. Having homemade stock on hand elevates everything from quick weeknight meals to impressive dinner party dishes.
- Classic chicken noodle soup: The most obvious use showcases the stock’s pure flavor with simple vegetables and pasta
- Risotto: Hot stock ladled gradually into arborio rice creates the creamiest texture possible
- Pan sauces: Deglaze a skillet after searing chicken or pork for an instant restaurant quality sauce
- Braised vegetables: Cook greens, root vegetables, or beans in stock for deeper flavor than water provides
- Grain bowls: Cook rice, quinoa, or farro in stock instead of water for a savory flavor boost
Drink Pairings
A warm mug of plain chicken stock makes a surprisingly satisfying sipping broth on cold days. Season with a little salt and perhaps some fresh herbs for a comforting, low calorie warming drink.
- Wine: A crisp, unoaked Chardonnay complements stock based soups without competing
- Beer: A light wheat beer or pilsner pairs well with chicken soup, offering refreshing contrast
- Non alcoholic: Hot water with lemon and ginger alongside a bowl of stock based soup
- Hot drink: Green tea served after a stock based soup cleanses the palate beautifully
Flavour Variations Worth Trying
- Asian style: Add sliced ginger, scallions, and star anise; use this for pho, ramen, or wonton soup
- Herb forward: Double the fresh herbs and add rosemary, sage, and oregano; perfect for Italian soups and braises
- Roasted garlic: Add two full heads of roasted garlic during the last hour; creates a rich, mellow garlic depth
- Spiced: Include whole coriander seeds, cumin seeds, and a cinnamon stick; excellent for Middle Eastern and North African dishes
- Clean and light: Use only raw bones with onion and celery; produces the most neutral stock for delicate applications
How to Adapt This Recipe for Your Diet
- Gluten free: This recipe is naturally gluten free; ensure any dishes using the stock remain free of gluten containing ingredients
- Dairy free: This recipe contains no dairy; it serves as the perfect base for dairy free soups and sauces
- Low carb and keto: Stock contains virtually zero carbohydrates and fits perfectly into ketogenic eating; the gelatin provides satisfying richness
- High protein: Add extra chicken wings or necks for more gelatin; simmer longer to extract maximum nutrients
- Vegetarian: For a similar depth of flavor, make vegetable stock using mushrooms, kombu seaweed, and extra aromatics for umami
How to Store and Reheat
In the Refrigerator
Store strained, cooled stock in airtight containers for up to 5 days. Leave the fat cap intact until you use the stock; it acts as a natural seal.
- Glass containers work best and will not absorb odors
- Check for off smells before each use; properly stored stock should smell clean and savory
In the Freezer
Chicken stock freezes beautifully for up to 6 months with minimal quality loss. Remove the fat cap before freezing for easier portioning.
- Leave one inch of headspace in containers to allow for expansion
- Label containers with the date and volume for easy meal planning
Reheating
Heat stock gently over medium low heat until steaming. Avoid boiling reheated stock if possible to preserve its clarity.
- Stovetop: The best method; heat slowly in a saucepan, stirring occasionally
- Microwave: Works for small portions; heat in 1 minute intervals, stirring between
- From frozen: Thaw overnight in refrigerator or place frozen block directly in a pot over low heat
Cost Breakdown
Making stock at home costs a fraction of buying it, especially when you use bones from chickens you already roasted. This recipe produces about 3 quarts, equivalent to 6 cartons of store bought stock.
| Ingredient | Estimated Cost |
|---|---|
| Chicken bones (saved from roasted chickens) | $0.00 |
| Chicken wings (1 pound) | $2.50 |
| Onions (2 large) | $1.00 |
| Carrots (3 large) | $0.75 |
| Celery (4 stalks) | $0.60 |
| Garlic (1 head) | $0.50 |
| Fresh herbs | $1.50 |
| Total Per Serving (12 servings) | $0.57 |
Nutrition Information
| Nutrient | Amount |
|---|---|
| Calories | 40 |
| Total Fat | 1g |
| Saturated Fat | 0.5g |
| Trans Fat | 0g |
| Cholesterol | 5mg |
| Sodium | 40mg |
| Total Carbohydrates | 2g |
| Dietary Fiber | 0g |
| Total Sugars | 1g |
| Added Sugars | 0g |
| Protein | 6g |
| Vitamin D | 0mcg |
| Calcium | 10mg |
| Iron | 0.5mg |
| Potassium | 200mg |
Nutritional values are estimates and will vary based on specific bones used, cooking time, and portion sizes.
Frequently Asked Questions
Can I use a rotisserie chicken carcass instead of raw bones?
Absolutely, and the seasoning from the rotisserie adds extra flavor. Save carcasses in the freezer until you have three or four, then make a batch.
Can I make the stock a day or two in advance?
Stock improves after a day in the refrigerator because the fat solidifies completely for easy removal. Make it up to 5 days ahead and store it properly.
How long will the stock last in the refrigerator?
Properly stored stock lasts up to 5 days refrigerated. If you see mold, smell sourness, or notice cloudiness developing, discard it.
Why did my stock turn out cloudy?
Cloudiness usually results from boiling too vigorously or stirring too often. The stock is still usable but will not have the refined appearance of restaurant stock.
Can I double this recipe?
Yes, as long as your pot accommodates everything with water covering the bones by 2 inches. Increase cooking time by 30 minutes for larger batches.
Do I need to blanch the bones first?
Blanching (briefly boiling and discarding that water) produces the clearest stock but is not strictly necessary. Thorough skimming achieves similar results with less effort.
Can I use this stock for ramen or pho?
Use the Asian variation with ginger, scallions, and star anise for pho. For ramen, consider adding pork bones for a richer, more traditional base.
My Final Word
Good chicken stock transforms your cooking in ways that are hard to describe until you experience it. That first bowl of soup made with your own stock will taste like it came from a different kitchen entirely.
I have made this recipe more times than I can count, and it works every single time as long as you respect the simmer. Give it a try this weekend when you have a few hours at home.
If you make this stock, I would love to hear how it turned out. Drop a comment below or tag Recipe Papa on social media with your soup creations.
Chicken Stock
Ingredients
Equipment
Method
- If roasting bones, spread them on a sheet pan in a single layer and roast at 400°F for 45 minutes until golden brown. For saved carcasses, break them into smaller pieces that fit comfortably in your pot.
- Quarter the onions through the root end, leaving the papery skin attached. Cut carrots and celery into large 3 inch pieces.
- Place the bones in your stockpot and cover with 5 quarts of cold water. The water should cover the bones by about 2 inches.
- Set the pot over medium high heat and bring the water slowly to a simmer. This should take about 30 minutes; do not rush it.
- As the stock approaches a simmer, gray and brownish foam will collect on the surface. Use a slotted spoon or ladle to remove this foam every few minutes for the first 30 minutes.
- After skimming, add the onions, carrots, celery, garlic, parsley, thyme, bay leaves, and peppercorns. Push them gently beneath the surface.
- Reduce heat to low and maintain a bare simmer for 3 to 4 hours. Only one or two bubbles should break the surface every few seconds.
- Monitor the liquid level throughout cooking. If it drops below the solids, add just enough hot water to keep everything covered.
- After 3 hours, taste the stock. It should taste savory, full bodied, and distinctly chickeny. If it tastes thin, continue simmering.
- Turn off the heat and let the stock rest for 15 minutes before straining to allow fine particles to settle.
- Set a fine mesh strainer over a large pot or heatproof container. Line it with cheesecloth for the clearest result. Ladle the stock through carefully.
- Transfer the strained stock to a shallow container and cool to room temperature within an hour, then refrigerate overnight. The fat will solidify on top for easy removal.