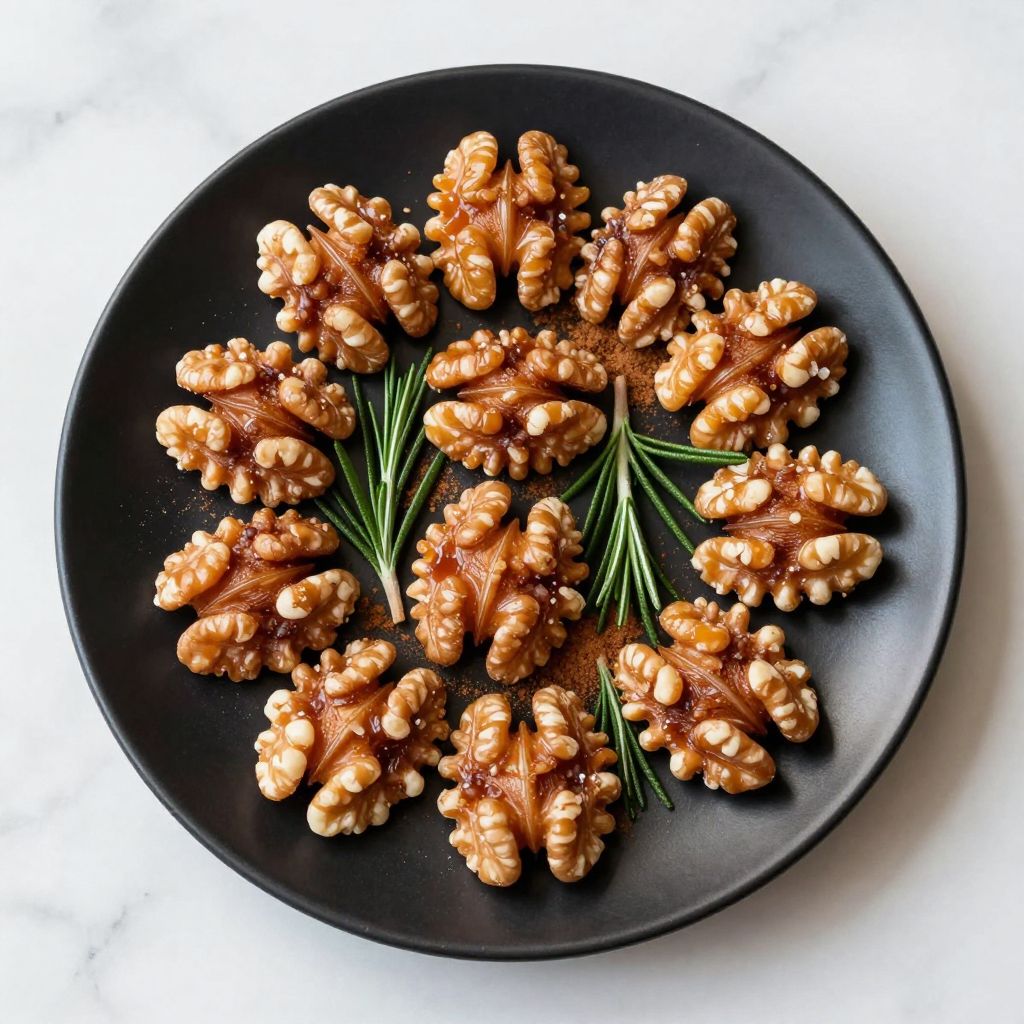
Candied walnuts transform ordinary nuts into a sweet, crunchy treat perfect for salads, desserts, or snacking straight from the jar. With just a handful of pantry staples and ten minutes of your time, you can create a batch of these glossy, caramelized beauties that rival anything from a gourmet food shop. The warm spices and buttery caramel coating make these irresistible.
Making candied walnuts at home gives you complete control over sweetness levels and spice combinations. This recipe delivers that perfect balance of sweet and nutty with a satisfying crunch that stays crisp for weeks when stored properly.
Why You’ll Love This Recipe
This candied walnut recipe requires minimal effort but delivers maximum flavor and versatility. The stovetop method ensures even coating and perfect caramelization every time.
- Ready in just 10 minutes with simple pantry ingredients
- Creates the perfect crunchy texture without any grittiness
- Works beautifully in both sweet and savory dishes
- Stores for weeks without losing that satisfying crunch
- Easily customizable with your favorite spices and flavors
My Experience Making This Recipe
I first made these candied walnuts for a holiday salad and watched them disappear before the greens even made it to the table. The smell of caramelizing sugar and toasting walnuts filled my kitchen with the most incredible aroma that had everyone wandering in to investigate.
The trick I learned after a few batches is to watch the sugar carefully as it melts. It goes from perfect to burnt faster than you think, so staying close to the stove is non-negotiable.
Now I keep a jar of these in my pantry year-round because they elevate everything from morning oatmeal to cheese boards. My guests always ask for the recipe, convinced these must be complicated to make.
Recipe Overview
- Recipe Name: Candied Walnuts
- Servings: 8 servings (about 2 cups)
- Prep Time: 2 minutes
- Cook Time: 8 minutes
- Total Time: 10 minutes
- Course: Snack, Topping
- Cuisine: American
- Calories per Serving: 215
Equipment You Will Need
- Large skillet or frying pan
- Wooden spoon or silicone spatula
- Baking sheet
- Parchment paper or silicone baking mat
- Measuring cups and spoons
- Small bowl for mixing spices
Ingredients for Candied Walnuts
- 2 cups raw walnut halves
- 1/2 cup granulated sugar
- 2 tablespoons unsalted butter
- 1/4 teaspoon salt
- 1/2 teaspoon ground cinnamon
- 1/4 teaspoon vanilla extract
- 2 tablespoons water
Ingredient Notes and Substitutions
- Raw walnut halves: Raw nuts are needed because they toast during the candying process. You can substitute pecans, almonds, or cashews with identical results.
- Granulated sugar: White sugar creates the classic glossy coating and caramelizes beautifully. Light brown sugar works but creates a softer, chewier texture with deeper molasses notes.
- Unsalted butter: Butter adds richness and helps the sugar coat the nuts evenly. Coconut oil can replace it for a dairy-free version, though the flavor will be slightly different.
- Ground cinnamon: Cinnamon provides warm, sweet spice that complements the caramel. Try cardamom, nutmeg, or pumpkin pie spice for different flavor profiles.
- Vanilla extract: Vanilla rounds out the sweetness and adds depth to the caramel. Maple extract or almond extract can substitute for interesting variations.
How to Make Candied Walnuts
Step 1: Prepare Your Workspace
Line a baking sheet with parchment paper or a silicone mat and set it near your stovetop. Having this ready before you start cooking prevents the candied nuts from hardening in the pan while you scramble to find somewhere to put them.
Step 2: Combine Ingredients in Pan
Add the sugar, butter, water, salt, and cinnamon to a large skillet over medium heat. Stir constantly until the butter melts and the sugar begins to dissolve, which takes about 2 minutes.
Step 3: Add the Walnuts
Toss the raw walnuts into the pan once the sugar mixture looks syrupy. Stir continuously to coat every nut evenly with the sugar mixture, ensuring no walnut gets left behind.
Step 4: Cook Until Caramelized
Keep stirring over medium heat for 5 to 6 minutes until the sugar crystallizes, then melts again into a glossy caramel coating. The mixture will look grainy and dry before it suddenly turns smooth and shiny, so don’t panic during the crystallization phase.
Step 5: Add Vanilla
Remove the pan from heat and quickly stir in the vanilla extract. The residual heat will be enough to incorporate it without cooking off all the vanilla flavor.
Step 6: Spread on Baking Sheet
Immediately pour the candied walnuts onto your prepared baking sheet. Use your spatula to spread them into a single layer quickly before they cool and stick together.
Step 7: Separate the Nuts
Use two forks to gently separate any walnuts that are clumping together while they’re still warm. Work fast because you only have about 30 seconds before the coating hardens completely.
Step 8: Cool Completely
Let the candied walnuts cool at room temperature for at least 10 minutes until the coating hardens to a crisp shell. Resist the urge to taste them immediately because that caramel coating is molten hot and will burn your tongue.
Pro Tip: The sugar will go through an awkward crystallized stage where it looks dry and grainy before it melts into smooth caramel. Keep stirring and trust the process instead of adding more liquid, which will only extend the cooking time.
Tips for the Best Candied Walnuts
- Use a light-colored pan so you can monitor the sugar’s color as it caramelizes. Dark pans make it hard to see when the sugar is approaching the burnt stage.
- Keep the heat at medium and never walk away from the stove. Sugar can go from perfect to burnt in less than 30 seconds.
- Toast the walnuts lightly in a dry pan before candying if you want an even deeper, nuttier flavor. Just 2 minutes over medium heat makes a noticeable difference.
- Make sure your baking sheet is completely flat so the coating pools evenly. A warped pan creates thick and thin spots in your candy coating.
- Work quickly when spreading the nuts because the sugar hardens fast. Have everything ready before you start cooking.
- Double the batch if you’re making these for gifts or a party because people eat them faster than you expect. One batch rarely survives more than a few days in my house.
Common Mistakes to Avoid
- Adding the vanilla too early causes it to burn and turn bitter. Always add it off the heat after cooking is complete.
- Using too high heat burns the sugar before it properly coats the nuts. Medium heat gives you control and prevents scorching.
- Not stirring constantly creates uneven coating and burnt spots. Your arm might get tired, but continuous stirring is the only way to get perfectly coated nuts.
- Leaving the nuts in the pan to cool makes them impossible to separate. Transfer them to the baking sheet immediately for individual pieces instead of one giant nut cluster.
- Using pre-toasted or roasted nuts results in overly dark, potentially burnt walnuts. Start with raw nuts and let the candying process do the toasting.
Serving Suggestions
These candied walnuts add texture and sweetness to countless dishes throughout the day. I love how they bridge the gap between sweet and savory applications with equal success.
- Toss them over mixed green salads with goat cheese, dried cranberries, and balsamic vinaigrette
- Sprinkle over vanilla ice cream or yogurt parfaits for instant sophistication
- Add to cheese boards alongside aged cheddar, brie, and fresh figs
- Mix into morning oatmeal or granola for extra crunch and sweetness
- Serve as part of a snack mix with dark chocolate chips and dried fruit
Variations to Try
- Spicy Candied Walnuts: Add 1/4 teaspoon cayenne pepper with the cinnamon for a sweet heat combination that’s addictive on salads. The spice hits after the sweetness fades.
- Maple Candied Walnuts: Replace half the sugar with pure maple syrup and skip the cinnamon for a pure maple flavor. These taste like breakfast in the best possible way.
- Rosemary Sea Salt Walnuts: Add 1 teaspoon chopped fresh rosemary and finish with flaky sea salt for a savory-sweet version perfect for cocktail hour. The herb brings an unexpected elegance.
- Orange Spice Walnuts: Add 1 teaspoon orange zest and replace cinnamon with pumpkin pie spice for a holiday-inspired version. These make incredible gifts when packaged in decorative jars.
- Honey Glazed Walnuts: Use honey instead of sugar for a softer, chewier coating with floral notes. The texture is less crunchy but equally delicious.
Dietary Adaptations
- Gluten-Free: This recipe is naturally gluten-free with no substitutions needed. Just verify your vanilla extract is gluten-free if you have celiac disease.
- Dairy-Free: Swap the butter for coconut oil or vegan butter in equal amounts. The coating will be slightly less rich but still delicious.
- Vegan: Use coconut oil instead of butter and ensure your sugar is processed without bone char if you follow strict vegan guidelines. The recipe works perfectly with this simple swap.
- Low-Sugar: Replace the granulated sugar with a granulated sugar substitute designed for cooking, though the texture may be slightly less glossy. Monk fruit sweetener works better than erythritol, which can recrystallize.
Storage and Reheating
Refrigerator
Store candied walnuts in an airtight container at room temperature rather than the refrigerator. Refrigeration introduces moisture that can make the coating sticky and soft.
- Keep in a sealed container away from heat and humidity
- They stay fresh and crunchy for up to 3 weeks
- Place parchment paper between layers if stacking
Freezer
Freezing candied walnuts works well for longer storage periods. The coating remains intact and the nuts stay fresh.
- Place in freezer-safe containers or bags with air removed
- Freeze for up to 3 months without quality loss
- Thaw at room temperature for 15 minutes before serving
Reheating
Reheating is generally unnecessary, but you can refresh slightly softened candied walnuts. Brief oven time restores crispness if humidity has affected them.
- Spread on a baking sheet and warm at 300°F for 3 to 5 minutes
- Let them cool completely before storing again
- This method re-crisps the coating without burning the nuts
Nutrition Information
| Nutrient | Amount |
|---|---|
| Calories | 215 |
| Total Fat | 17g |
| Saturated Fat | 2.5g |
| Carbohydrates | 15g |
| Fiber | 2g |
| Sugar | 13g |
| Protein | 4g |
| Sodium | 75mg |
| Cholesterol | 8mg |
Nutritional values are approximate and will vary based on specific ingredients used and serving sizes. Walnuts provide healthy omega-3 fatty acids despite the added sugar.
Frequently Asked Questions
Can I make candied walnuts in the oven instead?
You can bake them at 350°F for 12 to 15 minutes, stirring every 5 minutes, but the stovetop method gives you better control over caramelization. The oven method works in a pinch but produces slightly less glossy results.
Why did my candied walnuts turn out sticky instead of crunchy?
Sticky walnuts usually mean the sugar didn’t caramelize long enough or humidity got into your storage container. Cook them a minute longer next time until the coating looks completely glossy and dry, and make sure your storage container seals tightly.
Can I make these ahead for a party?
Candied walnuts are perfect make-ahead treats that actually benefit from sitting for a day. Make them up to 3 weeks in advance and store in an airtight container at room temperature.
What’s the best way to break apart walnuts that stuck together?
Gently break apart cooled clusters with your hands or place them in a sealed bag and tap lightly with a rolling pin. The coating is hard but brittle, so it breaks cleanly without pulverizing the nuts.
Can I reduce the sugar for a less sweet version?
You can reduce the sugar to 1/3 cup, but the coating will be thinner and less glossy. The nuts will still taste good but won’t have that signature candy shell appearance and crunch.
Why did my sugar crystallize and never turn into caramel?
Crystallization happens when sugar molecules group together, usually from stirring too vigorously or having undissolved sugar crystals on the pan sides. Keep stirring gently and consistently, and the crystallized sugar will eventually melt into smooth caramel if you maintain medium heat.
Final Thoughts
Making candied walnuts at home proves that impressive results don’t require complicated techniques or expensive ingredients. This simple recipe delivers professional-quality nuts that enhance everything from weeknight salads to holiday dessert spreads.
The beauty of this recipe lies in its versatility and reliability. Once you master the basic technique, you can experiment with different spices and nuts to create your own signature variations that friends and family will request again and again.
Candied Walnuts
Ingredients
Equipment
Method
- Line a baking sheet with parchment paper or a silicone mat and set it near your stovetop.
- Add the sugar, butter, water, salt, and cinnamon to a large skillet over medium heat. Stir constantly until the butter melts and the sugar begins to dissolve, about 2 minutes.
- Toss the raw walnuts into the pan once the sugar mixture looks syrupy. Stir continuously to coat every nut evenly with the sugar mixture.
- Keep stirring over medium heat for 5 to 6 minutes until the sugar crystallizes, then melts again into a glossy caramel coating.
- Remove the pan from heat and quickly stir in the vanilla extract.
- Immediately pour the candied walnuts onto your prepared baking sheet. Use your spatula to spread them into a single layer quickly before they cool and stick together.
- Use two forks to gently separate any walnuts that are clumping together while they're still warm.
- Let the candied walnuts cool at room temperature for at least 10 minutes until the coating hardens to a crisp shell.