Apple pie filling recipe made from scratch transforms ordinary apples into something that smells like autumn itself. This is the filling I make every fall when local apples hit the farmers market, and it works beautifully whether you spoon it into a pie crust, layer it over pancakes, or eat it straight from the jar with a spoon.
What Makes This Recipe Worth Your Time
Canned pie filling cannot compete with what happens when you cook fresh apples with real butter, warm spices, and a touch of lemon. This recipe gives you complete control over sweetness, spice levels, and texture.
- Fresh flavor that tastes like actual apples rather than sugar syrup with apple undertones
- Adjustable sweetness so you can dial it up or down based on your apple variety and personal taste
- Perfect texture with apples that hold their shape instead of turning to mush
- Freezer friendly so you can make a big batch in apple season and enjoy homemade filling all winter
- Versatile uses beyond pie: crisps, turnovers, oatmeal topping, ice cream sauce, and more
A Little Background on This Dish
Apple pie filling as we know it today traces back to colonial American kitchens where cooks preserved autumn harvests for winter baking. Early recipes relied on dried apples and molasses since white sugar was expensive and refrigeration did not exist.
The modern stovetop filling method developed once sugar became affordable and home cooks wanted fresher flavor than dried apples could deliver. Regional variations still exist across America, with some areas preferring a thicker, more jam-like filling and others favoring distinct apple slices in a lighter sauce.
My Experience With This Recipe
I started making my own pie filling about fifteen years ago when my kids complained that store-bought apple pie tasted "weird." They were right, and once I read the ingredient list on a can of commercial filling, I understood why.
My first few batches were disasters: mushy apples, filling that was either too runny or so thick it resembled apple-flavored cement. The breakthrough came when I finally learned to cook the sauce separately and add the apples at the end.
The first time I got it right, the kitchen smelled so good that everyone wandered in asking when the pie would be ready. I had to explain it was just the filling, and we still had hours to go before actual pie.
Before You Start: Key Things to Know
This recipe works for any skill level, but the biggest challenge is getting the apple texture right. You want tender slices that hold their shape, not applesauce.
- Difficulty level: Beginner friendly with one technique that requires attention
- Active time vs passive time: About 25 minutes of active cooking with no passive waiting
- Most important equipment: A large, heavy-bottomed skillet or Dutch oven that distributes heat evenly
- Step requiring most attention: Adding apples to the sauce and monitoring doneness to prevent overcooking
Recipe at a Glance
- Recipe Name: Homemade Apple Pie Filling
- Yield: Enough for one 9-inch pie (about 6 cups)
- Prep Time: 20 minutes
- Cook Time: 15 minutes
- Total Time: 35 minutes
- Resting Time: 30 minutes to cool before using or storing
- Difficulty: Easy
- Course: Dessert component
- Cuisine: American
- Calories per Serving: 185 per cup
How to Source the Best Ingredients
The apples you choose determine 90% of your final result. Great filling starts at the grocery store or farmers market, not in your kitchen.
- Apples: Choose firm, baking varieties like Granny Smith, Honeycrisp, or Braeburn; avoid soft varieties like McIntosh or Red Delicious which turn to mush; look for apples that feel heavy and have no soft spots
- Butter: Use unsalted butter so you control the salt level; European-style butter with higher fat content adds extra richness
- Brown sugar: Fresh brown sugar should feel soft and moist; hard, clumpy sugar indicates age and will not dissolve properly
- Cinnamon: Buy cinnamon sticks or ground cinnamon from a store with high turnover; old cinnamon smells dusty rather than warm and spicy
- Lemon: Choose lemons that feel heavy for their size with thin, smooth skin; thick-skinned lemons have less juice
Ingredients for Apple Pie Filling
For the Filling
- 3 pounds baking apples (about 7 medium), peeled, cored, and sliced 1/4 inch thick
- 3/4 cup brown sugar, packed
- 1/4 cup granulated sugar
- 3 tablespoons unsalted butter
- 2 tablespoons cornstarch
- 1 teaspoon ground cinnamon
- 1/4 teaspoon ground nutmeg
- 1/8 teaspoon ground allspice
- 1/4 teaspoon fine sea salt
- 2 tablespoons fresh lemon juice
- 1 teaspoon vanilla extract
- 1/2 cup water
Smart Substitutions and Swaps
- Brown sugar: Provides moisture and molasses flavor; substitute with coconut sugar for similar depth or use all granulated sugar for a cleaner, brighter taste
- Butter: Adds richness and helps the sauce coat the apples; use coconut oil for dairy-free with a slight coconut undertone
- Cornstarch: Thickens the filling without cloudiness; substitute with 2 tablespoons flour but expect a slightly opaque sauce
- Cinnamon: The dominant warming spice; reduce by half if you prefer a more apple-forward flavor
- Lemon juice: Balances sweetness and prevents browning; apple cider vinegar works but adds a different tang
- Vanilla extract: Rounds out the spice notes; almond extract makes a nice alternative with just 1/2 teaspoon
- Apples: Baking apples hold their shape under heat; mixing two varieties (one tart, one sweet) creates more complex flavor
Tools and Equipment You Will Need
Having everything ready before you start prevents the apples from overcooking while you hunt for a spatula. Mise en place matters here.
- Large heavy-bottomed skillet or Dutch oven, 12 inches (even heat distribution prevents scorching)
- Sharp chef’s knife or apple peeler/corer/slicer
- Cutting board
- Measuring cups and spoons
- Small bowl for mixing cornstarch slurry
- Wooden spoon or heat-resistant spatula (gentle on apple slices)
- Citrus juicer or reamer
- Large bowl for holding prepped apples
How to Make Apple Pie Filling
Read through all the steps before you begin and prep your apples first. Toss the apple slices with the lemon juice as you cut them to prevent browning.
Step 1: Prep the Apples
Peel, core, and slice the apples into 1/4-inch thick slices, placing them in a large bowl as you work. Toss the slices with the lemon juice immediately after cutting each apple.
Uniform thickness ensures even cooking so every slice reaches the same tenderness at the same time. Thicker slices will stay firm while thinner ones turn to mush.
The apple slices should glisten with lemon juice and show no brown edges. If you see browning, you waited too long between cutting and tossing.
Step 2: Mix the Dry Ingredients
In a small bowl, whisk together the brown sugar, granulated sugar, cornstarch, cinnamon, nutmeg, allspice, and salt until fully combined with no lumps.
Mixing the cornstarch with sugar before adding liquid prevents clumping. Cornstarch dropped directly into hot liquid forms stubborn lumps that never dissolve.
The mixture should look uniform in color with no white cornstarch streaks visible.
Step 3: Make the Cornstarch Slurry
Add the water to the dry ingredient mixture and whisk until completely smooth. This slurry will thicken your filling evenly.
A slurry disperses cornstarch throughout the liquid before heat activates it. This creates a smooth sauce rather than a lumpy gravy.
Step 4: Melt the Butter
Place your large skillet or Dutch oven over medium heat and add the butter. Let it melt completely, swirling the pan occasionally.
Starting with butter creates a rich base and prevents the sugars from burning directly on the pan surface. The fat also helps the sauce coat the apple slices.
The butter should be fully melted and starting to foam slightly around the edges before you proceed.
Step 5: Add the Slurry to the Pan
Pour the sugar and cornstarch slurry into the melted butter all at once. Whisk immediately and continuously to combine.
Constant whisking prevents the cornstarch from settling and scorching on the pan bottom. Even ten seconds of neglect can create burnt spots.
The mixture will look grainy at first, then begin to smooth out as it heats.
Step 6: Cook the Sauce Until Thickened
Continue whisking over medium heat for 2 to 3 minutes until the sauce thickens and becomes glossy. The mixture should coat the back of a spoon.
Cornstarch reaches full thickening power at around 200°F and needs a full minute at temperature to stabilize. Undercooking leaves you with thin, runny filling.
When ready, the sauce will have a consistency like warm caramel and will leave a trail when you drag a spoon through it.
Step 7: Add the Apples
Add all the apple slices to the pan at once and fold them gently into the sauce using a spatula. Work from the bottom to coat every slice without breaking them.
Adding apples all at once ensures even cooking. Adding them in batches would mean the first apples overcook while waiting for the last ones.
Every apple slice should be coated in sauce with no bare spots visible.
Step 8: Cook the Apples
Reduce heat to medium-low and cook the apples for 6 to 8 minutes, stirring gently every minute or so. The apples should soften but maintain their shape.
Low, gentle heat allows the apples to release their juices gradually while absorbing the spiced sauce. High heat toughens the exterior before the interior softens.
Test by piercing an apple slice with a fork; it should slide through with slight resistance, not feel mushy or crunchy.
Step 9: Test for Doneness
Remove one apple slice and cut it in half to check the interior. The center should be translucent and tender, not opaque white.
Opaque centers indicate undercooking; the apples will continue cooking in the oven, but raw centers will never fully soften inside a pie.
The sauce should cling to the apples thickly, not pool in the bottom of the pan.
Step 10: Add the Vanilla
Remove the pan from heat and stir in the vanilla extract. The residual heat will bloom the vanilla without cooking off its volatile aromatics.
Adding vanilla at the end preserves its floral notes. Vanilla cooked over direct heat loses complexity and tastes flat.
You should smell the vanilla immediately as it hits the warm filling.
Step 11: Cool the Filling
Transfer the filling to a heat-safe bowl or leave it in the pan and let it cool for at least 30 minutes before using in a pie. The filling will thicken further as it cools.
Hot filling added to raw pie dough can make the bottom crust soggy and prevent proper browning. Warm filling is fine, but hot filling is problematic.
The filling is ready to use when you can touch the bowl without discomfort.
Step 12: Use or Store
Use immediately in your favorite pie recipe, transfer to airtight containers for refrigerator storage, or cool completely and freeze for later. Label with the date.
Pro Tip: For the best texture in a baked pie, slightly undercook your filling by 1 to 2 minutes since the apples will continue softening during the 45 to 50 minutes they spend in the oven.
The Science Behind the Technique
Apples contain pectin, a natural thickener that breaks down with heat and time. Cooking the sauce separately before adding apples means the cornstarch can fully hydrate and thicken without the apples turning to mush while you wait.
The lemon juice serves double duty: its acid prevents enzymatic browning on cut apple surfaces, and it helps the pectin in the apples set up properly. The acid also balances the sweetness, making the filling taste more apple-forward rather than just sweet.
Chef Note: Different apple varieties have different pectin levels, which is why a mix of tart and sweet apples produces filling with better body and more complex flavor than a single variety.
Tips for Getting It Right Every Time
- Slice uniformly by using a mandoline or taking your time with a knife; uneven slices mean uneven cooking
- Use cold butter if you want distinct butter flavor, or softened butter if you want it to disappear into the sauce
- Taste as you go and adjust sugar after adding apples since different varieties have wildly different sweetness levels
- Stir gently with a folding motion rather than stirring aggressively to keep apple slices intact
- Trust the fork test over timing since apple freshness, variety, and slice thickness all affect cook time
- Cool completely before freezing to prevent ice crystals from forming and turning your filling watery when thawed
Mistakes That Will Ruin Your Dish
- Using soft apple varieties like McIntosh or Gala results in filling that dissolves into applesauce within minutes of hitting the heat
- Skipping the lemon juice produces filling that tastes flat and one-dimensional no matter how much sugar and spice you add
- Adding cornstarch directly to hot liquid creates lumps that no amount of whisking will ever smooth out
- Cooking over high heat scorches the sugar and gives the filling a bitter, burnt undertaste
- Overcooking the apples turns them into baby food and leaves you with no texture contrast in your finished pie
Make Ahead and Meal Prep Tips
This recipe begs to be made ahead since the flavors actually improve after a day in the refrigerator. Make a double batch during apple season and freeze half for holiday baking.
- Prepped apples: Slice and store in lemon water up to 24 hours ahead; drain and pat dry before cooking
- Fully cooked filling: Refrigerate in airtight containers for up to 5 days; reheat gently if using in a recipe that requires warm filling
- Frozen filling: Freeze in labeled freezer bags or containers for up to 4 months; thaw overnight in the refrigerator before using
- Spice mixture: Mix a large batch of the dry spices and store in a jar for up to 6 months; measure out what you need per batch
What to Serve With Apple Pie Filling
Beyond classic pie, this filling works as a topping, mix-in, or standalone treat. Keep a batch in the refrigerator for spontaneous dessert opportunities.
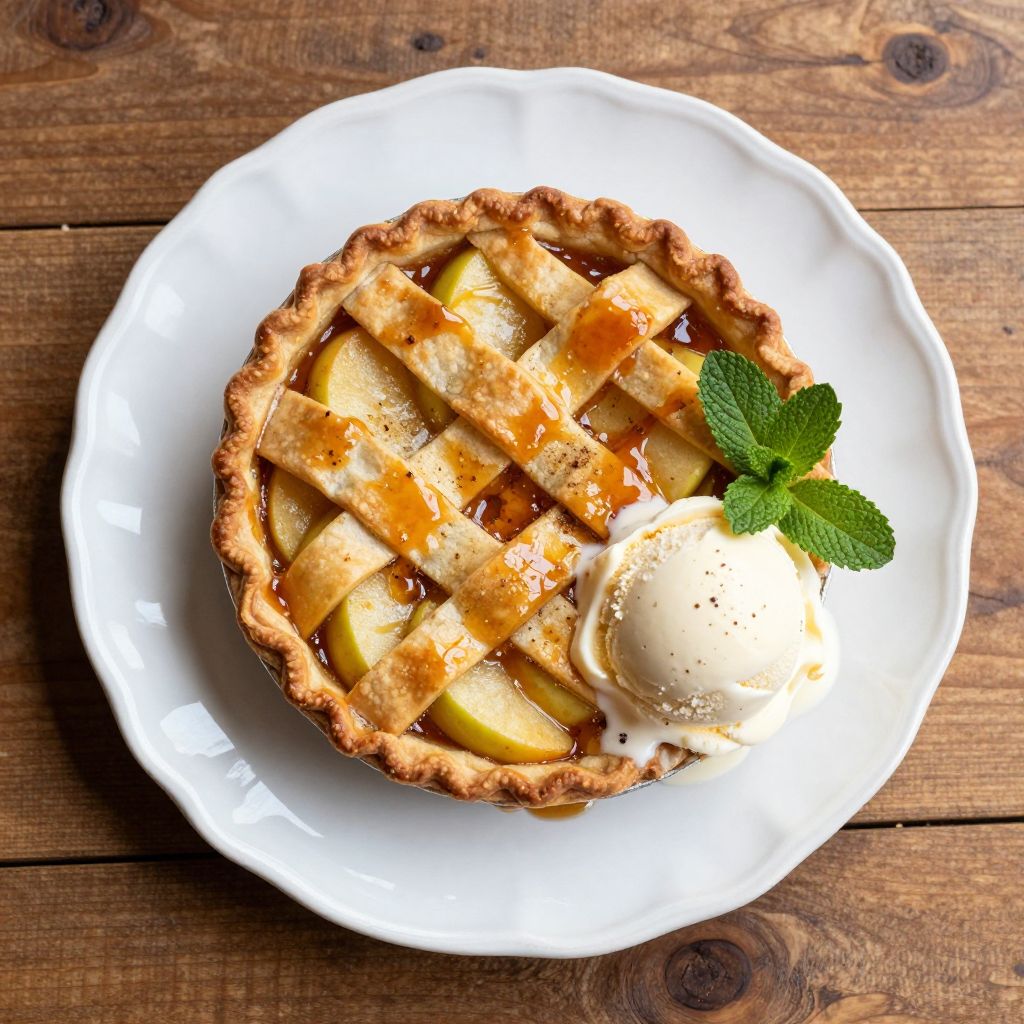
- Vanilla ice cream: The cold creaminess contrasts beautifully with warm, spiced apples, and the vanilla echoes the extract in the filling
- Buttermilk pancakes or waffles: Spoon warm filling over your morning stack instead of maple syrup for a fall breakfast upgrade
- Plain Greek yogurt: The tartness of yogurt balances the sweetness while adding protein for a more substantial snack
- Pound cake or angel food cake: A simple slice becomes dessert-worthy with a generous spoonful of filling and whipped cream
- Oatmeal or overnight oats: Stir in a few tablespoons for instant apple pie oatmeal that tastes far better than any flavored packet
Drink Pairings
A slightly sweet, aromatic beverage complements the warm spices without competing with the apple flavor. My favorite pairing is a glass of off-dry Riesling that mirrors the apple notes.
- Wine: German Riesling Spätlese with its balanced sweetness and apple-like aromatics, or an off-dry Gewürztraminer with spice notes
- Beer: Belgian-style tripel with fruity esters and subtle sweetness, or a cinnamon-spiced pumpkin ale in autumn
- Non-alcoholic: Warm spiced apple cider, which doubles down on the apple theme, or vanilla chai tea with its complementary spice profile
- Hot drink: Coffee with a splash of cream and a cinnamon stick, or bourbon-spiked hot chocolate for an adults-only pairing
Flavour Variations Worth Trying
- Salted caramel apple: Add 3 tablespoons of caramel sauce and an extra pinch of flaky salt to the finished filling. The salt heightens every other flavor and adds sophistication.
- Maple bourbon: Replace half the brown sugar with pure maple syrup and add 2 tablespoons of bourbon with the vanilla. The alcohol cooks off but leaves warm, oaky depth behind.
- Cranberry apple: Fold in 1/2 cup of fresh or frozen cranberries during the last 3 minutes of cooking. The tartness cuts through the sweetness and adds a festive red color.
- Ginger pear: Replace half the apples with ripe Bosc pears and add 1 teaspoon of freshly grated ginger. The pears soften faster, so add them 2 minutes after the apples.
- Brown butter sage: Brown the butter until nutty before adding the slurry, and add 6 fresh sage leaves during cooking (remove before serving). Surprisingly savory-sweet and perfect for Thanksgiving.
How to Adapt This Recipe for Your Diet
- Gluten-free: This recipe is naturally gluten-free as written since cornstarch contains no gluten. Verify your vanilla extract and spices are processed in a gluten-free facility if you have celiac disease.
- Dairy-free: Replace butter with refined coconut oil or vegan butter. Coconut oil works best for neutral flavor, while vegan butter maintains the richness.
- Vegan: Use the dairy-free adaptation and verify your sugar is not processed with bone char. Most organic cane sugars qualify.
- Low-carb/Keto: Replace sugars with equivalent sweetness of monk fruit or allulose (about 3/4 cup), and reduce cornstarch to 1 tablespoon. Expect a thinner sauce and slightly different mouthfeel.
- High-protein: The filling itself is not a protein source, but serve it over Greek yogurt, cottage cheese, or protein pancakes to boost the nutritional profile of your meal.
How to Store and Reheat
In the Refrigerator
Store cooled filling in airtight glass or plastic containers for up to 5 days. Press plastic wrap directly onto the surface to prevent a skin from forming.
- Glass containers work better than plastic for preventing odor absorption from other refrigerator items
- Portion into single-pie quantities before storing so you only remove what you need
In the Freezer
This filling freezes beautifully for up to 4 months with minimal texture loss. Cool completely before freezing to prevent ice crystals.
- Freeze in labeled quart-sized freezer bags laid flat for space-efficient storage and quick thawing
- Leave 1/2 inch headspace in containers since the filling expands slightly when frozen
Reheating
The gentler the reheat, the better the apples hold their shape. Low and slow wins every time.
- Oven reheating: Spread in a baking dish, cover with foil, and warm at 300°F for 15 to 20 minutes; this method best preserves texture
- Stovetop reheating: Warm over low heat in a saucepan, stirring gently every few minutes; add a splash of water if the filling seems too thick
- Microwave reheating: Use 50% power in 30-second intervals, stirring between each; this works in a pinch but can create hot spots that overcook some apples
Cost Breakdown
Making pie filling from scratch costs roughly the same as buying two cans of the commercial stuff, but you get three times the quality. The value becomes even better if you buy apples during peak season.
| Ingredient | Estimated Cost |
|---|---|
| Apples (3 lbs) | $4.50 |
| Brown sugar (3/4 cup) | $0.45 |
| Granulated sugar (1/4 cup) | $0.15 |
| Butter (3 tbsp) | $0.40 |
| Cornstarch (2 tbsp) | $0.10 |
| Spices | $0.25 |
| Lemon (1) | $0.40 |
| Vanilla extract (1 tsp) | $0.30 |
| Total Per Serving (6 cups) | $1.09 per cup |
Nutrition Information
| Nutrient | Amount |
|---|---|
| Calories | 185 |
| Total Fat | 4g |
| Saturated Fat | 2.5g |
| Trans Fat | 0g |
| Cholesterol | 10mg |
| Sodium | 85mg |
| Total Carbohydrates | 40g |
| Dietary Fiber | 3g |
| Total Sugars | 33g |
| Added Sugars | 20g |
| Protein | 0.5g |
| Vitamin D | 0mcg |
| Calcium | 20mg |
| Iron | 0.5mg |
| Potassium | 150mg |
Nutritional values are estimates based on standard ingredients and will vary depending on specific brands, apple varieties, and portion sizes used.
Frequently Asked Questions
Can I use Gala or Fuji apples for this filling?
You can, but they will produce a softer, sweeter filling. Mix them 50/50 with Granny Smith apples to maintain some texture and tartness.
Can I make the filling a day before making my pie?
Absolutely, and I recommend it. The flavors meld and deepen overnight, and cold filling is easier to work with when assembling a pie.
How long does homemade apple pie filling last?
It keeps 5 days refrigerated and 4 months frozen. Thaw frozen filling in the refrigerator overnight before using.
Why did my filling turn out runny?
Either the cornstarch did not cook long enough to activate, or you added too much liquid from the apples. Cook the sauce until thick before adding apples, and drain excess juice from the bowl before adding the apple slices.
Can I double this recipe?
Yes, but use your largest pot and expect cooking times to increase by 3 to 5 minutes. The apples release more juice in larger batches, so watch the consistency closely.
Do I need to pre-cook the filling before baking a pie?
Yes, this recipe is designed to be pre-cooked. The filling will not thicken properly if you skip cooking and go straight to baking raw apples in a crust.
Can I use this filling for apple turnovers or hand pies?
It works perfectly for both. Chop the apple slices smaller (about 1/2 inch pieces) and cook an extra minute so smaller pastries bake evenly.
My Final Word
This apple pie filling delivers what canned versions promise but never quite achieve: real apple flavor, perfect texture, and that warm spice aroma that makes everyone ask what you are baking. I have made it dozens of times, and it never fails to impress.
Try it once and you will never go back to store-bought. The recipe is forgiving enough for beginners and consistent enough for seasoned bakers who want reliable results every time.
If you make this filling, I would love to hear how it turned out. Drop a comment below or tag us on social media with your finished pie, crisp, or midnight snack straight from the container. We have all been there.
Homemade Apple Pie Filling
Ingredients
Equipment
Method
- Peel, core, and slice the apples into 1/4-inch thick slices, placing them in a large bowl as you work. Toss the slices with the lemon juice immediately after cutting each apple to prevent browning.
- In a small bowl, whisk together the brown sugar, granulated sugar, cornstarch, cinnamon, nutmeg, allspice, and salt until fully combined with no lumps.
- Add the water to the dry ingredient mixture and whisk until completely smooth to create a slurry.
- Place your large skillet or Dutch oven over medium heat and add the butter. Let it melt completely, swirling the pan occasionally until the butter starts to foam slightly around the edges.
- Pour the sugar and cornstarch slurry into the melted butter all at once. Whisk immediately and continuously to combine.
- Continue whisking over medium heat for 2 to 3 minutes until the sauce thickens and becomes glossy. The mixture should coat the back of a spoon.
- Add all the apple slices to the pan at once and fold them gently into the sauce using a spatula. Work from the bottom to coat every slice without breaking them.
- Reduce heat to medium-low and cook the apples for 6 to 8 minutes, stirring gently every minute or so. The apples should soften but maintain their shape.
- Test for doneness by removing one apple slice and cutting it in half. The center should be translucent and tender, not opaque white.
- Remove the pan from heat and stir in the vanilla extract.
- Transfer the filling to a heat-safe bowl or leave it in the pan and let it cool for at least 30 minutes before using in a pie. The filling will thicken further as it cools.
- Use immediately in your favorite pie recipe, transfer to airtight containers for refrigerator storage up to 5 days, or cool completely and freeze for up to 4 months.