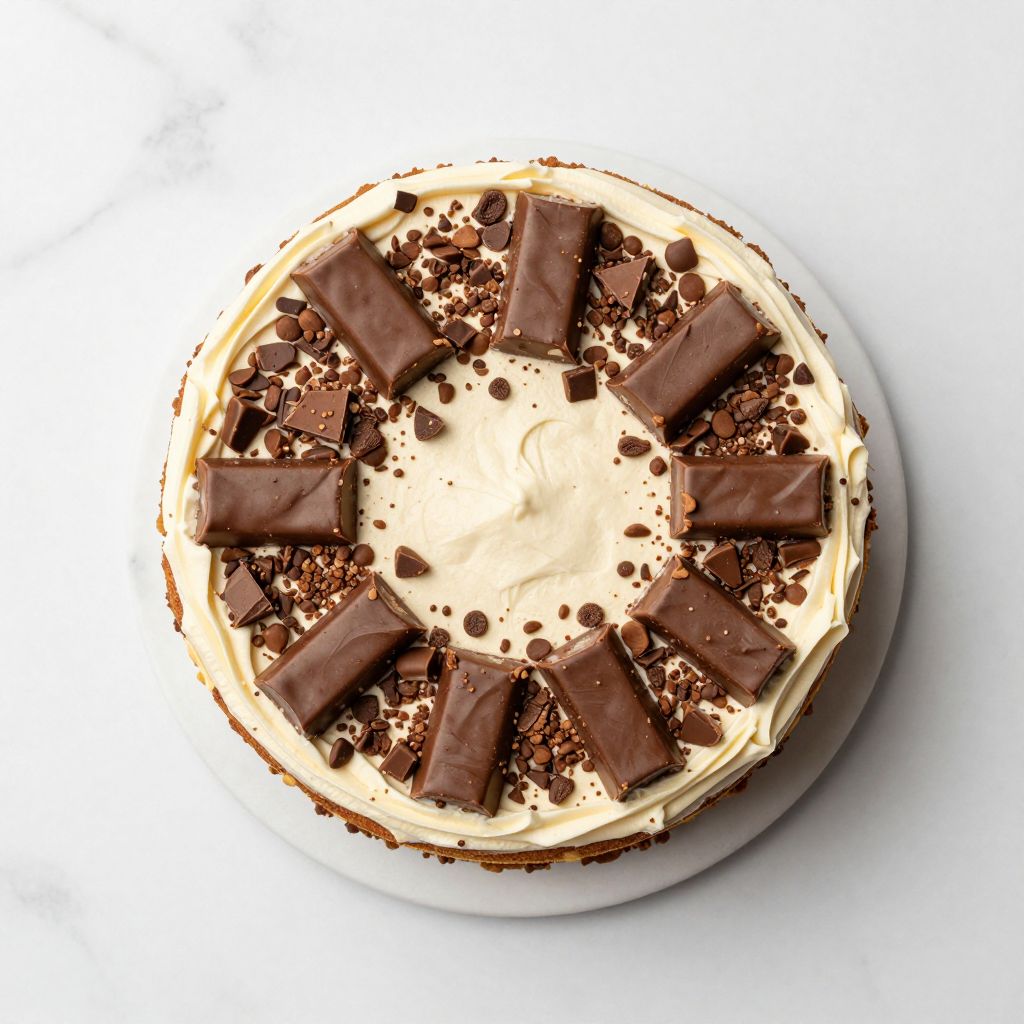
The smell of caramelized sugar and chocolate filling your kitchen is one of life’s simple pleasures, and Butterfinger cake delivers exactly that magic in every bite.
This recipe transforms the beloved candy bar into a show-stopping dessert that tastes like you spent hours in the kitchen, even though it’s surprisingly straightforward. The combination of buttery cake layers, creamy frosting, and crispy Butterfinger candy creates layers of texture and flavor that keep people coming back for seconds.
Whether you’re baking for a special occasion or just craving something indulgent, this cake proves that the best desserts don’t need to be complicated. Let’s get started.
Why You’ll Love This Recipe
This cake strikes the perfect balance between impressive and achievable, with a showstopping appearance that tastes even better than it looks.
- Buttery, tender cake layers that stay moist for days
- Creamy frosting studded with crushed Butterfinger pieces for signature crunch
- A dessert that feels fancy but uses simple, accessible ingredients
- Perfect for potlucks, celebrations, or when you want to treat yourself
- Comes together faster than most layer cakes without sacrificing flavor
My Experience Making This Recipe
I first baked this cake on a whim after spotting a Butterfinger bar at the grocery store checkout and thinking, “Why hasn’t this been a cake flavor all along?” The first batch taught me that the candy melts beautifully into the frosting when you crush it finely, creating ribbons of toffee and chocolate throughout.
What surprised me most was how the crushed Butterfinger pieces on the outside stayed crispy even as the cake aged in the refrigerator overnight. My neighbor stopped by unannounced and took one look at this cake, then didn’t leave until she had a slice. That’s when I knew this recipe was a keeper.
The cake bakes evenly in standard cake pans, and the frosting whips up in minutes once your butter reaches room temperature. I’ve made it at least a dozen times now, and it never fails to impress.
Recipe Overview
- Recipe Name: Butterfinger Cake
- Servings: 12 servings
- Prep Time: 20 minutes
- Cook Time: 30 minutes
- Total Time: 50 minutes (plus cooling time)
- Course: Dessert
- Cuisine: American
- Calories per Serving: 480 calories
Equipment You Will Need
- Two 9-inch round cake pans
- Parchment paper
- Mixing bowls (at least 2)
- Electric mixer or whisk
- Measuring cups and spoons
- Sifter or fine-mesh strainer
- Wooden spoon
- Cake tester or toothpick
- Cooling rack
- Offset spatula or butter knife
- Pastry bag with piping tip (optional)
Ingredients for Butterfinger Cake
For the Cake
- 2 cups all-purpose flour
- 1 3/4 teaspoons baking powder
- 1/2 teaspoon salt
- 1/2 cup unsalted butter, softened to room temperature
- 1 1/2 cups granulated sugar
- 2 large eggs
- 1 teaspoon vanilla extract
- 3/4 cup whole milk, at room temperature
For the Frosting
- 1 cup unsalted butter, softened to room temperature
- 3 cups powdered sugar
- 1/4 cup heavy cream or milk
- 1 teaspoon vanilla extract
- 6 Butterfinger candy bars, crushed (about 1 1/2 cups total, divided)
- Pinch of salt
Ingredient Notes and Substitutions
- All-purpose flour: This provides structure and a tender crumb without being too dense. You can substitute with cake flour for an even softer texture, but reduce the amount to 1 3/4 cups and sift it before measuring.
- Unsalted butter: It gives you control over the salt content and allows the Butterfinger flavor to shine. Salted butter works fine, but reduce the added salt to 1/4 teaspoon.
- Butterfinger bars: This is the star ingredient and hard to replace authentically. If unavailable, use crushed toffee bits mixed with chocolate chips for a similar effect.
- Heavy cream: It creates a rich, silky frosting that holds up well in warm weather. Regular milk works too but may require slightly less liquid for proper consistency.
- Whole milk: Room temperature milk blends smoothly into the batter without shocking the other ingredients. Any milk temperature works, but cold milk may tighten the batter slightly.
How to Make Butterfinger Cake
Step 1: Prepare Your Pans
Preheat your oven to 350 degrees Fahrenheit and position a rack in the center. Line the bottoms of two 9-inch round cake pans with parchment paper and lightly grease the sides with butter, which prevents the cake from sticking and ensures even baking.
Step 2: Combine Dry Ingredients
Sift together the flour, baking powder, and salt into a medium bowl. Sifting aerates the flour and removes lumps, creating a tender crumb structure that gives the cake its light, fluffy texture.
Step 3: Cream Butter and Sugar
In a large bowl, beat the softened butter and sugar together with an electric mixer on medium speed for 2 to 3 minutes until the mixture is pale and fluffy. This creaming process incorporates air into the batter, which helps the cake rise properly in the oven.
Step 4: Incorporate Eggs and Vanilla
Add the eggs one at a time, beating well after each addition, then mix in the vanilla extract. Adding eggs slowly prevents the batter from breaking and ensures they’re fully incorporated for a smooth, even crumb.
Step 5: Alternate Dry and Wet Ingredients
Add one third of the flour mixture to the butter mixture and blend on low speed for about 30 seconds. Then add half of the milk, mix briefly, followed by another third of flour, the remaining milk, and finally the last of the flour mixture.
Alternating these ingredients prevents overmixing, which would toughen the cake, and ensures everything combines evenly. Stop mixing as soon as you don’t see dry streaks.
Step 6: Divide and Bake
Pour the batter evenly into your prepared pans and smooth the tops with an offset spatula. Bake for 28 to 32 minutes, until a cake tester inserted in the center comes out clean or with just a few moist crumbs.
The cakes should smell buttery and golden, and the tops should spring back slightly when lightly touched. Don’t overbake, or the cake will dry out.
Step 7: Cool the Cakes
Let the cakes cool in their pans for 10 minutes, then turn them out onto a wire cooling rack to cool completely, about 1 hour. Cooling completely in the pans first prevents them from breaking, while cooling on a rack prevents steam from making them soggy.
Step 8: Make the Frosting
Beat the softened butter with an electric mixer on medium speed for 1 minute until creamy, then gradually add the powdered sugar, one cup at a time. Mix on low speed to avoid creating a powdered sugar cloud, and beat for about 2 minutes total.
Step 9: Add Cream and Flavor
Pour in the heavy cream and vanilla extract, and beat on medium speed for another minute until the frosting is light, fluffy, and spreadable. If it’s too thick, add another tablespoon of cream; if too thin, add a bit more powdered sugar.
Step 10: Fold in Butterfinger Pieces
Crush 5 of the Butterfinger bars into small pieces and fold them gently into the frosting with a spatula, reserving about 1/2 cup of the finest pieces for decoration. Folding in the candy by hand prevents overmixing the frosting and keeps the texture light.
Step 11: Assemble the Cake
Place one cooled cake layer on your serving plate and spread about 1 cup of frosting evenly over the top. Set the second cake layer on top and frost the top and sides with the remaining frosting, using an offset spatula for a smooth finish.
Step 12: Add the Final Touch
Crush the remaining Butterfinger bar finely and sprinkle it over the top and around the sides of the frosted cake. This not only looks beautiful but gives every bite that signature crunch and toffee flavor.
Pro Tip: Chill your frosted cake for 30 minutes before serving to let the frosting set and make slicing cleaner.
Tips for the Best Butterfinger Cake
- Bring all your ingredients to room temperature before baking, especially the eggs and milk, which blend smoothly and create a uniform batter.
- Don’t skip the sifting step for the dry ingredients; it makes a noticeable difference in how tender and light your cake turns out.
- Crush your Butterfinger bars just before using them to keep them as crispy as possible in the frosting.
- Use an offset spatula for frosting; it gives you much better control and a smoother, more professional-looking finish than a regular knife.
- Store your frosted cake in the refrigerator if your kitchen is warm, as the frosting holds its shape better when chilled.
- Let the cake sit at room temperature for 15 minutes before serving for the best flavor and texture.
Common Mistakes to Avoid
- Overmixing the batter after adding the dry ingredients will overdevelop the gluten and create a dense, tough cake instead of a tender crumb.
- Using cold ingredients straight from the fridge creates lumpy batter that doesn’t incorporate smoothly, resulting in uneven texture.
- Crushing the Butterfinger bars too early causes them to absorb moisture from the air and lose their crispness before the cake is served.
- Frosting the cake while it’s still warm melts the frosting and creates a messy, uneven appearance.
- Skipping the parchment paper makes it nearly impossible to remove the cake layers without breaking them apart.
Serving Suggestions
This cake shines on its own, but a few simple additions make it even more special. Serve it with a cold glass of milk or a cup of hot coffee for the ultimate pairing.
- A dollop of whipped cream on the side adds a cool, airy contrast to the rich frosting
- Vanilla ice cream alongside each slice creates a simple but elegant dessert
- A drizzle of caramel sauce on the plate makes it feel restaurant-worthy
- Crushed pretzels sprinkled on top add a salty crunch that balances the sweetness
- A light dusting of cocoa powder on the plate adds visual interest and a hint of bitterness
Variations to Try
- Chocolate Butterfinger Cake: Add 1/2 cup of cocoa powder to the dry ingredients for a chocolate base that pairs beautifully with the toffee candy flavor.
- Salted Caramel Butterfinger Cake: Mix 2 tablespoons of salted caramel sauce into the frosting and drizzle more over the assembled cake for extra depth.
- Mini Butterfinger Cakes: Divide the batter into a 12-cup muffin tin and bake for 18 to 20 minutes, then frost individual cupcakes for a cute presentation.
- Butterfinger Cake with Fudge Center: Spread a thin layer of chocolate fudge or ganache between the cake layers before frosting for extra indulgence.
- No-Dairy Butterfinger Cake: Use dairy-free butter and milk in the cake, and dairy-free butter with coconut cream in the frosting for a plant-based version.
Dietary Adaptations
- Gluten-Free: Replace all-purpose flour with a 1:1 gluten-free baking blend; the cake may be slightly denser but will still taste delicious.
- Dairy-Free: Use vegan butter and unsweetened almond milk in the cake, and vegan butter with coconut cream in the frosting for a creamy result.
- Vegan: Replace eggs with flax eggs (1 tablespoon ground flax mixed with 3 tablespoons water per egg) and follow the dairy-free adaptations above.
- Low-Carb/Keto: Use almond flour and monk fruit sweetener, though the texture and taste will differ significantly from the traditional version.
Storage and Reheating
Refrigerator
Store your frosted Butterfinger cake in an airtight container on a shelf in the refrigerator for up to 5 days. The cool temperature keeps the frosting firm and prevents the Butterfinger pieces from softening.
- Cover the cake loosely with plastic wrap before placing in a container to prevent condensation
- Keep the cake away from strong-smelling foods, as buttercream absorbs odors easily
Freezer
You can freeze an unfrosted cake layer wrapped tightly in plastic wrap and then aluminum foil for up to 3 months. Frosted cake is harder to freeze but can last 1 to 2 months if wrapped carefully.
- Freeze the cake uncovered for the first 2 hours to allow the frosting to set, then wrap with plastic wrap
- Thaw in the refrigerator overnight before serving for best results
Reheating
This cake doesn’t need reheating; simply remove it from the refrigerator 15 minutes before serving for the best flavor and texture. If you must warm it, use a microwave oven at 50 percent power for 10 to 15 seconds per slice.
- Never use a conventional oven for reheating frosted cake, as it will melt the frosting
- Room temperature cake tastes better than cold cake, so plan ahead and remove it from the fridge early
Nutrition Information
| Nutrient | Amount |
|---|---|
| Calories | 480 |
| Total Fat | 22g |
| Saturated Fat | 13g |
| Carbohydrates | 65g |
| Fiber | 0g |
| Sugar | 52g |
| Protein | 4g |
| Sodium | 240mg |
| Cholesterol | 85mg |
These values are estimated based on standard ingredient measurements and serving sizes. Nutritional content may vary depending on specific brands used and any recipe substitutions you make.
Frequently Asked Questions
Can I Make This Cake a Day Ahead?
Absolutely, and it often tastes better the next day as the flavors meld together. Frost it completely, cover it loosely with plastic wrap, and refrigerate overnight.
What If My Frosting Is Too Soft?
Add another 1/2 cup of powdered sugar a little at a time and beat until you reach the right consistency. If it’s too stiff, add cream one tablespoon at a time.
Can I Use a Box Cake Mix Instead?
Yes, prepare the box mix according to package directions and bake in two 9-inch pans, then use the Butterfinger frosting from this recipe. The frosting is what makes it special anyway.
Why Did My Cake Sink in the Middle?
This usually happens from opening the oven too early, overfilling the pans, or baking at the wrong temperature. Make sure your oven is properly calibrated and don’t peek until the minimum baking time has passed.
How Do I Get Neat, Even Layers?
Use cake strips or wet towels wrapped around the pans before baking to keep the edges from rising faster than the center. You can also use a cake leveler to trim any domed tops before frosting.
Can I Make This in a 9×13 Sheet Cake Pan?
Yes, pour all the batter into one greased pan and bake for 35 to 40 minutes until a tester comes out clean. Frost it right in the pan for a casual, easy presentation.
Butterfinger Cake
This Butterfinger Cake features tender buttery cake layers filled and frosted with toffee-infused buttercream studded with crunchy Butterfinger candy pieces.
- Two 9-inch round cake pans
- Parchment paper
- Mixing bowls
- Electric mixer or whisk
- Measuring cups and spoons
- Sifter or fine-mesh strainer
- Wooden spoon
- Cake tester or toothpick
- Cooling rack
- Offset spatula or butter knife
- Pastry bag with piping tip (optional)
For the Cake
- 2 cups all-purpose flour
- 1 3/4 teaspoons baking powder
- 1/2 teaspoon salt
- 1/2 cup unsalted butter (softened to room temperature)
- 1 1/2 cups granulated sugar
- 2 large eggs
- 1 teaspoon vanilla extract
- 3/4 cup whole milk (at room temperature)
For the Frosting
- 1 cup unsalted butter (softened to room temperature)
- 3 cups powdered sugar
- 1/4 cup heavy cream or milk
- 1 teaspoon vanilla extract
- 6 Butterfinger candy bars (crushed (about 1 1/2 cups total, divided))
- Pinch of salt
- Preheat the oven to 350°F (175°C) and line the bottoms of two 9-inch round cake pans with parchment paper, then grease the sides.
- In a medium bowl, sift together the flour, baking powder, and salt and set aside.
- In a large bowl, beat 1/2 cup softened butter and the granulated sugar on medium speed for 2 to 3 minutes until pale and fluffy.
- Add the eggs one at a time, beating well after each addition, then mix in the vanilla extract.
- Alternate adding the sifted dry ingredients and the whole milk in three additions, beginning and ending with the flour mixture, mixing each addition on low speed until just combined.
- Divide the batter evenly between the prepared pans and smooth the tops with an offset spatula.
- Bake for 28 to 32 minutes or until a toothpick inserted in the center comes out clean, then remove from the oven.
- Allow the cakes to cool in the pans for 10 minutes, then turn out onto a cooling rack and cool completely, about 1 hour.
- While the cakes cool, prepare the frosting by beating 1 cup softened butter on medium speed for 1 minute until creamy.
- Gradually add the powdered sugar, one cup at a time, mixing on low speed, then pour in the heavy cream and vanilla extract and beat on medium speed until light and fluffy.
- Fold in the crushed Butterfinger pieces, reserving about 1/2 cup for decorating the cake.
- Place one cake layer on a serving plate, spread about 1 cup of frosting over the top, then top with the second layer and frost the top and sides of the cake.
- Sprinkle the reserved crushed Butterfinger pieces over the top and around the sides of the cake, then chill for 30 minutes before serving.
Chill your frosted cake for 30 minutes before serving to let the frosting set for cleaner slices.