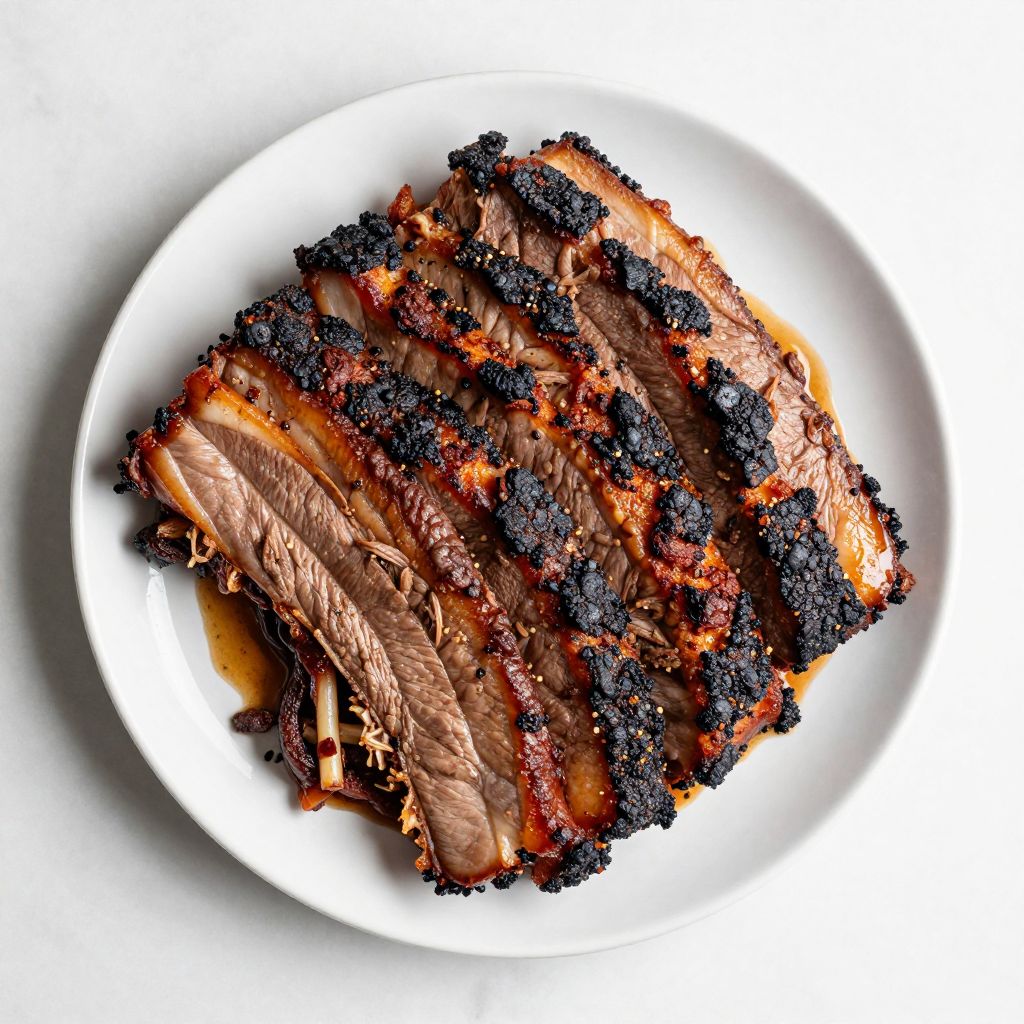
Nothing beats the smell of a Boston butt slow-roasting in the oven, filling your kitchen with smoke and anticipation for hours on end. This cut of pork shoulder transforms into tender, pull-apart meat that practically melts on your tongue when cooked low and slow.
A Boston butt is a forgiving cut that rewards patience and simple seasoning, making it perfect for backyard barbecues, family dinners, or meal prep that lasts all week. The fat renders beautifully, keeping the meat juicy while the bark develops into something irresistibly crispy.
Whether you’re smoking it, roasting it, or braising it, this guide covers everything you need to nail it every single time.
Why You’ll Love This Recipe
This recipe delivers tender, juicy pulled pork that works for tacos, sandwiches, salads, or eating straight from the platter. The method is straightforward enough for beginners but flexible enough for seasoned pit masters to tweak.
- Minimal hands-on time once it hits the heat
- Feeds a crowd without breaking your budget
- Leftovers stay moist and delicious for days
- Works with any rub or sauce style you prefer
- Can be made in an oven, smoker, or slow cooker
My Experience Making This Recipe
The first time I made a Boston butt, I was nervous about timing and temperature, convinced I’d somehow ruin a 10-pound hunk of meat. Six hours in, my neighbor knocked on the door asking what smelled so incredible, and I knew I’d nailed it.
The meat pulled apart with the gentlest pressure from two forks, and the bark had just the right amount of char without burning. My guests demolished it faster than I could serve it, and I made a mental note to buy two next time.
Since then, I’ve made this countless times in different ways, and it never disappoints. The best part is how little attention it demands once you set it up correctly.
Recipe Overview
- Recipe Name: Slow-Roasted Boston Butt
- Servings: 8 to 10
- Prep Time: 15 minutes
- Cook Time: 6 to 8 hours
- Total Time: 6 to 8 hours 15 minutes
- Course: Main
- Cuisine: American/Barbecue
- Calories per Serving: 320
Equipment You Will Need
- Large roasting pan or baking sheet with sides
- Meat thermometer, ideally instant-read
- Small bowl for mixing the rub
- Paper towels for patting the meat dry
- Aluminum foil for tenting if needed
- Two forks or meat shredders for pulling
- Optional: smoker or slow cooker as alternative cooking vessels
Ingredients for Boston Butt
- Pork Boston butt (also called pork shoulder): 8 to 10 pounds, bone-in or boneless
- Brown sugar: 3 tablespoons
- Paprika: 2 tablespoons
- Garlic powder: 1 tablespoon
- Onion powder: 1 tablespoon
- Black pepper: 1 tablespoon
- Kosher salt: 2 tablespoons
- Cayenne pepper: 1/2 teaspoon, optional for heat
- Beef or chicken broth: 1 to 2 cups
- Apple cider vinegar or barbecue sauce: 1/2 cup, for finishing
Ingredient Notes and Substitutions
- Pork Boston butt: This cut has the right fat-to-meat ratio for staying moist during long cooking. Pork shoulder works identically and costs less if you can’t find butt labeled that way.
- Brown sugar: It adds sweetness and helps caramelize the bark during cooking. Use white sugar or skip it entirely if you prefer a savory rub without sweetness.
- Paprika: Smoked paprika adds deeper, almost barbecued flavor without actual smoking. Regular paprika is milder and works fine if that’s what you have on hand.
- Garlic and onion powder: These build savory depth in the rub. Fresh garlic and onion burn at high heat, so powders work better for dry rubs.
- Kosher salt: Its larger grains distribute more evenly and taste less salty than table salt. Coarse sea salt is a direct substitute in the same amount.
- Broth: It keeps the environment moist and prevents the meat from drying out during cooking. Water works, but broth adds flavor that carries through to the finished dish.
How to Make Boston Butt
Step 1: Prep Your Pork and Oven
Remove your Boston butt from the refrigerator 30 minutes before cooking so it comes closer to room temperature and cooks more evenly. Preheat your oven to 325 degrees Fahrenheit, which is low enough to render the fat without drying the meat.
Step 2: Score and Dry the Meat
Using a sharp knife, lightly score the fat cap in a crosshatch pattern, cutting about 1/4 inch deep and spacing the lines an inch apart. Pat the entire pork shoulder dry with paper towels, which helps the rub stick and allows the bark to develop better.
Step 3: Mix Your Dry Rub
In a small bowl, combine the brown sugar, paprika, garlic powder, onion powder, black pepper, salt, and cayenne if using. Stir everything together until you have a uniform, slightly moist mixture with no clumps.
Step 4: Apply the Rub Generously
Rub the mixture all over the pork shoulder, working it into the scored fat and coating every exposed surface evenly. Don’t be shy here; the rub develops flavor and helps build the bark that makes pulled pork so incredible.
Step 5: Set Up Your Roasting Pan
Place the rubbed pork fat-side up in your roasting pan and pour 1 to 2 cups of broth into the bottom of the pan around the meat. The broth keeps the environment humid and prevents the exterior from burning while the inside stays tender.
Step 6: Roast Low and Slow
Put the pan in your preheated 325-degree oven and roast uncovered for about 5 to 6 hours, or until the internal temperature at the thickest part reaches 190 to 205 degrees Fahrenheit. Low heat gives the collagen time to break down into gelatin, which is what makes the meat so tender and pull-apart easy.
Step 7: Check and Tent if Needed
After 4 hours, check the pork and look at the bark. If it’s darkening too quickly or the pan is getting dry, tent the top loosely with aluminum foil and add another 1/2 cup of broth to the pan bottom.
Step 8: Rest Before Pulling
Once the meat hits temperature, remove it from the oven and let it rest for at least 15 minutes on a cutting board or in the pan. Resting allows the juices to reabsorb back into the meat rather than running out onto your cutting board when you start pulling.
Step 9: Pull the Pork
Using two forks, meat shredders, or even your hands with heat-resistant gloves, pull the meat apart into bite-sized shreds, discarding any large pieces of fat or bone. The meat should come apart effortlessly; if it’s resisting, it likely needs another 15 to 20 minutes of resting or cooking.
Step 10: Finish and Serve
Pour a splash of apple cider vinegar or your favorite barbecue sauce over the pulled pork and toss it gently to combine. Taste and adjust salt or sauce as needed before serving.
Pro Tip: Invest in an instant-read meat thermometer and trust it over time estimates. Every oven cooks differently, and the thermometer is your only reliable guide to perfectly tender meat.
Tips for the Best Boston Butt
- Buy a bone-in butt if possible; the bone adds flavor and helps support the meat structure during the long cook.
- Don’t rush the temperature. Hitting that 190 to 205-degree sweet spot makes all the difference between merely tender and fall-apart magic.
- Make extra broth or water available to add if the pan gets too dry during cooking. A dry pan leads to burnt edges and tough bark.
- Save the rendered fat and broth from the pan. Strain it and use it as a base for soups, gravies, or to reheat the pulled pork later.
- If your oven runs hot or cool, adjust the temperature accordingly. Better to cook at 300 degrees in a hot oven than chase temperature swings.
- Pull the meat while it’s still warm but cool enough to handle comfortably. Warm meat shreds cleanly; cold meat gets stringy and tears apart messily.
Common Mistakes to Avoid
- Cooking too hot or too fast. High heat seals in moisture but doesn’t break down collagen; you’ll end up with dry, tough meat even if it’s technically cooked through.
- Skipping the rest. Resting redistributes juices and prevents them from pooling outside the meat when you start pulling, keeping everything moist.
- Using a dry pan. Broth or water in the bottom keeps the environment humid and prevents the bottom and sides of the meat from charring excessively.
- Pulling the meat too early. If it resists shredding, it’s not done yet. Another 30 minutes usually does the trick.
- Discarding the pan drippings. Those browned bits and rendered fat are liquid gold for sauces, soups, and reheating the meat.
Serving Suggestions
Pulled pork shines on soft brioche buns with a tangy slaw, but it’s equally at home in tacos, grain bowls, or eaten straight from the plate. Pair it with sides that complement the richness and smokiness of the meat.
- Classic pulled pork sandwiches with coleslaw and pickled onions
- Crispy tacos with lime crema and fresh cilantro
- Loaded nachos with cheese, jalapeños, and sour cream
- Grain bowls with rice, roasted vegetables, and a drizzle of sauce
- Pulled pork nachos with sharp cheddar, jalapeños, and a drizzle of ranch
Variations to Try
- Smoked Boston Butt: Use your smoker at 225 to 250 degrees instead of an oven, adding smoke wood like hickory or oak for deeper, smokier flavor that’s incredible but takes 10 to 12 hours.
- Slow Cooker Version: Layer the rubbed pork in a slow cooker with broth and cook on low for 8 to 10 hours, which is perfect for a hands-off approach though you won’t get bark development.
- Spicy Carolina Style: Skip the brown sugar in the rub and finish with a vinegar-based sauce instead of sweet barbecue sauce for a tangy, peppery profile.
- Jerk-Seasoned Butt: Replace the dry rub with a wet paste of allspice, thyme, scotch bonnets, ginger, and garlic for a Caribbean-inspired version with complex spice.
- Coffee-Rubbed Pork: Add 1 tablespoon of finely ground espresso to your dry rub for a deeper, slightly bitter undertone that balances the meat’s richness.
Dietary Adaptations
- Gluten-Free: This recipe is naturally gluten-free as written. Just verify your barbecue sauce or broth doesn’t contain hidden gluten before using.
- Dairy-Free: Pulled pork itself is dairy-free; just watch any sauces or sides you pair it with for hidden cream or butter.
- Paleo: Skip the brown sugar and use a savory rub instead, focusing on salt, pepper, garlic, and smoke for a paleo-friendly version.
- Low-Carb or Keto: The pork is already low-carb; just avoid sugary sauces and pair it with non-starchy sides like cauliflower slaw or green salads.
Storage and Reheating
Refrigerator
Store pulled pork in an airtight container for up to 4 days, keeping it in its own juices if possible to prevent drying out.
- Layer it in containers with some pan broth or sauce between layers for moisture
- Keep it separate from toppings or sides until ready to serve
Freezer
Freeze pulled pork in airtight containers or heavy-duty freezer bags for up to 3 months, always including some of the cooking liquid.
- Flatten bags before freezing to save space and speed thawing
- Label with the date so you remember how long it’s been frozen
Reheating
Thaw frozen pork overnight in the refrigerator, then reheat gently in a covered skillet over medium-low heat with a splash of broth or sauce.
- Avoid the microwave, which dries out meat even with liquid
- Add fresh sauce or pan drippings as you reheat for best texture and flavor
Nutrition Information
| Nutrient | Amount |
|---|---|
| Calories | 320 |
| Total Fat | 18 g |
| Saturated Fat | 7 g |
| Carbohydrates | 2 g |
| Fiber | 0 g |
| Sugar | 1 g |
| Protein | 38 g |
| Sodium | 450 mg |
| Cholesterol | 105 mg |
These values are estimates based on an 8-pound pork butt yielding 10 servings and are for the plain pulled pork without sauce or sides. Actual nutrition varies based on butcher selection, cooking liquid choices, and any added sauces.
Frequently Asked Questions
Can I cook this Boston butt in a slow cooker instead of an oven?
Absolutely. Layer the rubbed pork in a slow cooker with 1 to 2 cups of broth and cook on low for 8 to 10 hours. You won’t develop bark this way, but the meat will be equally tender.
What temperature should the pork reach before it’s done?
Aim for an internal temperature of 190 to 205 degrees Fahrenheit at the thickest part, away from bone. This temperature range breaks down collagen and allows the meat to pull apart effortlessly.
How do I know if the pork is cooked enough to pull?
Test it with two forks. If it shreds easily without resistance, it’s ready. If it tears or resists, give it another 15 to 20 minutes of cooking or resting.
Can I make this recipe the day before serving?
Yes. Cook it fully, then cool and refrigerate it in its own juices overnight. Reheat gently in a covered skillet with a splash of broth or sauce before serving.
How do I get a better bark on my pulled pork?
Increase oven temperature to 350 degrees for the last hour of cooking, or spray the top with apple cider vinegar or sauce every 30 minutes during cooking to build layers of flavor and crust.
Is bone-in or boneless better for this recipe?
Bone-in adds flavor and costs less per pound, but takes slightly longer to cook. Boneless cooks faster and has no waste, though some of the depth is lost.
Can I use a pork shoulder instead of a Boston butt?
Pork shoulder and Boston butt come from the same general area of the pig and cook identically. They’re often sold under both names interchangeably.
Final Thoughts
Making a Boston butt is one of those cooking projects that teaches you patience and rewards you with delicious results every single time. The process is straightforward, the ingredient list is short, and the outcome feeds a crowd without demanding hours of active attention.
Whether you’re smoking it for a backyard gathering or slow-roasting it on a weeknight, this recipe deserves a place in your regular rotation. Pull one today and taste why this humble cut of pork has earned its place as a barbecue staple.
Slow-Roasted Boston Butt
This slow-roasted Boston butt yields tender, juicy pulled pork with a crispy bark, perfect for sandwiches, tacos, and more.
- Large roasting pan or baking sheet with sides
- Instant read meat thermometer
- Small mixing bowl
- Paper towels
- Aluminum foil
- Two forks or meat shredders
- Optional smoker or slow cooker
Main
- 8 to 10 pounds pork Boston butt (pork shoulder, bone-in or boneless)
- 3 tablespoons brown sugar
- 2 tablespoons paprika
- 1 tablespoon garlic powder
- 1 tablespoon onion powder
- 1 tablespoon black pepper
- 2 tablespoons kosher salt
- 1/2 teaspoon cayenne pepper (optional)
- 1 to 2 cups beef or chicken broth
- 1/2 cup apple cider vinegar or barbecue sauce
- Remove the Boston butt from the refrigerator 30 minutes before cooking and preheat the oven to 325°F.
- Score the fat cap in a crosshatch pattern about 1/4 inch deep and pat the meat dry with paper towels.
- In a small bowl, combine brown sugar, paprika, garlic powder, onion powder, black pepper, kosher salt, and cayenne pepper.
- Rub the spice mixture all over the pork shoulder, coating every surface evenly.
- Place the rubbed pork fat-side up in a roasting pan and pour 1 to 2 cups of broth around the meat.
- Roast uncovered in the preheated oven at 325°F for 5 to 6 hours, until the internal temperature reaches 190 to 205°F.
- After 4 hours, check the bark and if it is darkening too quickly or the pan is dry, tent loosely with foil and add 1/2 cup broth.
- Once cooked, remove from the oven and let the meat rest for at least 15 minutes.
- Using two forks or shredders, pull the pork into bite-sized pieces, discarding large pieces of fat or bone.
- Toss the pulled pork with apple cider vinegar or barbecue sauce before serving.
Strain and reserve pan drippings to use as a flavorful base for sauces or for reheating the pork.