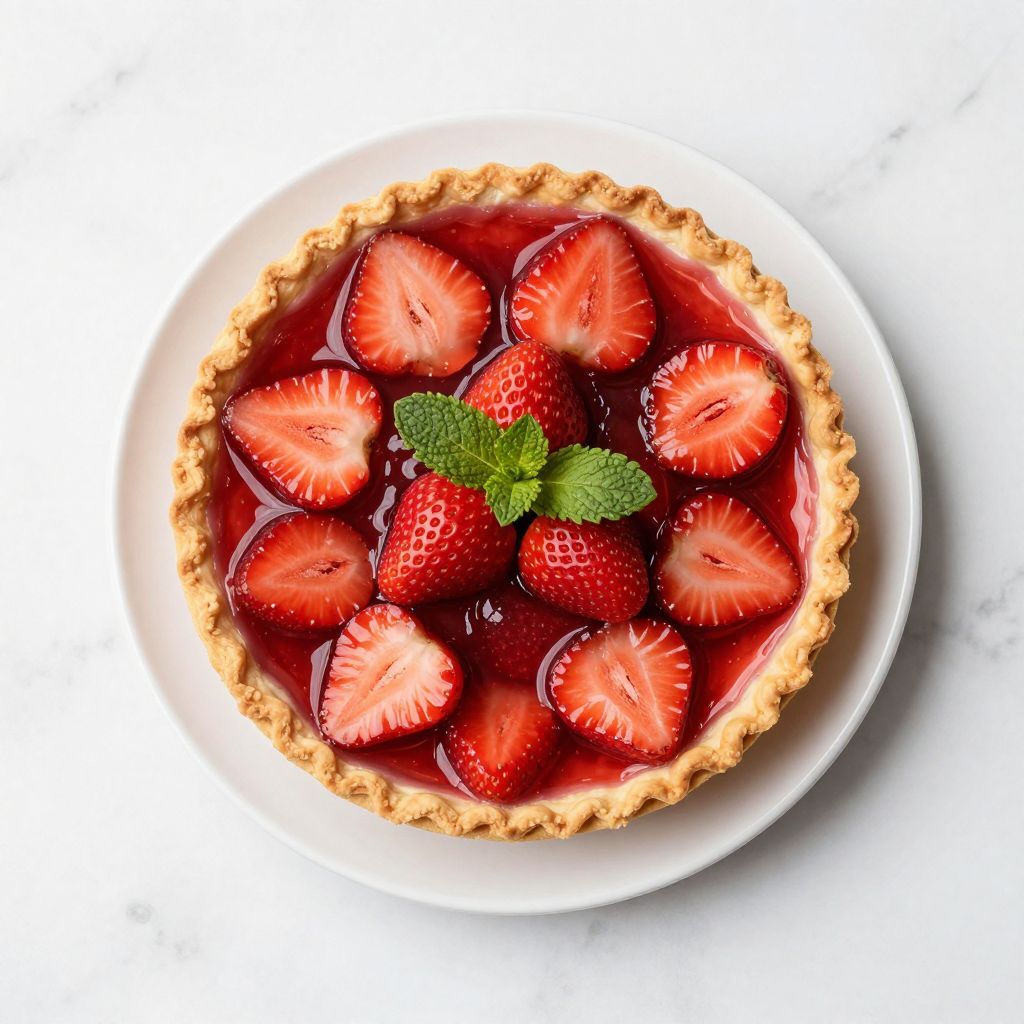
Picture this: a golden pie crust fresh from the oven, ready to cradle a glossy ruby filling that tastes like summer in every bite. Strawberry pie filling is one of those recipes that feels fancy enough for a dinner party but simple enough for a weeknight dessert.
This filling strikes the perfect balance between fresh strawberry flavor and that silky, spoonable texture that makes people come back for seconds. It’s naturally sweet, bursting with bright fruit, and works beautifully in pie, tarts, cheesecakes, or even as a topping for vanilla ice cream.
Whether you’re a seasoned baker or picking up a whisk for the first time, this recipe delivers consistent, restaurant-quality results without any fussy techniques or hard-to-find ingredients.
Why You’ll Love This Recipe
This filling checks every box for a crowd-pleasing dessert component. You get fresh strawberry flavor without any artificial tastes, a glossy appearance that looks professionally made, and the flexibility to use it however you want.
- Simple ingredients that come together in under 30 minutes
- No special baking skills required, just basic stovetop cooking
- Naturally beautiful deep red color that photographs well
- Works perfectly in pie, tarts, pastries, or layered desserts
- Can be made ahead and stored for convenience
My Experience Making This Recipe
I first made this filling on a random Tuesday evening when fresh strawberries went on sale at the farmer’s market. I grabbed two pounds without a real plan, which is exactly how my best kitchen adventures start.
The moment I poured the finished filling into my prebaked crust, I knew I’d found something special. The aroma alone filled my entire kitchen with this incredible sweet-tart strawberry perfume that made my neighbors ask what I was baking.
Watching people taste that pie was the real reward. Forks went silent, eyes closed, and someone actually said “restaurant quality” without any hint of exaggeration. That’s the magic of this particular filling recipe.
Recipe Overview
- Recipe Name: Strawberry Pie Filling
- Servings: Makes enough for one 9-inch pie (8 servings)
- Prep Time: 15 minutes
- Cook Time: 12 minutes
- Total Time: 27 minutes
- Course: Dessert
- Cuisine: American
- Calories per Serving: 95
Equipment You Will Need
- Large mixing bowl
- Medium saucepan
- Wooden spoon or heat-resistant spatula
- Measuring cups and spoons
- Sharp knife for slicing strawberries
- Cutting board
- Whisk
- Fine mesh strainer (optional but helpful)
Ingredients for Strawberry Pie Filling
- Fresh strawberries: 2 pounds, hulled and sliced
- Granulated sugar: 3/4 cup
- Cornstarch: 3 tablespoons
- Fresh lemon juice: 2 tablespoons
- Water: 1/4 cup
- Vanilla extract: 1 teaspoon
- Salt: 1/8 teaspoon
Ingredient Notes and Substitutions
- Fresh strawberries are the star here, contributing natural pectin and bright flavor that frozen berries simply cannot match. If you must use frozen, thaw them completely and drain excess liquid, though the filling will be slightly less vibrant.
- Cornstarch thickens the filling without clouding it like flour does, and it won’t add any raw taste. You can swap in tapioca starch for a nearly identical result, though the texture will be slightly more gel-like.
- Lemon juice brightens the strawberry flavor and prevents the filling from tasting one-dimensional and overly sweet. Fresh lime juice works nicely as a substitute and adds a subtle tropical note.
- Granulated sugar dissolves cleanly into the filling and caramelizes slightly during cooking. Honey or maple syrup can replace it, though they’ll add distinct flavors that change the classic strawberry pie experience.
- Vanilla extract adds depth without announcing itself loudly. A tiny splash of almond extract instead creates an interesting twist, though use only half a teaspoon since almond flavor is more assertive.
How to Make Strawberry Pie Filling
Step 1: Prepare Your Strawberries
Start by hulling your fresh strawberries and slicing them into uniform quarter-inch thick slices. Uniform slicing ensures even cooking and a consistent texture throughout your filling.
Step 2: Combine Dry Ingredients
In a small bowl, whisk together the sugar, cornstarch, and salt until no lumps remain in the cornstarch. This prevents clumping when you add the wet ingredients and ensures smooth thickening.
Step 3: Mix Water and Lemon Juice
In a separate small bowl, combine the water and fresh lemon juice. You’re creating a base liquid that will help the thickening agent distribute evenly without lumps.
Step 4: Create the Slurry
Whisk the dry mixture into the water and lemon juice until you have a smooth, lump-free slurry with the consistency of thin cream. This step is crucial because any lumps in the slurry will translate to lumps in your finished filling.
Step 5: Combine Strawberries with Slurry
Place your sliced strawberries into a large mixing bowl and pour the slurry over them, stirring gently to coat evenly. Let this mixture sit for about 2 minutes so the strawberries begin releasing their juice.
Step 6: Cook the Filling
Transfer the strawberry mixture to a medium saucepan and place it over medium heat. Stir frequently as the mixture heats, which usually takes about 5 minutes before it reaches a gentle simmer.
Step 7: Simmer Until Thickened
Once simmering, continue cooking for 5 to 7 minutes, stirring occasionally, until the filling becomes glossy and noticeably thickened. You want it thick enough to hold its shape when spooned, but still fluid enough to pour into your crust.
Step 8: Remove from Heat and Finish
Take the pan off the heat and stir in the vanilla extract immediately. This prevents the vanilla from cooking off and ensures you get its subtle flavor contribution in the finished filling.
Step 9: Cool Before Using
Allow the filling to cool for about 10 minutes at room temperature before pouring it into your prepared pie crust. This gives it time to set slightly, preventing it from soaking too deeply into the crust and making the bottom soggy.
Pro Tip: If you want an even glossier, jewel-like appearance, reserve about 1/4 cup of the most beautiful sliced berries and fold them in gently just before pouring into the crust, so they stay whole and visible.
Tips for the Best Strawberry Pie Filling
- Choose strawberries that are deep red all the way through with no white shoulders. White areas indicate underripe fruit that lacks flavor and natural pectin.
- Slice your strawberries fairly consistently so they cook at the same rate and create a uniform texture throughout the filling.
- Don’t skip creating the slurry separately. Dumping dry cornstarch directly onto fruit often creates lumps that won’t cook out.
- Taste the filling before it cools completely and add a pinch more salt or lemon juice if needed. Flavors fade slightly as food cools, so seasoning while warm helps you judge accurately.
- If your filling seems too thin after cooking, mix a teaspoon of cornstarch with a tablespoon of cold water, pour it into the simmering filling, and cook for another minute or two.
- For the prettiest pie, pour the still-warm filling into a crust that’s been prebaked for about 10 minutes. This prevents sogginess and helps the filling set more firmly.
Common Mistakes to Avoid
- Using underripe or pale strawberries produces a filling that tastes tart and one-dimensional rather than sweet and complex. Choose berries with deep color and a sweet aroma for the best flavor profile.
- Overcooking the filling results in a jam-like texture that’s too thick and stiff, losing that spoonable consistency that makes pie filling special. Aim for a glossy, pourable texture that holds its shape.
- Skipping the cooling step before pouring into the crust allows the hot filling to soak into the pastry, making the bottom layer soggy and mushy. Those 10 minutes make a genuine difference.
- Adding the cornstarch directly to the fruit without creating a slurry first almost always produces lumpy filling. Take the extra minute to whisk it smooth with liquid first.
- Using frozen strawberries without draining them properly adds excess liquid that prevents proper thickening. Thaw them completely and squeeze gently to remove water.
Serving Suggestions
Strawberry pie filling pairs beautifully with buttery pastry and creamy accompaniments that balance its bright tartness. Use it as the centerpiece of your dessert or as a supporting player in more complex creations.
- Pour into a prebaked pie crust and top with whipped cream or vanilla ice cream
- Layer between shortcake biscuits with fresh whipped cream for a classic strawberry shortcake
- Spread on a prebaked tart shell and top with candied strawberries for an elegant presentation
- Swirl into cheesecake batter before baking for marbled strawberry cheesecake
- Dollop onto pound cake or angel food cake with a scoop of vanilla ice cream
Variations to Try
- Strawberry Rhubarb Filling: Replace half the strawberries with diced rhubarb and increase the sugar to 1 cup. This creates a more complex flavor with pleasant tartness that’s less one-note than strawberry alone.
- Strawberry Balsamic Filling: Substitute 1 tablespoon of the lemon juice with aged balsamic vinegar. The vinegar adds sophisticated depth and sweetness that elevates the filling without making it taste vinegary.
- Strawberry Mint Filling: Add 1 tablespoon of finely chopped fresh mint along with the vanilla extract. The mint brings brightness and a subtle cooling effect that complements strawberry beautifully.
- Strawberry Cardamom Filling: Replace the vanilla with 1/4 teaspoon of ground cardamom for a spiced, almost floral quality. This works wonderfully in tarts or with a brown butter crust.
- Whole Berry Filling: Halve the strawberries instead of slicing them and increase cooking time by 2 minutes. This preserves larger berry pieces for a chunkier, more rustic texture.
Dietary Adaptations
- Gluten-free: This filling is naturally gluten-free, but use it in a gluten-free pie crust or tart shell instead of traditional wheat-based pastry for a complete gluten-free dessert.
- Dairy-free: The filling itself contains no dairy, making it suitable for dairy-free diets, though you’ll want to serve it with dairy-free whipped cream or ice cream.
- Vegan: This recipe is already vegan as written with no eggs or animal products, making it perfect for plant-based bakers.
- Low-carb/Keto: Replace the sugar with erythritol or monk fruit sweetener at a 1:1 ratio. The filling will set slightly differently and may be less glossy, but the flavor remains excellent.
Storage and Reheating
Refrigerator
Store your finished strawberry pie filling in an airtight container on the refrigerator shelf for up to 4 days. The filling keeps well but gradually loses its vibrant color and becomes slightly thicker over time.
- Cover tightly to prevent the filling from absorbing refrigerator odors
- Stir gently before using if any separation has occurred
Freezer
Strawberry pie filling freezes beautifully for up to 3 months when stored in a freezer-safe container or heavy-duty freezer bag. Thaw it overnight in the refrigerator before using.
- Leave a half-inch of headspace if freezing in containers to allow for expansion
- Label with the date so you remember when you made it
Reheating
Thaw frozen filling overnight in the refrigerator, then use it cold or warm it gently on the stovetop over low heat. Never microwave the filling, which can create hot spots that break down the texture.
- Stir frequently while warming to ensure even heating
- Use within a day of thawing for best quality
Nutrition Information
| Nutrient | Amount |
|---|---|
| Calories | 95 |
| Total Fat | 0g |
| Saturated Fat | 0g |
| Carbohydrates | 24g |
| Fiber | 1g |
| Sugar | 21g |
| Protein | 0g |
| Sodium | 25mg |
| Cholesterol | 0mg |
These values are based on the filling alone without crust, whipped cream, or other accompaniments. Actual values may vary based on specific strawberry varieties and exact ingredient amounts used.
Frequently Asked Questions
Can I make this filling without cornstarch?
You can use tapioca starch, arrowroot powder, or potato starch as 1:1 replacements. Flour works but creates a cloudier filling that may have a slightly raw taste if not cooked long enough.
How do I know when the filling is done cooking?
The filling should bubble gently around the edges and coat the back of a spoon thickly when done. A quick way to test: run your finger across the spoon, and it should leave a clean trail that doesn’t immediately fill back in.
Can I make this filling the day before?
Absolutely, and this is actually a smart move for pie baking. Make the filling, cool it completely, then refrigerate it in a covered container for up to 2 days, and pour it into your crust when you’re ready to bake.
What if my filling is too runny?
You may have needed to cook it longer, or your strawberries released more juice than expected. Mix a teaspoon of cornstarch with a tablespoon of cold water, stir it into the warm filling, then cook for another minute until thickened.
Do I need to cook the crust before adding the filling?
Prebaking the crust for 10 minutes prevents sogginess, especially when using a fresh, wet filling like this one. For the crispest bottom crust, brush the hot prebaked shell with a beaten egg white before adding filling.
Can I use this filling in other desserts besides pie?
This filling works wonderfully in tarts, pastry shells, cheesecake swirls, cake layers, and even as an ice cream topping. It’s versatile enough for virtually any strawberry dessert you can imagine.
Final Thoughts
Making strawberry pie filling from scratch transforms a simple dessert into something genuinely special. The deep flavor and beautiful texture remind everyone at the table why homemade tastes so much better than anything store-bought.
Grab some fresh strawberries this week and give this recipe a try. Your kitchen will smell incredible, your pie will look bakery-perfect, and you’ll probably want to make this again before the strawberry season ends.
Strawberry Pie Filling

A glossy, spoonable strawberry pie filling made with fresh strawberries, sugar, lemon juice, and vanilla. Perfect for pies, tarts, cheesecakes, or as a topping for desserts.
- Large mixing bowl
- Medium saucepan
- Wooden spoon or heat-resistant spatula
- Measuring cups and spoons
- Sharp knife
- Cutting board
- Whisk
- Fine-mesh strainer (optional)
Main
- 2 pounds fresh strawberries (hulled and sliced)
- 3/4 cup granulated sugar
- 3 tablespoons cornstarch
- 2 tablespoons fresh lemon juice
- 1/4 cup water
- 1 teaspoon vanilla extract
- 1/8 teaspoon salt
- Hull the fresh strawberries and slice them into uniform quarter-inch thick slices.
- In a small bowl, whisk together the granulated sugar, cornstarch, and salt until no lumps remain.
- In a separate small bowl, combine the water and fresh lemon juice.
- Whisk the dry mixture into the water and lemon juice until smooth and lump-free, creating a thin slurry.
- Place the sliced strawberries in a large mixing bowl and pour the slurry over them, stirring gently to coat evenly. Let sit for about 2 minutes.
- Transfer the strawberry mixture to a medium saucepan and cook over medium heat, stirring frequently for about 5 minutes until it reaches a gentle simmer.
- Continue cooking for 5 to 7 minutes, stirring occasionally, until the filling becomes glossy and noticeably thickened.
- Remove from the heat and stir in the vanilla extract immediately.
- Let the filling cool for about 10 minutes at room temperature before using it in a pie crust or other dessert.
For best results, use fresh deep-red strawberries and avoid skipping the slurry step. If you want extra visual appeal, reserve about 1/4 cup of the prettiest sliced berries and fold them in gently just before pouring into the crust. The filling can be refrigerated for up to 4 days or frozen for up to 3 months.