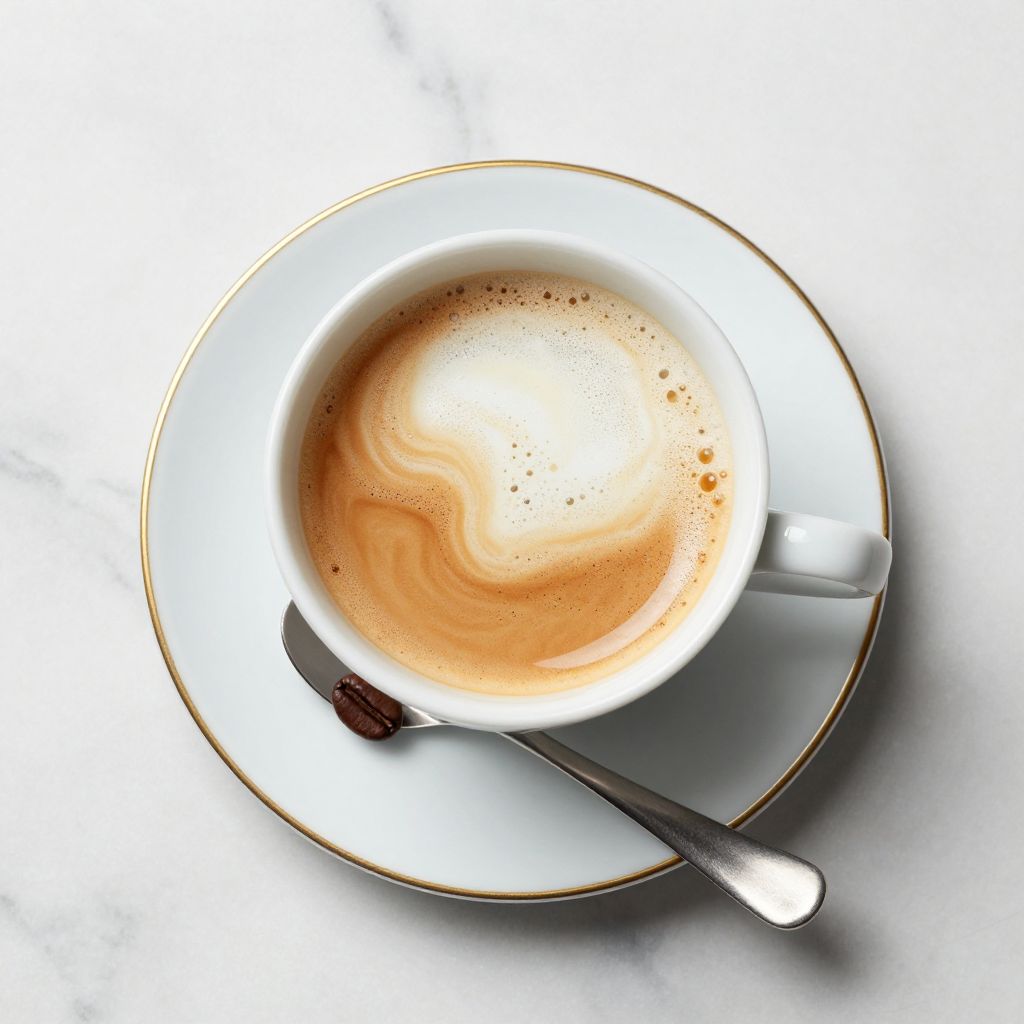
There’s something almost magical about that moment when you pour equal parts espresso and steamed milk into a small cup and watch them marry together into something greater than their separate parts. The cortado sits in that sweet spot between a bold espresso and a creamy cappuccino, offering the best of both worlds without apologies.
This Spanish coffee classic deserves a spot in your home brewing routine because it delivers real espresso flavor without requiring you to become a certified barista. The beauty of a cortado lies in its simplicity: just two ingredients, precise technique, and about five minutes of your morning, yet it rivals what you’d pay for at a specialty cafe.
Whether you’re looking to level up your coffee game at home or curious about what separates this drink from the cappuccino sitting next to it on every menu, this guide walks you through everything. You’ll learn exactly how to pull a shot, steam milk to the right texture, and combine them in a way that makes every sip count.
Why You’ll Love This Recipe
The cortado hits different because it respects both the espresso and the milk equally, creating a drink that’s smoother than a straight shot but still packed with coffee flavor. You get cafe-quality results at home with just basic equipment and a little practice.
- Perfect balance of rich espresso and velvety steamed milk in one small cup
- Takes only five minutes from start to finish, making it ideal for busy mornings
- Requires minimal equipment: an espresso machine, milk pitcher, and thermometer
- Teaches you foundational espresso and milk-steaming skills that transfer to other drinks
- Costs a fraction of what you’d spend buying cortados daily at a coffee shop
My Experience Making This Recipe
I spent my first year with an espresso machine pulling terrible shots and scalding milk before I understood what a cortado was really about. This drink taught me that coffee doesn’t need to be complicated; it just needs respect and attention to detail.
The moment my milk texture finally matched my espresso quality, everything clicked. That first properly made cortado tasted like validation, with that silky microfoam combining seamlessly with a bright, balanced shot instead of drowning it out.
Now I make cortados almost every morning, and they’ve become my morning reset button. The ritual of pulling the shot, steaming the milk, and pouring that perfect 1:1 ratio has become meditative, turning my kitchen into my favorite five-dollar cafe.
Recipe Overview
- Recipe Name: Cortado
- Servings: 1
- Prep Time: 2 minutes
- Cook Time: 3 minutes
- Total Time: 5 minutes
- Course: Beverage
- Cuisine: Spanish
- Calories per Serving: 15
Equipment You Will Need
- Espresso machine with grouphead
- Burr grinder (preferably espresso-specific)
- Milk pitcher (stainless steel, 12-20 oz)
- Steam wand thermometer or instant-read thermometer
- Tamper (flat, 58mm or matching your portafilter)
- Knockbox for spent grounds
- Small ceramic or glass cup (3-4 oz)
- Measuring scale (optional but recommended)
Ingredients for Cortado
- Espresso: 1 ounce (about 18-20 grams of whole beans)
- Whole milk: 1 ounce of steamed milk with microfoam
Ingredient Notes and Substitutions
- Espresso (18-20g whole beans): Freshly roasted beans ground immediately before pulling create a shot with balanced acidity and sweetness that defines the cortado. You can substitute with pre-ground espresso in a pinch, but the flavor will be noticeably flat and stale within minutes of grinding.
- Whole milk: Whole milk steams into silky microfoam with just the right fat content to complement espresso. Substitute with 2% milk for a slightly lighter drink with less richness, or oat milk for a creamy dairy-free option that froths well, though the flavor profile shifts toward nuttiness.
How to Make Cortado
Step 1: Prepare Your Espresso Machine
Turn on your espresso machine and let it heat for 10-15 minutes until the grouphead reaches temperature. This step matters because a cold grouphead will absorb heat from your shot, resulting in under-extracted, sour espresso that ruins the entire drink.
Step 2: Grind Your Beans
Grind 18-20 grams of fresh espresso beans to a fine, sand-like consistency just before pulling your shot. Grinding right before extraction preserves the aromatic compounds that make espresso bright and complex, while pre-ground coffee goes stale within seconds.
Step 3: Distribute and Tamp the Grounds
Pour your ground coffee into the portafilter, then distribute it evenly with your finger or a WDT tool to eliminate air pockets. Tamp down with firm, even pressure using a level tamper, applying about 30 pounds of pressure to create a compact puck that resists water flow equally.
Step 4: Purge the Grouphead
Before inserting your portafilter, run water through the empty grouphead for 2-3 seconds to flush out any old grounds or mineral buildup. This ensures your fresh grounds contact only clean water, preventing off-flavors from contaminating your shot.
Step 5: Pull Your Espresso Shot
Lock the portafilter into the grouphead and start the pump, watching for the first drops within 5-10 seconds. Pull until you reach 1 ounce of liquid (about 25-30 seconds total), then immediately remove the portafilter and dump the spent puck into your knockbox.
Step 6: Steam Your Milk
Pour 2 ounces of cold whole milk into your pitcher, then submerge the steam wand just below the surface at a slight angle. Create a whirlpool motion that pulls air into the milk for the first 3-5 seconds, listening for a faint hissing sound that indicates proper aeration.
Step 7: Heat the Milk to Temperature
Once the milk begins to foam, sink the steam wand deeper into the pitcher and angle it to maintain a rolling motion without introducing more air. Heat until your thermometer reads 150-155 degrees Fahrenheit; going above 160 degrees scalds the milk and destroys its sweetness.
Step 8: Combine Espresso and Milk
Pour your espresso into a small 3-4 ounce cup, then slowly pour the steamed milk into the center, holding back the foam with a spoon. Use a 1:1 ratio by volume, meaning equal parts espresso and steamed milk, finishing with a thin layer of microfoam on top.
Pro Tip: The difference between a cortado and a cappuccino comes down to ratio and microfoam thickness. Your cortado should have just a thin veil of foam, while a cappuccino drowns in it, so focus on creating silky, pourable milk rather than thick, fluffy bubbles.
Tips for the Best Cortado
- Invest in a burr grinder and grind immediately before pulling your shot; pre-ground espresso oxidizes within seconds and tastes flat no matter how perfect your technique is.
- Use a scale to weigh your espresso dose (aim for 18-20 grams) because eyeballing leads to inconsistent shots and unbalanced drinks.
- Keep your milk pitcher clean and cold before steaming; a warm pitcher accelerates milk temperature and reduces your window for proper microfoam development.
- Purge your steam wand immediately after steaming by running it into a towel for 2-3 seconds to prevent milk from drying and flaking inside the wand.
- Practice pulling shots until your extraction time falls between 25-30 seconds; shots pulling faster than 20 seconds taste sour, while those over 35 seconds taste bitter.
- Taste your water quality; hard water and heavily chlorinated water muddy espresso flavor, so consider a filtered pitcher or inline water filter on your machine.
Common Mistakes to Avoid
- Pulling shots with a too-coarse grind results in water flowing through grounds too quickly, creating sour, under-extracted espresso that overpowers any milk texture you create.
- Steaming milk above 160 degrees scalds it, burning the natural sweetness and making the drink taste sharp and bitter no matter how perfect your espresso is.
- Adding too much foam defeats the purpose of a cortado; you want silky, pourable microfoam that blends seamlessly rather than fluffy bubbles that sit on top like a cappuccino.
- Using stale beans (more than two weeks off the roast date) creates flat, one-dimensional espresso that can’t compete with the milk, leaving you wondering why your cortado tastes boring.
- Neglecting to backflush your grouphead between shots traps old grounds and oils inside, subtly contaminating each new shot with stale flavors that accumulate over time.
Serving Suggestions
A cortado works beautifully on its own as a morning ritual, but pairing it with something light makes the experience feel complete. The espresso’s brightness cuts through richness while the milk’s creaminess balances anything sharp or acidic.
- Serve alongside a buttery croissant or pastry for a classic European breakfast pairing
- Pair with toast topped with almond butter and honey for a balanced sweet and savory moment
- Enjoy with a biscotti for dunking, letting the coffee soften the cookie’s crispy texture
- Accompany with fresh fruit and aged cheese for a sophisticated mid-morning snack
- Sip alongside your favorite morning reading routine without food, treating it as a meditative pause
Variations to Try
- Cortado Doble: Use 2 ounces of espresso with 2 ounces of steamed milk for a stronger, bolder version that’s perfect for afternoon energy without the jitters of a straight shot.
- Cortado with Oat Milk: Swap whole milk for barista-blend oat milk to create a naturally sweet, velvety drink that’s dairy-free and pairs beautifully with chocolate pastries.
- Flavored Cortado: Add a small pump of vanilla or hazelnut syrup to your cup before pouring to introduce subtle sweetness without overpowering the espresso’s character.
- Cortado Freddo: Cool your espresso and milk separately, then combine over ice for a refreshing summer version that maintains the 1:1 ratio while offering a cold coffee experience.
- Cortado with Coconut Milk: Use full-fat coconut milk for a tropical twist that adds natural sweetness and a silky texture, though the flavor profile shifts noticeably toward the coconut.
Dietary Adaptations
- Gluten-free: Cortados are naturally gluten-free since they contain only espresso and milk; serve with gluten-free pastries if desired for a complete meal.
- Dairy-free: Substitute oat, almond, soy, or coconut milk for whole milk, though oat and soy milk produce the most reliable microfoam and closest flavor profile to traditional cortados.
- Vegan: Use plant-based milk as noted above; cortado remains vegan-friendly as neither espresso nor alternative milks derive from animal products.
- Low-carb/keto: Cortados contain minimal carbohydrates (under 2 grams per serving), making them ideal for low-carb diets when served with full-fat milk or heavy cream.
Storage and Reheating
Refrigerator
Store leftover cortado in an airtight container for up to 24 hours, though milk-based coffee drinks are best consumed immediately while the microfoam retains its silky texture. The espresso’s brightness fades noticeably after a few hours as oxidation dulls the aromatic compounds.
- Cool to room temperature before refrigerating to prevent condensation
- Store in a glass container rather than plastic, which absorbs coffee odors
- Keep away from strong-smelling foods since milk absorbs surrounding flavors easily
Freezer
Freezing cortados isn’t recommended because thawing separates the milk and espresso, and refrozen microfoam loses its texture entirely. The drink’s appeal centers on fresh preparation, and freezing destroys both the visual presentation and drinking experience.
Reheating
Reheat leftover cortado gently in a microwave for 30-45 seconds or in a small saucepan over low heat, stirring frequently. Avoid high heat, which scalds the milk and creates a burnt, bitter flavor that overpowers the espresso’s sweetness.
Nutrition Information
| Nutrient | Amount |
|---|---|
| Calories | 15 |
| Total Fat | 0.8g |
| Saturated Fat | 0.5g |
| Carbohydrates | 1.2g |
| Fiber | 0g |
| Sugar | 0.9g |
| Protein | 0.8g |
| Sodium | 12mg |
| Cholesterol | 3mg |
Nutritional values are approximate and calculated for 1 ounce of espresso combined with 1 ounce of whole steamed milk. Actual nutrition varies slightly based on your specific milk brand and espresso extraction yield.
Frequently Asked Questions
What’s the difference between a cortado and a cappuccino?
A cortado uses a 1:1 ratio of espresso to steamed milk with minimal foam, while a cappuccino uses a 1:1:1 ratio of espresso to steamed milk to foam and fills a larger cup. The cortado stays smaller and more espresso-forward, whereas a cappuccino becomes larger and milkier with each sip as the foam sits on top.
Can I make a cortado without an espresso machine?
A true cortado requires pressure-brewed espresso, which you can approximate using a Moka pot or AeroPress for a stronger coffee base. The result won’t be authentic espresso, but combining strong brewed coffee with steamed milk creates a similar balanced drink if you don’t have a machine.
How do I know when my espresso shot is properly extracted?
Watch for the first drops to appear 5-10 seconds after starting the pump, then pull until you reach 1 ounce of liquid in 25-30 seconds total. If extraction happens too quickly (under 20 seconds), your grind is too coarse; if it takes over 35 seconds, your grind is too fine or your tamp is too hard.
Why does my milk keep breaking or separating when I steam it?
Milk breaks when temperatures exceed 160 degrees, or when you over-aerate by keeping the steam wand too close to the surface for too long. Focus on creating a whirlpool after the initial aeration phase, and pull the thermometer away the moment it reaches 155 degrees to preserve the milk’s protein structure.
Should I use filtered water in my espresso machine?
Filtered water improves espresso flavor dramatically by removing chlorine and reducing mineral buildup inside your machine. Unfiltered tap water often contains chlorine that tastes sharp in espresso and leaves mineral deposits that slow water flow over time.
How long do espresso beans stay fresh?
Espresso beans peak in flavor 5-14 days after roasting and remain acceptable for 2-3 weeks; after one month, the aromatics fade noticeably and your cortado will taste flat. Check your bag’s roast date and buy beans weekly from a local roaster rather than buying a month’s supply at once.
Final Thoughts
The cortado isn’t just a coffee drink; it’s proof that simplicity and precision create something special. Once you nail the balance of that 1:1 ratio with properly extracted espresso and silky steamed milk, you’ll understand why people order them at every specialty cafe they visit.
Your first cortados might not be perfect, and that’s completely fine. Each cup teaches you something about grind size, extraction timing, or milk texture, building skills that improve everything else you brew. Stop making excuses about needing to visit a cafe and start making this drink at home where it belongs.
Cortado

A Spanish coffee classic that balances equal parts espresso and steamed milk into a smooth, espresso-forward drink that’s stronger than a cappuccino but creamier than a straight shot. This cafe-quality beverage takes just 5 minutes to make at home.
- Espresso machine with grouphead
- Burr grinder
- Milk pitcher (stainless steel, 12-20 oz)
- Steam wand thermometer or instant-read thermometer
- Tamper (flat, 58mm or matching your portafilter)
- Knockbox for spent grounds
- Small ceramic or glass cup (3-4 oz)
- Measuring scale (optional but recommended)
Main
- 1 ounce espresso (about 18-20 grams whole beans)
- 1 ounce whole milk (steamed with microfoam)
- Turn on your espresso machine and let it heat for 10-15 minutes until the grouphead reaches temperature.
- Grind 18-20 grams of fresh espresso beans to a fine, sand-like consistency just before pulling your shot.
- Pour your ground coffee into the portafilter, then distribute it evenly with your finger or a WDT tool to eliminate air pockets. Tamp down with firm, even pressure using a level tamper, applying about 30 pounds of pressure.
- Before inserting your portafilter, run water through the empty grouphead for 2-3 seconds to flush out any old grounds or mineral buildup.
- Lock the portafilter into the grouphead and start the pump, watching for the first drops within 5-10 seconds. Pull until you reach 1 ounce of liquid (about 25-30 seconds total), then immediately remove the portafilter and dump the spent puck into your knockbox.
- Pour 2 ounces of cold whole milk into your pitcher, then submerge the steam wand just below the surface at a slight angle. Create a whirlpool motion that pulls air into the milk for the first 3-5 seconds.
- Once the milk begins to foam, sink the steam wand deeper into the pitcher and angle it to maintain a rolling motion without introducing more air. Heat until your thermometer reads 150-155 degrees Fahrenheit.
- Pour your espresso into a small 3-4 ounce cup, then slowly pour the steamed milk into the center, holding back the foam with a spoon. Use a 1:1 ratio by volume, meaning equal parts espresso and steamed milk, finishing with a thin layer of microfoam on top.
The difference between a cortado and a cappuccino comes down to ratio and microfoam thickness. Your cortado should have just a thin veil of foam, while a cappuccino has much more. Focus on creating silky, pourable milk rather than thick, fluffy bubbles. For best results, use freshly roasted beans (5-14 days off roast) and grind immediately before pulling your shot.