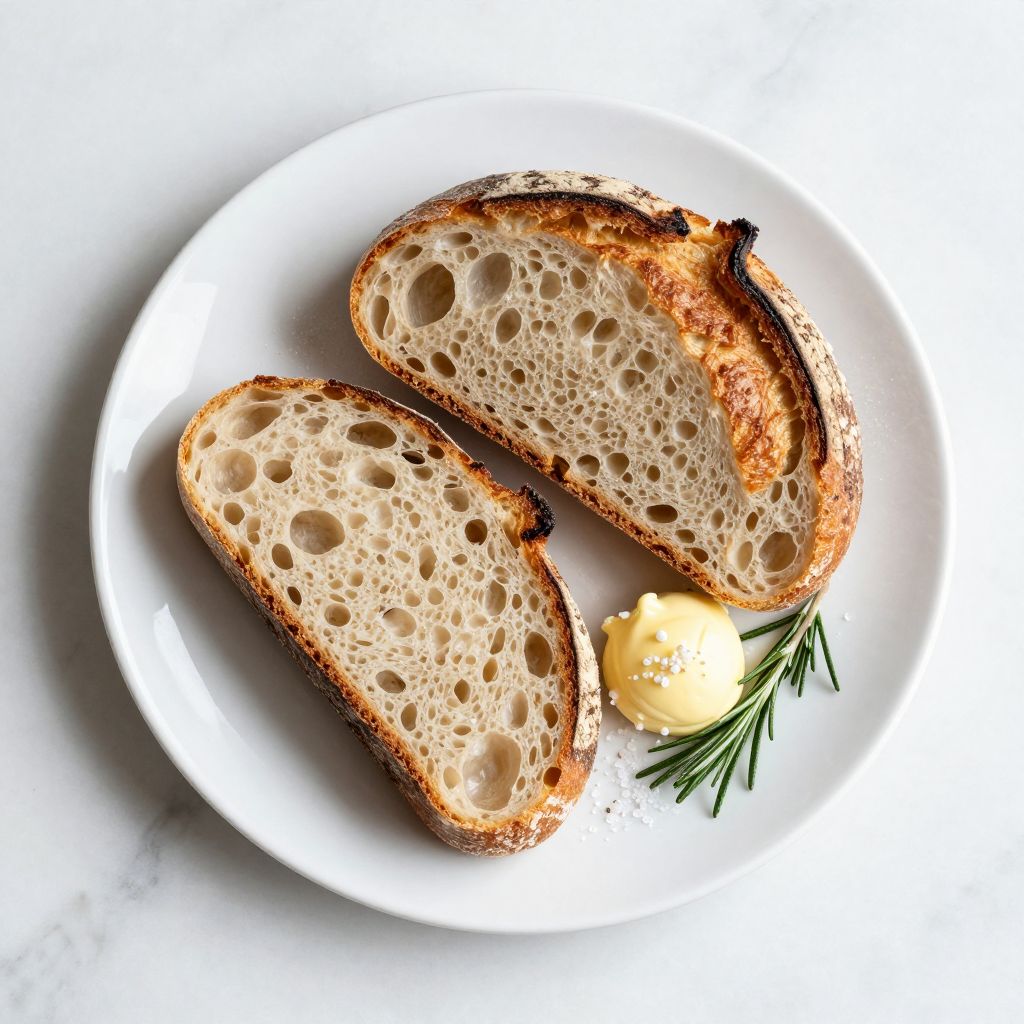
There’s nothing quite like the moment you pull a crusty, golden loaf of sourdough from your oven and hear that satisfying crackle as it cools on the counter. King Arthur sourdough has become my go-to recipe because it delivers bakery-quality results with straightforward, honest instructions that actually make sense.
This recipe strikes the perfect balance between approachability and authenticity. You’ll develop a deeply flavorful, complex loaf with a crispy crust and open, airy crumb structure that makes every bite rewarding.
What sets this approach apart is how it respects your schedule and your starter, building flavor through time and temperature rather than fussy techniques. Whether you’re a sourdough beginner ready to move beyond store-bought bread or an experienced baker looking for a reliable formula, this recipe delivers.
Why You’ll Love This Recipe
King Arthur’s sourdough method produces consistently excellent results without requiring a baking degree or specialty equipment. The recipe builds deep flavor through a long, cool fermentation that works with your lifestyle instead of against it.
- Achieves a crispy, crackling crust with minimal fussing or special equipment
- Creates an open, irregular crumb structure that looks and tastes like real artisan bread
- Works on a flexible schedule with both overnight and same-day options
- Uses just four simple ingredients: flour, water, salt, and active starter
- Builds complex, tangy flavor through cold fermentation rather than complicated techniques
My Experience Making This Recipe
The first time I made this loaf, I was skeptical that such a simple formula could produce something genuinely special. By the time that dark golden crust emerged from my oven, I understood why this recipe has become a standard in so many home kitchens.
The dough itself feels alive and responsive in your hands, developing beautiful tension and elasticity as you stretch and fold it through the bulk fermentation. I noticed the overnight cold rise creates this incredible depth of flavor that my rushed afternoon bakes never achieved, and the bread stays fresher longer because of it.
My family demolished half the loaf while it was still warm, which told me everything I needed to know. The crust shatters when you bite into it, releasing that toasted, wheaty aroma, and the interior has just enough chew without being gummy or dense.
Recipe Overview
- Recipe Name: King Arthur Sourdough
- Servings: 1 loaf, approximately 12 slices
- Prep Time: 20 minutes plus 48 hours for starter maintenance
- Cook Time: 45 minutes
- Total Time: Approximately 24 hours active fermentation plus baking
- Course: Bread
- Cuisine: Artisan/Rustic European
- Calories per Serving: Approximately 240 calories
Equipment You Will Need
- Large mixing bowl
- Kitchen scale for accurate flour and water measurement
- Bench scraper or dough knife
- Dutch oven or covered bread baker
- Banneton proofing basket or bowl lined with a floured kitchen towel
- Bread lame or sharp knife for scoring
- Instant-read thermometer for monitoring dough temperature
- Parchment paper
- Wire cooling rack
Ingredients for King Arthur Sourdough
- Bread flour: 500 grams (approximately 4 cups)
- Water: 350 grams (approximately 1.5 cups) at 75-80 degrees Fahrenheit
- Active sourdough starter: 100 grams (approximately 1/2 cup), fed and bubbly
- Sea salt: 10 grams (approximately 2 teaspoons)
Ingredient Notes and Substitutions
- Bread flour provides the gluten structure and strength needed for an open crumb and chewy texture; all-purpose flour works but yields slightly less volume and structure, so increase hydration by 5-10 grams if using it.
- Water temperature matters because it controls fermentation speed; if your kitchen is cool, use warmer water around 80 degrees, and if it’s warm, use cooler water around 70 degrees.
- Active, bubbly starter is essential for reliable rise and flavor development; if your starter is sluggish, feed it 4-8 hours before mixing and wait until it doubles in volume and shows clear bubbles on top.
- Sea salt enhances flavor and controls fermentation; kosher salt works as a direct substitute with the same weight, but table salt is more concentrated, so reduce to 8 grams if that’s all you have.
- Whole wheat flour can replace up to 10-15% of the bread flour for added flavor and nutrition; this darkens the crust and adds a slightly nutty taste but may reduce overall rise.
How to Make King Arthur Sourdough
Step 1: Mix the Dough
Combine 350 grams of room-temperature water, 100 grams of active sourdough starter, and 500 grams of bread flour in a large bowl, stirring until no dry flour remains. This initial mix, called the autolyse, should look shaggy and rough.
Let this mixture rest for 30-60 minutes before adding salt, which allows the flour to fully absorb water and develops better gluten structure naturally. This rest period makes the dough easier to work with and improves the final crumb.
Step 2: Add Salt and Mix
After the autolyse rest, add 10 grams of sea salt and 25 grams of water, mixing everything together until the salt fully dissolves and the dough comes together. The added water helps distribute the salt evenly and prevents it from drying out your dough.
Use a wet hand or bench scraper to incorporate these final ingredients, working for about 2-3 minutes until you have a cohesive, slightly sticky dough with no dry patches.
Step 3: Perform the First Stretch and Fold
About 30 minutes after mixing in the salt, grab one side of the dough, stretch it up and fold it over the center, then rotate the bowl and repeat from all four sides. This technique, called a stretch and fold, builds strength without traditional kneading.
Stretching and folding creates gluten development and traps gas bubbles, leading to better rise and a more open crumb structure. You should feel the dough tighten and become more elastic with each fold.
Step 4: Continue Bulk Fermentation with Stretches
Repeat the stretch and fold every 30 minutes for 2-2.5 hours, performing four sets total. After each set, you’ll notice the dough becoming smoother, more elastic, and increasingly bubbly.
Stop stretching when the dough looks puffy, jiggles when you move the bowl, and shows clear bubbles throughout. This signals that the gluten is well-developed and fermentation is progressing nicely.
Step 5: Prepare for Cold Fermentation
Turn the dough out onto a lightly floured surface and shape it gently into a round, working from the outside edges toward the center to create surface tension. Handle the dough as little as possible to preserve the bubbles you’ve built.
Place the shaped dough seam-side up in a banneton basket or a bowl lined with a well-floured kitchen towel, cover it, and refrigerate for 12-18 hours. The long, cold fermentation develops complex flavor and makes the dough much easier to score and handle.
Step 6: Preheat Your Dutch Oven
Place your Dutch oven or bread baker in a cold oven, then heat to 500 degrees Fahrenheit for at least 45 minutes. A fully preheated Dutch oven creates steam that gives you that spectacular crispy crust.
The intense, trapped heat causes the dough’s exterior to set quickly while the interior expands dramatically, creating that characteristic bakery-style oven spring and thick, crackling crust.
Step 7: Score and Load the Dough
Remove the chilled dough from the refrigerator and turn it seam-side down onto a piece of parchment paper. Using a sharp bread lame or knife, score a quarter-inch-deep line across the top at a slight angle; this cut guides where your dough will expand.
Scoring is crucial because it controls how the dough rises, preventing random tears and allowing the baker’s signature mark to develop beautifully. A good score makes the difference between bread that rises evenly and bread that explodes unpredictably.
Step 8: Bake Covered
Carefully remove the screaming-hot Dutch oven from the oven and place a piece of parchment paper with your dough on the hot surface. Cover immediately with the lid to trap steam.
Bake covered at 500 degrees for 20 minutes, which creates the aggressive steam environment that produces that shattered, golden crust. The steam keeps the dough’s surface moist just long enough for maximum expansion.
Step 9: Finish Baking
Remove the Dutch oven lid and reduce the temperature to 450 degrees, then bake for an additional 25-30 minutes until the loaf is deep golden brown. You’re looking for a rich, dark color that indicates proper caramelization and flavor development.
The internal temperature should reach 205-210 degrees Fahrenheit when measured with an instant-read thermometer inserted into the thickest part of the loaf. This temperature ensures the crumb is fully set and won’t collapse or feel gummy.
Step 10: Cool Completely
Transfer the baked loaf to a wire cooling rack and let it rest for at least 1-2 hours before slicing. This cooling period allows the interior crumb to set properly and the crust to crisp up completely.
If you cut into warm bread, the interior steam will escape and the crumb will feel dense and gummy. Waiting rewards you with a perfect slice that shows off your work.
Pro Tip: Keep your sourdough starter at 100% hydration (equal weights of flour and water) and always feed it with flour that matches what you’re using in your bread, ideally bread flour, for the most consistent results and reliable rise.
Tips for the Best King Arthur Sourdough
- Use a kitchen scale and measure everything by weight, not volume, for consistent results every single time you bake.
- Keep your starter active and healthy by feeding it consistently at predictable times, ideally the same time each day so you know when it peaks.
- Monitor dough temperature throughout fermentation; aim for 75-78 degrees Fahrenheit for reliable fermentation speed regardless of your kitchen’s temperature.
- Don’t rush the bulk fermentation stretch and fold sequence; those four sets over two hours build the gluten network that creates an open crumb.
- The cold overnight rest is not optional if you want flavor; 12-18 hours of cold fermentation develops the complex taste that makes sourdough worth making.
- Score boldly and decisively with a sharp tool; a timid, shallow score produces ragged, uncontrolled tears instead of a beautiful baker’s ear.
Common Mistakes to Avoid
- Using a sluggish or unfed starter will result in weak rise and minimal flavor development because your dough lacks the microbes needed to ferment properly.
- Skipping the autolyse rest or the stretch and fold sequence leads to tight, dense crumb and poor oven spring since your gluten hasn’t developed adequately.
- Baking without a preheated Dutch oven produces pale, soft crust instead of the crispy, crackling exterior you’re aiming for, since steam generation is critically important.
- Cutting the loaf too soon while it’s still warm causes the crumb to collapse and feel gummy rather than light and open with defined holes.
- Inconsistent dough temperature from one bake to the next creates unpredictable fermentation times and flavor, making it impossible to develop a reliable routine.
Serving Suggestions
This sourdough shines simplest, torn warm from the loaf with good butter and a sprinkle of sea salt. The complex flavor needs little accompaniment, but there are plenty of ways to use it beyond eating it plain.
- Toast thick slices and top with smashed avocado, flaky salt, and red pepper flakes for a simple, elegant breakfast
- Make tartine-style open-faced sandwiches with quality deli meats, cheese, pickled vegetables, and fresh herbs
- Use day-old slices as the base for panzanella salad with tomatoes, cucumbers, red onion, and a sharp vinaigrette
- Cut into cubes and toss with olive oil and herbs for homemade sourdough croutons that elevate any soup
- Serve alongside cheese and cured meats for an impressive cheese board, or pair with soup for a satisfying, complete meal
Variations to Try
- Add 50 grams of whole wheat flour to 450 grams of bread flour for a nuttier flavor and deeper color, though fermentation may speed up slightly due to the bran.
- Include 50-75 grams of mix-ins like chopped rosemary, cracked black pepper, or grated cheese added after the final stretch and fold for flavor variations.
- Make a higher hydration dough by increasing water to 375-400 grams for an even more open, irregular crumb, though you’ll need to adjust your handling technique.
- Shape into smaller boules or batards instead of one large round loaf, reducing bake time to 20-25 minutes and creating multiple portions for sharing.
- Extend the cold fermentation to 24-48 hours for even deeper flavor development and a more pronounced sour tang that really develops over time.
Dietary Adaptations
- Gluten-free: Substitute a high-quality gluten-free bread flour blend, increase water slightly to 360-370 grams, and expect less dramatic oven spring and a slightly denser crumb.
- Dairy-free: This recipe contains no dairy ingredients, so it’s naturally dairy-free without any modifications needed.
- Vegan: The recipe is completely vegan as written since it contains only flour, water, salt, and a live starter culture.
- Low-carb or keto: Sourdough is grain-based and relatively high in carbohydrates, making it unsuitable for strict low-carb diets without significant reformulation that changes the entire recipe’s character.
Storage and Reheating
Refrigerator
Store cooled sourdough wrapped in a paper bag or kitchen towel at room temperature for 3-4 days, which keeps the crust crackling and crumb tender. Paper breathes better than plastic and prevents the crust from softening.
- Never store in an airtight container at room temperature, which makes the crust soft and the crumb tough and stale
- If storing longer than 4 days, place the entire loaf in a freezer-safe bag and refrigerate for up to 2 weeks
Freezer
Wrap the completely cooled loaf in parchment paper, then place in a freezer-safe bag, squeezing out excess air before sealing. Frozen sourdough keeps beautifully for 2-3 months without quality loss.
- Slice the loaf before freezing if you prefer, so you can remove and toast individual slices as needed
- Thaw overnight at room temperature still wrapped to prevent condensation from making the crust soggy
Reheating
Refresh day-old slices by toasting them directly in your oven at 350 degrees for 5-10 minutes until the crust crackles again. This restores much of the original freshness and crispy texture.
- Wrap the entire loaf in a damp kitchen towel and warm in a 350-degree oven for 15-20 minutes to refresh it completely
- Do not use a microwave, which makes the crust tough and the crumb rubbery due to its moisture-reabsorbing effect
Nutrition Information
| Nutrient | Amount |
|---|---|
| Calories | 240 |
| Total Fat | 1.5g |
| Saturated Fat | 0.3g |
| Carbohydrates | 48g |
| Fiber | 2g |
| Sugar | 1g |
| Protein | 8g |
| Sodium | 390mg |
| Cholesterol | 0mg |
These values represent one slice of a 12-slice loaf and may vary slightly depending on your exact flour brand, water content, and how you cut the loaf. Sourdough’s long fermentation breaks down starches and increases bioavailable nutrients compared to quick breads.
Frequently Asked Questions
Can I use whole wheat flour instead of bread flour?
You can substitute up to 15% of the bread flour with whole wheat flour without major adjustments. Beyond 15%, you’ll need to increase hydration by 10-20 grams because whole wheat absorbs more water, and your fermentation will speed up noticeably.
What if my starter isn’t doubling in the time the recipe says?
Your kitchen temperature and starter strength affect fermentation speed significantly. Feed your starter more frequently for 3-5 days to build strength, maintain it at 70-75 degrees Fahrenheit, or adjust your water temperature up or down by 5-10 degrees to speed or slow fermentation as needed.
Can I make this dough in the morning and bake it the same day?
Yes, but you’ll sacrifice flavor since the long, cold fermentation is shortened, resulting in a milder taste and less developed crumb structure.
King Arthur Sourdough

This King Arthur sourdough recipe produces a crusty, golden loaf with bakery-quality results. Featuring a deeply flavorful crumb and crispy crust, this straightforward recipe uses just four simple ingredients and respects your schedule through long, cool fermentation that builds complex flavor.
- Large mixing bowl
- Kitchen scale
- Bench scraper or dough knife
- Dutch oven or covered bread baker
- Banneton proofing basket or bowl lined with floured kitchen towel
- Bread lame or sharp knife
- Instant-read thermometer
- Parchment paper
- Wire cooling rack
Main
- 500 grams approximately 4 cups bread flour
- 350 grams approximately 1.5 cups water at 75-80 degrees Fahrenheit
- 100 grams approximately 1/2 cup active sourdough starter, fed and bubbly
- 10 grams approximately 2 teaspoons sea salt
- 25 grams additional water for salt incorporation
- Combine 350 grams of room-temperature water, 100 grams of active sourdough starter, and 500 grams of bread flour in a large bowl, stirring until no dry flour remains. Let this mixture rest for 30-60 minutes.
- After the autolyse rest, add 10 grams of sea salt and 25 grams of water, mixing everything together until the salt fully dissolves and the dough comes together. Work for about 2-3 minutes until you have a cohesive, slightly sticky dough with no dry patches.
- About 30 minutes after mixing in the salt, grab one side of the dough, stretch it up and fold it over the center, then rotate the bowl and repeat from all four sides.
- Repeat the stretch and fold every 30 minutes for 2-2.5 hours, performing four sets total. Stop stretching when the dough looks puffy, jiggles when you move the bowl, and shows clear bubbles throughout.
- Turn the dough out onto a lightly floured surface and shape it gently into a round, working from the outside edges toward the center to create surface tension.
- Place the shaped dough seam-side up in a banneton basket or a bowl lined with a well-floured kitchen towel, cover it, and refrigerate for 12-18 hours.
- Place your Dutch oven or bread baker in a cold oven, then heat to 500 degrees Fahrenheit for at least 45 minutes.
- Remove the chilled dough from the refrigerator and turn it seam-side down onto a piece of parchment paper. Using a sharp bread lame or knife, score a quarter-inch-deep line across the top at a slight angle.
- Carefully remove the hot Dutch oven from the oven and place the parchment paper with your dough inside. Cover immediately with the lid.
- Bake covered at 500 degrees Fahrenheit for 20 minutes.
- Remove the Dutch oven lid and reduce the temperature to 450 degrees Fahrenheit, then bake for an additional 25-30 minutes until the loaf is deep golden brown and reaches an internal temperature of 205-210 degrees Fahrenheit.
- Transfer the baked loaf to a wire cooling rack and let it rest for at least 1-2 hours before slicing.
Keep your sourdough starter at 100% hydration (equal weights of flour and water) and always feed it with flour that matches what you’re using in your bread for the most consistent results. Use a kitchen scale and measure everything by weight for reliable outcomes. The cold overnight rest is essential for developing complex flavor. Store cooled sourdough wrapped in a paper bag or kitchen towel at room temperature for 3-4 days.