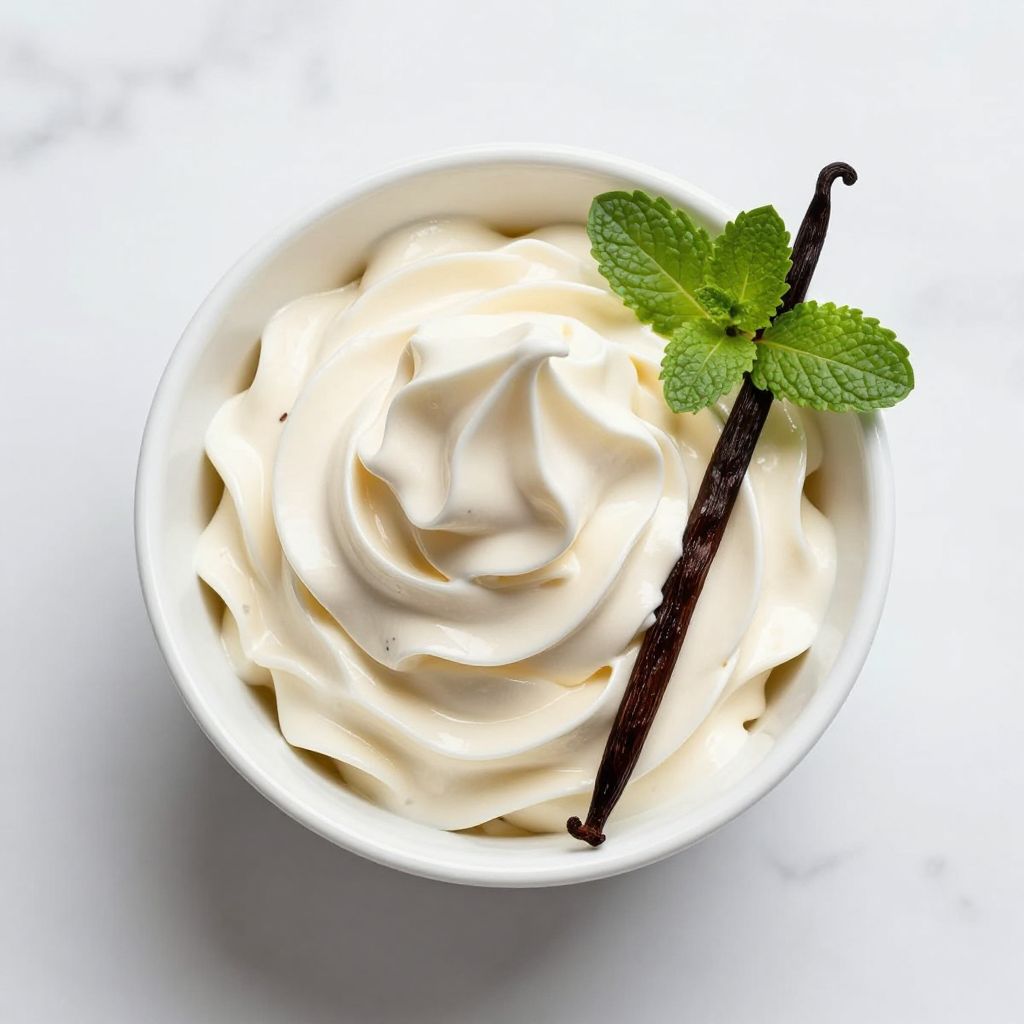
There’s something magical about the moment you press start on a Ninja Creami and watch it transform a frozen block into silky soft-serve in seconds. I first discovered this machine at a friend’s house on a sweltering summer afternoon, and honestly, I’ve been obsessed ever since.
The Ninja Creami is a game-changing appliance that lets you make restaurant-quality frozen treats at home without an ice cream maker or special skills. What makes it special is the speed, versatility, and sheer fun of watching it work.
Whether you’re freezing homemade gelato, sorbet, or even frozen cocktails, this machine handles it all with minimal effort. Let me walk you through everything you need to know to master your Creami.
Why You’ll Love This Recipe
The Ninja Creami opens up a world of frozen dessert possibilities with almost no learning curve. You’ll create café-quality treats in your kitchen without fancy equipment or hours of churning.
- Fast results: transform a frozen block into soft-serve in under a minute
- Endless flavor options: work with any freezable liquid from ice cream to Italian ice
- Perfect texture every time: the machine does the hard work for you
- Family-friendly: kids love pressing the button and watching the magic happen
- Cost-effective: homemade frozen treats cost less than buying from an ice cream shop
My Experience Making This Recipe
I started by making a simple vanilla base, and the results were so smooth I almost couldn’t believe it came from my kitchen. My kids immediately demanded I make it again the next day.
The best part was experimenting with flavors once I understood the basics. I froze fresh strawberry puree, churned out a raspberry sorbet, and even tested a frozen coffee drink that tasted like something from a specialty café.
What surprised me most was how forgiving the machine is with different consistencies. Even when my mixture wasn’t perfectly smooth, the Creami created an incredible texture that nobody would guess came from a home freezer.
Recipe Overview
- Recipe Name: Basic Ninja Creami Frozen Treat Base
- Servings: 4
- Prep Time: 10 minutes
- Freeze Time: 6 hours (or overnight)
- Total Time: 6 hours 10 minutes
- Course: Dessert
- Cuisine: American
- Calories per Serving: 180
Equipment You Will Need
- Ninja Creami machine
- Creami-compatible freezer bowl (comes with machine)
- Blender or food processor
- Measuring cups and spoons
- Whisk or stirring spoon
- Pour spout pitcher or mixing bowl
- Freezer with adequate space
Ingredients for Basic Ninja Creami Frozen Treat Base
- Whole milk: 1 cup
- Heavy cream: 1 cup
- Granulated sugar: 3/4 cup
- Vanilla extract: 2 teaspoons
- Egg yolks: 4 large
- Salt: 1/4 teaspoon
Ingredient Notes and Substitutions
- Whole milk provides the base richness and helps create a smooth texture when frozen. If you prefer a lighter option, use 2% milk, though the final product will be slightly less creamy.
- Heavy cream creates that luxurious soft-serve consistency by adding fat content. Non-dairy cream works as a substitute for dairy-free versions, with minimal texture difference.
- Granulated sugar sweetens the base and prevents excessive ice crystal formation. Honey or maple syrup can replace it one-to-one, adding distinct flavor notes.
- Vanilla extract flavors the base subtly without overpowering other tastes. Almond extract or bourbon work well as alternatives for different flavor profiles.
- Egg yolks create richness and improve texture by adding natural emulsifiers. You can skip them for a simpler recipe, though the texture will be icier.
- Salt brightens the overall flavor and balances sweetness. Omit it if you’re sensitive to sodium, but it does enhance taste.
How to Make Basic Ninja Creami Frozen Treat Base
Step 1: Heat the Milk and Cream
Pour 1 cup of whole milk and 1 cup of heavy cream into a saucepan and heat over medium heat until small bubbles form around the edges, about 5 minutes. You’re not boiling it, just warming it enough to infuse flavors and cook the eggs safely when you add them.
Step 2: Prepare the Egg Yolk Mixture
Whisk together 4 egg yolks and 3/4 cup granulated sugar in a separate bowl until the mixture becomes pale yellow and ribbony, roughly 3 minutes of whisking. This step incorporates air and ensures the sugar dissolves completely, creating a smoother final texture.
Step 3: Temper the Eggs
Slowly pour about 1/2 cup of the hot milk mixture into the egg yolk mixture while whisking constantly to prevent the eggs from scrambling. This process, called tempering, gradually raises the temperature of the eggs so they cook gently without curdling.
Step 4: Combine Mixtures
Pour the tempered egg mixture back into the saucepan with the remaining hot milk, whisking constantly as you pour. Continue whisking for another 2 minutes while the mixture heats gently, which fully cooks the eggs and creates a custard base.
Step 5: Strain the Custard
Pour the mixture through a fine-mesh strainer into a clean bowl to remove any cooked egg particles or lumps that might create graininess. This step is worth the extra minute because it guarantees silky smooth texture in your final product.
Step 6: Add Flavorings and Cool
Stir 2 teaspoons of vanilla extract and 1/4 teaspoon of salt into the cooled custard base. Place the bowl in an ice bath or refrigerator for at least 2 hours until the mixture is completely chilled, which makes freezing faster and more even.
Step 7: Pour Into Creami Bowl
Pour the chilled mixture into your Creami freezer bowl, filling it up to the line marked on the inside. Do not overfill, as the mixture expands slightly as it freezes and you need room for the blade to move freely.
Step 8: Freeze Completely
Place the filled bowl in the freezer for at least 6 hours, though overnight freezing is ideal for best results. The mixture needs to freeze solid throughout so the Creami blade can break it down into that perfect soft-serve texture.
Step 9: Assemble and Process
Remove the frozen bowl from the freezer and insert it into your Ninja Creami machine according to the manufacturer’s instructions. Select your desired setting (sorbet, slushi, or gelato mode depending on your machine) and press start to watch the magic happen.
Pro Tip: Keep your Creami bowl in the freezer at all times so it’s always ready to use. A properly frozen bowl makes the difference between smooth soft-serve and chunky results.
Tips for the Best Ninja Creami Frozen Treat
- Chill your base mixture completely before freezing so it freezes evenly without ice crystals forming on top. This extra step takes just a few hours but makes a noticeable texture difference.
- Fill your Creami bowl to the proper line, not higher or lower, for consistent processing and the best texture. Overfilling prevents the blade from working properly, while underfilling creates uneven results.
- Serve immediately after processing for the creamiest, silkiest texture. Soft-serve melts fast, so have your bowls ready and eat right away.
- Experiment with different liquid bases like fruit purees, coffee, or even cocktails once you master the basic technique. The Creami works with virtually any freezable liquid you want to throw at it.
- If your frozen mixture seems too hard to process, let it sit on the counter for 5 minutes before using the Creami. A slightly warmer surface layer helps the machine work more smoothly without forcing the motor.
- Clean your Creami bowl immediately after use while any residue is still soft and easy to wipe away. Letting it harden makes cleanup much harder and can damage the non-stick coating.
Common Mistakes to Avoid
- Skipping the tempering step with eggs leads to scrambled bits in your custard, which creates a grainy texture no amount of processing can fix. Always whisk the hot milk into eggs gradually, not the other way around.
- Freezing the mixture in a regular bowl instead of the Creami-specific container prevents proper processing and frustration ensues. The bowl’s shape and the way it holds the block is specifically designed for the blade mechanism.
- Not chilling the base before freezing creates large ice crystals that the Creami struggles to break down smoothly. A few hours in the fridge makes the difference between silky and icy.
- Overfilling or underfilling the Creami bowl throws off the machine’s balance and processing ability. Always fill to the marked line for the results the machine was designed to deliver.
- Processing a partially frozen mixture yields disappointing results because the blade can’t grip it properly. Wait until your mixture is rock solid before opening the freezer door.
Serving Suggestions
Scoop your fresh Creami creation into chilled bowls and serve it immediately with your favorite toppings. The possibilities for pairing flavors are truly endless and depend on what sounds good in the moment.
- Top with fresh berries, chocolate chips, and a drizzle of honey for a classic sundae vibe
- Sprinkle with crushed cookies, nuts, and a dollop of whipped cream for extra indulgence
- Serve alongside fresh fruit like peaches or mangoes to complement fruity frozen bases
- Dust with cocoa powder and serve with biscotti for an elegant dessert plate
- Create a float by pouring ginger ale or root beer over your soft-serve creation
Variations to Try
- Strawberry sorbet: Replace the cream with an additional cup of milk and blend 2 cups of fresh strawberries into the mixture before freezing for a refreshing, dairy-free option with bright fruit flavor.
- Coffee gelato: Brew 1 cup of strong espresso, cool it completely, and substitute it for 1 cup of the milk in the base for a rich coffee flavor that pairs beautifully with chocolate toppings.
- Salted caramel: Drizzle 1/2 cup of homemade or store-bought salted caramel sauce into the base before freezing, creating sweet and salty swirls throughout your soft-serve.
- Pistachio: Blend 1 cup of roasted, unsalted pistachios with 1/4 cup milk until smooth, strain it, and add the liquid to your base for a nutty, naturally colored frozen treat.
- Lavender honey: Infuse the warm milk with 2 tablespoons of dried culinary lavender for 15 minutes, strain, and add 1/4 cup of honey instead of granulated sugar for a floral, delicate flavor.
Dietary Adaptations
- Gluten-free: This base recipe is naturally gluten-free, so no substitutions needed for the base itself, though check any toppings or mix-ins for hidden gluten.
- Dairy-free: Substitute coconut cream and oat milk for the heavy cream and whole milk one-to-one, omit the egg yolks, and use coconut sugar for a fully plant-based version that still freezes beautifully.
- Vegan: Replace eggs with 1 tablespoon of cornstarch mixed with 2 tablespoons of water per egg yolk, use plant-based milk and cream, and use agave nectar instead of granulated sugar.
- Low-carb or keto: Replace sugar with monk fruit sweetener or erythritol at a 1:1 ratio and use full-fat coconut cream instead of heavy cream to keep carbs minimal while maintaining richness.
Storage and Reheating
Refrigerator
Store your Creami bowl covered with plastic wrap in the freezer, not the refrigerator, since thawing and refreezing damages the texture. The base mixture can be refrigerated for up to 3 days before freezing if you’re not ready to use it yet.
- Keep the frozen bowl at the coldest part of your freezer
- Cover tightly to prevent freezer burn and flavor absorption from other foods
- Do not transfer to a regular bowl or container once frozen
Freezer
A properly frozen Creami bowl stays fresh for about 1 month in the freezer before ice crystals start forming on the surface. Keep it in an airtight container or wrapped tightly in plastic wrap to prevent freezer burn.
- Store in the coldest part of your freezer away from the door
- Keep a dedicated space so the bowl doesn’t get jostled or damaged
- Rotate bowls if you make multiple batches to use oldest ones first
Reheating
Your Creami bowl never needs reheating since you process it straight from frozen. If you need to use the bowl again, simply scrape out any remaining frozen mixture and wash it before refilling.
- Let the bowl sit at room temperature for 10 minutes if the old mixture is stuck
- Wash with warm water and mild dish soap immediately after emptying
- Dry completely before returning to the freezer to prevent ice buildup
Nutrition Information
| Nutrient | Amount |
|---|---|
| Calories | 180 |
| Total Fat | 12g |
| Saturated Fat | 7g |
| Carbohydrates | 16g |
| Fiber | 0g |
| Sugar | 15g |
| Protein | 3g |
| Sodium | 85mg |
| Cholesterol | 95mg |
Nutritional values are estimates based on standard ingredients and serving sizes. Actual nutrition varies depending on your specific ingredients and how much you consume.
Frequently Asked Questions
Can I use regular ice cream instead of making a base?
Absolutely. Soften store-bought ice cream slightly, pour it into your Creami bowl, freeze it solid, and process it for a fresh soft-serve version in minutes. This is the fastest way to enjoy your Creami if you don’t want to make a base from scratch.
How long does it take to freeze the mixture solid?
Most bases freeze completely in 6 hours, though overnight freezing is ideal for best results. The exact time depends on your freezer temperature and the depth of the mixture in the bowl.
Can I make the base ahead of time and freeze it later?
Yes, the base mixture can be refrigerated for up to 3 days before you pour it into your Creami bowl and freeze. This makes meal prep easy if you want to have multiple flavors ready to process throughout the week.
What’s the difference between the gelato, sorbet, and slushi settings?
Gelato mode creates the creamiest, densest texture since it breaks down the frozen mixture slowly. Sorbet mode works best for fruit-based or non-dairy frozen drinks, while slushi mode creates a frozen drink texture similar to a snow cone.
Why is my soft-serve coming out icy instead of smooth and creamy?
Ice crystals form when the base wasn’t chilled before freezing or when the mixture wasn’t completely frozen solid. Make sure your base is refrigerated for at least 2 hours and frozen for at least 6 hours before processing.
Can I make frozen cocktails in my Creami?
Yes, pour your favorite cocktail into the bowl and freeze it the same way as any other mixture. Just remember that alcohol has a lower freezing point, so it may take longer to freeze solid, and the texture might be slightly less dense than cream-based options.
Final Thoughts
The Ninja Creami transforms frozen bases into café-quality soft-serve that tastes way better than anything you can grab at a ice cream shop. Once you nail the basic technique, you’ll find yourself experimenting with flavors and creating custom treats for your family all summer long.
Start with this simple vanilla base to learn how your machine works, then branch out into sorbets, coffee drinks, and anything else your freezer can handle. Your Creami will quickly become your favorite kitchen appliance, and homemade frozen treats will become a regular part of your dessert routine.
Basic Ninja Creami Frozen Treat Base
Transform a simple custard base into silky smooth soft-serve ice cream using your Ninja Creami machine. This versatile recipe creates restaurant-quality frozen treats at home with minimal effort and endless flavor possibilities.
- Ninja Creami machine
- Creami-compatible freezer bowl
- Blender or food processor
- Measuring cups and spoons
- Whisk or stirring spoon
- Pour spout pitcher or mixing bowl
- Saucepan
- Fine mesh strainer
Main
- 1 cup whole milk
- 1 cup heavy cream
- 3/4 cup granulated sugar
- 2 teaspoons vanilla extract
- 4 large egg yolks
- 1/4 teaspoon salt
- Pour 1 cup of whole milk and 1 cup of heavy cream into a saucepan and heat over medium heat until small bubbles form around the edges, about 5 minutes. Do not boil.
- Whisk together 4 egg yolks and 3/4 cup granulated sugar in a separate bowl until the mixture becomes pale yellow and ribbony, roughly 3 minutes of whisking.
- Slowly pour about 1/2 cup of the hot milk mixture into the egg yolk mixture while whisking constantly to temper the eggs and prevent scrambling.
- Pour the tempered egg mixture back into the saucepan with the remaining hot milk, whisking constantly as you pour. Continue whisking for another 2 minutes while the mixture heats gently.
- Pour the mixture through a fine-mesh strainer into a clean bowl to remove any cooked egg particles or lumps.
- Stir 2 teaspoons of vanilla extract and 1/4 teaspoon of salt into the custard base. Place the bowl in an ice bath or refrigerator for at least 2 hours until the mixture is completely chilled.
- Pour the chilled mixture into your Creami freezer bowl, filling it up to the line marked on the inside. Do not overfill.
- Place the filled bowl in the freezer for at least 6 hours or overnight until frozen solid throughout.
- Remove the frozen bowl from the freezer and insert it into your Ninja Creami machine according to manufacturer’s instructions. Select your desired setting and press start to process.
- Serve immediately for the creamiest, silkiest texture with your favorite toppings.
Chill your base mixture completely before freezing to prevent ice crystals. Fill the Creami bowl to the proper line for best results. If the frozen mixture seems too hard to process, let it sit on the counter for 5 minutes. Clean the Creami bowl immediately after use. The base mixture can be refrigerated for up to 3 days before freezing. Frozen bowl stays fresh for about 1 month in the freezer.