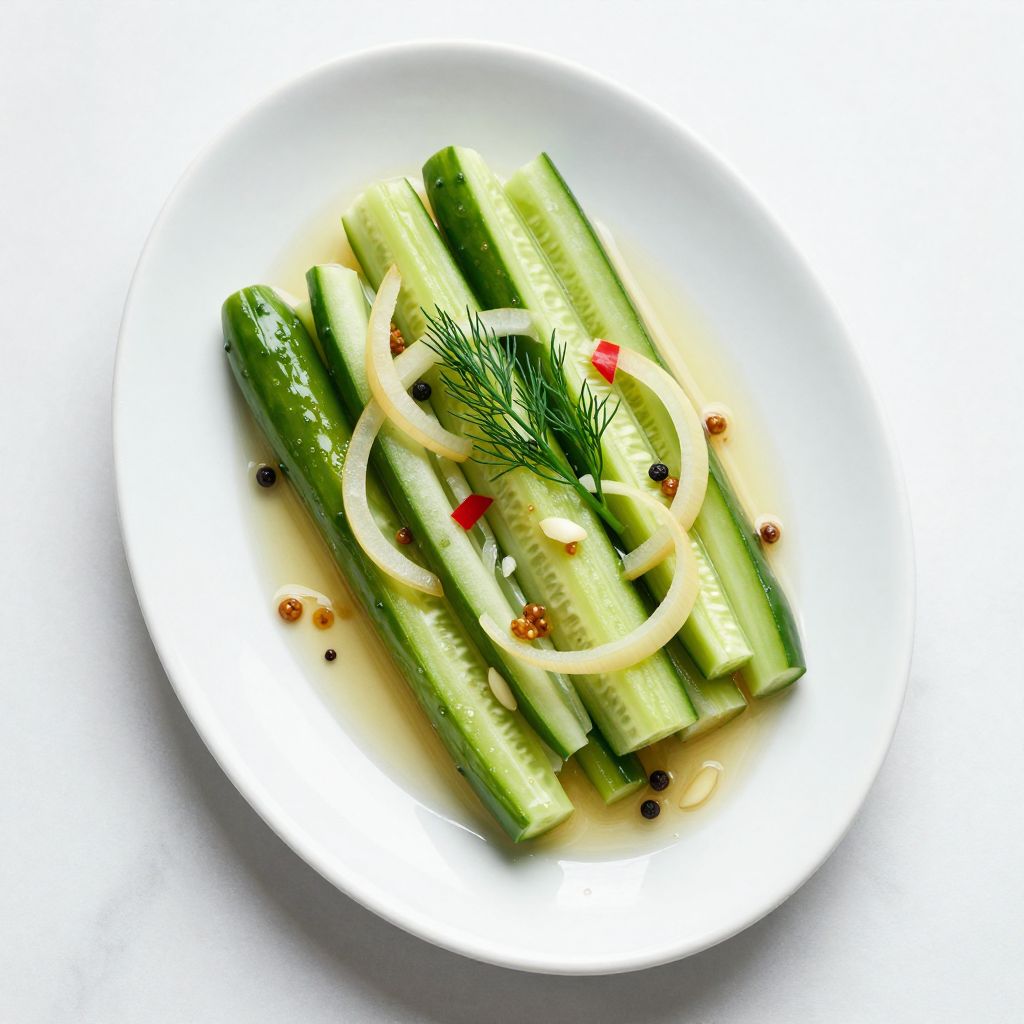
There’s something magical about biting into a crisp, tangy-sweet pickle that makes your taste buds wake up and pay attention. Sweet pickles are the kind of condiment that transforms a boring sandwich into something memorable, adds sparkle to a charcuterie board, and somehow disappears faster than you’d expect from a mason jar in the fridge.
This recipe delivers that perfect balance of sweetness and vinegar bite without any fuss. Unlike store-bought versions loaded with preservatives, homemade sweet pickles let you control the sugar and spices, so you get pure, clean flavor every time.
The best part? These pickles are ready to eat in just a few days, and they’re so easy that even a kitchen beginner can nail them on the first try.
Why You’ll Love This Recipe
Sweet pickles hit the sweet spot between homemade goodness and actual convenience. You’ll find yourself reaching for these again and again once you taste the difference.
- Ready to eat in 3 to 4 days, not weeks
- Made with just a handful of pantry staples you probably already own
- Perfectly crisp and crunchy with that addictive tangy-sweet flavor
- A gift-worthy jar that impresses anyone who loves pickled things
- Works with cucumbers, onions, or whatever vegetables you have on hand
My Experience Making This Recipe
I first made these pickles on a whim when my garden cucumbers started piling up faster than my family could eat them. Within three days, the aroma coming from my fridge was so good that my partner kept opening the jar just to sniff it.
The real surprise came when I tasted them. They were crisp, perfectly seasoned, and had that restaurant-quality texture that made me wonder why I’d wasted money on jarred pickles for so long.
Now I make a fresh batch every couple of weeks during cucumber season. I’ve also experimented with pickling onions, green beans, and even cauliflower using this exact method, and everything comes out fantastic.
Recipe Overview
- Recipe Name: Sweet Pickle Recipe
- Servings: 1 quart (about 8 servings)
- Prep Time: 15 minutes
- Cook Time: 5 minutes
- Total Time: 20 minutes (plus 3 to 4 days brining time)
- Course: Condiment or Snack
- Cuisine: American
- Calories per Serving: 45
Equipment You Will Need
- One clean quart-sized mason jar
- A medium saucepan
- A chef’s knife and cutting board
- A wooden spoon or non-metal utensil
- A measuring cup and measuring spoons
- A slotted spoon or tongs
- Paper towels or a clean kitchen towel
Ingredients for Sweet Pickles
- 2 pounds fresh cucumbers (pickling varieties work best, but regular cucumbers work too)
- 1 cup white vinegar (or apple cider vinegar for a slightly softer flavor)
- 3/4 cup granulated sugar
- 1/2 cup water
- 1 tablespoon kosher salt
- 1 teaspoon mustard seeds
- 1/2 teaspoon celery seeds
- 1/2 teaspoon black peppercorns
- 2 to 3 garlic cloves, smashed or sliced
- 1 small yellow onion, thinly sliced
- 1 fresh dill head or 1 teaspoon dried dill (optional but recommended)
- 1 small hot pepper or 1/4 teaspoon red pepper flakes (optional, for a hint of heat)
Ingredient Notes and Substitutions
- Pickling cucumbers: These small varieties have fewer seeds and thinner skins, making them ideal for crisp pickles. English cucumbers or even sliced regular cucumbers work if you can’t find pickling varieties, though they’ll be slightly softer.
- White vinegar: The classic choice for pickles because it’s sharp and clean. Apple cider vinegar adds a rounder, slightly malty flavor that some people prefer, though it may brown the pickles slightly.
- Granulated sugar: Creates a clear brine and consistent sweetness. Brown sugar or honey will work but will darken the brine and create a different flavor profile.
- Kosher salt: Dissolves evenly and won’t cloud the brine like iodized salt. Sea salt works fine as a substitute with no real downside.
- Fresh dill: Adds classic pickle flavor and subtle grassy notes. If you don’t have fresh dill, use 1 teaspoon of dried dill or skip it entirely.
- Garlic and onion: Aromatics that infuse the brine with depth. Skip them if you prefer a plainer pickle, or double them for more assertive flavor.
How to Make Sweet Pickles
Step 1: Prepare Your Cucumbers
Rinse your fresh cucumbers under cool running water and pat them dry thoroughly with paper towels or a kitchen towel. Wet cucumbers won’t pack into the jar as efficiently, and any surface dirt can cloud your brine or introduce unwanted bacteria.
Trim off the blossom end (the end opposite the stem) because it contains enzymes that can make pickles soft. Slice the cucumbers into spears, rounds, or sticks, depending on your preference.
Step 2: Prepare the Jar and Flavorings
Wash your mason jar with hot soapy water and rinse it thoroughly, then set it upside down on a clean towel to air dry for a few minutes. Place the smashed garlic cloves, sliced onion, dill head, mustard seeds, celery seeds, peppercorns, and hot pepper (if using) directly into the bottom of the jar.
This arrangement lets the aromatics infuse the brine as it cools, creating deeper flavor throughout your pickles.
Step 3: Pack the Cucumbers
Firmly but gently pack your cucumber pieces into the jar on top of the aromatics, filling it until the cucumbers reach about half an inch below the rim. Leave just enough headspace so the hot brine can cover everything without overflowing.
Packing them snugly helps them stay submerged as the brine cools and prevents them from floating up and drying out on top.
Step 4: Make the Pickling Brine
Pour the white vinegar, granulated sugar, water, and kosher salt into your saucepan and bring the mixture to a boil over medium-high heat. Stir occasionally so the sugar dissolves completely and the salt distributes evenly.
The salt and sugar need to fully dissolve before you pour the brine over the cucumbers, or you’ll end up with undissolved crystals settling at the bottom of the jar.
Step 5: Pour the Hot Brine
Carefully pour the hot brine over the packed cucumbers until they’re completely covered, leaving about half an inch of headspace at the top. Work slowly to avoid sloshing hot liquid everywhere.
Submerging the cucumbers completely prevents the exposed parts from softening or discoloring due to air exposure.
Step 6: Cool the Jar
Set the filled jar on your kitchen counter and let it cool to room temperature, which takes about 1 to 2 hours. You’ll notice the brine becoming clearer as it cools.
Cooling gradually helps the flavors meld together and allows the cucumbers to absorb the brine more evenly.
Step 7: Refrigerate
Once cooled, cover the jar and move it to the refrigerator. The pickles will be ready to eat after 3 to 4 days, though they develop even deeper flavor if you wait a full week.
Refrigeration stops any fermentation and keeps the pickles crisp for several weeks.
Step 8: Taste and Adjust (Optional)
After 3 days, open the jar and taste a pickle slice. If you want them sweeter, you can add a bit more sugar dissolved in a small amount of vinegar; if you want them tangier, add a splash more vinegar.
This optional step lets you fine-tune the flavor to your exact preference once you know what you’re working with.
Pro Tip: Keep the jar in the coldest part of your fridge away from the door, where temperature fluctuations can make pickles soften.
Tips for the Best Sweet Pickles
- Use fresh, firm cucumbers picked within a day or two of pickling; older cucumbers absorb the brine less effectively and may turn mushy.
- Always remove the blossom end of the cucumber, which contains softening enzymes that break down the cell walls.
- Keep your jars and utensils scrupulously clean to prevent mold or unwanted flavors from developing.
- For extra crispness, add a grape leaf, oak leaf, or 1/2 teaspoon of calcium chloride to the jar before packing the cucumbers.
- If you like a spicier pickle, add a dried red chili, fresh jalapeño slices, or increase the red pepper flakes.
- Experiment with spices: try adding cinnamon sticks, cloves, or allspice berries for a more complex flavor.
Common Mistakes to Avoid
- Using old or soft cucumbers that absorb too much brine and turn mushy before you eat them. Start with fresh, farm-stand quality cukes whenever possible.
- Leaving the blossom end on the cucumber, which releases enzymes that soften your pickles no matter how good your brine is.
- Not submerging the cucumbers fully, which causes the exposed tops to discolor and soften from air exposure and mold growth.
- Adding too much salt or sugar to the brine, which can overpower the pickle flavor. Stick to the recipe ratios unless you deliberately want a sweeter or saltier result.
- Opening the jar constantly out of excitement to check on them, which introduces air and bacteria and disrupts the brining process.
Serving Suggestions
Sweet pickles pair beautifully with grilled meats, pulled pork sandwiches, and charcuterie boards. They’re also fantastic on hot dogs, burgers, tacos, and alongside barbecue as a palate cleanser.
- Chop them and mix into potato salad or coleslaw for added crunch and brightness
- Layer them on a charcuterie board between cheeses, cured meats, and bread
- Serve alongside barbecued ribs or pulled pork as a refreshing counterpoint
- Top tacos, fish sandwiches, or pulled pork with a few slices for tangy-sweet crunch
- Pair with aged cheddar and sharp cheeses on a cheese board
Variations to Try
- Spicy Sweet Pickles: Add 2 to 3 dried red chilies, 1 teaspoon of red pepper flakes, or fresh jalapeño slices to bring heat that balances the sweetness beautifully.
- Bread and Butter Pickles: Increase the sugar to 1 cup, decrease the salt to 1/2 tablespoon, and add 1/2 teaspoon of turmeric for a golden color and slightly different flavor profile.
- Dill Pickle Version: Double the fresh dill or use 2 teaspoons of dried dill, add 2 more garlic cloves, and reduce the sugar to 1/2 cup for a tangier, herbier pickle.
- Quick Onion Pickles: Replace the cucumbers with 2 pounds of thinly sliced yellow or red onions; they’ll be ready in just 1 to 2 days and work beautifully on burgers and tacos.
- Mixed Vegetable Pickles: Combine cucumbers with green beans, cauliflower florets, carrots, and bell peppers using the same brine; everything pickles evenly and creates a colorful jar.
Dietary Adaptations
- Gluten-Free: This recipe is naturally gluten-free as written; simply ensure your mustard seeds and other spices come from a certified gluten-free source if you have celiac disease.
- Dairy-Free: Sweet pickles contain no dairy, so they’re completely dairy-free and suitable for anyone avoiding milk products.
- Vegan and Vegetarian: This recipe is both vegan and vegetarian; it uses only plant-based ingredients with no animal products at all.
- Low-Carb or Keto: Reduce the sugar to 1/4 cup and use a keto-approved sweetener like monk fruit or erythritol instead; the taste will be less sweet but still enjoyable.
Storage and Reheating
Refrigerator
Store your sweet pickles in a sealed mason jar in the refrigerator for up to 3 months. The cold temperature preserves crispness and prevents fermentation.
- Keep the jar in the coldest part of your fridge, away from the door where temperatures fluctuate
- If the brine level drops, you can top it off with a mixture of equal parts vinegar and water
- Always use clean utensils when removing pickles to prevent contamination
Freezer
Sweet pickles don’t freeze well because they lose their crisp texture once thawed. Stick with refrigerator storage for the best results.
- The texture becomes mushy and unpleasant after freezing
- Stick to making smaller batches you’ll eat within a few weeks
Reheating
Sweet pickles are meant to be eaten cold and should never be heated. If you want to use them in a cooked dish, add them at the very end after cooking is finished.
- Add pickles to hot sandwiches just before serving to keep them crisp
- Toss into warm potato salad after cooking the potatoes but before adding dressing
- Top hot dogs or burgers right before eating to maintain crunchiness
Nutrition Information
| Nutrient | Amount |
|---|---|
| Calories | 45 |
| Total Fat | 0.2g |
| Saturated Fat | 0g |
| Carbohydrates | 11g |
| Fiber | 0.5g |
| Sugar | 10g |
| Protein | 0.3g |
| Sodium | 620mg |
| Cholesterol | 0mg |
These values are approximate and based on standard ingredients measured by volume. Actual nutrition may vary slightly depending on your specific ingredients and how much brine clings to each pickle piece.
Frequently Asked Questions
Can I use regular slicing cucumbers instead of pickling varieties?
Yes, you can use regular cucumbers, but they’ll be slightly softer than pickles made with pickling varieties because they contain more water and seeds. The flavor will still be delicious, just with a less crisp texture.
How long do sweet pickles last in the fridge?
Sweet pickles stored in a sealed jar in the refrigerator last for 3 months or even longer. They remain safe to eat as long as the jar stays sealed and there are no signs of mold or cloudiness.
Can I make these pickles in advance and store them?
Absolutely, and they actually taste better if made a week or two ahead. Store them in a sealed jar in the fridge and they’re ready whenever you need a quick condiment or snack.
Why did my pickles turn soft?
Soft pickles usually result from old cucumbers, not removing the blossom end, or keeping the jar at room temperature instead of the fridge. Always start with fresh cukes, trim the blossom end, and refrigerate immediately after brining.
Can I reuse the brine for a second batch?
You can reuse the brine once by straining out the old spices and cucumbers, then heating it briefly before adding fresh cucumbers. After that, the brine becomes too diluted and weak, so start fresh for best results.
What if I want my pickles sweeter or more sour?
Taste your pickles after 3 days and adjust to preference: add dissolved sugar for sweetness or extra vinegar for tanginess. You can make minor tweaks without completely remaking the recipe.
Do I need to process the jars in a water bath for shelf stability?
No, these refrigerator pickles don’t require water bath canning. Store them in the fridge and eat them within 3 months for the best flavor and texture.
Final Thoughts
Making your own sweet pickles is one of those kitchen skills that feels fancy but is honestly just as simple as boiling water and waiting a few days. Once you taste the crisp, clean flavor of homemade pickles against the bland
Sweet Pickle Recipe
This homemade sweet pickle recipe delivers the perfect balance of sweetness and vinegar bite with crisp, crunchy texture. Ready to eat in just 3 to 4 days, these refrigerator pickles are made with simple pantry staples and require no canning process. They’re perfect for sandwiches, burgers, charcuterie boards, and as a tangy-sweet snack.
- One clean quart-sized mason jar
- A medium saucepan
- A chef’s knife and cutting board
- A wooden spoon or non-metal utensil
- A measuring cup and measuring spoons
- A slotted spoon or tongs
- Paper towels or a clean kitchen towel
Main Ingredients
- 2 pounds fresh cucumbers (pickling varieties work best, but regular cucumbers work too)
- 1 cup white vinegar (or apple cider vinegar for a slightly softer flavor)
- 3/4 cup granulated sugar
- 1/2 cup water
- 1 tablespoon kosher salt
- 1 teaspoon mustard seeds
- 1/2 teaspoon celery seeds
- 1/2 teaspoon black peppercorns
- 2 to 3 garlic cloves (smashed or sliced)
- 1 small yellow onion (thinly sliced)
- 1 fresh dill head or 1 teaspoon dried dill (optional but recommended)
- 1 small hot pepper or 1/4 teaspoon red pepper flakes (optional, for a hint of heat)
- Rinse your fresh cucumbers under cool running water and pat them dry thoroughly with paper towels or a kitchen towel. Trim off the blossom end (the end opposite the stem). Slice the cucumbers into spears, rounds, or sticks, depending on your preference.
- Wash your mason jar with hot soapy water and rinse it thoroughly, then set it upside down on a clean towel to air dry for a few minutes. Place the smashed garlic cloves, sliced onion, dill head, mustard seeds, celery seeds, peppercorns, and hot pepper (if using) directly into the bottom of the jar.
- Firmly but gently pack your cucumber pieces into the jar on top of the aromatics, filling it until the cucumbers reach about half an inch below the rim. Leave just enough headspace so the hot brine can cover everything without overflowing.
- Pour the white vinegar, granulated sugar, water, and kosher salt into your saucepan and bring the mixture to a boil over medium-high heat, about 5 minutes. Stir occasionally so the sugar dissolves completely and the salt distributes evenly.
- Carefully pour the hot brine over the packed cucumbers until they’re completely covered, leaving about half an inch of headspace at the top. Work slowly to avoid sloshing hot liquid everywhere.
- Set the filled jar on your kitchen counter and let it cool to room temperature, which takes about 1 to 2 hours. You’ll notice the brine becoming clearer as it cools.
- Once cooled, cover the jar and move it to the refrigerator. The pickles will be ready to eat after 3 to 4 days, though they develop even deeper flavor if you wait a full week.
- After 3 days, open the jar and taste a pickle slice. If you want them sweeter, you can add a bit more sugar dissolved in a small amount of vinegar; if you want them tangier, add a splash more vinegar. This optional step lets you fine-tune the flavor to your exact preference.
Store your sweet pickles in a sealed mason jar in the refrigerator for up to 3 months. Keep the jar in the coldest part of your fridge, away from the door where temperatures fluctuate. Always use clean utensils when removing pickles to prevent contamination. If the brine level drops, you can top it off with a mixture of equal parts vinegar and water. Sweet pickles don’t freeze well because they lose their crisp texture once thawed. For extra crispness, add a grape leaf, oak leaf, or 1/2 teaspoon of calcium chloride to the jar before packing the cucumbers.