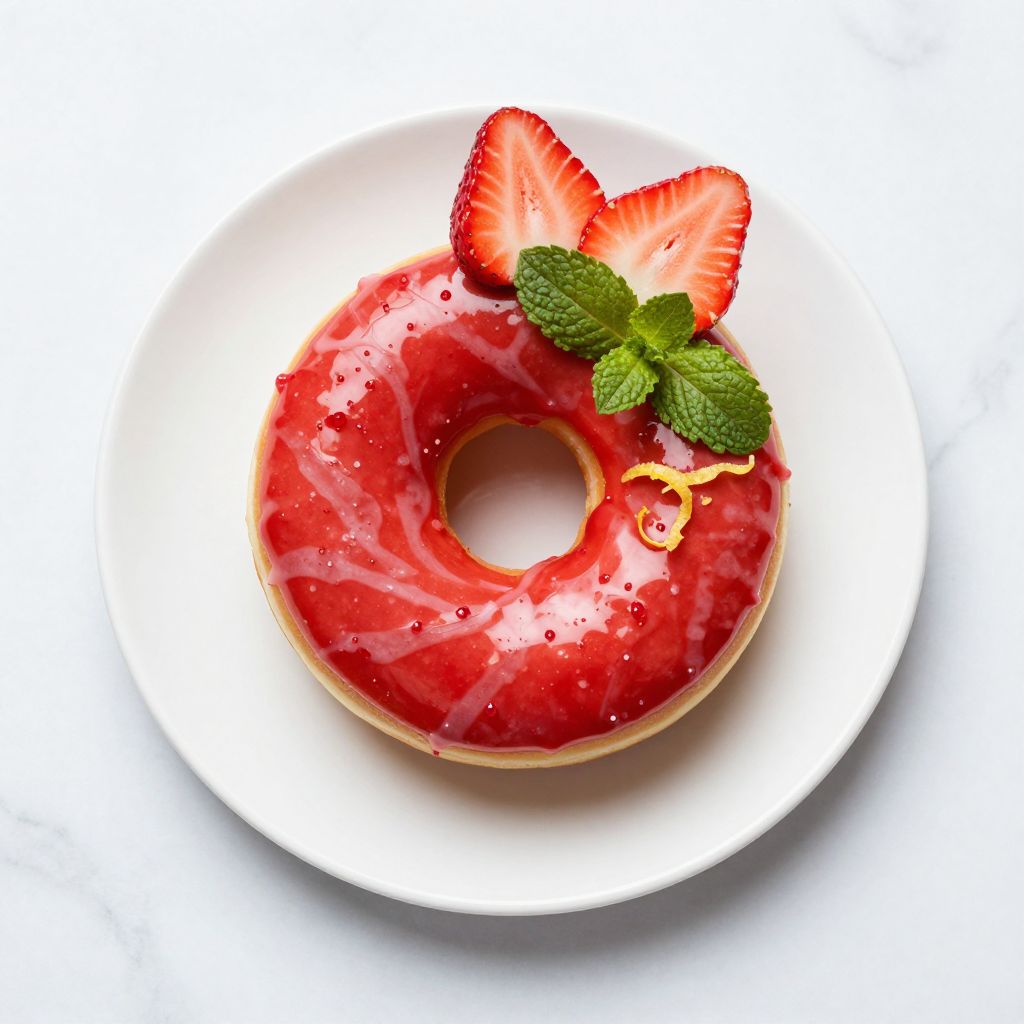
There’s something magical about that first bite of a pastry glazed with strawberry glaze, when the glossy, jewel-toned coating catches the light and the berry sweetness hits your tongue. This recipe delivers that bakery-quality finish without requiring culinary school credentials or an arsenal of specialty equipment.
A homemade strawberry glaze beats store-bought versions by miles because you control the sugar level, fruit intensity, and glossiness. Whether you’re topping cheesecakes, donuts, tarts, or scones, this versatile glaze transforms ordinary baked goods into something that looks and tastes like it came from a professional kitchen.
What makes this recipe shine is the balance between fresh strawberry flavor and a silky-smooth texture that sets properly without cracking. You’ll have a stunning glaze ready in under 15 minutes that keeps people coming back for seconds.
Why You’ll Love This Recipe
This strawberry glaze checks all the boxes for home bakers who want impressive results without headaches. Here’s what sets it apart from other glazes you’ve tried:
- Quick to make, with active prep time under 10 minutes and minimal equipment needed
- Fresh strawberry flavor shines through without any artificial aftertaste or chemical notes
- Creates a glossy, smooth finish that looks professionally done every single time
- Works beautifully on dozens of different desserts and baked goods
- Sets up perfectly without cracking, weeping, or becoming rock-hard
My Experience Making This Recipe
I stumbled onto this glaze recipe while desperately trying to rescue a batch of plain donuts for a morning gathering. The first batch I made turned out so silky and vibrant that guests kept asking where I’d bought them from a bakery.
The smell alone when the strawberries hit the heat is incredible, filling your kitchen with that bright, jammy aroma. I’ve made this glaze at least 20 times now on everything from pound cake to puff pastry, and it performs flawlessly every time.
What surprised me most was how forgiving this recipe is if you’re slightly off on measurements or cooking time. Even small tweaks in technique still yield a gorgeous glaze that tastes amazing, which takes the pressure off perfection.
Recipe Overview
- Recipe Name: Strawberry Glaze
- Servings: Makes about 1 cup of glaze (enough for 12 to 16 pastries)
- Prep Time: 5 minutes
- Cook Time: 8 to 10 minutes
- Total Time: 15 minutes
- Course: Topping/Glaze
- Cuisine: American/French-inspired
- Calories per Serving: 45 calories per tablespoon
Equipment You Will Need
- One medium saucepan with a heavy bottom
- Wooden spoon or silicone spatula for stirring
- Fine mesh strainer or sieve
- Small whisk
- Instant read thermometer (optional but helpful)
- Measuring cups and spoons
- Small mixing bowl for cornstarch slurry
Ingredients for Strawberry Glaze
- Fresh strawberries: 1 pound (about 16 ounces), hulled and halved
- Granulated sugar: 1/2 cup
- Lemon juice: 2 tablespoons, freshly squeezed
- Cornstarch: 1 tablespoon
- Water: 2 tablespoons, room temperature
- Vanilla extract: 1/4 teaspoon (optional but recommended)
- Pinch of salt: just 1/8 teaspoon
Ingredient Notes and Substitutions
- Fresh strawberries: Frozen strawberries (thawed) work in a pinch, though fresh ones yield better color and texture. If using frozen, reduce the cooking time by 1 to 2 minutes since they release liquid faster.
- Granulated sugar: Adjust to 1/3 cup if you prefer a less sweet glaze, or bump it to 2/3 cup for extra sweetness. Caster sugar dissolves slightly faster but granulated works perfectly fine.
- Lemon juice: The acid brightens strawberry flavor and prevents the glaze from tasting one-dimensional. Lime juice offers a tropical twist but use the same amount.
- Cornstarch: This creates the smooth, glossy texture that coats beautifully without being gluey. Arrowroot powder works as a one-to-one substitute for a slightly cleaner taste.
- Vanilla extract: Adds depth without overpowering the strawberry, though you can skip it if you prefer pure berry flavor. Almond extract (use 1/8 teaspoon only) offers an interesting variation.
How to Make Strawberry Glaze
Step 1: Prepare Your Strawberries
Hull your fresh strawberries by removing the green tops and white core, then cut them in half or into quarters depending on their size. You want roughly uniform pieces so they cook at the same rate and break down evenly into the glaze.
Step 2: Combine Strawberries and Sugar
Add your prepared strawberries and granulated sugar into a medium saucepan over medium heat. Stir gently for the first minute or two until the sugar starts to dissolve and the strawberries release their juice.
Step 3: Bring to a Gentle Boil
Once the mixture is warm and the sugar has mostly dissolved, increase the heat slightly and bring it to a gentle boil. You should see bubbles breaking the surface consistently, but avoid a rolling boil which can cause too much evaporation and make the glaze overly thick.
Step 4: Add Lemon Juice and Salt
Stir in your freshly squeezed lemon juice and a tiny pinch of salt to brighten the strawberry flavor and balance the sweetness. The acid prevents the glaze from tasting flat or cloying, which is the secret many home cooks miss.
Step 5: Prepare Your Cornstarch Slurry
In a small bowl, whisk together 1 tablespoon of cornstarch with 2 tablespoons of room temperature water until completely smooth with no lumps. This slurry thickens the glaze without creating a cloudy or starchy appearance.
Step 6: Thicken the Mixture
Slowly pour your cornstarch slurry into the simmering strawberry mixture while stirring constantly with a wooden spoon or silicone spatula. Keep stirring for 1 to 2 minutes until the glaze thickens noticeably and the cloudiness from the cornstarch clears, leaving a transparent, glossy coating.
Step 7: Cook Until Set Point
Continue simmering for another 1 to 2 minutes after the glaze clears to ensure the cornstarch fully activates and the consistency is perfect. You’re looking for a texture that coats the back of a spoon and slowly runs off when tilted, not a thin syrup and not a thick jam.
Step 8: Strain and Cool Slightly
Remove the saucepan from heat and carefully pour the glaze through a fine mesh strainer into a clean bowl, pressing the strawberry solids gently with the back of a spoon to extract maximum flavor and juice. Stir in your vanilla extract if using, then let the glaze cool for 5 to 10 minutes before using so it doesn’t slide right off your baked goods.
Pro Tip: The glaze thickens as it cools, so if it seems slightly too thin when warm, resist the urge to add more cornstarch; give it time and it will reach the perfect consistency for coating.
Tips for the Best Strawberry Glaze
- Use ripe, flavorful strawberries because the quality of your fruit directly impacts how delicious the glaze tastes. Underripe berries won’t deliver enough sweetness or color, making the final glaze pale and lackluster.
- Don’t skip the straining step because small pulp particles make the glaze look chunky rather than smooth and professional. A few seconds of pressure with a spoon captures the flavor while removing solids.
- Apply the glaze when it’s still warm but not piping hot, as this gives you the best coating without the glaze sliding immediately off your baked goods. Test the temperature on your wrist like you would for a baby’s bottle.
- Make the glaze no more than a few hours before you plan to use it for the brightest flavor and most vibrant color. It keeps its glossy appearance longer when applied to items that are already at room temperature.
- If your glaze becomes too thick after cooling, warm it gently over low heat for 30 seconds while stirring, adding a few drops of water if needed. This happens when the cornstarch continues to set, and gentle reheating reverses the process beautifully.
Common Mistakes to Avoid
- Cooking the strawberries for too long, which breaks them down into mush and causes the glaze to darken and taste slightly cooked rather than fresh. Keep the cooking time between 8 to 10 minutes total.
- Skipping the strainer because you think the texture doesn’t matter, resulting in a rustic-looking glaze full of pulp particles instead of a smooth, glossy finish. Professional-looking glazes are always strained.
- Adding cornstarch directly to the hot strawberry mixture without making a slurry first, creating lumps that ruin the smooth texture. Always mix cornstarch with cold liquid first to prevent clumping.
- Using frozen strawberries without thawing them first, which adds unexpected liquid and throws off your cooking time and final consistency. Thaw them first and drain excess liquid when possible.
- Applying the glaze to hot pastries that immediately melt the topping or cause it to slide off, wasting your beautiful work. Always let baked goods cool to at least room temperature first.
Serving Suggestions
This strawberry glaze transforms an endless variety of desserts into show-stopping treats that look bakery-quality. Use it generously on anything that benefits from bright berry flavor and a glossy finish.
- Drizzle over classic vanilla cheesecake for an elegant, restaurant-style presentation
- Top glazed donuts or cake donuts for a vibrant, professional-looking finish
- Coat fresh fruit tarts or tartlets filled with pastry cream and fresh berries
- Swirl into or drizzle across plain pound cake, angel food cake, or vanilla sponge cake
- Spoon over fresh whipped cream and pound cake for a simple yet sophisticated parfait
Variations to Try
- Strawberry Balsamic Glaze: Add 1 tablespoon of quality balsamic vinegar instead of lemon juice for a sophisticated, slightly tangy twist that pairs beautifully with chocolate desserts. The balsamic adds depth and complexity without overwhelming the strawberry.
- White Chocolate Strawberry Glaze: Stir in 2 ounces of melted white chocolate at the end of cooking for a creamier texture and subtle vanilla notes. This variation works wonderfully on delicate pastries and pairs perfectly with raspberry or almond flavors.
- Champagne Strawberry Glaze: Replace the water in your cornstarch slurry with 2 tablespoons of dry champagne or prosecco for a luxurious, slightly floral twist. This elevated version is perfect for special occasions and fancy desserts.
- Strawberry Mint Glaze: Add 4 to 5 fresh mint leaves to the simmering glaze and remove them before straining for a refreshing herbal note. Mint brightens strawberry flavor naturally and looks beautiful when you add a small mint leaf as garnish.
- Spiced Strawberry Glaze: Add a pinch of ground cinnamon, nutmeg, or a tiny pinch of black pepper to the finished glaze for warmth and complexity. Spices enhance rather than mask the berry flavor when used with a light hand.
Dietary Adaptations
- Gluten-Free: This recipe is naturally gluten-free since it contains no flour or wheat products, making it safe for celiac or gluten-sensitive guests. Apply it to any gluten-free baked good with confidence.
- Dairy-Free: Strawberry glaze contains no dairy ingredients, so it works perfectly on vegan pastries, dairy-free cakes, or any egg-free baked goods. The recipe is fully plant-based as written.
- Vegan/Vegetarian: This recipe is automatically vegan and vegetarian since it’s made entirely from plant-based strawberries, sugar, and cornstarch. No modifications needed whatsoever.
- Low-Carb/Keto: Replace granulated sugar with an equal amount of erythritol or monk fruit sweetener and reduce the cornstarch to 1 teaspoon. The glaze will be thinner and less glossy, but still tasty for low-carb diets.
Storage and Reheating
Refrigerator
Store leftover glaze in an airtight container in the refrigerator for up to 5 days. The texture thickens significantly when cold, which is actually helpful for preventing it from sliding off pastries.
- Reheat gently over low heat for 30 to 45 seconds, stirring constantly, to restore a pourable consistency
- Add a few drops of water if the glaze seems too thick after reheating
- Never microwave the glaze, as this causes uneven heating and potential hot spots
Freezer
Strawberry glaze freezes beautifully for up to 3 months in an airtight, freezer-safe container. Freezing preserves the bright strawberry flavor and glossy texture perfectly.
- Thaw in the refrigerator overnight before using, then reheat gently as described above
- Avoid refreezing the glaze once it’s been thawed
- Label your container with the date so you know when it was frozen
Reheating
Always reheat over low heat while stirring constantly to prevent the glaze from breaking or becoming too thick. A quick 30-second warm-up usually restores the perfect consistency for applying to your baked goods.
- Use a double boiler method if you’re nervous about direct heat damaging the glaze
- Stir in water one teaspoon at a time if reheating makes the glaze too thick
- Never let the glaze come to a boil when reheating, as this causes it to break down
Nutrition Information
| Nutrient | Amount |
|---|---|
| Calories | 45 |
| Total Fat | 0 g |
| Saturated Fat | 0 g |
| Carbohydrates | 11 g |
| Fiber | 0.3 g |
| Sugar | 10 g |
| Protein | 0.1 g |
| Sodium | 20 mg |
| Cholesterol | 0 mg |
This nutritional information is calculated per tablespoon of glaze and is based on standard USDA ingredient data. Values may vary depending on the specific brands and ripeness level of your strawberries.
Frequently Asked Questions
Can I use frozen strawberries instead of fresh ones?
Yes, frozen strawberries work perfectly as long as you thaw them first and drain off the excess liquid. The cooking time might be slightly shorter since frozen berries are already partially broken down.
How do I prevent my glaze from becoming too thick?
The glaze thickens considerably as it cools, so make it slightly thinner than you think you need when it’s hot. If it becomes too thick after cooling, simply warm it gently over low heat and stir in a splash of water.
Can I make this glaze ahead of time?
Absolutely, you can make it up to 3 days ahead and store it in the refrigerator in an airtight container. Reheat gently before using, and the flavor and appearance will be just as beautiful as freshly made glaze.
What if my glaze is lumpy after adding the cornstarch?
Lumps happen when cornstarch isn’t mixed with cold water first before adding to hot liquid. Pour the lumpy glaze through a fine mesh strainer immediately to remove the lumps, then heat it gently again if needed.
Can I use this glaze on warm pastries right out of the oven?
It’s best to wait until pastries cool to at least room temperature before glazing, as warm items cause the glaze to slide off rather than coat nicely. If you must glaze warm pastries, chill the glaze in the refrigerator for 15 minutes first.
Does this glaze work on chocolate cakes and desserts?
Strawberry glaze looks and tastes stunning on chocolate cakes, brownies, and chocolate tarts because the brightness of the berry cuts through the richness. The contrast between tart strawberry and rich chocolate is actually a classic pairing in professional patisseries.
Final Thoughts
This strawberry glaze recipe is proof that you don’t need fancy ingredients or complex techniques to create bakery-quality results in your own kitchen. The combination of fresh strawberries, a touch of lemon, and proper thickening creates a glaze that looks and tastes professional every single time.
Strawberry Glaze

This homemade strawberry glaze delivers bakery-quality results with a glossy, jewel-toned finish and fresh berry flavor. Ready in under 15 minutes, it creates a smooth, professional coating that sets perfectly without cracking on cheesecakes, donuts, tarts, and more.
- Medium saucepan with heavy bottom
- Wooden spoon or silicone spatula
- Fine mesh strainer or sieve
- Small whisk
- Measuring cups and spoons
- Small mixing bowl
Main
- 1 pound about 16 ounces fresh strawberries, hulled and halved
- 1/2 cup granulated sugar
- 2 tablespoons lemon juice (freshly squeezed)
- 1 tablespoon cornstarch
- 2 tablespoons water (room temperature)
- 1/4 teaspoon vanilla extract (optional but recommended)
- 1/8 teaspoon salt
- Hull your fresh strawberries by removing the green tops and white core, then cut them in half or into quarters depending on their size for uniform pieces.
- Add prepared strawberries and granulated sugar into a medium saucepan over medium heat. Stir gently for 1 to 2 minutes until the sugar starts to dissolve and the strawberries release their juice.
- Increase the heat slightly and bring the mixture to a gentle boil with bubbles breaking the surface consistently, avoiding a rolling boil.
- Stir in the freshly squeezed lemon juice and salt to brighten the strawberry flavor and balance the sweetness.
- In a small bowl, whisk together 1 tablespoon of cornstarch with 2 tablespoons of room temperature water until completely smooth with no lumps.
- Slowly pour the cornstarch slurry into the simmering strawberry mixture while stirring constantly. Keep stirring for 1 to 2 minutes until the glaze thickens noticeably and the cloudiness clears, leaving a transparent, glossy coating.
- Continue simmering for another 1 to 2 minutes after the glaze clears to ensure the cornstarch fully activates. The consistency should coat the back of a spoon and slowly run off when tilted.
- Remove the saucepan from heat and carefully pour the glaze through a fine mesh strainer into a clean bowl, pressing the strawberry solids gently with the back of a spoon to extract maximum flavor and juice.
- Stir in vanilla extract if using, then let the glaze cool for 5 to 10 minutes before using so it doesn’t slide right off your baked goods.
The glaze thickens as it cools, so if it seems slightly too thin when warm, resist the urge to add more cornstarch. Apply the glaze when it’s still warm but not piping hot for the best coating. Store leftover glaze in an airtight container in the refrigerator for up to 5 days or freeze for up to 3 months. Reheat gently over low heat for 30 to 45 seconds, adding a few drops of water if needed.