The first time I seared ahi tuna at home, I nearly convinced myself I’d opened a high-end restaurant in my kitchen. That moment when the sesame crust hits the hot pan and releases its nutty aroma changed everything I thought about weeknight cooking.
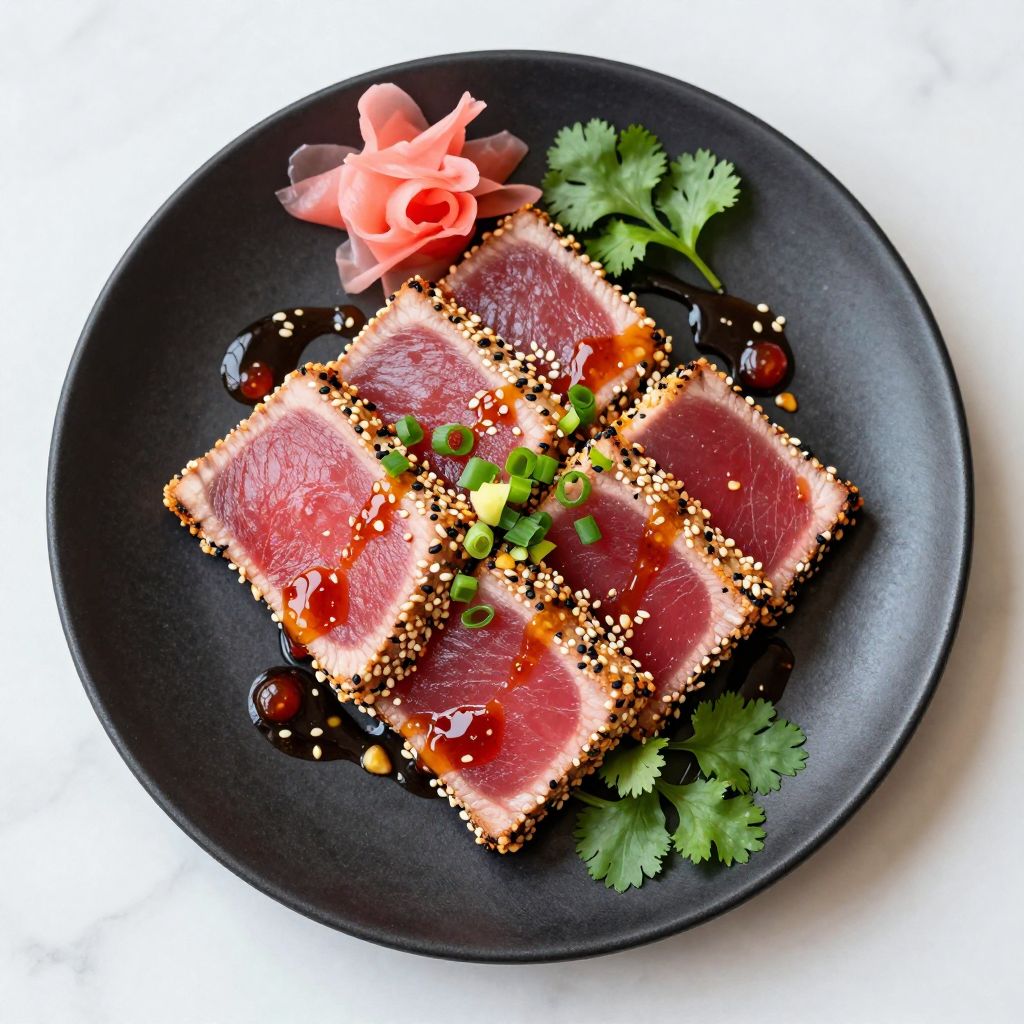
This seared ahi tuna recipe delivers restaurant-quality results in less than 15 minutes. The contrast between the perfectly crusted exterior and the rare, ruby-red center creates a texture experience that feels both luxurious and surprisingly simple to achieve.
You’ll master a technique that impresses guests without the stress of complicated prep work. The key lies in quality fish and a screaming-hot pan, nothing more.
Why You’ll Love This Recipe
This recipe turns premium ingredients into an elegant meal without demanding hours in the kitchen. The technique works every single time once you understand the basics.
- Ready in under 15 minutes from start to finish
- Minimal ingredients let the fish flavor shine through
- Looks like something from a fancy steakhouse menu
- High in protein and healthy omega-3 fatty acids
- Versatile enough for salads, bowls, or plated dinners
My Experience Making This Recipe
The first attempt taught me that patience with the searing process matters more than anything else. I learned to resist the urge to move the tuna around, letting the crust form naturally over high heat.
My kitchen filled with the toasted sesame aroma within seconds of the fish hitting the pan. The sizzle was loud and confident, which initially startled me but became my signal that everything was going right.
When I sliced into that first piece and saw the perfect pink center surrounded by the thin cooked edge, I felt genuinely proud. My partner, who orders seared tuna at every restaurant, declared this version better than most places we’ve tried.
Recipe Overview
- Recipe Name: Seared Ahi Tuna
- Servings: 4
- Prep Time: 10 minutes
- Cook Time: 4 minutes
- Total Time: 14 minutes
- Course: Main Course
- Cuisine: Japanese-Inspired
- Calories per Serving: 245
Equipment You Will Need
- Cast iron skillet or heavy-bottomed stainless steel pan
- Sharp chef’s knife or sashimi knife
- Shallow plate or wide bowl for coating
- Paper towels
- Tongs
- Cutting board
- Small bowl for mixing seasonings
Ingredients for Seared Ahi Tuna
For the Tuna
- 1.5 pounds sushi-grade ahi tuna steaks (about 1 inch thick)
- 3 tablespoons sesame seeds (mix of black and white)
- 2 tablespoons high-heat oil (avocado or grapeseed)
- 1 teaspoon kosher salt
- 1/2 teaspoon black pepper
For the Soy Dipping Sauce
- 1/4 cup soy sauce
- 2 tablespoons rice vinegar
- 1 tablespoon honey
- 1 teaspoon sesame oil
- 1 teaspoon grated fresh ginger
- 1 clove garlic, minced
- 1 teaspoon sriracha (optional)
Ingredient Notes and Substitutions
- Sushi-grade ahi tuna: This designation means the fish is safe to eat raw and has been flash-frozen to kill parasites. You can substitute yellowfin tuna or even salmon if ahi is unavailable, though cooking times may vary slightly.
- Sesame seeds: The mixed black and white seeds create visual appeal and a nutty flavor that complements the fish. Use all white sesame seeds if that’s what you have on hand, though you’ll lose some presentation value.
- High-heat oil: Oils with high smoke points prevent burning during the intense searing process. Regular olive oil will smoke and turn bitter, so stick with avocado, grapeseed, or refined coconut oil.
- Rice vinegar: This mild vinegar balances the saltiness of soy sauce without overwhelming the delicate fish. White wine vinegar or apple cider vinegar can work in a pinch, but use slightly less as they’re more acidic.
- Fresh ginger: The bright, spicy notes cut through the richness of the tuna beautifully. Ground ginger lacks the same punch, but you can use 1/4 teaspoon if that’s all you have available.
How to Make Seared Ahi Tuna
Step 1: Prepare the Tuna
Remove the tuna from the refrigerator and pat it completely dry with paper towels. Moisture is the enemy of a good sear, so take your time getting every surface dry.
Let the fish sit at room temperature for about 10 minutes while you prep everything else. This brief tempering helps the tuna cook more evenly and prevents the outside from overcooking before the inside warms slightly.
Step 2: Make the Dipping Sauce
Whisk together the soy sauce, rice vinegar, honey, sesame oil, ginger, garlic, and sriracha in a small bowl. The honey balances the salty and acidic elements while adding a subtle sweetness that complements the fish.
Set the sauce aside to let the flavors meld while you cook the tuna. This resting time allows the raw garlic and ginger to soften slightly in the acidic mixture.
Step 3: Season and Coat the Tuna
Mix the sesame seeds, salt, and pepper on a shallow plate. Press each side of the tuna steaks firmly into the sesame mixture, ensuring an even coating that will form your crust.
The salt draws out a tiny bit of moisture that helps the seeds adhere better. Don’t skip coating the edges, as that crust running around the entire perimeter makes for a better presentation.
Step 4: Heat Your Pan Properly
Place your cast iron skillet over high heat and let it preheat for 3 to 4 minutes. The pan needs to be smoking hot for the quick sear that keeps the interior rare.
Add the oil only when the pan is fully heated, swirling to coat the bottom evenly. The oil should shimmer and move like water across the surface, a sign that your temperature is perfect.
Step 5: Sear the First Side
Carefully lay the tuna steaks in the pan, placing them away from you to avoid oil splatter. You should hear an aggressive sizzle immediately if your pan is hot enough.
Sear for exactly 90 seconds without moving the fish at all. Resist every urge to peek or shift the tuna, as movement prevents proper crust formation and can cause the sesame seeds to fall off.
Step 6: Flip and Sear the Second Side
Use tongs to flip each steak confidently and quickly. Sear the second side for another 90 seconds, maintaining that same hands-off approach.
The timing creates a cooked exterior of about 1/4 inch on each side while leaving the center beautifully rare. If you prefer yours more cooked, add 30 seconds per side, though true ahi tuna shine when served rare to medium-rare.
Step 7: Sear the Edges
Hold each tuna steak upright with your tongs and briefly sear each edge for about 15 seconds. This step completes the sesame crust around the entire piece and looks incredibly professional when sliced.
The edges cook quickly because they have less mass than the flat sides. Watch carefully to avoid overcooking, as you want just enough heat to set the crust.
Step 8: Rest and Slice
Transfer the seared tuna to a cutting board and let it rest for 2 minutes. This brief rest allows the juices to redistribute and makes slicing cleaner.
Use a very sharp knife to cut the tuna into 1/4-inch thick slices, wiping the blade between cuts for clean edges. The slices should reveal that gorgeous gradient from the sesame crust through the barely cooked edge to the ruby-red center.
Pro Tip: Buy the thickest tuna steaks you can find, at least 1 inch thick. Thinner steaks cook through too quickly, leaving you with no rare center and defeating the entire purpose of this preparation method.
Tips for the Best Seared Ahi Tuna
- Source your tuna from a reputable fishmonger who can confirm it’s sushi-grade and safe to eat rare. The quality of your fish determines 80% of this dish’s success, so don’t compromise here.
- Freeze the tuna steaks for 15 minutes before searing if you want an even rarer center. This technique gives you more control over the internal temperature while still achieving a perfect crust.
- Keep your kitchen well-ventilated because high-heat searing produces smoke. Open windows or turn on your exhaust fan before you start cooking.
- Slice against the grain of the fish for the most tender texture. Look at the tuna before cooking to identify the direction of the muscle fibers, then cut perpendicular to those lines.
- Serve immediately after slicing because the residual heat continues cooking the fish. The tuna tastes best within minutes of leaving the pan, when the temperature contrast between the crust and center is most dramatic.
- Save leftover sliced tuna for poke bowls the next day if you somehow have extras. The texture changes slightly but still tastes delicious over rice with fresh vegetables.
Common Mistakes to Avoid
- Using a pan that isn’t hot enough results in steamed fish instead of a proper sear. The tuna will stick, turn gray, and develop no crust whatsoever.
- Moving the fish around during cooking prevents crust formation and causes the sesame coating to fall off. Set it down and walk away until it’s time to flip.
- Overcooking the tuna turns it dry and loses the buttery texture that makes this dish special. Remember that ahi tuna is meant to be served rare to medium-rare, not cooked through like canned tuna.
- Using wet fish creates steam that prevents browning and makes the sesame seeds soggy. Pat the tuna obsessively dry before seasoning and coating.
- Cutting with a dull knife tears the fish and makes your beautiful sear look messy. Sharpen your knife before you start, or use your sharpest blade for slicing.
Serving Suggestions
This seared ahi tuna works beautifully as the star of a composed plate or sliced over fresh greens. The rich, meaty flavor pairs best with bright, acidic, or crunchy elements that provide contrast.
- Serve over a bed of mixed greens with sliced avocado, cucumber, and pickled ginger for a refreshing salad
- Pair with wasabi mashed potatoes and sauteed snap peas for an Asian fusion dinner plate
- Arrange over sushi rice with edamame, shredded carrots, and a drizzle of spicy mayo for a deconstructed poke bowl
- Serve alongside chilled soba noodles tossed with sesame oil and scallions
- Present with a simple cucumber and seaweed salad dressed in rice vinegar
Variations to Try
- Spicy version: Mix red pepper flakes or shichimi togarashi into your sesame seed coating for heat that builds with each bite. The spice complements the fish’s richness without overwhelming its delicate flavor.
- Citrus-crusted: Add lemon or lime zest to the sesame mixture for a bright, aromatic crust. The citrus oils release during cooking and add a subtle fragrance that pairs beautifully with the soy dipping sauce.
- Herb-enhanced: Press the tuna in finely chopped cilantro or Thai basil after the sesame coating for an herbal dimension. This variation works particularly well when serving the tuna in Asian-inspired salads or rice bowls.
- Everything bagel style: Replace sesame seeds with everything bagel seasoning for a fun fusion twist. The garlic, onion, and poppy seeds create a completely different flavor profile that still works surprisingly well.
- Ponzu glazed: Brush the seared tuna with ponzu sauce immediately after cooking for a tangy, citrusy finish. The sauce soaks into the warm crust while adding extra moisture and flavor.
Dietary Adaptations
- Gluten-free: Replace regular soy sauce with tamari or coconut aminos in the dipping sauce. The flavor remains nearly identical, and most guests won’t notice the difference.
- Dairy-free: This recipe is naturally dairy-free as written, making it perfect for those avoiding lactose or milk proteins. No substitutions needed.
- Low-carb/Keto: The recipe fits beautifully into low-carb diets with only about 2 grams of carbs per serving. Skip the honey in the dipping sauce or replace it with a sugar-free sweetener if you need to reduce carbs further.
- Paleo: Use coconut aminos instead of soy sauce to keep this recipe compliant with paleo guidelines. The rest of the ingredients align perfectly with paleo principles.
Storage and Reheating
Refrigerator
Store leftover seared tuna in an airtight container in the refrigerator for up to 24 hours. The texture changes as the fish continues to cook slightly from residual heat, so the center won’t be as rare.
- Wrap tightly in plastic wrap before placing in the container to prevent oxidation
- Store the dipping sauce separately in a sealed container for up to 5 days
- Consume chilled or at room temperature rather than reheating for best texture
Freezer
Freezing cooked seared tuna is not recommended because it significantly degrades the texture. The delicate fish becomes mushy and loses the appealing contrast between the crust and the center.
- If you must freeze, wrap each portion tightly in plastic wrap and then in aluminum foil
- Use within 1 month for best quality
- Thaw overnight in the refrigerator, never at room temperature
Reheating
Reheating seared tuna defeats the purpose of cooking it rare in the first place. The fish will cook through completely and become dry and tough.
- Enjoy leftovers cold, sliced thin over salads or in rice bowls
- Bring to room temperature for 15 minutes before serving if you don’t like it straight from the fridge
- Chop and mix into a tuna tartare or poke if the texture has changed too much
Nutrition Information
| Nutrient | Amount |
|---|---|
| Calories | 245 |
| Total Fat | 11g |
| Saturated Fat | 2g |
| Carbohydrates | 4g |
| Fiber | 1g |
| Sugar | 2g |
| Protein | 39g |
| Sodium | 890mg |
| Cholesterol | 65mg |
Nutritional values are approximate and calculated based on standard ingredient measurements. Your actual nutrition may vary depending on specific brands used and portion sizes.
Frequently Asked Questions
Can I use frozen tuna for this recipe?
You can absolutely use frozen tuna, and in fact, most sushi-grade tuna has been previously frozen for safety reasons. Thaw it slowly in the refrigerator overnight and pat it completely dry before cooking to achieve the best sear.
What if I can’t find sushi-grade tuna?
If sushi-grade tuna isn’t available, you’ll need to cook the fish all the way through for food safety. Sear each side for 3 to 4 minutes instead, accepting that you’ll lose the signature rare center that makes this dish special.
How do I know when the tuna is done?
For rare tuna, you want a cooked exterior of about 1/4 inch on each side with a cool, ruby-red center. The fish should feel firm on the outside but give slightly when pressed in the center, similar to pressing the fleshy part of your palm below your thumb.
Can I make this ahead for a dinner party?
You can prep the sauce and coat the tuna up to 2 hours ahead, keeping it refrigerated until cooking time. However, sear the fish at the last possible moment before serving, as it tastes best within minutes of leaving the pan.
Why did my sesame seeds burn?
Sesame seeds burn quickly when exposed to high heat for too long, turning bitter and acrid. This happens when your pan is too hot or you cook the tuna for longer than 90 seconds per side, so watch your timing carefully
Seared Ahi Tuna
Ingredients
Equipment
Method
- Remove the tuna from the refrigerator and pat it completely dry with paper towels. Let the fish sit at room temperature for about 10 minutes while you prep everything else.
- Whisk together the soy sauce, rice vinegar, honey, sesame oil, ginger, garlic, and sriracha in a small bowl. Set the sauce aside to let the flavors meld while you cook the tuna.
- Mix the sesame seeds, salt, and pepper on a shallow plate. Press each side of the tuna steaks firmly into the sesame mixture, ensuring an even coating. Don't skip coating the edges.
- Place your cast iron skillet over high heat and let it preheat for 3 to 4 minutes until smoking hot. Add the oil only when the pan is fully heated, swirling to coat the bottom evenly.
- Carefully lay the tuna steaks in the pan. Sear for exactly 90 seconds without moving the fish at all.
- Use tongs to flip each steak and sear the second side for another 90 seconds, maintaining that same hands-off approach.
- Hold each tuna steak upright with your tongs and briefly sear each edge for about 15 seconds to complete the sesame crust around the entire piece.
- Transfer the seared tuna to a cutting board and let it rest for 2 minutes. Use a very sharp knife to cut the tuna into 1/4-inch thick slices, wiping the blade between cuts for clean edges. Serve immediately with the dipping sauce.


