The smell of boiled peanuts simmering away on the stove brings back memories of southern road trips and lazy summer afternoons. There’s something almost magical about transforming raw peanuts into soft, salty, addictive snacks that people can’t stop eating once they start.
This recipe captures that authentic flavor with minimal effort and maximum reward. The beauty lies in the simplicity: just peanuts, water, and salt create a snack that’s both comforting and completely different from roasted peanuts.
Whether you’re introducing someone to this southern staple or recreating childhood memories, you’ll find the process relaxing and the results satisfying. Let’s get those peanuts bubbling.
Why You’ll Love This Recipe
This southern classic delivers incredible flavor with barely any active work required. You’ll spend most of the time letting the pot do its thing while you go about your day.
- Requires only three basic ingredients you probably already have
- Perfectly customizable for your preferred saltiness level
- Makes a huge batch perfect for sharing at gatherings
- Healthier than fried or heavily processed snacks
- Keeps well in the fridge for easy snacking all week
My Experience Making This Recipe
I first attempted boiled peanuts after tasting them at a roadside stand in Georgia, and I knew I had to recreate that experience at home. The apartment filled with a savory, earthy aroma that had my neighbors knocking on the door to ask what smelled so good.
My first batch was slightly under-salted because I got nervous about overdoing it. Now I’ve learned that peanuts need more salt than you’d think to penetrate those shells properly.
Friends who claimed they didn’t like peanuts changed their minds after trying these. The soft, bean-like texture surprises people expecting something crunchy, but that’s exactly what makes them special.
Recipe Overview
- Recipe Name: Southern Style Boiled Peanuts
- Servings: 12
- Prep Time: 10 minutes
- Cook Time: 4 hours
- Total Time: 4 hours 10 minutes
- Course: Snack
- Cuisine: Southern American
- Calories per Serving: 180
Equipment You Will Need
- Large stockpot with lid (at least 8 quarts)
- Long wooden spoon for stirring
- Measuring cups
- Colander for draining
- Large serving bowl
- Kitchen timer
Ingredients for Boiled Peanuts
- 2 pounds raw peanuts in shells (green or raw, not roasted)
- 1 cup kosher salt (plus more to taste)
- 8 quarts water (or enough to cover peanuts by 2 inches)
Ingredient Notes and Substitutions
- Raw peanuts: These are the green or raw variety still in their shells, which soften during boiling. You can’t substitute roasted peanuts as they won’t achieve the proper texture.
- Kosher salt: The coarse grains dissolve well and provide clean, straightforward saltiness. You can use sea salt, but reduce to 3/4 cup since it’s denser.
- Water: Tap water works perfectly fine for this recipe. Filtered water won’t make a noticeable difference in the final taste.
How to Make Boiled Peanuts
Step 1: Rinse the Peanuts
Place the raw peanuts in a colander and rinse them under cold running water to remove any dirt or debris. Give them a good shake to drain off excess water before transferring them to your stockpot.
Clean peanuts prevent any gritty texture in your final product and ensure you’re working with sanitary ingredients. Dirt on the shells can affect the taste of the brine that seeps inside.
Step 2: Cover with Water and Salt
Add the peanuts to your large stockpot and pour in enough water to cover them by about 2 inches. Stir in the full cup of kosher salt, mixing well to help it start dissolving.
The peanuts will float initially, which is normal. The generous amount of salt is necessary because only a portion will penetrate the shells to season the actual peanuts inside.
Step 3: Bring to a Boil
Place the pot on your stove over high heat and bring the water to a rolling boil. This should take about 15 to 20 minutes depending on your stove.
Starting with high heat gets the process going quickly. You’ll hear the water bubbling vigorously when it reaches the right temperature.
Step 4: Reduce Heat and Simmer
Once boiling, reduce the heat to medium-low to maintain a gentle simmer. Place the lid on the pot, leaving it slightly ajar to allow steam to escape.
The gentle simmer prevents the peanuts from breaking apart while still cooking them through. Too much heat can cause shells to split open messily.
Step 5: Cook for Several Hours
Let the peanuts simmer for 3 to 4 hours, stirring every 30 minutes or so. Check the water level periodically and add more hot water if needed to keep the peanuts submerged.
This long cooking time softens the peanuts to that perfect tender texture. The exact time depends on how fresh your raw peanuts are and your personal texture preference.
Step 6: Test for Doneness
After 3 hours, carefully remove a peanut with a spoon and let it cool for a minute. Crack it open and taste the peanut inside to check if it’s soft and well-seasoned.
The peanut should have a soft, almost bean-like texture and be salty throughout. If it’s still crunchy or bland, continue cooking and add more salt if needed.
Step 7: Adjust Seasoning
Once the peanuts are tender, taste another one and assess the salt level. Add more salt to the pot if needed, stirring well and simmering for another 15 minutes to let it absorb.
Getting the salt right at this stage is your last chance to perfect the flavor. Remember that the peanuts will taste slightly less salty once cooled and drained.
Step 8: Soak After Cooking
Turn off the heat and let the peanuts sit in the hot brine for at least 30 minutes, or up to 2 hours. This soaking time allows the salt to penetrate deeper into the shells.
Patience here pays off with more evenly seasoned peanuts. Many people actually prefer to let them soak overnight in the fridge for maximum flavor.
Step 9: Drain and Serve
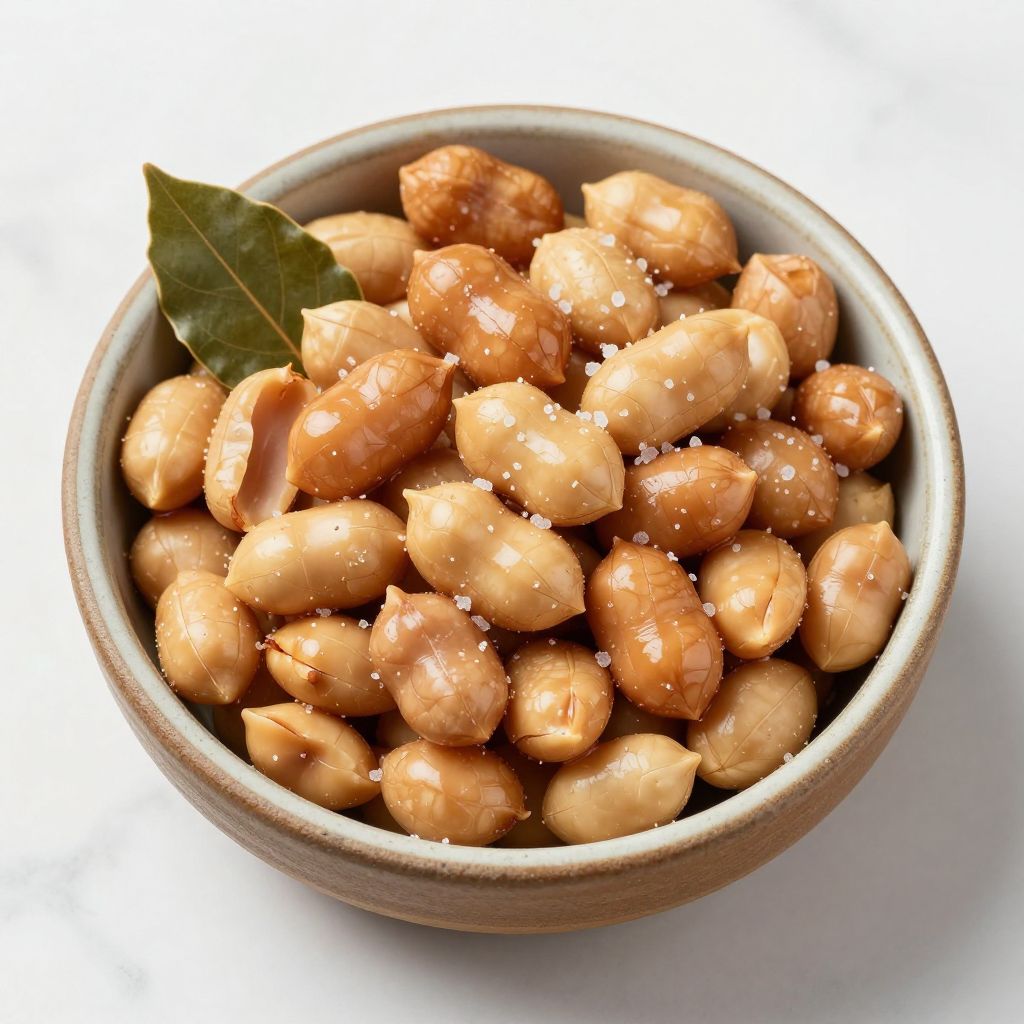
Pour the peanuts into a colander to drain off the brine. Transfer them to a large serving bowl while they’re still warm for the best eating experience.
Serve them with plenty of napkins or paper towels since eating boiled peanuts is a wonderfully messy experience. The shells get wet and slippery, adding to the fun.
Pro Tip: Add a tablespoon of Cajun seasoning or Old Bay to the boiling water during the last hour of cooking for a spicy, flavorful twist that takes these peanuts to the next level.
Tips for the Best Boiled Peanuts
- Use the freshest raw peanuts you can find, preferably within a few weeks of harvest. Older peanuts take longer to soften and may never reach the perfect texture.
- Don’t rush the cooking process by turning up the heat. A gentle simmer produces better results than a rapid boil that can make the texture uneven.
- Stir the pot regularly to ensure even salt distribution and prevent any peanuts from sticking to the bottom. This also helps you monitor the water level.
- Taste peanuts from different parts of the pot when testing for doneness. The ones at the bottom may cook faster than those floating at the top.
- Save some of the cooking brine in a jar if you want to store the peanuts. Keeping them in their liquid maintains moisture and continues the seasoning process.
- Experiment with aromatics like garlic cloves, bay leaves, or peppercorns added to the pot. These subtle flavors infuse the peanuts with extra depth.
Common Mistakes to Avoid
- Using roasted peanuts instead of raw ones will result in mushy, unpleasant texture. Only green or raw peanuts work for this recipe.
- Not using enough salt is the most common error. The shells block most of the salt, so you need what seems like an excessive amount.
- Removing the peanuts from heat too quickly prevents proper seasoning. Let them soak in the brine for better flavor penetration.
- Cooking at too high a temperature can cause shells to burst open and peanuts to become mushy. Maintain a gentle simmer throughout.
- Forgetting to check and refill the water level can leave peanuts exposed and cooking unevenly. Keep them fully submerged the entire time.
Serving Suggestions
Boiled peanuts shine as a casual snack served in big bowls at gatherings. They pair beautifully with cold beer, sweet tea, or lemonade for the ultimate southern experience.
- Set them out at tailgate parties or barbecues alongside other finger foods
- Serve as an appetizer before a lowcountry boil or fish fry
- Pack them in containers for road trips or beach outings
- Pair with pickled vegetables and cold cuts for a southern snack board
- Enjoy them while watching sports or playing cards with friends
Variations to Try
- Cajun Boiled Peanuts: Add 3 tablespoons of Cajun seasoning and a teaspoon of cayenne pepper to the water. The spicy, complex flavors give these a Louisiana twist that’s addictive.
- Garlic and Herb: Toss in 8 smashed garlic cloves, fresh thyme sprigs, and rosemary during cooking. The aromatic herbs create a more sophisticated flavor profile.
- Sweet and Spicy: Add 1/4 cup of brown sugar along with chili flakes for a unique balance. This version surprises people with its unexpected sweetness.
- Beer Boiled: Replace half the water with your favorite beer for a malty, slightly bitter undertone. Lighter beers work better than heavy stouts for this application.
- Asian Inspired: Use soy sauce, star anise, and ginger in the cooking liquid. This creates an umami-rich version that’s completely different but equally delicious.
Dietary Adaptations
- Gluten-Free: This recipe is naturally gluten-free as written. Just verify any seasoning blends you add don’t contain gluten-containing additives.
- Dairy-Free: No dairy exists anywhere in this recipe. Boiled peanuts are perfect for those avoiding milk products.
- Vegan: Completely vegan and plant-based as peanuts are legumes. This makes a protein-rich snack for anyone following a vegan lifestyle.
- Low-Carb: While peanuts contain some carbs, they’re relatively low compared to chips or crackers. Rinse after draining to reduce sodium if watching salt intake.
Storage and Reheating
Refrigerator
Store drained boiled peanuts in an airtight container in the refrigerator for up to one week. They actually taste better after a day or two as the salt continues to penetrate.
- Keep them in some of the cooking brine to maintain moisture
- Eat them cold straight from the fridge or warm them up
- Drain before serving if the brine seems too salty
Freezer
Freeze boiled peanuts in freezer-safe bags or containers for up to 3 months. Remove as much air as possible to prevent freezer burn.
- Portion them into smaller bags for easy thawing
- Label with the date and any seasonings used
- Thaw overnight in the refrigerator before eating
Reheating
Warm refrigerated peanuts in the microwave for 1 to 2 minutes or simmer them in a pot with a little water for 5 minutes. Frozen peanuts can go straight into simmering water.
- Add a pinch of salt to the reheating water for extra flavor
- Avoid overheating or they’ll become too soft
- Drain well after reheating to avoid soggy shells
Nutrition Information
| Nutrient | Amount |
|---|---|
| Calories | 180 |
| Total Fat | 14g |
| Saturated Fat | 2g |
| Carbohydrates | 10g |
| Fiber | 3g |
| Sugar | 1g |
| Protein | 8g |
| Sodium | 980mg |
| Cholesterol | 0mg |
Nutritional values are approximate and will vary based on exact ingredient brands and portion sizes. Sodium content can be reduced by using less salt or rinsing the peanuts after cooking.
Frequently Asked Questions
Can I use roasted peanuts instead of raw peanuts?
No, roasted peanuts won’t work for this recipe. Raw peanuts are needed because the long boiling process softens them from their naturally hard state into the tender texture that makes boiled peanuts special.
How do I know when the peanuts are fully cooked?
The peanuts are done when they’re completely soft with a texture similar to cooked beans. Crack one open and bite into it; there should be no crunch whatsoever, just tender, creamy peanut that’s well-seasoned throughout.
Can I make these in a slow cooker instead?
Yes, a slow cooker works great for boiled peanuts. Cook them on high for 5 to 7 hours or on low for 10 to 12 hours, checking periodically and adding water as needed.
Why are my boiled peanuts not salty enough?
The shells block a lot of the salt from penetrating, so you need more than seems reasonable. Let them soak in the brine after cooking for at least an hour, or add more salt to the pot and simmer for another 30 minutes.
Can I reduce the cooking time?
You can use a pressure cooker to cut the time down to about 60 to 90 minutes at high pressure. The texture won’t be quite the same as the traditional long-simmer method, but it’s a decent shortcut when you’re pressed for time.
What’s the difference between green peanuts and raw peanuts?
Green peanuts are freshly harvested raw peanuts with higher moisture content that cook faster. Raw peanuts have been dried after harvest and take longer to soften, but both work fine for this recipe.
Final Thoughts
Making boiled peanuts at home connects you to a southern tradition that’s been passed down through generations. The simple process and incredible results make this recipe one you’ll return to again and again.
Don’t let the long cooking time intimidate you since the hands-on work is minimal. Grab some raw peanuts, set up your pot, and prepare to discover why southerners are so passionate about this humble snack.
Southern Style Boiled Peanuts
Ingredients
Equipment
Method
- Place the raw peanuts in a colander and rinse them under cold running water to remove any dirt or debris. Give them a good shake to drain off excess water before transferring them to your stockpot.
- Add the peanuts to your large stockpot and pour in enough water to cover them by about 2 inches. Stir in the full cup of kosher salt, mixing well to help it start dissolving.
- Place the pot on your stove over high heat and bring the water to a rolling boil. This should take about 15 to 20 minutes depending on your stove.
- Once boiling, reduce the heat to medium-low to maintain a gentle simmer. Place the lid on the pot, leaving it slightly ajar to allow steam to escape.
- Let the peanuts simmer for 3 to 4 hours, stirring every 30 minutes or so. Check the water level periodically and add more hot water if needed to keep the peanuts submerged.
- After 3 hours, carefully remove a peanut with a spoon and let it cool for a minute. Crack it open and taste the peanut inside to check if it's soft and well-seasoned. The peanut should have a soft, almost bean-like texture and be salty throughout.
- Once the peanuts are tender, taste another one and assess the salt level. Add more salt to the pot if needed, stirring well and simmering for another 15 minutes to let it absorb.
- Turn off the heat and let the peanuts sit in the hot brine for at least 30 minutes, or up to 2 hours. This soaking time allows the salt to penetrate deeper into the shells.
- Pour the peanuts into a colander to drain off the brine. Transfer them to a large serving bowl while they're still warm for the best eating experience.


