The buttery aroma of a fresh Auntie Anne’s pretzel hits you like a warm hug in a crowded mall. You know that smell: toasted dough, melted butter, and just enough salt to make you weak at the knees.
This copycat recipe brings that iconic pretzel experience straight to your kitchen without the food court trip. These pretzels nail that golden-brown exterior and impossibly soft interior that made Auntie Anne’s famous.
What makes these pretzels special is the combination of a quick baking soda bath and a generous butter glaze. The process is simpler than you think, and the results will make you question why you ever stood in that mall line.
Why You’ll Love This Recipe
This recipe captures the exact taste and texture of the mall classic you crave. The method is straightforward enough for beginners but delivers professional results every time.
- Ready in under 90 minutes from start to finish
- Soft, chewy texture with that signature golden crust
- Costs a fraction of buying them at the mall
- Tastes even better fresh from your own oven
- Fun weekend project that kids love helping with
My Experience Making This Recipe
The first time I twisted these pretzels, half of them looked like abstract art rather than proper knots. But here’s the thing: even the ugly ones tasted incredible, and by batch three, I was twisting like a pro.
The baking soda bath intimidated me at first, but it’s the secret to that deep brown color and distinctive pretzel flavor. My kitchen smelled like a German bakery for hours afterward, and I wasn’t mad about it.
When I brushed on that melted butter right out of the oven, I watched it soak into every crevice. My family devoured eight pretzels in about ten minutes, and someone actually asked if I’d secretly gone to the mall.
Recipe Overview
- Recipe Name: Auntie Anne’s Pretzel
- Servings: 8 large pretzels
- Prep Time: 20 minutes
- Cook Time: 12 minutes
- Total Time: 1 hour 20 minutes (including rise time)
- Course: Snack, Appetizer
- Cuisine: American
- Calories per Serving: 320
Equipment You Will Need
- Stand mixer with dough hook (or large mixing bowl)
- Large pot for boiling water
- Two large baking sheets
- Parchment paper or silicone baking mats
- Slotted spoon or spider strainer
- Pastry brush
- Kitchen towel
- Measuring cups and spoons
- Instant-read thermometer (optional but helpful)
Ingredients for Auntie Anne’s Pretzel
For the Dough
- 1 1/2 cups warm water (110-115°F)
- 2 tablespoons light brown sugar
- 2 1/4 teaspoons active dry yeast (1 packet)
- 4 1/2 cups all-purpose flour, plus more for dusting
- 2 tablespoons unsalted butter, melted
- 2 teaspoons fine salt
For the Baking Soda Bath
- 10 cups water
- 2/3 cup baking soda
For the Topping
- 4 tablespoons unsalted butter, melted
- Coarse pretzel salt or kosher salt
Ingredient Notes and Substitutions
- Active dry yeast: This creates the airy, soft texture that makes these pretzels so addictive. You can substitute instant yeast in the same amount, but skip the proofing step and add it directly to the flour.
- Brown sugar: The molasses content adds subtle depth and feeds the yeast for a better rise. White granulated sugar works in a pinch but won’t give quite the same flavor complexity.
- All-purpose flour: This provides the right protein content for chewy yet tender pretzels. Bread flour makes them slightly chewier, while cake flour makes them too soft.
- Baking soda: This alkaline bath gives pretzels their distinctive flavor and mahogany color. There is no substitute that produces the same result, so don’t skip this step.
- Unsalted butter: Using unsalted lets you control the salt level in both the dough and topping. Salted butter works but reduce the added salt by half.
How to Make Auntie Anne’s Pretzel
Step 1: Activate the Yeast
Combine the warm water, brown sugar, and yeast in your mixer bowl or large mixing bowl. Let the mixture sit for 5-7 minutes until it becomes foamy on top.
This proofing step confirms your yeast is alive and ready to work. If nothing happens after 10 minutes, your water was too hot or your yeast is dead, so start over with fresh ingredients.
Step 2: Mix the Dough
Add the flour, melted butter, and salt to the yeast mixture. Mix on low speed with the dough hook for 4-5 minutes until a smooth, elastic dough forms that pulls away from the bowl sides.
The dough should feel slightly tacky but not sticky. If it sticks to your hands like glue, add flour one tablespoon at a time until it reaches the right consistency.
Step 3: Let the Dough Rise
Form the dough into a ball and place it in a lightly greased bowl, turning once to coat. Cover with a damp kitchen towel and let it rise in a warm spot for 45-60 minutes until doubled in size.
The rise develops flavor and creates that pillowy texture inside. Rushing this step gives you dense, bread-like pretzels instead of the light, airy ones you’re after.
Step 4: Shape the Pretzels
Punch down the dough and divide it into 8 equal pieces (each about 4 ounces). Roll each piece into a 22-inch rope, keeping the rope slightly thicker in the middle and tapered at the ends.
Form a U-shape with the rope, cross the ends over each other twice, then fold them down and press onto the bottom curve of the U. The traditional pretzel shape might take practice, but the taste won’t suffer if yours look wonky.
Step 5: Prepare the Baking Soda Bath
Line your baking sheets with parchment paper. Bring the 10 cups of water to a rolling boil in your large pot, then carefully add the baking soda (it will foam vigorously, so add it slowly).
The high pH of this bath is what transforms regular bread dough into proper pretzel dough. This chemical reaction creates that distinctive chewy crust and deep color you can’t get any other way.
Step 6: Boil the Pretzels
Lower the heat to a gentle simmer. Carefully place one pretzel at a time into the bath for 20-30 seconds per side, using your slotted spoon to flip it.
Don’t overcrowd the pot or skip this step thinking it’s optional. This brief bath alkalizes the surface, which is non-negotiable for authentic pretzel flavor and appearance.
Step 7: Add Toppings and Bake
Transfer the boiled pretzels to your prepared baking sheets, spacing them about 2 inches apart. Sprinkle generously with coarse salt while they’re still wet so it sticks properly.
Bake at 450°F for 10-12 minutes until deep golden brown. They should look almost too dark but trust the process: this color means maximum flavor.
Step 8: Brush with Butter
The moment the pretzels come out of the oven, brush them liberally with melted butter on all surfaces. Don’t be shy with the butter because this is what makes them taste like the real deal.
The hot pretzels absorb the butter immediately, creating that glossy sheen and rich flavor. Serve them warm within the first 30 minutes for peak deliciousness.
Pro Tip: Weigh your dough portions on a kitchen scale to get perfectly uniform pretzels that bake evenly. Eyeballing it usually leaves you with a mix of oversized and tiny pretzels that cook at different rates.
Tips for the Best Auntie Anne’s Pretzel
- Check your water temperature with a thermometer because too-hot water kills yeast and too-cool water won’t activate it. The sweet spot is 110-115°F, which should feel warm but not hot on your wrist.
- Keep your rolled ropes covered with a damp towel while shaping the others to prevent drying and cracking. Dry dough won’t seal properly at the twist points and can split during boiling.
- Work quickly once you start the boiling process because the shaped pretzels can over-proof if they sit too long. Have everything prepped and ready before you begin this step.
- Rotate your baking sheets halfway through cooking for even browning. Ovens have hot spots, and this simple move prevents pale pretzels on one side and burnt ones on the other.
- Make a small test pretzel first if you’re nervous about the process. This lets you dial in your shaping technique and timing without risking the whole batch.
- Serve these pretzels within a few hours of baking for maximum softness. They’re still good the next day but lose that fresh-from-the-oven magic that makes them irresistible.
Common Mistakes to Avoid
- Skipping the baking soda bath or using too little baking soda produces pale, bread-like pretzels without that signature pretzel taste and appearance.
- Rolling the ropes too thin creates wispy pretzels that turn hard and crunchy instead of maintaining that soft, chewy interior texture.
- Boiling the pretzels for too long makes them gummy and tough because the exterior absorbs too much moisture and becomes dense.
- Underbaking because they look dark enough results in pale, doughy pretzels that lack the proper crust and flavor development.
- Adding salt after the butter instead of before means it won’t stick properly and will mostly fall off onto your plate or lap.
Serving Suggestions
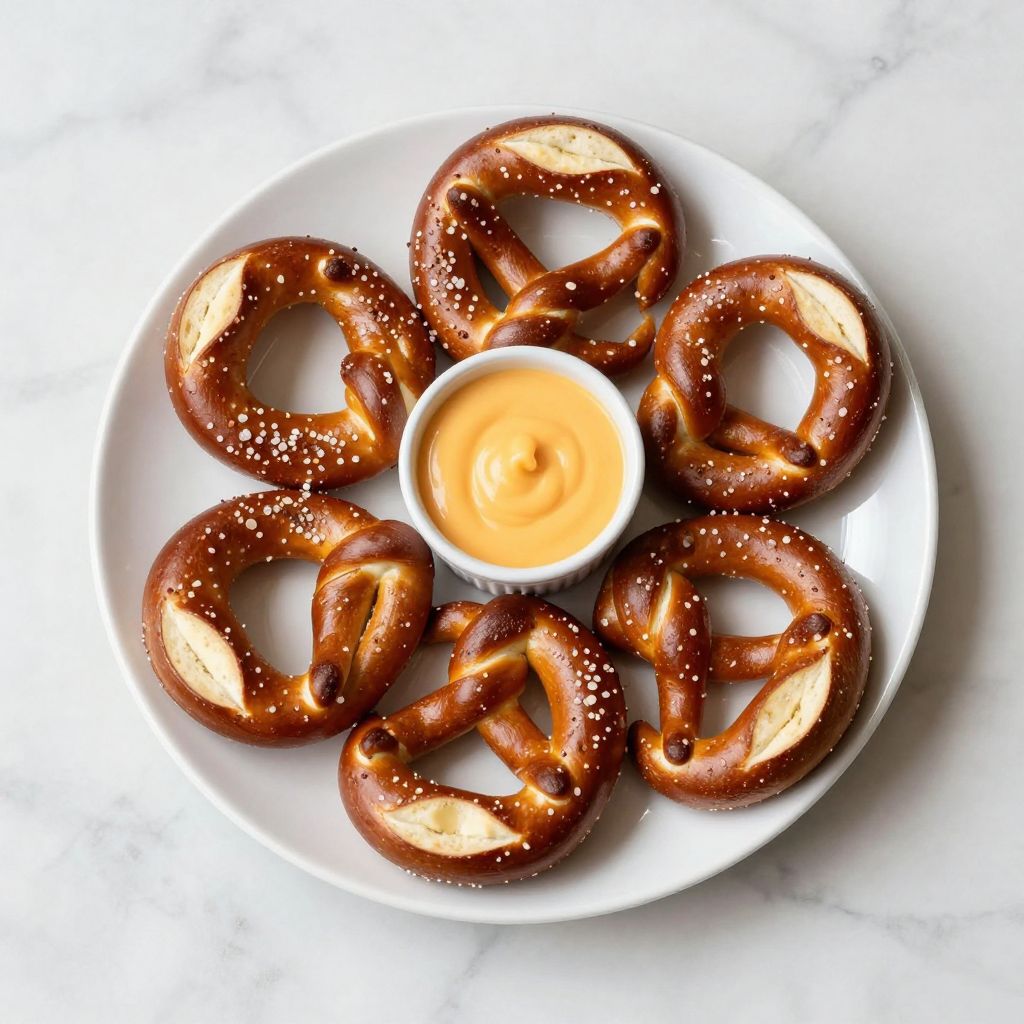
These pretzels shine brightest when served warm with your favorite dipping sauce. Classic yellow mustard is traditional, but don’t limit yourself to just one option.
- Warm cheese sauce (the gooey, nacho-style kind) for the ultimate indulgence
- Sweet cream cheese dip mixed with powdered sugar for a dessert-style twist
- Spicy brown mustard or whole-grain mustard for grown-up sophistication
- Marinara sauce for an Italian-inspired snack that works surprisingly well
- Honey mustard that splits the difference between sweet and tangy
Variations to Try
- Cinnamon sugar pretzels: Skip the salt and brush with butter, then roll in a cinnamon-sugar mixture while still hot. These taste like a cross between a pretzel and a churro.
- Everything bagel pretzels: Replace the coarse salt with everything bagel seasoning for a savory, garlicky version that pairs perfectly with cream cheese.
- Jalapeño cheddar pretzels: Knead 1 cup shredded sharp cheddar and 2 diced jalapeños into the dough after the first rise. These have a kick that makes them wildly addictive.
- Pretzel bites: Cut the ropes into 1-inch pieces instead of shaping them, perfect for parties and way easier to dip than full-size pretzels.
- Garlic parmesan pretzels: Mix melted butter with garlic powder and brush on after baking, then shower with grated parmesan cheese. These taste like the best breadsticks you’ve ever had.
Dietary Adaptations
- Gluten-free: Use a cup-for-cup gluten-free flour blend with xanthan gum, though the texture will be slightly more crumbly and less chewy than traditional pretzels.
- Dairy-free: Replace the butter with melted coconut oil or vegan butter, which works perfectly without noticeably changing the flavor or texture.
- Vegan: Use the dairy-free butter swap above and replace the brown sugar with maple syrup if your sugar isn’t certified vegan, though most brown sugar is plant-based anyway.
- Low-carb: Unfortunately, pretzels are basically pure carbs, so there’s no great low-carb adaptation that maintains the authentic texture and flavor without completely changing the recipe.
Storage and Reheating
Refrigerator
Store leftover pretzels in an airtight container or resealable bag for up to 3 days. They’ll lose some of their softness but still taste good.
- Let pretzels cool completely before storing to prevent condensation
- Place parchment paper between layers if stacking to prevent sticking
- Bring to room temperature or reheat before serving for best texture
Freezer
Freeze baked and cooled pretzels in a freezer bag for up to 3 months. This is perfect for making a big batch and having fresh pretzels on demand.
- Flash-freeze on a baking sheet first, then transfer to bags to prevent clumping
- Write the date on the bag because frozen pretzels all look the same after a few weeks
- Thaw at room temperature or reheat directly from frozen
Reheating
The key to reviving pretzels is adding back moisture while crisping the exterior. Never use a microwave alone because it turns them rubbery.
- Oven method: Spritz with water, wrap in foil, and heat at 350°F for 5-7 minutes
- Toaster oven: Heat at 325°F for 3-4 minutes until warmed through
- Air fryer: Cook at 320°F for 2-3 minutes for a slightly crispier result
Nutrition Information
| Nutrient | Amount |
|---|---|
| Calories | 320 |
| Total Fat | 8g |
| Saturated Fat | 5g |
| Carbohydrates | 54g |
| Fiber | 2g |
| Sugar | 4g |
| Protein | 8g |
| Sodium | 890mg |
| Cholesterol | 20mg |
Nutritional values are approximate and will vary based on specific ingredients used and portion sizes. The sodium content is high primarily from the salt topping, which you can reduce by using less.
Frequently Asked Questions
Can I make the dough ahead of time?
You can refrigerate the dough after the first rise for up to 24 hours, which actually improves the flavor. Let it come to room temperature for 30 minutes before shaping, or it will be too stiff to work with.
Why did my pretzels turn out tough?
Tough pretzels usually mean you added too much flour or overworked the dough. The dough should be soft and slightly tacky, and you should stop kneading once it’s smooth and elastic.
Can I skip the baking soda bath?
Technically yes, but you’ll end up with soft breadsticks instead of real pretzels. The bath is what creates the distinctive flavor, color, and chewy crust that defines a pretzel.
How do I get my pretzels really dark like at the mall?
Don’t pull them out too early, even if they look dark. Real pretzels should be deep mahogany brown, and using a full 2/3 cup of baking soda in the bath helps achieve that color.
Can I use this dough to make pretzel buns?
Absolutely, and they’re fantastic for burgers or sandwiches. Shape the dough into 8 round buns, boil them the same way, then bake for 15-18 minutes until golden brown.
What’s the white powder on store-bought soft pretzels?
That’s actually dried residue from the baking soda bath, not flour. Some commercial operations use a stronger alkaline solution that leaves more visible residue, but it’s edible and harmless.
My yeast didn’t foam during proofing. What went wrong?
Either your water was too hot (which kills yeast), too cold (which won’t activate it), or your yeast was expired. Always check the expiration date and water temperature before starting.
Final Thoughts
Making Auntie Anne’s pretzels at home transforms an ordinary weekend into something special
Auntie Anne's Pretzel
Ingredients
Equipment
Method
- Combine the warm water (110-115°F), brown sugar, and yeast in your mixer bowl or large mixing bowl. Let the mixture sit for 5-7 minutes until it becomes foamy on top.
- Add the flour, melted butter, and salt to the yeast mixture. Mix on low speed with the dough hook for 4-5 minutes until a smooth, elastic dough forms that pulls away from the bowl sides. The dough should feel slightly tacky but not sticky.
- Form the dough into a ball and place it in a lightly greased bowl, turning once to coat. Cover with a damp kitchen towel and let it rise in a warm spot for 45-60 minutes until doubled in size.
- Punch down the dough and divide it into 8 equal pieces (each about 4 ounces). Roll each piece into a 22-inch rope, keeping the rope slightly thicker in the middle and tapered at the ends.
- Form a U-shape with the rope, cross the ends over each other twice, then fold them down and press onto the bottom curve of the U to create the traditional pretzel shape.
- Line your baking sheets with parchment paper. Bring the 10 cups of water to a rolling boil in your large pot, then carefully add the baking soda slowly (it will foam vigorously).
- Lower the heat to a gentle simmer. Carefully place one pretzel at a time into the bath for 20-30 seconds per side, using your slotted spoon to flip it.
- Transfer the boiled pretzels to your prepared baking sheets, spacing them about 2 inches apart. Sprinkle generously with coarse salt while they're still wet.
- Bake at 450°F for 10-12 minutes until deep golden brown.
- The moment the pretzels come out of the oven, brush them liberally with melted butter on all surfaces. Serve warm within the first 30 minutes for peak deliciousness.


