Lemon glaze recipe transforms ordinary baked goods into something extraordinary with just a few simple ingredients and about five minutes of your time. This bright, tangy topping made from fresh lemon juice and powdered sugar creates the perfect balance of sweetness and citrus punch that works beautifully on everything from pound cakes to cookies.
The best part about this glaze is its versatility and how quickly it comes together. You can adjust the thickness to suit your needs, whether you want a thin, barely-there drizzle or a thick, opaque coating that sets firm.
Why You’ll Love This Recipe
This lemon glaze delivers maximum flavor with minimal effort and uses just two primary ingredients you probably already have. It beats store-bought glazes hands down in both taste and freshness.
- Ready in under 5 minutes with no cooking required
- Adjustable consistency from thin drizzle to thick icing
- Fresh lemon flavor that tastes bright and natural, never artificial
- Works on cakes, cookies, scones, muffins, and even savory dishes
- Cost-effective way to make baked goods look and taste professionally finished
My Experience Making This Recipe
I’ve made this lemon glaze at least a hundred times, and I still get excited watching it transform plain baked goods into something bakery-worthy. The first time I made it, I was shocked at how something so simple could add such a professional finish to a basic bundt cake.
What surprised me most was how the glaze develops flavor as it sits. Fresh off the whisk, it tastes sweet with a citrus kick, but after it sets on whatever you’re glazing, the lemon flavor becomes more pronounced and complex.
My family now expects this glaze on practically everything I bake. My daughter once asked if we could put it on pancakes, and honestly, it wasn’t a terrible idea.
Recipe Overview
- Recipe Name: Lemon Glaze
- Servings: Makes about 3/4 cup (enough for one 9-inch cake or 24 cookies)
- Prep Time: 5 minutes
- Cook Time: 0 minutes
- Total Time: 5 minutes
- Course: Topping, Condiment
- Cuisine: American
- Calories per Serving: 60 calories (per 1 tablespoon)
Equipment You Will Need
- Medium mixing bowl
- Whisk or fork
- Fine-mesh strainer or sifter
- Citrus juicer or reamer
- Measuring cups and spoons
- Microplane or zester (optional, for added lemon zest)
Ingredients for Lemon Glaze Recipe
- 2 cups powdered sugar (also called confectioners’ sugar or icing sugar)
- 3 to 4 tablespoons fresh lemon juice (from about 1.5 to 2 lemons)
- 1 teaspoon lemon zest (optional, for extra lemon flavor)
- Pinch of salt (optional, to balance sweetness)
Ingredient Notes and Substitutions
- Powdered sugar: This dissolves instantly and creates a smooth glaze without any grittiness. Granulated sugar won’t work as a substitute because it won’t dissolve properly without heat.
- Fresh lemon juice: Provides the bright, tangy flavor that makes this glaze special and balances the sweetness perfectly. Bottled lemon juice can work in a pinch, but it tastes flat and slightly bitter compared to fresh.
- Lemon zest: Adds extra lemon oil and intensifies the citrus flavor without adding more liquid. You can skip it if you don’t have a zester, but it really does make a difference.
- Salt: A tiny pinch cuts through the sweetness and makes the lemon flavor pop more. Leave it out if you’re watching sodium or prefer a purely sweet glaze.
How to Make Lemon Glaze Recipe
Step 1: Sift the Powdered Sugar
Place your powdered sugar in a fine-mesh strainer or sifter set over a medium bowl. Sift the sugar to remove any lumps that could create a bumpy glaze.
This step takes less than a minute but prevents those annoying little clumps that refuse to dissolve. If you skip sifting, you’ll spend five times longer whisking and still end up with a slightly grainy texture.
Step 2: Juice the Lemons
Roll your lemons firmly on the counter with the palm of your hand before cutting them in half. This breaks down the internal membranes and releases more juice.
Juice enough lemons to get at least 3 tablespoons of fresh juice, straining out any seeds. Room temperature lemons yield more juice than cold ones, so take them out of the fridge 20 minutes before you start if you remember.
Step 3: Add Lemon Juice Gradually
Pour 3 tablespoons of lemon juice into the sifted powdered sugar. Start with less liquid than you think you need because you can always add more but can’t take it away.
The glaze will look impossibly thick at first, but resist the urge to dump in more liquid right away. You need to whisk it first to see the true consistency.
Step 4: Whisk Until Smooth
Whisk the mixture vigorously for about 30 seconds until it becomes completely smooth and all the sugar dissolves. You want a consistency that drips slowly from the whisk but isn’t runny.
The glaze should look glossy and coat the back of a spoon. If you draw a line through it with your finger, the line should stay visible for a second before slowly filling back in.
Step 5: Adjust the Consistency
Check if your glaze has the right thickness for your intended use. For a thin, translucent drizzle, add the remaining tablespoon of lemon juice or even a bit more.
For a thicker glaze that sets opaque and firm, add more powdered sugar one tablespoon at a time. The glaze will thicken slightly as it sits, so account for that in your adjustments.
Step 6: Add Optional Ingredients
If you’re using lemon zest, stir it in now along with a tiny pinch of salt if desired. The zest adds little flecks of yellow color and concentrated lemon flavor.
Mix just until everything is evenly distributed. The zest won’t dissolve, but that’s exactly what you want for those bursts of intense citrus flavor.
Step 7: Test the Glaze
Dip a spoon into the glaze and hold it horizontally over the bowl. The glaze should fall in a slow, steady ribbon that takes a few seconds to disappear back into the surface.
If it runs off immediately like water, whisk in more powdered sugar. If it barely moves, add more lemon juice drop by drop until it loosens up.
Step 8: Use Immediately
Apply the glaze right away while it’s at its smoothest and most workable. Drizzle it over cooled baked goods, dip the tops of cookies directly into it, or spread it with an offset spatula.
The glaze will begin to set within 10 to 15 minutes and fully harden in about an hour. If it starts to thicken in the bowl before you finish using it, whisk in a few drops of lemon juice to loosen it back up.
Pro Tip: Always glaze baked goods that have cooled completely to room temperature. If your cake or cookies are even slightly warm, the glaze will melt, become translucent, and soak in rather than sitting on top as a pretty coating.
Tips for the Best Lemon Glaze Recipe
- Use fresh-squeezed lemon juice for the brightest, most natural flavor that bottled juice simply can’t match. The difference is dramatic and worth the extra minute of squeezing.
- Sift your powdered sugar even if it looks lump-free because hidden clumps always show up in the finished glaze. A smooth glaze looks infinitely more professional.
- Start with less liquid and add more gradually to avoid making the glaze too thin. It’s much easier to thin a thick glaze than to thicken a runny one.
- Apply glaze to a wire rack set over parchment paper or a baking sheet for easy cleanup. The excess will drip through and you can scrape it up to reuse if needed.
- Make the glaze right before you need it rather than in advance because it starts to form a crust as it sits. Fresh glaze spreads and drizzles more beautifully.
- Warm the lemon juice slightly in the microwave for 5 seconds if you want a thinner, more pourable glaze that soaks in slightly rather than sitting completely on top. This works great for pound cakes.
Common Mistakes to Avoid
- Adding all the liquid at once creates a glaze that’s too thin and watery, which will run right off your baked goods instead of coating them. Always start with less liquid and add more as needed.
- Using bottled lemon juice results in a flat, slightly bitter flavor that tastes artificial. Fresh juice makes a world of difference and takes only two minutes longer.
- Glazing warm baked goods causes the glaze to melt and become transparent instead of setting opaque and white. Patience pays off here, even though warm cake smells amazing.
- Not sifting the powdered sugar leaves you with lumps that won’t dissolve no matter how much you whisk. That grainy texture ruins an otherwise perfect glaze.
- Making the glaze too far in advance allows it to form a skin and become difficult to work with. Mix it fresh when you’re ready to use it for the smoothest application.
Serving Suggestions
This lemon glaze works beautifully on so many baked goods that you’ll find yourself looking for excuses to make it. The bright citrus flavor pairs especially well with buttery or vanilla-flavored bases.
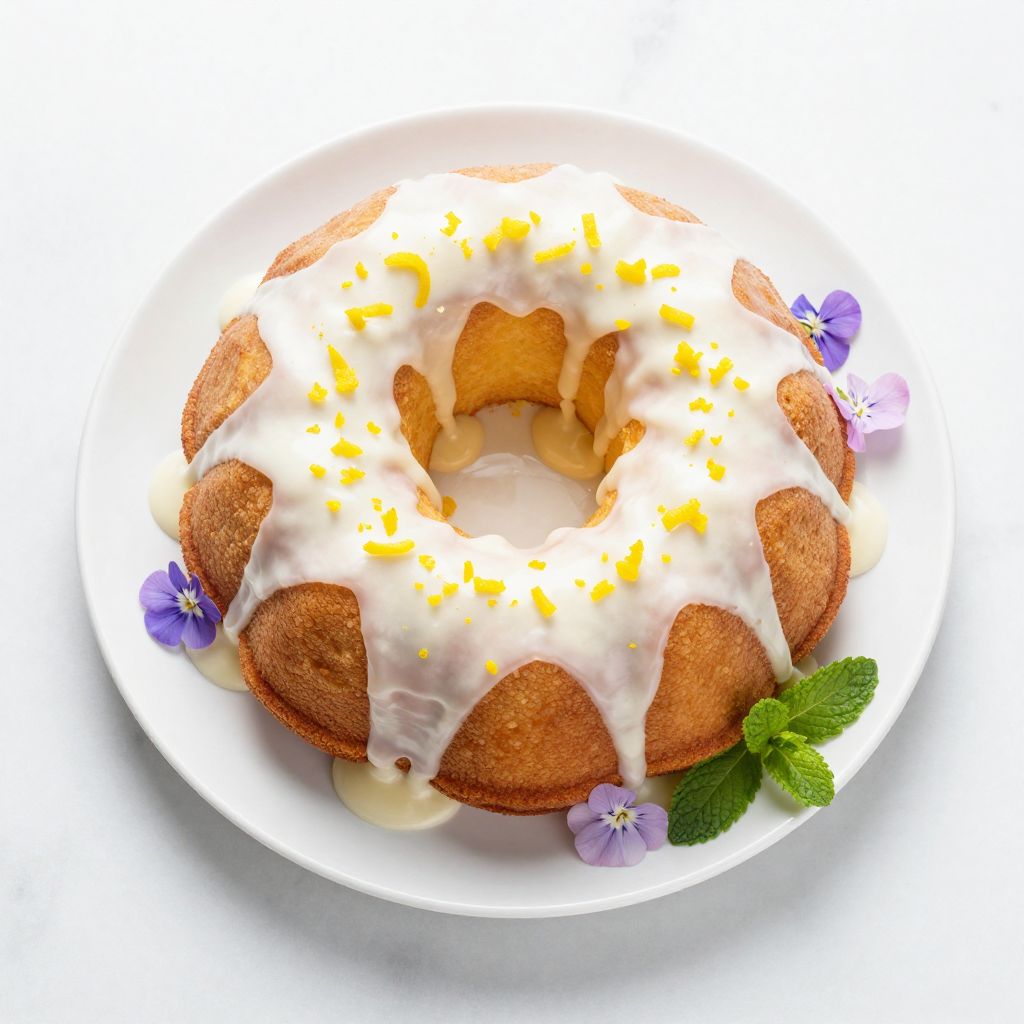
- Drizzle over pound cake, bundt cake, or angel food cake for a classic combination
- Dip the tops of sugar cookies, shortbread, or biscotti for a sweet and tangy coating
- Pour over warm scones, muffins, or sweet rolls as they come out of the oven
- Glaze lemon bars, blueberry bread, or poppy seed cake to double down on citrus
- Spread on cinnamon rolls instead of cream cheese frosting for a lighter, tangier option
Variations to Try
- Orange glaze: Swap lemon juice for fresh orange juice and add orange zest for a sweeter, mellower citrus flavor that’s amazing on chocolate or spice cakes. You might need slightly less juice since oranges are less acidic.
- Lime glaze: Use fresh lime juice and zest for a more tropical, slightly bitter edge that works beautifully on coconut or ginger desserts. The tartness is even more pronounced than lemon.
- Lemon-vanilla glaze: Add half a teaspoon of vanilla extract along with the lemon juice for a rounder, more complex flavor. This softens the citrus edge slightly while adding depth.
- Lemon-almond glaze: Stir in a quarter teaspoon of almond extract for a sophisticated flavor combination that’s perfect for biscotti or tea cakes. The almond complements lemon beautifully.
- Thick lemon icing: Use only 2 tablespoons of lemon juice to create a spreadable icing that pipes well and sets very firm. This works great for decorating cookies or writing on cakes.
Dietary Adaptations
- Gluten-free: This recipe is naturally gluten-free as written, but always check your powdered sugar label since some brands add a small amount of cornstarch that could be processed in facilities with gluten. Most major brands are safe.
- Dairy-free: This glaze contains no dairy products and is already suitable for dairy-free diets. Just make sure the baked goods you’re putting it on are also dairy-free if that’s your goal.
- Vegan: Standard powdered sugar is vegan, but some brands use bone char in processing, so look for organic or vegan-certified powdered sugar if this matters to you. Otherwise, the recipe is already plant-based.
- Low-carb/Keto: Replace powdered sugar with powdered erythritol or powdered allulose in the same amount for a sugar-free version. The texture will be slightly less smooth and it won’t harden quite as firm, but it works reasonably well.
Storage and Reheating
Refrigerator
Store leftover glaze in an airtight container in the refrigerator for up to one week. Press plastic wrap directly onto the surface before sealing to prevent a hard crust from forming.
- Let it come to room temperature before using, which takes about 30 minutes
- Whisk vigorously to restore the smooth consistency
- Add a few drops of lemon juice if it has thickened too much
Freezer
Freezing glaze isn’t recommended because the texture changes significantly when thawed. The sugar and liquid separate, creating a grainy, weeping mess that’s difficult to fix.
- If you must freeze it, use a freezer-safe container and freeze for up to 3 months
- Thaw overnight in the refrigerator and whisk extremely well
- Be prepared to add fresh lemon juice to restore the consistency
Reheating
You don’t reheat this glaze in the traditional sense, but you can warm it slightly to thin it out. Microwave cold glaze for 5 to 10 seconds at a time, stirring between intervals.
- Heat only until barely lukewarm, not hot
- Stir well after each heating interval
- Add a few drops of lemon juice if needed to restore proper consistency
Nutrition Information
| Nutrient | Amount |
|---|---|
| Calories | 60 |
| Total Fat | 0g |
| Saturated Fat | 0g |
| Carbohydrates | 15g |
| Fiber | 0g |
| Sugar | 15g |
| Protein | 0g |
| Sodium | 0mg |
| Cholesterol | 0mg |
Nutritional values are approximate and based on one tablespoon of glaze. Your actual nutrition will vary based on how thickly you apply the glaze and the specific brands of ingredients you use.
Frequently Asked Questions
Can I use bottled lemon juice instead of fresh?
You can, but I really don’t recommend it because bottled juice tastes flat and slightly bitter compared to fresh. If you absolutely must use bottled, start with less because it’s often more concentrated and acidic.
How do I make the glaze thicker or thinner?
Add more powdered sugar one tablespoon at a time to thicken it, or add more lemon juice a few drops at a time to thin it. Make tiny adjustments because a little liquid goes a long way in changing the consistency.
Can I make this glaze ahead of time?
You can make it a few hours ahead and store it covered at room temperature, but it’s really best made fresh right before using. If it thickens as it sits, whisk in a few drops of lemon juice to loosen it back up.
Why did my glaze turn out grainy?
Graininess happens when you skip sifting the powdered sugar or don’t whisk long enough to dissolve all the sugar. Sift first and whisk vigorously for at least 30 seconds to ensure a smooth texture.
How long does it take for the glaze to set?
The glaze will begin to set and lose its wet shine in about 10 to 15 minutes and will be fully hardened in about an hour. Thicker glazes set faster than thin ones.
Can I add food coloring to this glaze?
Yes, gel food coloring works best because it won’t thin out the glaze like liquid coloring does. Add it drop by drop and mix well between additions to control the color intensity.
What’s the best way to drizzle glaze in neat lines?
Transfer the glaze to a zip-top bag, snip off a tiny corner, and pipe it over your baked goods for controlled lines. You can also use a spoon and move it back and forth quickly over the item for a more rustic look.
Final Thoughts
This lemon glaze recipe proves that the simplest recipes are often the best. With just two main ingredients and five minutes, you can transform everyday baked goods into something that looks and tastes bakery-quality.
The bright, tangy sweetness of this glaze elevates everything it touches without overwhelming the base flavor. Try it once and I guarantee you’ll keep lemons and powdered sugar stocked in your kitchen permanently.
Lemon Glaze
Ingredients
Equipment
Method
- Place your powdered sugar in a fine-mesh strainer or sifter set over a medium bowl. Sift the sugar to remove any lumps that could create a bumpy glaze.
- Roll your lemons firmly on the counter with the palm of your hand before cutting them in half. Juice enough lemons to get at least 3 tablespoons of fresh juice, straining out any seeds.
- Pour 3 tablespoons of lemon juice into the sifted powdered sugar. Start with less liquid than you think you need because you can always add more but can't take it away.
- Whisk the mixture vigorously for about 30 seconds until it becomes completely smooth and all the sugar dissolves. You want a consistency that drips slowly from the whisk but isn't runny.
- Check if your glaze has the right thickness for your intended use. For a thin, translucent drizzle, add the remaining tablespoon of lemon juice or even a bit more. For a thicker glaze that sets opaque and firm, add more powdered sugar one tablespoon at a time.
- If you're using lemon zest, stir it in now along with a tiny pinch of salt if desired. Mix just until everything is evenly distributed.
- Dip a spoon into the glaze and hold it horizontally over the bowl to test consistency. The glaze should fall in a slow, steady ribbon that takes a few seconds to disappear back into the surface. If it runs off immediately like water, whisk in more powdered sugar. If it barely moves, add more lemon juice drop by drop.
- Apply the glaze right away while it's at its smoothest and most workable. Drizzle it over cooled baked goods, dip the tops of cookies directly into it, or spread it with an offset spatula. The glaze will begin to set within 10 to 15 minutes and fully harden in about an hour.