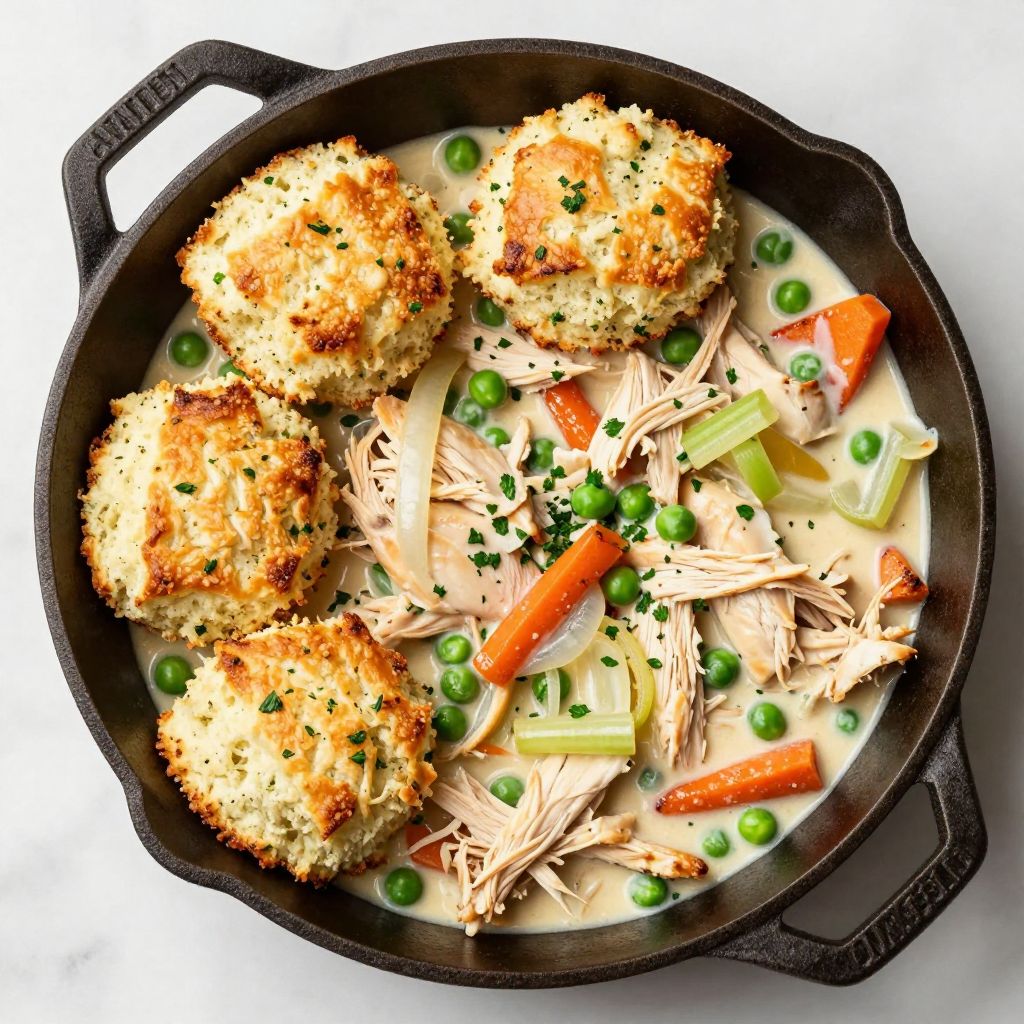
Chicken and biscuits recipe brings together tender chicken in a creamy sauce topped with fluffy, golden biscuits for the ultimate comfort food dinner. This hearty dish combines simple ingredients like chicken, vegetables, and herbs into a one-pan meal that feels like a warm hug on a plate.
Whether you need a satisfying weeknight dinner or a cozy meal to share with family, this recipe delivers big flavor without complicated steps. The buttery biscuits bake right on top of the creamy chicken filling, creating a complete meal that requires minimal cleanup.
Why You’ll Love This Recipe
This chicken and biscuits recipe transforms basic pantry ingredients into a restaurant-quality meal that everyone requests again and again. You get all the satisfaction of chicken pot pie with half the effort and none of the fussy crust-making.
- One-pan cooking means less cleanup and more time at the dinner table
- The biscuit topping bakes perfectly golden while the filling stays creamy
- Uses rotisserie chicken for a 40-minute start-to-finish dinner
- Feeds a crowd without breaking the budget
- Freezes beautifully for make-ahead convenience
My Experience Making This Recipe
I stumbled onto this recipe on a rushed Tuesday when I had leftover rotisserie chicken and a serious craving for comfort food. The smell of those biscuits baking on top of the bubbling chicken filling made my kitchen smell better than any bakery.
My kids devoured their servings and actually asked for seconds of something containing vegetables, which felt like a parenting victory. The crispy-edged biscuits soaked up just enough of that creamy sauce while staying fluffy in the middle.
I’ve made this at least two dozen times since that first attempt, tweaking the herbs and testing different biscuit recipes. The version I’m sharing today represents the best combination I’ve found after all that delicious experimentation.
Recipe Overview
- Recipe Name: Chicken and Biscuits
- Servings: 6
- Prep Time: 15 minutes
- Cook Time: 30 minutes
- Total Time: 45 minutes
- Course: Main Dish
- Cuisine: American
- Calories per Serving: 485
Equipment You Will Need
- Large oven-safe skillet (10 or 12 inch)
- Medium mixing bowl
- Wooden spoon or spatula
- Whisk
- Measuring cups and spoons
- Box grater or food processor (for butter)
- Biscuit cutter or round glass (2.5 inches)
Ingredients for Chicken and Biscuits
For the Chicken Filling
- 3 cups cooked chicken, shredded or cubed
- 3 tablespoons butter
- 1 medium onion, diced
- 2 medium carrots, peeled and diced
- 2 celery stalks, diced
- 3 cloves garlic, minced
- 1/3 cup all-purpose flour
- 2 cups chicken broth
- 1 cup whole milk
- 1 cup frozen peas
- 1 teaspoon dried thyme
- 1/2 teaspoon dried rosemary
- 1 teaspoon salt
- 1/2 teaspoon black pepper
For the Biscuit Topping
- 2 cups all-purpose flour
- 1 tablespoon baking powder
- 1 teaspoon salt
- 1/2 teaspoon garlic powder
- 6 tablespoons cold butter, cubed
- 3/4 cup cold buttermilk
- 2 tablespoons fresh parsley, chopped
Ingredient Notes and Substitutions
- Cooked chicken: Rotisserie chicken saves time and adds extra flavor from the seasoned skin. You can substitute poached chicken breasts or leftover roasted chicken.
- Buttermilk: Creates tender, tangy biscuits with the perfect rise. Mix 3/4 cup regular milk with 2 teaspoons lemon juice and let sit 5 minutes as a substitute.
- Chicken broth: Provides the savory base for the creamy sauce. Vegetable broth works if you want a lighter flavor profile.
- Whole milk: Adds richness to the filling without being too heavy. Half-and-half makes it richer, while 2% milk works for a lighter version.
- Cold butter: Keeps the biscuits flaky by creating steam pockets as it melts. Frozen butter grated on a box grater works even better than cubed.
- Fresh parsley: Adds color and freshness to the biscuits. Dried parsley (1 tablespoon) or fresh chives work as alternatives.
How to Make Chicken and Biscuits
Step 1: Prepare the Vegetables and Preheat
Preheat your oven to 425°F so it reaches the right temperature when your filling is ready. Dice your onion, carrots, and celery into small, uniform pieces about 1/4 inch in size so they cook evenly and quickly.
Step 2: Cook the Vegetable Base
Melt the butter in your large oven-safe skillet over medium heat until it stops foaming. Add the onion, carrots, and celery, cooking for 5-6 minutes until the vegetables soften and the onion becomes translucent, stirring occasionally to prevent sticking.
Add the minced garlic and cook for 30 seconds until fragrant but not browned. Garlic burns quickly and turns bitter, so watch it closely during this short cooking time.
Step 3: Create the Roux
Sprinkle the flour over the vegetables and stir constantly for 2 minutes to cook out the raw flour taste. This roux will thicken your sauce and prevent that pasty, floury texture that ruins so many cream sauces.
Step 4: Build the Creamy Sauce
Slowly pour in the chicken broth while whisking constantly to prevent lumps from forming in your sauce. Add the milk, thyme, rosemary, salt, and pepper, then bring the mixture to a simmer.
Let it bubble gently for 3-4 minutes until the sauce thickens enough to coat the back of a spoon. The sauce should be slightly thicker than heavy cream since the biscuits will absorb some liquid as they bake.
Step 5: Add Chicken and Peas
Stir in your cooked chicken and frozen peas until everything is evenly distributed throughout the sauce. The peas will thaw quickly in the hot filling, so there’s no need to defrost them first.
Taste the filling and adjust the salt and pepper if needed. The filling should be well-seasoned because the biscuits will dilute the overall flavor slightly.
Step 6: Make the Biscuit Dough
Whisk together the flour, baking powder, salt, and garlic powder in a medium bowl. Add the cold cubed butter and use your fingers or a pastry cutter to work it into the flour until the mixture looks like coarse crumbs with some pea-sized butter chunks remaining.
Pour in the cold buttermilk and parsley, then stir gently with a fork just until the dough comes together. Overmixing develops gluten and creates tough, dense biscuits instead of tender, flaky ones.
Step 7: Shape and Place the Biscuits
Turn the shaggy dough onto a lightly floured surface and pat it into a rectangle about 3/4 inch thick. Cut out biscuits using a 2.5-inch cutter, pressing straight down without twisting to help them rise evenly.
Place the biscuits on top of the hot chicken filling, leaving a small gap between each one for air circulation. Gather the scraps, pat them out once more, and cut additional biscuits until you’ve used all the dough.
Step 8: Bake Until Golden
Transfer the skillet to your preheated oven and bake for 18-22 minutes until the biscuits turn golden brown on top and the filling bubbles around the edges. The biscuits should sound hollow when tapped and the internal temperature should reach 200°F.
Let the dish rest for 5 minutes before serving so the sauce thickens slightly and you don’t burn your tongue. This brief wait makes serving much easier and lets the flavors settle together.
Pro Tip: Freeze your butter for 15 minutes before making the biscuit dough, then grate it on a box grater directly into the flour mixture. This creates the flakiest biscuits imaginable because the tiny butter shreds create more steam pockets than larger chunks ever could.
Tips for the Best Chicken and Biscuits
- Keep all your biscuit ingredients cold, including the bowl if you have time to chill it. Cold butter creates steam when it hits the hot oven, which makes those coveted flaky layers.
- Don’t twist your biscuit cutter when cutting out the dough shapes. Twisting seals the edges and prevents the biscuits from rising as high and light as they should.
- Season your chicken filling generously because under-seasoned filling makes the whole dish taste bland. The biscuits themselves are fairly neutral, so the filling needs to carry most of the flavor.
- Use an oven-safe skillet with a light-colored or stainless steel interior so you can see when your roux reaches the right golden color. Dark non-stick pans make this nearly impossible to judge accurately.
- Let the filled skillet sit for 2-3 minutes after removing it from the stovetop before adding biscuits. This slight cooling prevents the bottoms from cooking too quickly and becoming gummy.
- Brush the biscuit tops with melted butter halfway through baking for an extra golden, glossy finish that looks professionally made.
Common Mistakes to Avoid
- Adding warm or room-temperature butter to your biscuit dough creates flat, dense biscuits without those signature flaky layers. The butter must be ice-cold to create steam pockets.
- Overcrowding the skillet with too many biscuits prevents proper air circulation and leaves you with pale, soggy tops. Leave at least half an inch between each biscuit.
- Skipping the roux-cooking step leaves you with a sauce that tastes like raw flour and has a gritty, unpleasant texture. Those 2 minutes of stirring make all the difference.
- Using pre-cooked frozen vegetables instead of sautéing fresh ones means you miss out on the caramelized flavors that form the foundation of this dish. Fresh vegetables develop sweetness and depth that frozen can’t match.
- Opening the oven door repeatedly to check on the biscuits releases heat and prevents them from rising properly. Trust your timer and only peek once after 18 minutes.
Serving Suggestions
This chicken and biscuits recipe works beautifully as a complete meal on its own, but a few simple sides round out the plate nicely. Light, fresh accompaniments balance the rich, creamy main dish perfectly.
- A crisp green salad with vinaigrette cuts through the richness and adds necessary crunch
- Roasted green beans with garlic and lemon bring brightness to the plate
- Cranberry sauce offers a sweet-tart contrast that complements the savory filling
- Simple steamed broccoli with butter and salt keeps things classic and vegetable-forward
- Apple cider or crisp white wine pairs wonderfully with the herbs and creamy sauce
Variations to Try
- Mushroom lovers version: Add 8 ounces of sliced mushrooms to the vegetable base and cook until golden. The earthy mushroom flavor adds incredible depth and a restaurant-quality touch.
- Spicy kick: Stir in 1/4 teaspoon cayenne pepper and 1/2 cup diced jalapeños to the filling. The heat plays surprisingly well against the cooling effect of the buttermilk biscuits.
- Herb garden special: Replace dried herbs with 2 tablespoons fresh thyme and 1 tablespoon fresh rosemary. Fresh herbs create a brighter, more vibrant flavor that tastes like spring.
- Bacon enhanced: Cook 6 strips of bacon until crispy, crumble them into the filling, and use the bacon fat instead of butter for the vegetable base. The smoky flavor transforms this into a completely different dish.
- Cheesy upgrade: Add 1 cup of shredded sharp cheddar to the filling and sprinkle more on top of the biscuits before baking. The cheese makes it even more indulgent and kid-friendly.
Dietary Adaptations
- Gluten-free: Use a 1:1 gluten-free flour blend for both the roux and the biscuits, adding 1/2 teaspoon xanthan gum to the biscuit dough if your blend doesn’t include it. The texture won’t be quite as flaky but still delicious.
- Dairy-free: Substitute coconut oil or vegan butter for regular butter, use unsweetened almond milk instead of dairy milk, and replace buttermilk with almond milk mixed with vinegar. The richness decreases slightly but the dish remains satisfying.
- Low-carb: Skip the biscuits entirely and serve the creamy chicken filling over cauliflower rice or with low-carb biscuits made from almond flour. You’ll miss the classic presentation but save considerable carbs.
- Higher protein: Increase the chicken to 4 cups and reduce the sauce slightly to maintain the right consistency. This bumps each serving up by about 10 grams of protein.
Storage and Reheating
Refrigerator
Store leftover chicken and biscuits in an airtight container in the refrigerator for up to 4 days. The biscuits will soften as they absorb moisture from the filling, but they still taste fantastic.
- Separate the biscuits from the filling if possible to maintain better texture
- Cover the container tightly to prevent the dish from absorbing other food odors
Freezer
Freeze the chicken filling and biscuits separately for best results, storing them for up to 3 months. Freezing them together makes the biscuits soggy and unpleasant when reheated.
- Cool the filling completely before transferring to freezer-safe containers
- Wrap baked biscuits individually in plastic wrap, then place in a freezer bag
- Label everything with the date so you use the oldest batches first
Reheating
Reheat the filling in a skillet over medium-low heat until warmed through, adding a splash of milk if the sauce has thickened too much. Warm the biscuits separately in a 350°F oven for 5-7 minutes to restore some of their original texture.
- Microwave individual portions for 2-3 minutes if you’re short on time
- Cover the dish with foil when reheating in the oven to prevent the biscuits from over-browning
Nutrition Information
| Nutrient | Amount |
|---|---|
| Calories | 485 |
| Total Fat | 22g |
| Saturated Fat | 12g |
| Carbohydrates | 42g |
| Fiber | 3g |
| Sugar | 6g |
| Protein | 28g |
| Sodium | 890mg |
| Cholesterol | 85mg |
Nutrition information is calculated based on standard ingredient measurements and may vary based on specific brands and preparation methods used. These values are estimates and should not be considered medical or dietary advice.
Frequently Asked Questions
Can I use canned biscuits instead of homemade?
Absolutely, and refrigerated biscuit dough actually works great when you’re short on time. Just arrange them on top of the hot filling and bake according to the package directions, usually 12-15 minutes at 375°F.
Can I make this ahead of time?
You can prepare the filling up to 2 days ahead and refrigerate it, then make fresh biscuit dough and bake everything together when ready to serve. Baking the biscuits fresh ensures they stay light and fluffy rather than soggy.
Why is my filling too thin or too thick?
If your filling is too thin, simmer it for a few extra minutes to reduce and thicken
Chicken and Biscuits
Ingredients
Equipment
Method
- Preheat your oven to 425°F. Dice your onion, carrots, and celery into small, uniform pieces about 1/4 inch in size so they cook evenly and quickly.
- Melt the butter in your large oven-safe skillet over medium heat until it stops foaming. Add the onion, carrots, and celery, cooking for 5-6 minutes until the vegetables soften and the onion becomes translucent, stirring occasionally to prevent sticking.
- Add the minced garlic and cook for 30 seconds until fragrant but not browned.
- Sprinkle the flour over the vegetables and stir constantly for 2 minutes to cook out the raw flour taste.
- Slowly pour in the chicken broth while whisking constantly to prevent lumps from forming. Add the milk, thyme, rosemary, salt, and pepper, then bring the mixture to a simmer.
- Let it bubble gently for 3-4 minutes until the sauce thickens enough to coat the back of a spoon.
- Stir in your cooked chicken and frozen peas until everything is evenly distributed throughout the sauce. Taste the filling and adjust the salt and pepper if needed.
- Whisk together the flour, baking powder, salt, and garlic powder in a medium bowl. Add the cold cubed butter and use your fingers or a pastry cutter to work it into the flour until the mixture looks like coarse crumbs with some pea-sized butter chunks remaining.
- Pour in the cold buttermilk and parsley, then stir gently with a fork just until the dough comes together.
- Turn the shaggy dough onto a lightly floured surface and pat it into a rectangle about 3/4 inch thick. Cut out biscuits using a 2.5-inch cutter, pressing straight down without twisting to help them rise evenly.
- Place the biscuits on top of the hot chicken filling, leaving a small gap between each one for air circulation. Gather the scraps, pat them out once more, and cut additional biscuits until you've used all the dough.
- Transfer the skillet to your preheated oven and bake for 18-22 minutes until the biscuits turn golden brown on top and the filling bubbles around the edges.
- Let the dish rest for 5 minutes before serving so the sauce thickens slightly.