Ginger bug recipe is your gateway to creating naturally fermented, fizzy sodas and drinks right at home using just fresh ginger, sugar, and water. This living culture of wild yeast and beneficial bacteria transforms simple ingredients into a powerful starter that rivals any commercial probiotic beverage. Whether you want to make traditional ginger beer or experiment with homemade sodas, mastering this fermentation starter opens up a world of delicious possibilities.
Making your own ginger bug takes just five minutes of daily effort over about a week. The payoff is a sustainable, reusable culture that keeps giving for months with proper care.
Why You’ll Love This Recipe
This ginger bug is the foundation for countless probiotic beverages without needing store-bought yeast or starters. Once you have an active culture, you can create fizzy drinks whenever the mood strikes.
- Costs pennies compared to buying kombucha or probiotic sodas at the store
- Uses only three simple, natural ingredients with no special equipment required
- Creates a living culture you can maintain and use indefinitely with proper feeding
- Produces naturally carbonated beverages packed with beneficial probiotics and enzymes
- Gives you complete control over sweetness levels and flavor profiles in your fermented drinks
My Experience Making This Recipe
I started my first ginger bug on a whim after getting tired of paying seven dollars for a single bottle of ginger beer. Within three days, I noticed tiny bubbles forming around the ginger pieces, and by day five, the mixture was actively fizzing when I stirred it. The smell transformed from plain ginger to something slightly yeasty and pleasantly tangy.
My first batch of homemade ginger soda turned out better than I expected, with a natural effervescence that commercial sodas can’t replicate. I’ve kept the same bug alive for over eight months now, and it just gets more vigorous with time. Friends who try my fermented drinks always ask for the recipe, surprised that something so simple produces such complex, refreshing flavors.
Recipe Overview
- Recipe Name: Ginger Bug Recipe
- Yield: About 2 cups of active starter
- Prep Time: 5 minutes daily
- Fermentation Time: 5 to 7 days
- Total Time: 5 to 7 days
- Course: Beverage starter/culture
- Cuisine: Universal
- Calories per Serving: Negligible (used as starter, not consumed directly)
Equipment You Will Need
- One quart-sized glass jar (mason jar works perfectly)
- Breathable cloth or coffee filter for covering
- Rubber band or string to secure the cloth
- Non-metal spoon for stirring (wood or plastic)
- Sharp knife and cutting board for ginger
- Measuring spoons
- Small grater or microplane (optional)
Ingredients for Ginger Bug Recipe
Initial Starter
- 2 cups filtered or dechlorinated water (chlorine will kill the beneficial bacteria)
- 2 tablespoons fresh ginger root, finely chopped or grated with skin on
- 2 tablespoons organic cane sugar
Daily Feeding (Days 2 through 5-7)
- 1 tablespoon fresh ginger root, finely chopped or grated with skin on (per day)
- 1 tablespoon organic cane sugar (per day)
Ingredient Notes and Substitutions
- Fresh ginger root: The wild yeasts live on the ginger skin, which is why you keep it on and use organic when possible. You can use conventional ginger if you scrub it well, but organic reduces pesticide exposure that might inhibit fermentation.
- Organic cane sugar: This feeds the yeast and bacteria, creating the fermentation. White granulated sugar works fine, but avoid honey initially as its antimicrobial properties can slow the process.
- Filtered water: Chlorine and chloramine in tap water kill beneficial microbes. Let tap water sit uncovered for 24 hours to off-gas chlorine, or use filtered, spring, or well water instead.
- Non-metal utensils: Metal can react with the acidic ferment and potentially harm the culture. Stick with wood, plastic, or silicone for all tools that touch the bug.
How to Make Ginger Bug Recipe
Step 1: Prepare Your Jar and Ginger
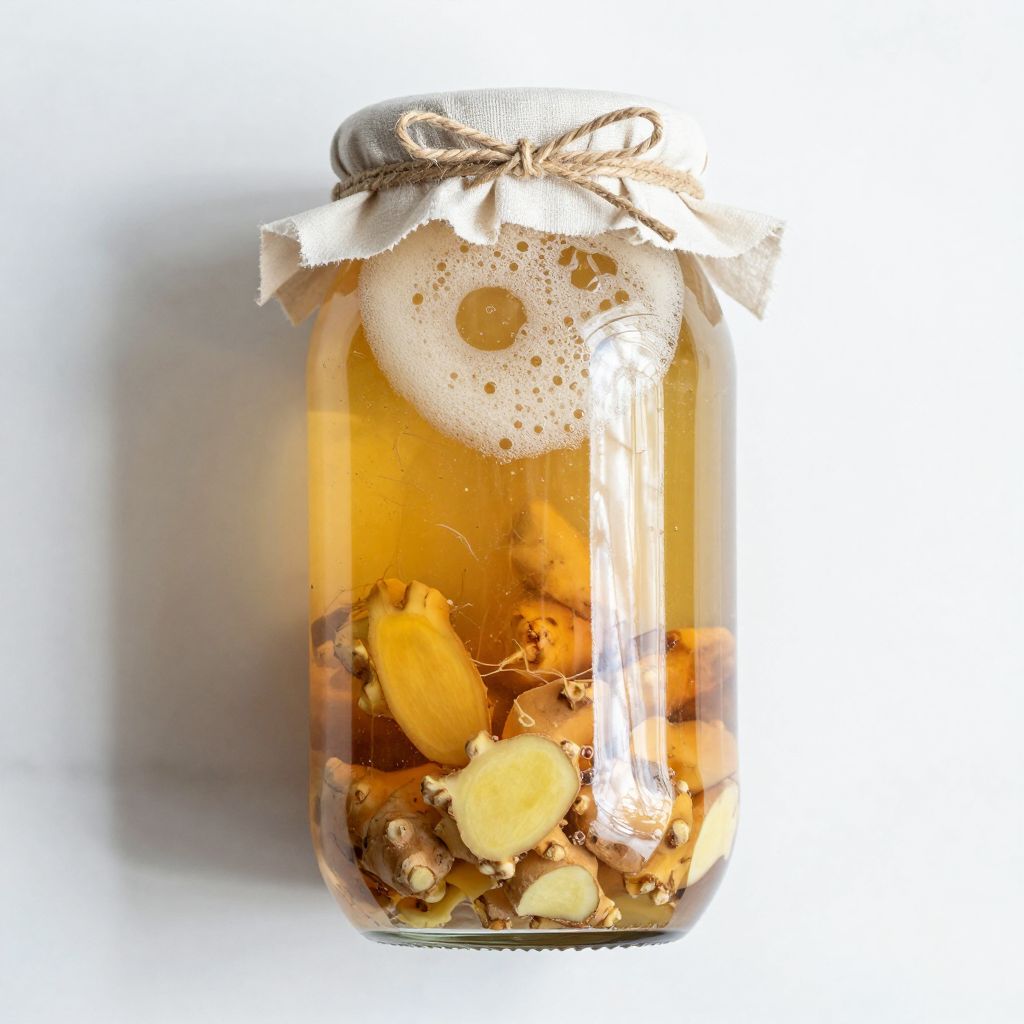
Wash your glass jar thoroughly with hot soapy water and rinse well to remove any soap residue. Chop or grate 2 tablespoons of fresh ginger with the skin on, keeping the pieces small to maximize surface area for the wild yeasts.
Smaller pieces release more flavor and provide more surface area for the beneficial microbes to colonize. The skin contains most of the wild yeast, so never peel your ginger for this recipe.
Step 2: Mix the Initial Starter
Add the chopped ginger and 2 tablespoons of sugar to your clean jar, then pour in 2 cups of filtered water. Stir vigorously with a non-metal spoon until the sugar completely dissolves into the water.
Thorough stirring introduces oxygen that the yeast needs during the initial growth phase. The mixture will look cloudy at first, which is completely normal.
Step 3: Cover and Store Properly
Cover the jar with a breathable cloth, coffee filter, or paper towel secured with a rubber band. Place the jar in a warm spot in your kitchen, ideally between 68 to 78 degrees Fahrenheit, away from direct sunlight.
The breathable cover allows wild yeast to enter while keeping out debris and insects. Warmer temperatures speed fermentation, while cooler temps slow it down but still work.
Step 4: Begin Daily Feeding Routine
Starting on day two, add 1 tablespoon each of freshly chopped ginger and sugar to the jar. Stir well with your non-metal spoon, then re-cover and return to its warm spot.
This daily feeding gives the growing culture fresh food and keeps the fermentation active. Think of it like feeding a sourdough starter but much simpler.
Step 5: Monitor Fermentation Progress
Continue the daily feeding for five to seven days total, watching for signs of active fermentation. You should start seeing small bubbles forming around the ginger pieces by day three or four, with more vigorous bubbling by day five.
The mixture will develop a pleasantly yeasty, slightly tangy aroma as the fermentation progresses. If you see a few bubbles and smell that characteristic fermented scent, you’re on the right track.
Step 6: Test for Readiness
Your ginger bug is ready when it bubbles actively within a few minutes of stirring and has a noticeably fizzy, tangy smell. Pour a small amount into a glass and listen for a slight fizzing sound, similar to opening a soft drink.
The surface should show consistent bubble activity, and the liquid will have a cloudy appearance from the active yeast suspension. If fermentation seems slow, continue daily feedings for another day or two.
Step 7: Strain and Use Your Active Bug
Once active, strain out the amount you need for your recipe through a fine mesh strainer. Use about 1/4 to 1/2 cup of strained liquid per quart of soda or beverage you’re fermenting.
The strained ginger pieces go back into your jar to maintain the culture. This process is similar to maintaining a sourdough starter, where you keep the culture going for future batches.
Step 8: Maintain Your Ginger Bug Long-Term
After using some bug for a recipe, continue feeding the remaining culture every one to three days if kept at room temperature. When you feed it, add equal parts ginger and sugar, usually 1 tablespoon of each.
If your bug gets too full of ginger pieces, strain out and discard about half before feeding. You can also refrigerate your bug and feed it just once a week, though it will become less active and need a day at room temperature to wake up before using.
Pro Tip: If your ginger bug isn’t bubbling after seven days, the water might be too cold or chlorinated, or the ginger wasn’t organic. Try moving it to a warmer spot, switching to filtered water, and using organic ginger for your next feeding. Patience pays off because even slow-starting bugs usually become active with consistent care.
Tips for the Best Ginger Bug Recipe
- Temperature matters tremendously: Keep your bug between 68 and 78 degrees for optimal activity. A spot on top of the refrigerator or near (not on) the stove often provides gentle warmth that accelerates fermentation.
- Stir every single time you walk past: Extra stirring introduces oxygen and distributes the yeast evenly, which creates a more vigorous culture. I stir mine three or four times daily during the initial creation phase.
- Use organic ginger for the first batch: The wild yeast population on organic ginger tends to be more robust since it hasn’t been treated with pesticides or anti-sprouting agents. Once your bug is established, you can switch to conventional ginger if needed.
- Don’t worry about exact measurements: Fermentation is forgiving, so if you add slightly more or less ginger or sugar during feeding, your bug will adapt. Consistency matters more than precision.
- Remove old ginger periodically: After a few weeks, your jar will fill with ginger sediment. Strain out about half the solids every two weeks to keep the culture fresh and prevent it from becoming too thick.
- Smell tells you everything: A healthy ginger bug smells pleasantly yeasty, tangy, and gingery. Any off-putting, rotten, or acetone-like smells mean something went wrong, and you should start over.
Common Mistakes to Avoid
- Using chlorinated tap water directly: Chlorine kills the beneficial bacteria and yeast you’re trying to cultivate. Always use filtered water or let tap water sit out uncovered for 24 hours minimum.
- Sealing the jar with an airtight lid: Your bug needs to breathe during the initial fermentation, and sealing it can create too much pressure or prevent wild yeast from entering. Always use a breathable cover secured with a rubber band.
- Peeling the ginger before adding it: The wild yeast lives primarily on the ginger skin, so peeling removes exactly what you need for fermentation. Just scrub the ginger clean if it looks dirty.
- Forgetting to feed for several days: The culture needs regular food to stay alive and active. Missing a day or two won’t kill it, but going a week without feeding will cause the beneficial organisms to die off and the bug to go dormant or spoil.
- Expecting instant results: Fermentation takes time, and trying to rush it by adding more sugar or yeast won’t help. Trust the process, stick to daily feedings, and let nature do its work over the five to seven day period.
Serving Suggestions
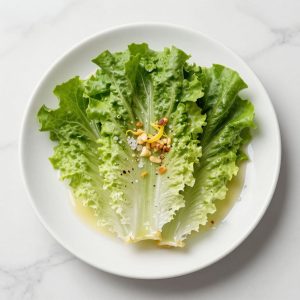
Your active ginger bug is a starter culture rather than a finished drink, so you’ll use it to ferment other beverages. The most popular option is homemade ginger beer, but the possibilities extend far beyond that single use.
- Traditional ginger beer made by fermenting ginger tea, sugar, and lemon juice with your bug for one to three days
- Naturally fermented fruit sodas using any fruit juice combined with the bug as a starter
- Herbal fermented drinks made from tea infusions of herbs like hibiscus, mint, or lemon balm
- Root beer using sassafras, sarsaparilla, or root beer extract with your bug instead of commercial yeast
- Fermented lemonade that develops a complex, slightly tangy flavor with natural carbonation
Variations to Try
- Turmeric ginger bug: Substitute half the ginger with fresh turmeric root for an anti-inflammatory twist that adds a golden color. The flavor becomes more earthy and the health benefits multiply.
- Spiced ginger bug: Add a cinnamon stick, a few cloves, or cardamom pods to your bug during feeding for additional flavor complexity. These spices impart their essence to any beverages you make with the bug.
- Honey-fed bug: After your initial bug is active, you can switch from sugar to honey for feeding, though the fermentation becomes slightly slower. Raw honey adds different microbes and creates a more complex flavor profile.
- Concentrated bug: Use half the water for a more potent culture that takes up less fridge space. This works well if you make fermented drinks frequently and need a stronger starter.
- Galangal bug: Replace ginger with galangal root, a related rhizome common in Southeast Asian cooking. The resulting bug has a more citrusy, pine-like flavor that creates unique sodas.
Dietary Adaptations
- Refined sugar-free: Switch to coconut sugar, maple sugar, or rapadura after the bug is established, though these alternatives slow fermentation slightly. Start with white sugar for the initial creation to give the culture the easiest food source.
- Lower sugar option: You can’t eliminate sugar entirely because the microbes need it to survive, but established bugs can tolerate slightly less. Reduce daily feeding to 2 teaspoons each of ginger and sugar once active, though fermentation will slow.
- Alcohol-conscious: Ginger bug produces trace amounts of alcohol during fermentation, typically under 0.5 percent. If this is a concern, you can heat beverages made with the bug to 160 degrees for one minute to kill the yeast, though you’ll lose the probiotic benefits.
- Vegan-friendly: This recipe is naturally vegan since it contains only plant-based ingredients and relies on wild fermentation. No animal products or processing aids are involved at any stage.
Storage and Reheating
Room Temperature Maintenance
Keep your active ginger bug on the counter if you plan to use it regularly, feeding it every one to three days. The culture stays most vigorous at room temperature with consistent feeding.
- Cover with breathable cloth secured by rubber band at all times
- Stir daily even if not feeding to distribute yeast evenly
- Strain out excess ginger solids every two weeks
- Should bubble actively within minutes of stirring when healthy
Refrigerator Storage
Refrigeration slows fermentation dramatically, allowing weekly feeding instead of daily. This method works perfectly for occasional users who make fermented drinks once or twice a month.
- Cover jar tightly with a lid once refrigerated to prevent absorption of food odors
- Feed once per week with 1 tablespoon each ginger and sugar
- Bring to room temperature 12 to 24 hours before using in a recipe
- Can store this way for several months with consistent weekly feeding
Reviving a Dormant Bug
If you neglect your bug or it seems to have died, you can often revive it with patience. Sometimes cultures that appear dead are just dormant.
- Resume daily feedings with fresh ginger and sugar
- Move to a warmer location to encourage microbial activity
- Wait five to seven days, watching for any bubble formation
- If no activity appears after ten days of feeding, start a fresh batch
Nutrition Information
| Nutrient | Amount |
|---|---|
| Calories | Not applicable (used as starter) |
| Total Fat | 0g |
| Saturated Fat | 0g |
| Carbohydrates | Negligible after fermentation |
| Fiber | 0g |
| Sugar | Consumed by fermentation |
| Protein | 0g |
| Sodium | 0mg |
| Cholesterol | 0mg |
Nutritional values are not applicable since ginger bug is used as a starter culture and strained before use. The finished beverages you create with the bug will have their own nutritional profiles based on ingredients used.
Frequently Asked Questions
Can I use ground ginger powder instead of fresh ginger root?
No, you need fresh ginger root because the wild yeast lives on the skin of fresh rhizomes. Ground ginger has been dried and processed, killing any beneficial microbes that would create fermentation.
How do I know if my ginger bug has gone bad?
A healthy bug smells pleasantly yeasty and tangy, while a bad one develops a rotten, putrid, or nail-polish-remover smell. Visible mold in colors other than white also indicates contamination, and you should discard the batch and start over.
Can I make a larger batch of ginger bug all at once?
The daily feeding method creates a stronger culture than mixing everything at once. You can double or triple the recipe quantities while keeping the same feeding schedule, but don’t try to skip the daily feeding process as it builds the microbial population gradually.
Why isn’t my ginger bug bubbling after a week?
The most common causes are chlorinated water, too-cold temperatures, or non-organic ginger treated with growth
Ginger Bug Recipe
Ingredients
Equipment
Method
- Wash your glass jar thoroughly with hot soapy water and rinse well to remove any soap residue. Chop or grate 2 tablespoons of fresh ginger with the skin on, keeping the pieces small to maximize surface area for the wild yeasts.
- Add the chopped ginger and 2 tablespoons of sugar to your clean jar, then pour in 2 cups of filtered water. Stir vigorously with a non-metal spoon until the sugar completely dissolves into the water.
- Cover the jar with a breathable cloth, coffee filter, or paper towel secured with a rubber band. Place the jar in a warm spot in your kitchen, ideally between 68 to 78 degrees Fahrenheit, away from direct sunlight.
- Starting on day two, add 1 tablespoon each of freshly chopped ginger and sugar to the jar. Stir well with your non-metal spoon, then re-cover and return to its warm spot.
- Continue the daily feeding for five to seven days total, watching for signs of active fermentation. You should start seeing small bubbles forming around the ginger pieces by day three or four, with more vigorous bubbling by day five.
- Your ginger bug is ready when it bubbles actively within a few minutes of stirring and has a noticeably fizzy, tangy smell. Pour a small amount into a glass and listen for a slight fizzing sound, similar to opening a soft drink.
- Once active, strain out the amount you need for your recipe through a fine mesh strainer. Use about 1/4 to 1/2 cup of strained liquid per quart of soda or beverage you're fermenting. The strained ginger pieces go back into your jar to maintain the culture.
- After using some bug for a recipe, continue feeding the remaining culture every one to three days if kept at room temperature. When you feed it, add equal parts ginger and sugar, usually 1 tablespoon of each. If your bug gets too full of ginger pieces, strain out and discard about half before feeding.