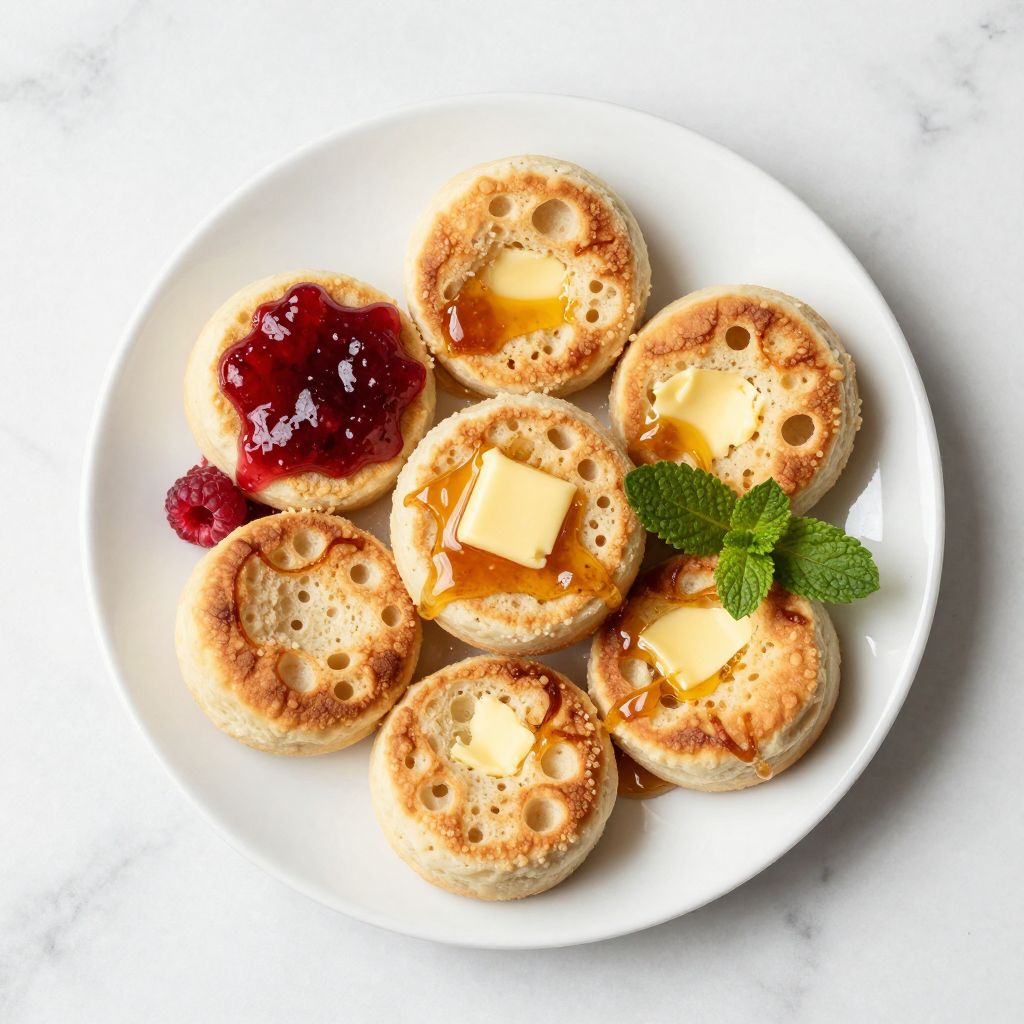
Crumpet recipe enthusiasts know there’s nothing quite like biting into a warm, golden crumpet fresh from the griddle, with butter pooling in those signature holes. These spongy, yeasted griddle cakes are a breakfast staple across Britain, and making them at home fills your kitchen with an irresistible aroma that no store-bought version can match.
The secret to perfect crumpets lies in the batter consistency and the cooking technique. Once you master the simple steps, you’ll wonder why you ever bought them from the supermarket.
Why You’ll Love This Recipe
This homemade crumpet recipe delivers bakery-quality results with ingredients you probably already have in your pantry. The process is surprisingly simple once you understand the basics.
- Creates those iconic honeycomb holes that soak up butter and jam perfectly
- Requires minimal hands-on time since the yeast does most of the work
- Costs a fraction of what you’d pay for shop-bought crumpets
- Tastes infinitely better than anything you’ll find in stores
- Freezes beautifully for quick breakfasts throughout the week
My Experience Making This Recipe
I’ll admit my first batch of crumpets looked more like sad pancakes than the holey wonders I was aiming for. The batter was too thick, and I learned the hard way that consistency is everything with crumpets.
After adjusting the liquid and letting the batter really bubble and rise, my second attempt produced those gorgeous craters I was chasing. The smell of yeast and toasting batter filled my kitchen, and I felt ridiculously proud when I pulled back the crumpet ring to reveal perfect honeycomb patterns.
My family devoured them slathered in salted butter while they were still hot from the pan. Even my skeptical teenager, who usually grumbles about homemade versions of things, admitted these beat the store-bought ones hands down.
Recipe Overview
- Recipe Name: Homemade Crumpets
- Servings: 12 crumpets
- Prep Time: 15 minutes
- Cook Time: 40 minutes
- Total Time: 1 hour 55 minutes (including rising time)
- Course: Breakfast
- Cuisine: British
- Calories per Serving: 118
Equipment You Will Need
- Large mixing bowl
- Whisk or electric mixer
- Measuring cups and spoons
- Heavy-bottomed frying pan or griddle
- Crumpet rings or metal egg rings (about 3 to 4 inches diameter)
- Pastry brush for greasing
- Spatula or palette knife
- Clean kitchen towel
- Small ladle or measuring cup for pouring batter
Ingredients for Crumpet Recipe
- 2 cups all-purpose flour
- 1 teaspoon salt
- 1 teaspoon sugar
- 2 teaspoons instant yeast
- 1 and 1/4 cups warm milk (around 110°F)
- 3/4 cup warm water
- 1/2 teaspoon baking soda
- 2 tablespoons warm water (for dissolving baking soda)
- Vegetable oil or butter for greasing
Ingredient Notes and Substitutions
- All-purpose flour: Provides the structure for the crumpets and creates the perfect texture. You can use bread flour for slightly chewier crumpets with more structure.
- Instant yeast: Gives the batter its rise and creates those signature holes through fermentation. Active dry yeast works but needs to be bloomed in warm liquid for 5 minutes first.
- Milk: Adds richness and helps create a tender crumb with a lovely golden color. Substitute with any plant-based milk like almond or oat for a dairy-free version.
- Baking soda: Creates additional bubbles and helps form the characteristic holes in the crumpet surface. Omitting this will result in fewer holes and a denser texture.
- Sugar: Feeds the yeast and adds a subtle sweetness that balances the savory notes. Honey or maple syrup can replace it in equal amounts.
How to Make Crumpet Recipe
Step 1: Mix the Initial Batter
Combine the flour, salt, sugar, and instant yeast in a large mixing bowl, whisking them together until evenly distributed. Pour in the warm milk and 3/4 cup of warm water, then whisk vigorously for about 2 minutes until you have a smooth batter with no lumps.
The batter should resemble thick pancake batter at this stage. Whisking well introduces air and helps activate the gluten, which creates the structure needed for those holes to form.
Step 2: Let the Batter Rise
Cover the bowl with a clean kitchen towel and place it in a warm spot in your kitchen for about 1 hour. The batter should become very bubbly and almost double in volume, with a pleasant yeasty aroma.
This rising period allows the yeast to ferment and create gas bubbles, which is what gives crumpets their distinctive texture. A warm environment speeds up fermentation, so near a sunny window or on top of the refrigerator works well.
Step 3: Add the Baking Soda
Dissolve the baking soda in 2 tablespoons of warm water, stirring until completely dissolved. Pour this mixture into your risen batter and stir gently to combine.
The baking soda reacts with the slightly acidic batter to create extra bubbles that form the holes on top. You’ll notice the batter becomes even lighter and more bubbly after adding this.
Step 4: Prepare Your Pan and Rings
Heat your frying pan or griddle over medium-low heat and lightly grease both the pan surface and the inside of your crumpet rings with vegetable oil or butter. Place the greased rings directly onto the heated pan to warm them up.
Proper greasing prevents sticking and ensures you can remove the rings easily once the crumpets are cooked. Low to medium-low heat is key because crumpets need gentle, even cooking to set properly without burning.
Step 5: Cook the Crumpets
Ladle or pour about 1/3 cup of batter into each ring, filling them roughly halfway. The batter should sizzle gently when it hits the pan.
Cook for 8 to 10 minutes without moving them until the surface is covered with holes and appears almost dry, with no wet batter visible. The bottoms should be golden brown, and the tops should look set but pale.
Step 6: Remove the Rings
Carefully lift off the crumpet rings using a kitchen towel or tongs, as they’ll be hot. If the crumpets stick, gently run a knife around the inside edge to loosen them.
The crumpets should hold their shape perfectly once the rings are removed. If they collapse, the batter was too thin or they needed more cooking time.
Step 7: Finish Cooking the Tops
Flip the crumpets over and cook for just 1 to 2 minutes on the holey side to lightly toast the top. This step is optional but adds a nice texture contrast.
Don’t overcook the top or you’ll seal those beautiful holes you worked so hard to create. A quick kiss of heat is all you need.
Step 8: Keep Warm and Repeat
Transfer the cooked crumpets to a plate and cover them with a clean towel to keep them warm and soft while you cook the remaining batter. Re-grease your rings and pan between batches to prevent sticking.
The batter may thicken slightly as it sits, so give it a quick stir before ladling out each batch. Consistent batter consistency means consistent results across all your crumpets.
Pro Tip: The batter consistency is absolutely critical for perfect holes. If your crumpets aren’t developing those signature craters, the batter is too thick. Add warm water a tablespoon at a time until the batter is thin enough to pour easily but still coats the back of a spoon. Think crepe batter rather than pancake batter.
Tips for the Best Crumpet Recipe
- Use a thermometer to check your liquids are around 110°F. Too hot kills the yeast, too cold slows it down dramatically.
- Don’t skip the second rise after adding the baking soda. Let the batter rest for 5 to 10 minutes before cooking for even better holes.
- Keep your heat low and steady. Rushing with high heat will burn the bottoms before the tops set, leaving you with raw centers.
- If you don’t have crumpet rings, clean tuna cans with both ends removed work surprisingly well in a pinch.
- Test your first crumpet and adjust. If it’s too dense, thin the batter slightly; if it’s spreading too much, add a tablespoon of flour.
- Fresh yeast creates the best flavor, but instant yeast is far more convenient and reliable for consistent results.
Common Mistakes to Avoid
- Making the batter too thick results in dense, hole-free crumpets that resemble English muffins instead of proper crumpets.
- Cooking over high heat burns the bottoms before the tops can set and develop their characteristic bubbles.
- Not greasing the rings adequately causes the batter to stick, making removal nearly impossible without destroying your crumpets.
- Skipping the rising time produces flat, dense crumpets without the light, airy texture that makes them special.
- Overfilling the rings causes batter to spill over the edges and creates uneven, oddly shaped crumpets that won’t cook properly.
Serving Suggestions
Crumpets are incredibly versatile and shine with both sweet and savory toppings. The holes act like little butter reservoirs, making every bite rich and satisfying.
- Classic salted butter that melts into every crater, served with your favorite jam or marmalade
- Honey and ricotta with a sprinkle of cinnamon for a luxurious breakfast treat
- Smoked salmon, cream cheese, and fresh dill for an elegant brunch option
- Marmite or Vegemite for the ultimate British experience (love it or hate it)
- Poached eggs and hollandaise sauce as a creative eggs Benedict base
Variations to Try
- Whole wheat crumpets: Replace half the all-purpose flour with whole wheat flour for a nuttier, heartier version with added fiber.
- Sourdough crumpets: Substitute 1/2 cup of the liquid with active sourdough starter and reduce the yeast to 1 teaspoon for tangy, complex flavor.
- Cheese and herb crumpets: Stir in 1/2 cup grated cheddar and 2 tablespoons chopped fresh herbs into the batter before the second rise for savory breakfast options.
- Sweet cinnamon crumpets: Add 1 teaspoon of cinnamon and increase the sugar to 2 tablespoons for crumpets perfect for sweet toppings.
- Gluten-free crumpets: Use a cup-for-cup gluten-free flour blend, though the texture will be slightly different and may require batter adjustment.
Dietary Adaptations
- Gluten-free: Use a good quality gluten-free all-purpose flour blend with xanthan gum, though the texture will be less chewy and the holes may be smaller.
- Dairy-free: Replace milk with almond, oat, or soy milk without any other changes needed, maintaining the same proportions and cooking method.
- Vegan: This recipe is already vegan-friendly as written, containing no eggs or dairy, making it perfect for plant-based diets.
- Low-carb/Keto: Crumpets are inherently high in carbohydrates due to the flour, and low-carb versions using almond or coconut flour won’t replicate the authentic texture or holes.
Storage and Reheating
Refrigerator
Store cooled crumpets in an airtight container or resealable bag in the refrigerator for up to 5 days. Separate layers with parchment paper to prevent sticking.
- Let crumpets cool completely before storing to prevent condensation and sogginess
- Keep them sealed tightly to maintain freshness and prevent them from drying out
Freezer
Freeze crumpets for up to 3 months by placing them in a single layer on a baking sheet until solid, then transferring to a freezer bag. This prevents them from sticking together.
- No need to thaw before toasting, just pop them straight into the toaster from frozen
- Label your freezer bag with the date so you use the oldest ones first
Reheating
The toaster is absolutely the best method for reheating crumpets, giving them crispy edges while keeping the interior soft. Toast them until golden and heated through, about 3 to 4 minutes.
- Split thicker crumpets in half before toasting for even heating and extra crispy surfaces
- You can also reheat in a dry frying pan over medium heat for 2 minutes per side
- Avoid microwaving as it makes crumpets rubbery and tough rather than delightfully crispy
Nutrition Information
| Nutrient | Amount |
|---|---|
| Calories | 118 |
| Total Fat | 1g |
| Saturated Fat | 0.3g |
| Carbohydrates | 23g |
| Fiber | 1g |
| Sugar | 2g |
| Protein | 4g |
| Sodium | 295mg |
| Cholesterol | 2mg |
Nutritional values are approximate and calculated based on the ingredients listed without additional toppings or spreads. Adding butter, jam, or other toppings will increase the calorie and fat content significantly.
Frequently Asked Questions
Can I make crumpets without crumpet rings?
Yes, you can use clean metal cookie cutters, biscuit cutters, or even empty food cans with both ends removed as makeshift rings. Just make sure whatever you use is at least 2 inches tall to contain the batter properly.
Why aren’t my crumpets developing holes?
The most common reason is batter that’s too thick or heat that’s too high. Thin your batter with warm water until it pours easily, and reduce your heat to medium-low for slower, gentler cooking.
Can I make the batter ahead of time?
You can prepare the batter up to 24 hours in advance and store it covered in the refrigerator. Bring it back to room temperature and add the baking soda mixture just before cooking for best results.
How do I know when to flip the crumpets?
Wait until the entire surface is covered with holes and looks dry with no wet batter showing, which takes 8 to 10 minutes. The edges should also start to look set and pull away slightly from the ring.
What’s the difference between crumpets and English muffins?
Crumpets have a smooth bottom and holey top with a spongier texture, while English muffins are cooked on both sides and split open to reveal nooks and crannies throughout. Crumpets use a wetter batter, whereas English muffins use a stiffer dough.
Can I cook crumpets without rings and just make them freeform?
The batter is too thin to hold its shape without rings and will spread out like thin pancakes rather than staying thick and developing proper holes. Rings are really necessary for authentic crumpet texture and appearance.
Final Thoughts
Making crumpets at home transforms a simple breakfast into something special that connects you to centuries of British baking tradition. The process is forgiving once you nail the batter consistency, and the results are so much better than anything you’ll find in stores.
Give this recipe a try and experience the joy of butter melting into those perfect little holes you created yourself. Your kitchen will smell amazing, and you’ll have a breakfast staple that’s both comforting and impressive.
Homemade Crumpets
Ingredients
Equipment
Method
- Combine the flour, salt, sugar, and instant yeast in a large mixing bowl, whisking them together until evenly distributed. Pour in the warm milk and 3/4 cup of warm water, then whisk vigorously for about 2 minutes until you have a smooth batter with no lumps.
- Cover the bowl with a clean kitchen towel and place it in a warm spot in your kitchen for about 1 hour. The batter should become very bubbly and almost double in volume, with a pleasant yeasty aroma.
- Dissolve the baking soda in 2 tablespoons of warm water, stirring until completely dissolved. Pour this mixture into your risen batter and stir gently to combine.
- Heat your frying pan or griddle over medium-low heat and lightly grease both the pan surface and the inside of your crumpet rings with vegetable oil or butter. Place the greased rings directly onto the heated pan to warm them up.
- Ladle or pour about 1/3 cup of batter into each ring, filling them roughly halfway. The batter should sizzle gently when it hits the pan. Cook for 8 to 10 minutes without moving them until the surface is covered with holes and appears almost dry, with no wet batter visible. The bottoms should be golden brown, and the tops should look set but pale.
- Carefully lift off the crumpet rings using a kitchen towel or tongs, as they'll be hot. If the crumpets stick, gently run a knife around the inside edge to loosen them.
- Flip the crumpets over and cook for just 1 to 2 minutes on the holey side to lightly toast the top. This step is optional but adds a nice texture contrast.
- Transfer the cooked crumpets to a plate and cover them with a clean towel to keep them warm and soft while you cook the remaining batter. Re-grease your rings and pan between batches to prevent sticking.